Table of Contents
Advertisement
Quick Links
Download this manual
See also:
Manual
•
Pixim D8800C Seawolf Digital Imaging System CMOS
•
700 TVL High Resolution
•
WDR - Wide Dynamic Range
•
3DNR - Three Dimensional Noise Reduction
•
Secondary Video Output (Cable Included)
•
OSD (On Screen Display) for Camera Function Setup
•
Flush or Surface Mount
•
Infinity Ball Mount for Any Viewing Angle
•
UTP interface and Heater / Blower Options Available
•
UTC Control - Serial Control over Coax
•
¾" Conduit Knockouts
•
Indoor and Vandal/Water Resistant IP 686 Rated Models
•
Optional Extreme Cold (-60°F) Temperature Kit available
•
Available in Ivory or Black
•
Dual Voltage 12VDC & 24VAC
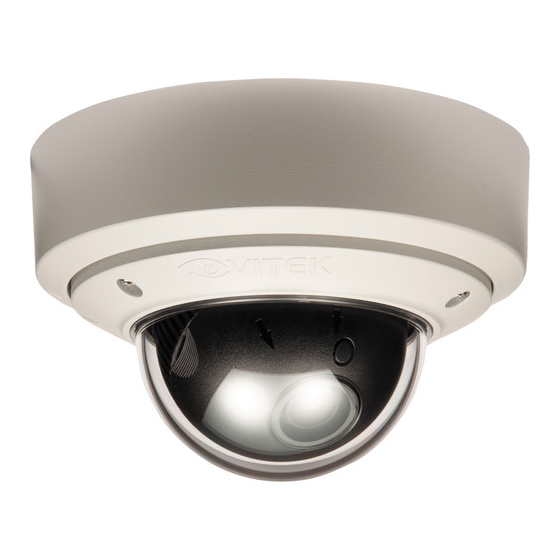
Mighty Series
WDR Dome
Cameras
700 TVL Pixim-Powered
WDR Dome Cameras
Advertisement
Table of Contents

Subscribe to Our Youtube Channel
Related Manuals for Vitek Mighty Series


Summary of Contents for Vitek Mighty Series
- Page 1 Mighty Series WDR Dome Cameras 700 TVL Pixim-Powered WDR Dome Cameras • Pixim D8800C Seawolf Digital Imaging System CMOS • 700 TVL High Resolution • WDR - Wide Dynamic Range • 3DNR - Three Dimensional Noise Reduction • Secondary Video Output (Cable Included) •...
-
Page 2: Table Of Contents
TABLE OF CONTENTS BOX CONTENTS MOUNTING ACCESSORIES AVAILABLE MODELS/ACCESSORIES MIGHTY DOME LAYOUT INSTALLATION JUNCTION BOX INSTALLATION OPEN GIMBAL COVER CONNECTIONS LENS ADJUSTMENT INFINITE AXIS GIMBAL ADJUSTMENT WDR MIGHTY DOME FEATURES OSD MENU FEATURES/SETUP 1. In the menu 2. Entering Menu 3. -
Page 3: Box Contents
BOX CONTENTS 1) Dome Camera 2) Accessories 3) VT-MD-2VOC (Secondary Video Output Cable) 4) Instruction Manual & Mounting Template INCLUDED ACCESSORIES Torx Wrench - (Vandal & IR Versions Only) Type #: T20 Length: 63mm / Diameter: 4mm Qty: 1 Phillips head Screws - (Vandal & IR Versions Only) For attaching the dome cover to the flush housing. -
Page 4: Available Models/Accessories
AVAILABLE MODELS / ACCESSORIES Indoor MIghty doMe ConfIguratIons: VTD-MP2810WDR: Indoor Wide Dynamic Range Color Dome Camera with 2.8-10mm Varifocal Lens & 700TVL VTD-MP922WDR: Indoor Wide Dynamic Range Color Dome Camera with 9-22mm Varifocal Lens & 700TVL VTD-MP1850WDR: Indoor Wide Dynamic Range Color Dome Camera with 18-50mm Varifocal Lens &... -
Page 5: Mighty Dome Layout
MIGHTY DOME LAYOUT 1) Lens 8) Dome Cover Ring 2) Power Input Connector(12VDC / 9) Flush Mount Base 24VAC) 10) Surface Mount Plate 3) Video Output Connector - BNC 11) Assembly Screws - Torx M4x9 4) Camera Holder and 2nd Video (Vandalproof) output 12) Assembly Screws - Phillips... -
Page 6: Installation
INSTALLATION 1) Dome Cover 1.1 Vandal Proof Domes - Use the provided Torx wrench to unscrew the vandal proof screws and remove the dome cover. 1.2 Indoor Domes - Turn the dome cover to the left to remove the dome cover. 2) Flush Mount Installation: Using four St4x30 screws, attach the flush mount base to a sturdy surface. -
Page 7: Junction Box Installation
JUNCTION BOX INSTALLATION Mighty Domes can easily be flush or surface mounted to an electrical junction box (4S J-Box) using the pre-drilled mounting holes on either the surface mount housing or the the flush mount base. -
Page 8: Open Gimbal Cover
OPEN GIMBAL COVER To adjust the zoom and the focus, the gimbal needs to be removed temporarily from its base. 1) Remove the ball gimbal from its socket, and hold the base firmly with one hand. 2) Gently squeeze Point A and B and pull away from the base until the gimbal is removed from the base. -
Page 9: Connections
CONNECTIONS • Power connection: 12VDC or 24VAC dual input. • All Mighty Dome cameras come standard with a secondary video output. The secondary video cable (VT-MD-2VOC) is included in the box. VTM-LCD... -
Page 10: Lens Adjustment
LENS ADJUSTMENT 1) Remove the Gimbal cover from the Gimbal base. 2) Loosen Zoom & Focus screws and make necessary adjustments as shown. Field of view: Telephoto(T) to Wide(W) Focus: Near(N) to infinity( ) 3) OSD Joystick Control 4) Reattach the gimbal cover to the gimbal base. OSD Joystick Control... -
Page 11: Infinite Axis Gimbal Adjustment
INFINITE AXIS GIMBAL ADJUSTMENT Rotation and “Friction Hold” Placement The Gimbal mechanism yields maximum rotation and placement as shown below. -
Page 12: Wdr Mighty Dome Features
WDR Mighty Dome Features CMOS image sensor: - Provides the best quality image without any blooming or vertical smear even under the spot light. Pixim’s DPS technology: - Offers unparalleled image quality across lighting conditions especially high - contrast environments such as indoor and outdoor elements combined in the same field of view, or other extreme bright &... -
Page 13: In The Menu
OSD Menu Features/Setup SETUP 1 In the Menu buttons to move the menu, buttons to change the settings and press button to select or enter. stands for MENU or ENTER button. button stands for MENU or ENTER. 2 Entering Menu Press button longer for than 2 seconds on the back of the camera. -
Page 14: Exposure
OSD Menu Features/Setup 4 EXPOSURE To enter EXPOSURE menu, press button at MAIN>EXPOSURE. EXPOSURE Default Descriptions EXPOSURE Descriptions In NTSC system, the entire color tone on the monitor may continuously <WDR MID> Medium level of the dynamic range control for each PRESETs. show reddish and greenish. -
Page 15: Day/Night
OSD Menu Features/Setup 5 DAY/NIGHT To enter EXPOSURE menu, press button at MAIN>DAY/NIGHT>AUTO IMPORTANT!!! IMPORTANT!!! DAY->NIGHT and NIGHT->DAY operations must be examined and verified at the final step of the installation. Block the lens for a few seconds for NIGHT mode and release and let it return to DAY mode. If camera stays at NIGHT mode more than 10 seconds, increase N-->D THRES a little and repeat the fore-mentioned steps. -
Page 16: D Nr
OSD Menu Features/Setup 6 3D NR To enter EXPOSURE menu, press button at MAIN>3D NR 3D NR Default Descriptions Determines the depth of Three Dimensional Noise Reduction. DEPTH High value effectively reduces the noise but a comet effect may occur for a fast moving object and vice versa. -
Page 17: Picture Control
OSD Menu Features/Setup 8 PICTURE CONTROL To enter the EXPOSURE menu, press button at MAIN>PICTURE CONTROL. PICTURE Factory Descriptions CONTROL Default Sets ATW Normal, ATW Desat, ATW Xtnd or MANUAL. ATW NORMAL – Compensates automatically in range of 2800K-7500K. ATW DESAT – Compensates automatically in range of 2000K-11000K. WHITE In the range of 2000-2800K and 7500-11000K, white balance is BALANCE... -
Page 18: Motion
OSD Menu Features/Setup SPECIAL Default Descriptions If it is set to ON and motion is detected, MOTION message will appear on MOTION the monitor. See page 16, ‘MOTION ’ for settings. PRIVACY If set to ON, it is available up to 6 privacy masks . MASK See page 11, ‘PRIVACY Area’... -
Page 19: Privacy Area
OSD Menu Features/Setup 11 PRIVACY AREA Up to 6 privacy areas can be programmed in size, position and mask color. Use joystick to change size, position and mask color. Right after pressing button at ON, the 1st Image after pressing button again. -
Page 20: Rs485 Control
Description CONTROL CAMERA ID Determines the camera’s identification (between 1 and 255) ID DISPLAY Displays camera title on top-left corner of the screen. PROTOCOL VITEK VITEK is available only. BAUD RATE 2400 Select 2400/4800/9600/19200 bps. 13 D-EFFECT D-EFFECT Default Descriptions FREEZE Image freezes and shows the still image at the moment when set to ON. -
Page 21: Exit
OSD Menu Features/Setup 14 EXIT MENU-2 Descriptions EXIT Exits menu with discarding any changes. SAVE AND EXIT Exits menu after saving the parameters. Restores and saves all parameters of factory settings. FACTORY SET Camera resets and restarts automatically. -
Page 22: Dimensions
HEADER DIMENSIONS Indoor Vandal... -
Page 23: Heater/Blower Specifications
HEATER / BLOWER SPECIFICATIONS HEADER Specifications Power Supply 24 VAC Power Consumption 10W (Heater) / .7W (Blower) Heater On: at 41ºF / Off at 59ºF Blower Continuous 24 Hour Operation Extreme Weather Heater - Optional On: -60ºF... -
Page 24: Indoor Mighty Dome Specifications
INDOOR MIGHTY DOME SPECIFICATIONS HEADER Specifications NTSC Image Device Pixim D8800C Seawolf Digital Imaging System CMOS Effective Pixels 758(H) X 540(V) Scan Frequency 59.94HZ(V), 15.734K HZ(H) 50HZ(V), 15.625K HZ(H) Synchronization Internal / Line Lock (Phase Adjust) Horizontal Resolution 700TVL Sensitivity 0.00008Lux at F1.2@40IRE, 32x (DSS + ICR mode)* S/N Ratio More than 52dB AGC OFF at 50IRE... -
Page 25: Vandal Mighty Dome Specifications
VANDAL MIGHTY DOME SPECIFICATIONS HEADER Specifications NTSC Pixim D8800C Seawolf Digital Imaging System CMOS Image Device 758(H) x 540(V) Effective Pixels 59.94HZ(V), 15.734K HZ(H) 50HZ(V), 15.625KHZ(H) Scan Frequency Internal / Line Lock (Phase Adjust) Synchronization 700TVL Horizontal Resolution 0.00008Lux at F1.2@40IRE, 32x (DSS + ICR Mode)* Sensitivity More than 50dB AGC OFF at 50IRE S/N Ratio... - Page 26 VTM-LCDP Series 15” 17” and 19” Professional LCD Monitors • 15” 17“ and 19” Professional LCD Display Panels • Designed for continuous 24/7 operation • VGA, Looping BNC Composite, and S-Video Video Inputs. DVI & HDMI Inputs on 17“ & 19” Versions •...
- Page 27 CHRONO Series 8, and 16 Channel Digital Video Recorders • Highly efficient H.264 compression H.264 • Built-in Data Redundancy • Real-time recording and real-time playback • System Setup Wizard and User Friendly GUI • Multi-Resolution recording • 4 Spot Output (8 &16 Channel) •...
-
Page 28: Warranty
(3) years, or as otherwise stated above, from the date of purchase by the end user. This warranty is non-transferable and extends only to the original buyer or end user customer of a VITEK Authorized Reseller. The product must have been used only for its intended purpose, and not been subjected to damage by misuse, willful or accidental damage, caused by excessive voltage or lightning.
Need help?
Do you have a question about the Mighty Series and is the answer not in the manual?
Questions and answers