Table of Contents
Advertisement
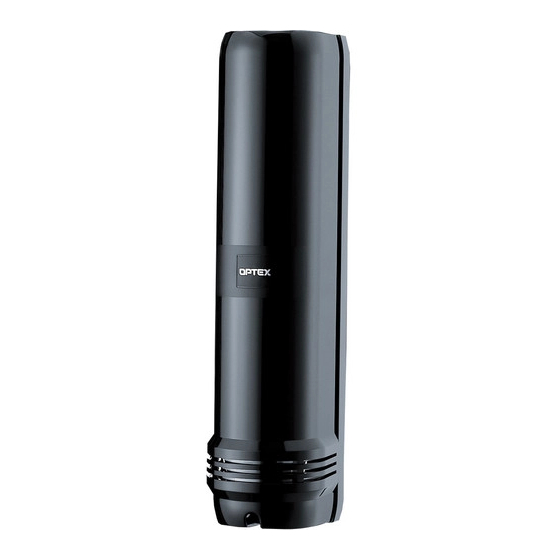
PHOTOELECTRIC DETECTOR
AX-250PLUS, AX-500PLUS
AX-350TF, AX-650TF
Photoelectric detectors detect intruders when both the upper and lower invisible infrared beams are simultaneously broken.
Maximum detection range between Transmitter and Receiver for the AX-250PLUS is 250ft. (75m), the AX-500PLUS is 500ft. (150m) and for the
AX-350TF is 350ft. (100m), the AX-650TF is 650ft. (200m)
FEATURES
• Beam interruption time adjustment
• Anti-Frost Structure
• Alignment level monitor jack
• Form C relay
• Tamper
• Option
• UL Listed
AX-350TF, AX-650TF ONLY
• LED indicator for fi ne beam alignment level
• Selectable beam frequencies
• Re-Transmit Circuit
• D.Q.Circuit (Environmental Disqualifi cation)
• Alarm Memory
For Safe Use of the Product
• Read this instruction manual carefully prior to installation.
• After reading, store this manual carefully in an easily accessible place for reference.
• This manual uses the following warning indications for correct use of the product and harm to you or other people and damage to your assets, which
are described below. Be sure to understand the description before reading the rest of this manual.
WARNING
Failure to follow the instructions provided with this indication and improper handling may cause death or serious injury.
Failure to follow the instructions provided with this indication and improper handling may cause injury
CAUTION
and / or property damage.
This symbol indicates prohibition. The specifi c prohibited action is provided in and/or around the fi guer.
This symbol requires an action or gives an instruction.
Do not use the product for purposes other than the detection of moving objects such as people and vehicles.
Do not use the product to activate a shutter, etc., which may cause an accident.
Do not touch the unit base or power terminals of the product with a wet hand (do not touch when the
product is wet with rain, etc.). It may cause electric shock.
WARNING
Never attempt to disassemble or repair the product. It may cause fi re or damage to the devices.
Do not exceed the voltage or current rating specifi ed for any of the terminals during installation, doing so
may cause fi re or damage to the devices.
Do not pour water over the product with a bucket, hose, etc. The water may enter, which may cause damage
to the devices.
CAUTION
Clean and check the product periodically for safe use. If any problem is found, do not attempt to use the
product as it is and have the product repaired by a professional engineer or electrician.
1.PARTS IDENTIFICATION ····································· P2
2.PRECAUTIONS ····················································· P2
3.INSTALLATION METHOD ···································· P3
4-1.TERMINAL ······················································ P4
4-2.WIRING ··························································· P4
4-3.OPTICAL ALIGNMENT ·································· P5
5-1.TERMINAL ······················································ P6
5-2.WIRING ··························································· P6
5-3.OPTICAL ALIGNMENT ·································· P7
Please read intsructions completely before beginning installation.
: This function allows you to select the suitable beam interruption time for any environment.
: Prevents fog and condensation from blocking the beams.
: Can easily obtain maximum optical alignment by checking the voltage from this jack.
: Form C relay for more applications.
: N.C., Opens when cover is removed.
: Heating unit (HU-1), Back cover (BC-1) AX-Beam Tower (AX-BT)
: For UL Listed applications, the heating unit (HU-1) shall not be installed with the models AX-350TF and AX-650TF.
: The optical alignment level can be checked at the Reciver.
: Crosstalk is eliminated with 4, channel selectable, beam frequencies. Used when stacking beams
or for long range applications.
: The advantage of this method is the elimination of wiring, from a detector or switch, back to the
control panel.
: The environmental compensation circuit is designed to eliminate false alarms caused by snow,
fog, heavy rain, ice and misalignment.
C O N T E N T S
< STANDARD >
< 4 SELECTABLE BEAM FREQUENCIES >
6.BEAM INTERRUPTION
TIME ADJUSTMENT ············································ P8
7-1.SELECTABLE BEAM FREQUENCIES ·········· P8
7-2.ALARM MEMORY ·········································· P8
7-3.DQ CIRCUIT ··················································· P9
7-4.RE-TRANSMITTING CIRCUIT ······················· P9
8.SPECIFICATIONS ··············································· P10
9.DIMENSIONS ······················································ P10
CHECK SHEET ············································ P11,P12
1
No. 59-1365-4 0902-05
INSTALLATION MANUAL
Advertisement
Table of Contents

Related Manuals for Optex AX-500PLUS


Summarization of Contents
Features
General Features
Lists core features like beam interruption time, anti-frost, alignment monitor, and tamper protection.
Model-Specific Features
Highlights features exclusive to AX-350TF/AX-650TF, including LED indicator and selectable frequencies.
Safe Use of Product
Installation Precautions
Emphasizes reading the manual and understanding warnings for safe installation and operation.
Safety Warnings and Cautions
Details critical safety instructions regarding electrical shock, repair, voltage limits, and water exposure.
Parts Identification
Unit Components
Diagram and labels identifying key components of the detector unit and mounting plate.
Standard Accessories
Lists all included accessories such as screws, brackets, and blocking tools for installation.
Precautions
Mounting and Environmental Considerations
Guidance on mounting surfaces, avoiding wind-affected objects, direct sunlight, and unsteady surfaces.
Beam Interference Prevention
Instructions to prevent interference from other beam types and maintain adequate spacing from walls/fences.
Installation Method
General Installation Guidelines
Covers detection range, installation height, and maximum distances between transmitter and receiver.
Alignment Angle Specifications
Details the acceptable horizontal and vertical alignment angles for optimal beam detection.
Mounting Options
Describes pole mounting, wall mounting, and conduit installation methods for securing the unit.
AX-250/500PLUS Wiring and Terminals
Terminal Connections
Diagrams and pinouts for receiver and transmitter terminals, including power, alarm, and spare connections.
Wiring Distance Specifications
Table outlining maximum wire lengths based on wire gauge and voltage for multiple unit installations.
Wiring Configurations
Illustrates basic wiring setups for single sets and units connected in a line.
AX-250/500PLUS Optical Alignment
Rough Alignment Procedure
Initial alignment using the viewfinder to center the detector lenses horizontally and vertically.
Fine Alignment Adjustment
Detailed steps for adjusting upper and lower mirrors using a voltmeter for precise beam alignment.
Alignment Confirmation and Walk Test
Final checks using the monitor jack and performing a walk test to ensure proper operation.
AX-350/650TF Wiring and Terminals
Terminal Configurations
Pinout diagrams for receiver and transmitter, including DQ and Alarm Memory terminals.
Wiring Distance Guidelines
Table specifying maximum wire lengths for different wire gauges and voltages for this model series.
Wiring Examples
Illustrations of single set, in-line, stacked, and DQ/Alarm Memory wiring configurations.
AX-350/650TF Optical Alignment
Beam Frequency Selection
Instructions on selecting beam frequencies to avoid crosstalk when stacking or installing multiple units.
Horizontal and Vertical Adjustment
Procedure for aligning lenses and mirrors using the viewfinder and fine adjustment screws.
LED Indicator and Monitor Jack
Explanation of LED indicators for alignment level and using the monitor jack for voltage checks.
Beam Interruption Time Adjustment
Sensitivity Adjustment
Guide to adjusting interruption time via dip switches to match environmental conditions and reduce false alarms.
Selectable Beam Frequencies
Frequency Selection and Stacking
Instructions for selecting frequencies to prevent crosstalk in beam stacking or long-distance applications.
Alarm Memory Function
Wiring and Operation
Details on connecting the alarm memory terminal and how the LED indicator confirms triggered alarms.
DQ Circuit (Environmental Disqualification)
Trouble Signal Generation
Explains how the DQ circuit signals reduced beam strength due to environmental factors like fog or rain.
Wiring Examples
Illustrates wiring configurations for DQ circuit outputs, including trouble and alarm signals.
Re-Transmitting Circuit
Wiring Advantage
Describes the benefit of eliminating wiring to the control panel by using the re-transmitting circuit.
Connection and Jumper Setup
Instructions for connecting N.C. outputs and managing jumpers for the re-transmitting circuit.
Trouble Shooting
No Power or Action
Troubleshooting steps for when the unit shows no activity after power application.
No Alarm Activation
Diagnostic guide for when beams are blocked but no alarm signal is generated.
False Activations Troubleshooting
Alarm Signal Without Blocked Beams
Steps to resolve false alarms, focusing on alignment, wiring, and control panel checks.
Common Causes of False Alarms
Identifies environmental factors and installation issues that can lead to false activations.
Need help?
Do you have a question about the AX-500PLUS and is the answer not in the manual?
Questions and answers