Table of Contents
Advertisement
Quick Links
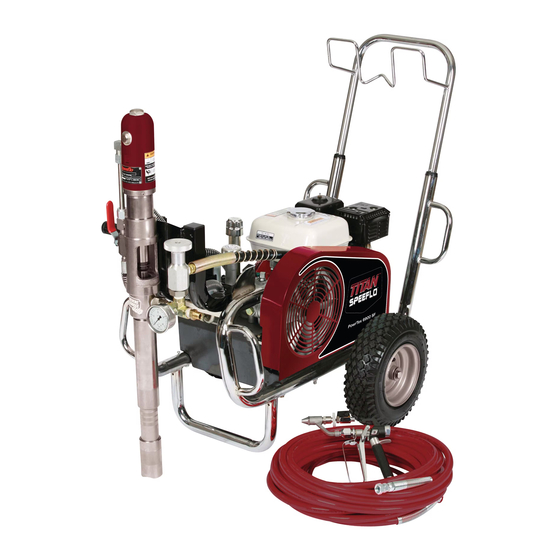
PowrTex 6900 SF / 12000 SV
Model Numbers:
6900 SF Gas, Comp.
6900 SF Gas, Bare
12000 SV Gas, Comp.
12000 SV Gas, Bare
Register your product online at:
www.titantool.com
Proper registration will serve as proof of purchase in the event your
original receipt becomes misplaced or lost.
_ _ _ _ _ _ _ _ _ _
Serial Number
Printed in the U.S.A.
SPEEFLO
Texture Sprayers
600-160
600-161
600-170
600-171
Owner's Manual
For professional use only
Do not use this equipment
before reading this manual!
NOTE: This manual contains important
warnings and instructions. Please
read and retain for reference.
© Titan Tool Inc. All Rights Reserved. Form No. 0528919C
0512
•
Advertisement
Table of Contents

Related Manuals for Titan SPEEFLO PowrTex 12000 SV


Summary of Contents for Titan SPEEFLO PowrTex 12000 SV
- Page 1 Proper registration will serve as proof of purchase in the event your original receipt becomes misplaced or lost. _ _ _ _ _ _ _ _ _ _ Serial Number © Titan Tool Inc. All Rights Reserved. Form No. 0528919C 0512 • Printed in the U.S.A.
-
Page 2: Safety Precautions
(add more hose if necessary). Flammable vapors are often heavier than air. Floor area must be extremely well ventilated. The pump contains arcing parts that emit sparks and can ignite vapors. © Titan Tool Inc. All rights reserved. -
Page 3: Grounding Instructions
If the plug will not fit the outlet, have the proper outlet installed by a qualified electrician. Grounded Outlet IMPORTaNT: Do not lift by cart handle when loading or unloading. Grounding Pin Cover for grounded outlet box © Titan Tool Inc. All rights reserved. -
Page 4: Table Of Contents
26” W (66 cm) x 35” H (89 cm) Fluid section wetted parts: Electroless nickel plated ductile iron, electroless nickel plated carbon steel, stainless steel, tungsten carbide, , thiokol impregnated leather, ultra high molecular weight polyethylene. © Titan Tool Inc. All rights reserved. -
Page 5: Introduction
Refer to the Maintenance and Parts List sections of this manual for more information on the filter assembly. © Titan Tool Inc. All rights reserved. -
Page 6: Operation
If you notice any undesirable operating characteristics while using a gasoline that contains alcohol, or one that you think contains alcohol, switch to a gasoline that you know does not contain alcohol. © Titan Tool Inc. All rights reserved. -
Page 7: Setup
Remove the tip if it is already attached. Bleed Valve 4. Fill the oil cup 1/2 full with Titan Piston Lube (P/N 314- Pressure Control 480) supplied by the factory. This extends packing life. -
Page 8: Preparing To Spray
9. Turn off the sprayer. To turn off the gas engine, • set the pressure to minimum by turning the pressure control knob fully counterclockwise, © Titan Tool Inc. All rights reserved. -
Page 9: Pressure Relief Procedure
Never trigger the gun unless the tip is in either the spray or the unclog position. always engage the gun trigger lock before removing, replacing or cleaning tip. © Titan Tool Inc. All rights reserved. -
Page 10: Cleanup
13. Trigger the gun into the metal waste container until the paint is flushed out of the hose and solvent is coming out of the gun. © Titan Tool Inc. All rights reserved. -
Page 11: Maintaining The Hydraulic System
2. Change the hydraulic fluid every twelve months. Drain 3. Clean and re-gap the spark plug. the old fluid from the tank and fill with 4 quarts of Titan Coolflo™ Hydraulic Fluid. Start the sprayer at just enough 4. Clean the spark arrestor. -
Page 12: Replacing The Motor Brushes (Electric Motor)
6. Place the thick PTFE gasket onto the top of the thin For cSa approved sprayers only: The ON/OFF switch is gasket. also the RESET! 7. Tighten the filter cap assembly onto the filter body. © Titan Tool Inc. All rights reserved. -
Page 13: Troubleshooting
Hose size or length is too small or too long Increase hose size to minimize pressure drop through hose and/or reduce hose length. Solvent has caused upper packing to swell Replace packing. Pump chatters on up or down stroke © Titan Tool Inc. All rights reserved. -
Page 14: Hydraulic Motor
NOTE: Engine labors at stall on if the head becomes hotter. This will help determine both strokes. if center o-ring is blown on spool valve. If hot, remove and replace o-ring. Bad hydraulic pump Replace hydraulic pump. © Titan Tool Inc. All rights reserved. -
Page 15: Spray Patterns
Remove restrictions in system; clean tip screen if filter is used. Round pattern Worn tip Replace tip. Fluid too heavy for tip Increase pressure. Thin material. Change nozzle tip. © Titan Tool Inc. All rights reserved. - Page 16 3300 PSI. Ceci est valable de chiffons et autres matières inflammables. Français © Titan Tool Inc. Tous droits réservés.
- Page 17 13. Ne pulvérisez pas à l’extérieur par temps venteux. 14. Débranchez toujours le cordon électrique de la prise avant de travailler sur l’équipement. IMPORTaNT: Ne pas soulever par la poignée du chariot lors du chargement ou du déchargement. © Titan Tool Inc. Tous droits réservés. Français...
- Page 18 11. Antes de utilizar el aparato, verifique que todas las que pulverice. Lea las hojas de datos sobre seguridad conexiones son seguras. de los materiales (MSDS) y las etiquetas en los botes de Español © Titan Tool Inc. Todos los derechos reservados.
- Page 19 13. No pulverice al aire libre si hace viento. 14. Desenchufe siempre el cable antes de trabajar en el equipo. IMPORTaNTE: No cargue el equipo por el asa del carrito durante la carga y descarga. © Titan Tool Inc. Todos los derechos reservados. Español...
-
Page 20: Parts Lists And Service Instructions
Hydraulic system ..........1 862-002 Washer ............2 449-181 “V” Belt, 6900 SF (gas model) ......1 506-279 Convertokit, DC electric, 120V 449-986 “V” Belt, 12000 SV (gas model) (electric model, includes belt, not shown) ..1 © Titan Tool Inc. All rights reserved. -
Page 21: Cart Assembly
Nut ..............1 449-185 Belleville washer ...........1 862-001 Flat washer ...........1 449-187 Clip ...............1 449-198 Flat washer ...........1 449-166 Bolt ...............1 759-104 Label, PowrTex 6900 SF (not shown) 759-122 Label, PowrTex 12000 SV (not shown) © Titan Tool Inc. All rights reserved. -
Page 22: Hydraulic Motor
6. The piston rod (19) should be near the top of its stroke for disassembly. It may be necessary to use a wood or nylon driver to push the piston rod up to its top position. © Titan Tool Inc. All rights reserved. - Page 23 Check valve rod assembly for normal spring action at this time. 6. Install piston seal (16) with lips facing downward. Carefully install o-ring (17). Expand the ring and stretch it sufficiently for installation. © Titan Tool Inc. All rights reserved.
-
Page 24: Fluid Section
Fluid section service kit, minor (includes items 1, 3, 4, 10, 12, 16, 19, 21, and Loctite P/N 426-051) 600-403 Foot valve assembly (includes items 18–21) 600-402 Outlet valve assembly (includes items 9–13) © Titan Tool Inc. All rights reserved. - Page 25 (13) together. Tighten in a vise to 900 in./lbs. (75 IMPORTaNT: use of non-Titan service parts may void ft./lbs.). warranty. ask for original parts made by Titan for best 11. Insert the PTFE o-ring (3) into the upper grove of the services. This pump should receive a routine servicing motor/pump block.
- Page 26 PowrTex 12000 Sv Fluid Section Motor/ Pump Block Suction tube cleanout for heavy materials © Titan Tool Inc. All rights reserved.
- Page 27 IMPORTaNT: use of non-Titan service parts may void packings in the motor/pump block. warranty. ask for original parts made by Titan for best 13. Thread the shovel valve assembly onto the pump cylinder services. This pump should receive a routine servicing (6) until it stops and then back off until it reaches the after approximately 1,000 hours of use.
- Page 28 (20) on top of the ball. 12. Position the pressure plate (15) on top of the inlet valve housing (40), and insert the four hex head screws (12) and washers (13). Tighten the hex head screws evenly © Titan Tool Inc. All rights reserved.
-
Page 29: Hydraulic System
Torque to 8 FT/LBS (11 N/m) Use hydraulic sealant Use hydraulic sealant Use hydraulic sealant Torque to 15 FT/LBS (20,5 N/m) Torque to 15 FT/LBS (20,5 N/m) Torque to 15 FT/LBS (20,5 N/m) © Titan Tool Inc. All rights reserved. -
Page 30: Gas Convertokit
Mounting plate, gas engine, 12000 SV 860-502 Stop nut, 6900 SF........4 862-410 Stop nut,12000 SV 449-181 “V” Belt, 6900 SF (not shown, not part of assembly) 449-986 “V” Belt, 12000 SV (not shown, not part of assembly) © Titan Tool Inc. All rights reserved. -
Page 31: Electric Convertokit, 230V
Valve body ..........1 891-073 O-ring, PTFE ..........1 945-023 Valve stem ..........1 970-011 Lock nut ............1 945-005 Knob ............1 945-906 Valve seat ..........1 138-226 Ball, T.C............1 945-026 Valve stem stop ........1 891-183 O-ring, PTFE ..........1 © Titan Tool Inc. All rights reserved. -
Page 32: Filter Assembly (Optional)
Outlet Ports........(1) 1/4” NPT(F) for bleed valve (1) 3/8” NPT(F) with 3/8 NPSM(M) hose connection (1) 3/8” NPT(F) plugged for additional gun hookup Wetted Parts ........Carbon steel with electroless nickel plating, stainless steel, tungsten carbide, PTFE © Titan Tool Inc. All rights reserved. -
Page 33: Sae O-Ring Fitting Installation
Service Kits SaE O-Ring Fitting Installation These items may be purchased separately from your local Titan Steps 1 & 2: distributor. Lubricate Part # Description 103-830 5 Gal. Siphon Hose Assembly w/Rock Catcher 1” x 4.5’ Lubricate 103-808 55 Gal. - Page 34 • High pressure swivel Part # Description 580-100 ..LX-80II — 4 Finger Gun 581-085 ..LX-80II — 2 Finger Gun 580-050 ..LX-80II — 4 Finger GTH Kit 581-150 ..LX-80II — 2 Finger GTH Kit © Titan Tool Inc. All rights reserved.
- Page 35 Notes © Titan Tool Inc. All rights reserved.
-
Page 36: Warranty
Warranty Titan Tool, Inc., (“Titan”) warrants that at the time of delivery to the original purchaser for use (“End User”), the equipment covered by this warranty is free from defects in material and workmanship. With the exception of any special, limited, or extended warranty published by Titan, Titan’s obligation under this warranty is limited to replacing or repairing without charge those parts which, to Titan’s...
Need help?
Do you have a question about the SPEEFLO PowrTex 12000 SV and is the answer not in the manual?
Questions and answers