
Related Manuals for Pitney Bowes DI425 Series


Summarization of Contents
SECTION 1 Introduction
1.1 Purpose
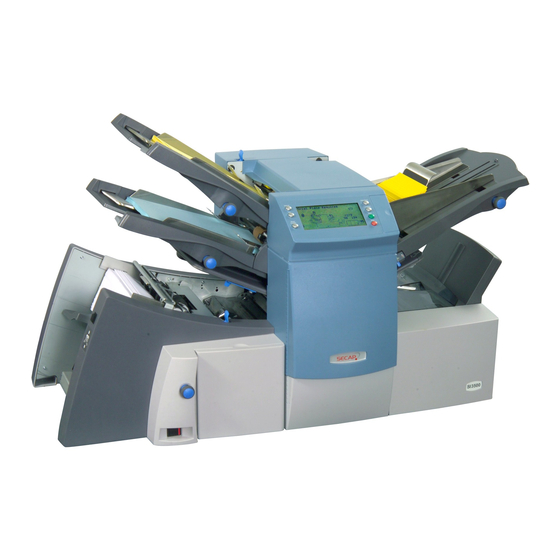
Manual supports installation and site repair of the DI380/DI425/SI3300/SI3500 Inserter.
1.2 Equipment Covered
Manual covers the sheet feeder, accessories, and interface kits for tabletop operation.
1.3 Related Publications
Lists operating guides for DI380, DI425, SI3300, SI3500 in various languages.
1.5 Safety Summary
Explains warning, caution, and important messages used in the manual.
1.6 Equipment Safety
Guidelines for protecting sensitive equipment from static damage.
SECTION 2 Specifications
2.1 Material Specifications
Details sheet sizes, paper weights, fold configurations, and tray capacities for feeders.
2.2 Machine Specifications
Covers physical dimensions, noise level, electrical requirements, and maximum speed.
SECTION 3 Theory of Operation
3.1 Introduction To System Theory
Explains the basic operation of the DI380/SI3300 and DI425/SI3500 machines.
3.2 Single Sheet Feeder Mode & Linked Feeder Mode
Details the process of feeding single sheets and envelopes in sequence.
3.3 Insert Feeder Mode
Describes the operation when using the insert feeder for documents.
3.4 Two Sheet Feeder Mode
Explains the process of feeding two sheets at a time with an envelope.
3.5 Single Sheet Feeder Plus an Insert Mode
Describes operation with one sheet feeder and an insert.
3.6 Two Sheet Feeders Plus an Insert Mode
Explains operation with two sheet feeders and an insert.
3.7 The Fold Only Mode
Details the sequence of operation when only folding is performed.
3.8 Accumulation From Main Sheet Feeder
Explains how multiple sheets are accumulated and inserted.
3.9 Double Detect Sensors
Describes the function and positions of double detection sensors.
3.10 AC Motor
Explains the AC motor operation and its associated components.
SECTION 4 Removal & Replacement
4.1 Removing Covers and P.C.B
Steps for removing machine covers and the printed circuit board assembly.
4.2 Removal of Jam Access Plate
Procedure for removing the jam access plate for clearing obstructions.
4.3 Removing Sheet Feeder Separator Roller & Pad
Steps to remove and replace the sheet feeder's separator roller and pad.
4.4 Removing Carriage Assembly
Instructions for removing the carriage assembly from the machine.
4.5 Removal of Lower Collation Roller
Detailed steps for removing the lower collation roller.
4.6 Removal of Upper Insert Drive Rollers
Guide for removing the upper insert drive rollers.
4.7 Fold Roller Removal/Replacement
Procedure for removing and replacing fold rollers.
4.8 Dismantling Insert Feeder (DI380/SI330 Only)
Steps to dismantle the insert feeder for the DI380/SI330 model.
4.9 Dismantling Insert Feeder (DI425/SI3500 Only)
Steps to dismantle the insert feeder for the DI425/SI3500 model.
4.10 Removal of Top Assembly
Instructions for removing the top assembly of the machine.
4.11 Removal of Envelope Feed Rollers and Separator Pad (DI380/SI330 Only)
Steps for removing envelope feed rollers and separator pad (DI380/SI330).
4.12 Removing Envelope Feeder (DI425/SI3500 Only)
Procedure for removing the envelope feeder (DI425/SI3500).
4.13 Removing Envelope Feed Rollers & Separator Pad (DI425/SI3500 Only)
Steps for removing envelope feed rollers and separator pad (DI425/SI3500).
4.14 Removal of Flapper Assembly and Blade
Guide for removing the flapper assembly and blade.
4.15 Removal of the Transport Pivot Plate & Insertion Roller
Steps for removing the transport pivot plate and insertion roller.
4.16 Removal of Sealer Rollers
Instructions for removing the sealer rollers.
4.17 Removal the Inverter Motor Assembly
Procedure for removing the inverter motor assembly.
4.18 Removal of the Conveyor Transport Belts and Rollers
Steps to remove conveyor transport belts and rollers.
4.19 Removing Lower Flapper Rollers
Guide for removing the lower flapper rollers.
4.20 Removal of the Lower Envelope Drive Roller
Instructions for removing the lower envelope drive roller.
4.21 Removal of the Power Supply Unit and AC Motor
Steps for removing the power supply unit and AC motor.
SECTION 5 Adjustments
5.1 Envelope feed tray guides (DI380/SI3300 Only)
Adjusts side guides for proper envelope feeding in the tray.
5.2 ENVELOPE FEEDER OFFSET ADJUSTMENT (DI425/SI3500 Only)
Adjusts envelope feed bias left or right for better insertion.
5.3 ENVELOPE SEPARATOR PAD SIDE TO SIDE ADJUSTMENT
Adjusts the separator pad to be centralized with the separator roller.
5.4 ENVELOPE SEPARATOR PAD HEIGHT (DI380/SI3300 Only)
Sets the gap between the separator pad and roller for correct paper separation.
5.5 ENVELOPE SEPARATOR PAD HEIGHT (DI425/SI3500 Only)
Sets the gap between the separator pad and roller for DI425/SI3500.
5.6 INSERTION FLIPPER ACTUATION HEIGHT/ HOLD DOWN SOLENOID ADJUSTMENT
Adjusts flipper height and hold down solenoid position.
5.7 INSERTION HOLD DOWN FINGER REST POSITION
Sets the rest position for hold down fingers with a 1mm gap.
5.8 TRANSPORT PIVOT PLATE END FLOAT
Adjusts transport plate for minimal end float but free pivoting movement.
5.9 TRANSPORT PIVOT PLATE SETTING
Sets the transport plate for correct flag position in the sensor.
5.10 FOLD PLATES 1 AND 2 OFFSET
Adjusts fold plate offsets to match job setup dimensions.
5.11 NESTING CONSTANT
Sets insert firing timing into a folded sheet for proper nesting.
5.12.1 Alignment
Aligns the Q station by measuring envelope lead edge to insertion shaft.
5.12.2 Q Station Calibration
Calibrates the Q station by measuring envelope lead edge distance.
5.12.3 Q Station Height
Adjusts Q station height for insertion of different thicknesses.
5.13.1 Separator Roller Alignment
Aligns insert feeder separator rollers with the separator stone cut-outs.
5.13.2 Separator Roller Height
Adjusts insert feeder separator roller height for proper paper drag.
5.13.3 Separator Pre-Feed Height (DI380/SI3300 Only)
Sets insert feeder pre-feed roller height for minimum insert width.
5.14 SKEW ADJUSTMENT
Adjusts the machine to fold skewed documents squarely.
5.15 FLAPPER ADJUSTMENT
Adjusts the flapper blade to touch spacers with felt resistance.
SECTION 6 OMR
6.1 A Brief Overview of OMR on this system
Introduces OMR sensors, their adjustability, and paper size compatibility.
6.2 OMR SPECIFICATIONS
Details mark thickness, paper weight, envelope thickness, and clear zone requirements.
6.3 OMR MARK GROUPING
Explains OMR code structure and mark grouping for different fold types.
6.4 Basic OMR
Enables collation of multi-page documents with variable pages per envelope.
6.5 BENCHMARK
A mandatory mark appearing on every sheet for code identification.
6.6 SAFETY
A mark that improves mailing integrity by calculating mark distance.
6.7 BOC-(NOT) AND EOC-(NOT)
Marks indicating beginning/end of set for sheet collation.
6.8 PARITY AND OTHER CHECKS
Explains parity marks for error checking and handling.
6.9 RETIME MARKS
Marks for reliable code reading due to paper speed variation.
6.10 ALLOWABLE MARK COMBINATIONS
Shows valid mark combinations for Basic OMR.
6.11 ENHANCED OMR
Provides selective feeding, auto-batch, and higher mailpiece integrity.
6.12 AUTO-BATCH
Stops OMR at predefined points for special handling or batch separation.
6.13 SELECTIVE INSERTION
Allows specifying supplementary sheets or inserts based on OMR marks.
6.14 WRAP-AROUND SEQUENCE
Implements sequential counting for detecting missing or misplaced sheets.
6.15 Wrap-Around Sequence Marks
Details the marks used for sequential counting in OMR.
6.16 ENABLING THE OMR FEATURES
Steps to enable Basic and Enhanced OMR modes via service parameters.
6.17 SCANNING TEMPLATE
Information on the OMR scanning template for set-up.
6.18 Procedure for manually setting the sensitivity of the OMR sensors
Guide for manually adjusting OMR sensor sensitivity.
SECTION 7 Service Menu & Troubleshooting
7.1 ENTERING THE SERVICE MENU
Steps to access the service menu using the control panel.
7.2 PARAMETERS MENU
Allows engineers to change NVM settings and machine configurations.
7.3 SERVICE DIAGNOSTICS
Tools for testing machine components using the control panel.
7.4 Troubleshooting CHARTS
Guides for diagnosing faults using charts and logic tests.
7.5 Fault Finding Charts
Detailed table linking error codes to operator checks and diagnostics.
SECTION 8 Preventive Maintenance
8.1 General Information
Overview of service procedures at 100,000 and 200,000 cycle intervals.
8.2 The 100K service
Maintenance tasks required at the 100,000 cycle service interval.
8.3 The 200K service
Maintenance tasks required at the 200,000 cycle service interval.
SECTION 9 Installation
9.1 UNPACK AND CHECK
Steps for unpacking, checking for damage, and setting up the machine.
9.2 OPERATOR TRAINING
Training content for machine operators on layout, functions, and operation.
9.3 SUPERVISOR TRAINING
Additional training for supervisors on job programming and fine-tuning.
SECTION 10 Diagrams
10.1 FLOW DIAGRAMS
Visual representations of machine operation sequences for different models.
10.2 COMPONENT LOCATIONS
Diagrams showing the physical placement of components on the machine.
10.3 SWITCHES, SENSORS, MOTORS, SOLENOIDS TEST LEVELS
Tables detailing test levels, PCB locations, and pinouts for components.
10.4 PCB LAYOUT
Diagram showing the layout of components on the main printed circuit boards.
10.5 DRIVE BELT ROUTING
Diagrams illustrating the routing of drive belts on the machine.
10.6 SCHEMATIC - INSERTION/MOISTENER/EXIT AREAS
Electrical schematic for the insertion, moistener, and exit areas.
10.7 SCHEMATIC - SHEET FEEDERS/COLLATION MOTOR
Electrical schematic for sheet feeders and collation motor.
10.8 SCHEMATIC - FOLD PLATES/HALF FOLD
Electrical schematic for fold plates and half fold mechanisms.
10.9 SCHEMATIC - ENVELOPE FEEDER/AC HAND CRANK (MANUAL ADVANCE)
Electrical schematic for the envelope feeder and manual advance.
10.10 SCHEMATIC - P40 ENVELOPE PLATFORM CONNECTOR (DI425/SI3500)
Electrical schematic for the P40 connector on the envelope platform.
10.11 SCHEMATIC - P41 ENVELOPE PLATFORM MOTOR CONNECTOR (DI425/SI3500)
Electrical schematic for the P41 connector on the envelope platform motor.
10.12 SCHEMATIC - INSERT FEEDER
Electrical schematic for the insert feeder components.
10.13 SCHEMATIC - DISPLAY/PSU
Electrical schematic for the display and power supply unit.
Need help?
Do you have a question about the DI425 Series and is the answer not in the manual?
Questions and answers