Pitney Bowes OfficeRight DI200 Operator's Manual
Hide thumbs
Also See for OfficeRight DI200:
- Quick install manual (12 pages) ,
- Operating manual (42 pages)
Table of Contents
Advertisement
Quick Links
Advertisement
Table of Contents

Related Manuals for Pitney Bowes OfficeRight DI200


Summary of Contents for Pitney Bowes OfficeRight DI200
- Page 1 Operator Guide Inserting System Offi ceRight ™ DI200...
- Page 2 Cet appareil numérique de la classe A est conforme á la norme NMB-003 du Canada. CAUTION: Changes or modifi cations to this equipment not expressly approved by the party responsible for compliance (Pitney Bowes) could void the user’s authority to operate the equipment. SV40189-OG Revision C February 2005 ©2005 Pitney Bowes Inc.
-
Page 3: Table Of Contents
Contents Page 1. Introduction Important Safety Information ............4 About Your Machine ..............5 Machine Confi gurations ..............5 Machine Controls, Indicators and Features ........6 The Controls ................8 2. Preparing and Loading Connecting Power and Turning On ...........10 Filling the Moistener ..............11 Loading the Sheet Feeders (Feeders A1 and A2) ....12 Loading the Envelope Feeder (Feeder B) .........13 Loading the Insert Feeder (Feeder C) ........14 3. -
Page 4: Introduction
Safety 1. INTRODUCTION Important Safety Information • Please read all the instructions in this manual before you attempt to operate your Offi ceRight™ DI200. Save all instructions. WARNING! Always use the power cord sup- plied with your machine and plug it into a prop- erly grounded wall outlet that’s located near the machine and easily accessible. -
Page 5: About Your Machine
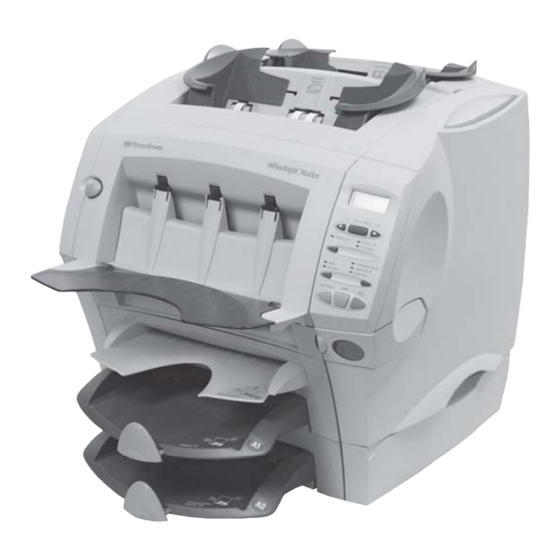
Introduction About Your Machine Your new Offi ceRight™ DI200 is a compact folding and inserting machine designed to speed the process of mail creation. It has a minimal number of user adjustments and an intuitive, easy- to-use control panel. This greatly simplifi es machine operation and will enhance the productivity of your mailing operation. -
Page 6: Machine Controls, Indicators And Features
Introduction Machine Controls, Indicators and Features Insert Cover E Release Button (Blue Button Marked E) Press this button to release the insert cover if a jam occurs in this area of the machine. The display prompts you if you need to open this cover to remove jammed material. - Page 7 Introduction Moistener Tank This tank contains solution or water to moisten and ® E-Z Seal seal envelope fl aps. It slides out to the right for refi lling and has an oval level indicator window at the front so you can easily check fl...
-
Page 8: The Controls
Introduction The Controls Menu / Enter Feeder A2 Feeder A1 2nd Page Envelope Fdr B Insert Fdr C Seal Fold Only No Seal Start Trial Piece Stop Display Shows the current status of your Offi ceRight™ DI200 and dis- plays prompts or error messages which help you in operating the machine. - Page 9 Introduction Selection Buttons and Indicator Lights Press these buttons to step through the feeders and options that are available on your machine. Depending on your model confi guration, some indicator lights and associated feeders may be inoperable. If your model doesn’t have a second sheet feeder, for example, the indicators associated with this feeder will not light.
-
Page 10: Preparing And Loading
Loading 2. PREPARING AND LOADING This chapter explains how to connect and load the machine. Once you understand the subjects covered in this chapter, you can quickly set up and use the machine for a variety of jobs as explained later in Chapter 3, Running Jobs . -
Page 11: Filling The Moistener
Loading Filling the Moistener Refi ll the moistener when the fl uid gets low. Check fl uid level through the oval viewing window (fi gure, below right). Slide the moistener out to the right. IMPORTANT: Never open the moistener while the machine is processing material. -
Page 12: Loading The Sheet Feeders (Feeders A1 And A2)
Loading Loading the Sheet Feeders (Feeders A1 and A2) Sheet Feeder A1 is common to all models and is located immediately below the Manual Feeder M. Sheet Feeder A2 is an option on all models. It allows the machine to insert a second folded sheet into an envelope. -
Page 13: Loading The Envelope Feeder (Feeder B)
Loading Loading the Envelope Feeder (Feeder B) Always fan (aerate) envelopes before you load them. This prevents them from sticking together. Then tap the stack of envelopes onto a fi rm surface to align the edges. IMPORTANT: Load envelopes right way up and facing you. -
Page 14: Loading The Insert Feeder (Feeder C)
Loading Loading the Insert Feeder (Feeder C) Insert Feeder C is only available on certain machine confi gurations. Use this feeder to add additional inserts to your envelope that do not require folding by the machine. Feeder C is especially suited to feeding pre-folded or thicker inserts such as business reply envelopes (BREs), response cards and similar materials. -
Page 15: Running Jobs
Running 3. RUNNING JOBS Chapter 1 explained the main features of the machine and how to use the control panel. Chapter 2 described how to turn the machine ON and load the feeders and moistener unit. This chapter assumes you understand the content of the previous chapters. - Page 16 Running MODELS with an OPTIONAL SECOND SHEET FEEDER A2 2 folded sheets 2 folded sheets (collated) envelope envelope see note below JOB 5 Page 22 JOB 6 Page 23 2 folded sheets 2 folded sheets no envelope (fold only) (collated) no envelope (fold only) see note below JOB 7...
-
Page 17: Job 1: One Folded Sheet Into An Envelope
Job 1 One Folded Sheet into an 1 folded sheet Envelope Model Required: Any Offi ceRight™DI200 Notes: If your machine has the optional 2nd sheet feeder A2, you can use it instead of A1, envelope as long as you load and select it as described in steps 1 and 3 below. -
Page 18: Job 2: One Folded Sheet, No Envelope (Fold Only)
Job 2 One Folded Sheet, No Envelope (Fold Only) Model Required: Any Offi ceRight™DI200 1 folded sheet no envelope (fold only) Notes: If your machine has the optional 2nd sheet feeder A2, you can use it instead of Feeder A1, as long as you load and select it as described in steps 1 and 3 below. -
Page 19: Job 3: One Folded Sheet + One Insert Into An Envelope
Job 3 One Folded Sheet + One Insert 1 insert into an Envelope 1 folded sheet Model Required: Offi ceRight™DI200 must have an Insert Feeder C envelope Notes: Inserts are pre-folded sheets or unfolded items such as business reply envelopes, response cards and similar items. - Page 20 Job 3 One Folded Sheet + One Insert into an Envelope (continued) Step Action Tips More Details… Press Trial Piece Trial piece will not Page 8, 9 button and check seal—this is normal trial piece Press Start button Stop button will stop Page 8, 9 to run job machine at end of cycle...
-
Page 21: Job 4: One Insert Into An Envelope
Job 4 One Insert into an Envelope 1 insert Model Required: Your Offi ceRight™ DI200 must have an Insert Feeder C. Notes: Inserts are pre-folded sheets or envelope unfolded items such as business reply envelopes, response cards and similar materials. Step Action Tips... -
Page 22: Job 5: Two Folded Sheets Into An Envelope
Job 5 Two Folded Sheets into an 2 folded sheets Envelope Model Required: Your Offi ceRight™ DI200 must have the optional Sheet Feeder A2. envelope Notes: Run the address-bearing document from Sheet Feeder A2 and a second sheet that needs folding from Sheet Feeder A1. Step Action Tips... -
Page 23: Job 6: Two Collated, Folded Sheets Into An Envelope
Job 6 Two Collated, Folded Sheets 2 folded sheets into an Envelope (collated) Model Required: Your Offi ceRight™ DI200 must have the optional Sheet Feeder A2. Notes: This job uses the second sheet envelope feeder A2 in 2nd Page mode to feed two- sheet, collated sets. -
Page 24: Job 7: Two Folded Sheets, No Envelope (Fold Only)
Job 7 Two Folded Sheets, No Envelope (Fold Only) Model Required: Your Offi ceRight™ DI200 2 folded sheets must have an optional Sheet Feeder A2. no envelope (fold only) Notes: Run the address-bearing document from Sheet Feeder A2 and a second sheet that needs folding from Sheet Feeder A1. -
Page 25: (Fold Only)
Job 8 Two Collated, Folded Sheets, No Envelope (Fold Only) 2 folded sheets Model Required: Your Offi ceRight™ DI200 (collated) must have an optional Sheet Feeder A2. no envelope (fold only) Notes: This job uses the second sheet feeder A2 in 2nd Page mode to feed two- sheet collated sets. -
Page 26: Job 9: Two Folded Sheets And An Insert Into An Envelope
Job 9 Two Folded Sheets and an Insert 1 insert into an Envelope 2 folded sheets Model Required: Your Offi ceRight™ DI200 must have the optional Sheet Feeder A2 and an Insert Feeder C envelope Notes: Run the address-bearing document from Sheet Feeder A2 and a second sheet that needs folding from Sheet Feeder A1. - Page 27 Job 9 Two Folded Sheets and an Insert into an Envelope (continued) Step Action Tips For More Details… Press Trial Piece button Trial piece will not Page 8, 9 and check trial piece seal—this is normal Press Start button Stop button will stop Page 8, 9 to run job machine at end of...
-
Page 28: Envelope
Job 10 Two Collated, Folded Sheets 1 insert and an Insert into an Envelope 2 folded sheets (collated) Model Required: Your Offi ceRight™ DI200 must have the optional Sheet Feeder A2 and an Insert Feeder C. envelope Notes: This job uses the second sheet feeder A2 in 2nd Page mode to feed two-sheet, collated sets. - Page 29 Job 10 Two Collated, Folded Sheets and an Insert into an Envelope (continued) Step Action Tips For More Details… Press Trial Piece button Trial piece will not Page 8, 9 and check trial piece seal—this is normal Press Start button Stop button will stop Page 8, 9 to run job...
-
Page 30: The Manual Feeder M
Manual Feed The Manual Feeder M All Offi ceRight™ DI200 models have a Manual Feeder M that allows you to feed stapled sets of up to three sheets, one set at a time, for processing by the machine. Using the manual feeder automatically turns off both sheet feeders . You can, however, use the manual feeder along with the envelope, insert, fold-only and sealer selections to run a variety of jobs manually. -
Page 31: Advanced Menu Options
The Menu 4. ADVANCED MENU OPTIONS Press the Menu/Enter Button to get to the advanced menu options. These allow you to: • Reset the counter Choose this option if you want to set the piece counter back to zero. • Change paper size Choose this option to select Menu / Enter... -
Page 32: Change Paper Size
The Menu Change Paper Size Paper: 8-1/2 x 11 Change Size? Choose this menu option to select the paper (sheet) size you want to Paper: 8-1/2 x 14 run. You can set your Offi ceRight™ Change Size? DI200 to process letter-size sheets (8-1/2 x 11 inches) or legal-size sheets (8-1/2 x 14 inches). -
Page 33: Sheet Double Detect On/Off
The Menu Press the Menu/Enter button Move address repeatedly until the screen displays: In window? Move address in window? Press yes ( ) to enter the function. Shift.. X The screen displays: Shift...X Down (where X is the current setting) Set the desired number using the yes ( ) and no ( ) buttons. -
Page 34: Insert Double Detect On/Off
The Menu Insert Double Detect On/Off This option lets you turn the insert feeder’s double document detection on or off. When turned on… The machine records the thickness of the piece. When you start the run, the machine automatically stops when it senses a double feed. When turned off…... -
Page 35: Reference
Reference 5. REFERENCE Error Messages Message Meaning and Action CANNOT No sheet feeder has been selected in the job setup. SHIFT The display automatically times out from this message ADDRESS after two seconds and moves on to the turn double ON INSERTS detect On/Off menu function. - Page 36 Reference Message Meaning and Action CHECK SHEET Sheet feeder A2 out of paper, failed to feed, or a jam that FEEDER A2 was no cleared successfully from this area. Remove the paper in sheet feeder A2, reload and start run. CHECK SHEET The machine has detected a material jam between FEEDER A2...
- Page 37 Reference Message Meaning and Action INSERT The machine has detected a double feed from the DOUBLE FEED insert feeder. Lift cover D and remove material. Reload inserts and start run. LIFT COVER D This state could be produced by any kind of material REMOVE ALL crash in or near the insertion area, or a previous jam not being cleared correctly.
- Page 38 Press the sheet feeder selection button until the required feeder is selected. SYSTEM ERROR This is an unrecoverable system error. Please call CALL SERVICE Pitney Bowes for assistance (see page 41). Offi ceRight™ DI200 Operator Guide (SV41289-OG Rev. C)
-
Page 39: General Troubleshooting
Reference General Troubleshooting Poor folding If you’re running perforated material, the machine may have problems folding. If a machine fold almost corresponds with the perforation, a “box fold” may occur. This happens when another fold is created just off of the perforation and buckles slightly, creating, in effect, a third fold. -
Page 40: Clearing Material Jams
Reference Inserts or business reply envelopes feed poorly from Insert Feeder Changing the orientation of the insert stack may help. For pre-folded inserts it’s normally best to load with the closed edge feeding fi rst. Business reply envelopes can normally be loaded right way up and facing you. -
Page 41: Getting Help
Reference …from area beneath cover E If the display indicates a jam beneath cover E, press the blue button marked E to release the cover. Push the cover backwards to gain full access. Then carefully remove any stalled material from the machine. Button E Getting Help Should you experience a problem with your Offi... -
Page 42: Ordering Supplies
Reference Ordering Supplies Pitney Bowes has made it easier than ever to order supplies—such ® as E-Z Seal (Item Code 601-0, USA only) and Moistener Wick Replacement (Item Code 639-0)—that are designed specifi cally for your Offi ceRight™ DI200. Ordering Online (USA Only) Just point your browser to http://www.pitneybowes.com/supplies... -
Page 43: Material Specifi Cations
Reference Reference“ Material Specifi cations Sheet Feeders A1 and/or A2: Sheet Size Letter (8-1/2 x 11”) or Legal (8-1/2 x 14”) Paper Weight 20 to 24 lb. bond Capacity 80 sheets of 20 lb. bond maximum Limitations DO NOT run NCR or litho/inkjet coated papers Insert Feeder C (Optional): Sheet Size Width: 5 to 8-3/4”... -
Page 44: Machine Specifi Cations
Reference Manual Feeder M You can process stapled sets of up to three sheets of 20 lb. bond paper. Sheet Feeders A1 and A2 are not designed to work in conjunction with the Manual Feeder. We DO NOT recommend using glossy/coated sheets. Sealer Capacity The machine can seal up to a maximum of 1,000 envelopes between refi... -
Page 45: Index
Index Address Display, Front Panel 8 Not Centered in Window 39 Double Detection Position Wrong 39 Insert Address-Bearing Sheet Turning On and Off 34 Considerations when Using Sheet Sheet Feeder A2 7 Turning On and Off 32 Double Feed Check Fdr A2 Error Message 36 Doubles (Double Feed) Cannot shift address on Inserts... - Page 46 Index Insert Feeder Error Messages Loading the 14 Cannot Shift Address on Inserts Insert Feeder (Optional) Location and Function of 6 Check Areas A1, A2 & D 35 Inserts Feed Poorly 40 Check Sheet Feeder A1 35 Check Sheet Feeder A2 36 Check/Clear Insert Fdr C 35 Clear Feeder M 36 Jam Clearance 40...
- Page 47 Index Lift Cover D Remove All No Button, Function of 8 Error Message 37 Lift Cover D Remove Env Error Message 37 Open Cover E Remove All Lifting Handles Error Message 37 Location and Function of 7 Operating Guide Slot Loading Location of 6 Envelope Feeder 13...
- Page 48 Setting Up a Job. See Job Setups: Turning Machine On 10 Illustrated Guide to Sheet Feeders A1 and A2 Loading 12 Web Address, Pitney Bowes 41 Sheets Required Error Message 38 Sleep Mode, Explained 9 Yes Button, Function of 8 Specifi...
- Page 49 Operator Guide 1 Elmcroft Road Stamford, Connecticut 06926-0700 www.pb.com For Service or Supplies PB Form SV40189-OG Rev. C 4/05 © 2005 Pitney Bowes Inc. All Rights Reserved Printed in the USA Printed on recyclable paper *sv40189-OGrevc*...
Need help?
Do you have a question about the OfficeRight DI200 and is the answer not in the manual?
Questions and answers