Table of Contents
Advertisement
Quick Links
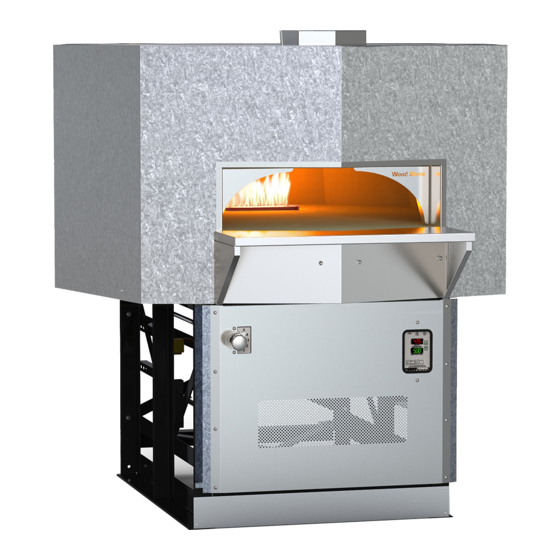
MOUNTAIN SERIES
Stone Hearth Oven
Dual Burner, Gas-Fired Models
wood stone corporation
1801 w. bakerview rd.
bellingham, wa 98226 usa
Installation and
Operation Manual
MT. CHUCKANUT
WS-MS-4-RFG-IR, RFG-IR
MT. ADAMS
WS-MS-5-RFG-IR, RFG-IR
MT. BAKER
WS-MS-6-RFG-IR, RFG-IR-(NAP)
MT. RAINIER
WS-MS-7-RFG-IR, RFG-IR
tf. 800.988.8103
t. 360.650.1111
f. 360.650.1166
woodstone-corp.com
Revised September 2014
Doc no: M0033.02
Advertisement
Table of Contents

Related Manuals for Wood Stone MT. ADAMS WS-MS-5-RFG-IR


Summarization of Contents
CAUTIONS AND WARNINGS
Essential Safety Precautions
Critical warnings about gas, flammables, power failures, and proper installation to prevent fires.
Read and Follow All Instructions
Emphasizes the critical need to read and follow all installation instructions to prevent fires.
Installation & Maintenance Warnings
Warnings about improper installation, adjustment, service, and the importance of reading the manual.
Clearance and Material Safety
Highlights fire risks from clearance failures and warnings about handling materials like glasswool.
Product Certifications
Information on ETL listing and approval by Intertek Testing Services for safety standards.
UNLOADING AND MOVING
Lifting the Oven Safely
Procedures for safely unloading and moving the oven using a crane or forklift.
Using a Pallet Jack
Instructions and safety warnings for moving the oven with a pallet jack.
Delivery Notes and Support
Important notes regarding delivery confirmation and seeking factory technical support.
INSTALLATION CLEARANCES
Minimum Clearance Requirements
Details minimum 1" side and 14" top clearances to combustibles.
Facade and Floor Clearances
Specifies non-combustible facade materials and non-combustible floor surface requirements.
Stucco Application Clearances
Notes that stucco-ready appliances follow similar clearances with specific stucco mix requirements.
Critical Installation Warnings
Emphasizes fire risks from improper installation and warnings about insulation in air spaces.
Clearance Diagram and Details
Provides a visual diagram illustrating top, side, and facade clearances for Wood Stone ovens.
FACADE DETAILS
ETL Sanitation Listing and Model Specifics
Explains the ETL Sanitation listing and how it applies to exposed surfaces and cooking.
Facade Construction Guidelines
Details requirements for facade materials, access for exhaust hoods, and service panels.
Facade Wall Material Requirements
Specifies that facade walls 6" to either side of the doorway and above must be non-combustible.
OUTDOOR INSTALLATION
Outdoor Installation Requirements
Outlines ETL approval for outdoor use and enclosure requirements, maintaining clearances.
Area Clearance for Combustibles
Mandates keeping the area around and beneath the oven clear of grass, leaves, and other combustibles.
Enclosure Options
Mentions available Wood Stone options for enclosing the area beneath the oven.
GAS SPECIFICATIONS
Gas Connection and Testing
Details the 3/4" NPT gas connection and testing procedures, advising against flame tests.
Burner Control Valves (SV-1 & SV-2)
Identifies SV-1 for IR burner and SV-2 for radiant burner, with test port locations.
Manifold Pressure Specifications
Provides factory-specified manifold pressures for Natural Gas and Propane models.
Altitude and Pressure Notes
Notes no altitude modifications are needed and the maximum inlet gas pressure.
Hourly Input Rates (BTU/hr)
Lists hourly input rates for Natural Gas and Propane models.
Gas Code Limitations
Outlines requirements for installation, pressure testing, and isolation from gas supply piping.
ELECTRICAL SPECIFICATIONS
Power Connection and Voltage Verification
Details connecting power to the terminal strip and verifying oven voltage (120 VAC or 240 VAC).
Electrical Ratings and Code
Lists electrical ratings (120/240 VAC) and grounding requirements per local and national codes.
VENTING
Venting Recommendations and Options
Manufacturer's recommendations for venting, prohibiting "B vent" and requiring grease duct material.
Venting Option 1: Direct Connection
Details direct connection via chimney or field-built grease duct, requiring specific static pressure.
CFM Requirements for Venting
Lists required CFM for different oven models to achieve specified static pressure.
Flue Adapter Information
Information on the flue adapter for round duct connection and MS-4 collar details.
Venting Option 2: Type 1 Hood
Describes using a Listed Type 1 exhaust hood and its installation requirements.
Venting Option 3: Combined Exhaust
Explains combining oven exhaust with other equipment under specific conditions and duct requirements.
Venting Prohibitions and Recommendations
Prohibits "B vent" and recommends consulting engineers and local authorities for venting plans.
Fire Suppression Requirements
Details fire suppression requirements, Type 1 hood usage, and fusible link ratings.
FLUE ADAPTER
Flue Adapter Installation
Instructions for attaching the flue adapter for round duct connection to the oven exhaust outlet.
MS-4 Collar and Duct Attachment
Notes MS-4 models have a standard 8" collar and may not need an adapter; duct must be grease-rated.
VENTING DO'S AND DON'TS
General Venting Rules and Guidelines
Covers basic rules for airflow, intake, and exhaust to ensure proper operation and prevent damage.
Direct Connect Venting Examples
Illustrates acceptable and unacceptable direct connect venting scenarios with diagrams.
Hood Installation Procedures and Clearances
Details hood mounting, facade requirements, and clearance specifications from pages 22-25.
ASSEMBLY
Oven Assembly Steps
Instructions for mounting the mantle, toe kick, and service/intake panel on the oven stand.
Service Panel Access Note
Highlights the service panel as the sole access for components and the need to maintain airflow.
Stucco Finish Oven Assembly
Specific instructions for stucco application on ovens ending with "-S", requiring 1-inch thickness.
MANTLE MOUNTING
Mantle/Bracket Installation
Steps for installing threaded studs, positioning the mantle/bracket, and securing with cap nuts.
Silicone Sealant Application
Instructions for filling gaps with high-temperature silicone sealant for a secure fit.
Granite Mantle Installation
Steps for applying silicone adhesive and seating granite stone onto the mantle bracket.
FRONT PANEL ASSEMBLY
Standard Front Panel & Toe Kick Instructions
Details assembly of the front panel and toe kick, including screw types.
Transformer Box and Connections
Identifies the transformer box location and notes the need for a licensed electrician for connections.
Service Panel Throttle Assembly
Describes the throttle knob assembly and its adjustable position for flame height control.
EXTENSION PANEL ASSEMBLY
Optional Lower Extension Assembly
Instructions for attaching the lower extension assembly to the oven legs.
Throttle Rod and Controller Assembly
Steps for removing the throttle rod assembly and attaching the controller to the extension.
Connecting Throttle Rod Extension
Details passing the EMT throttle rod through brackets and securing it with a cotter pin.
Final Throttle Rod & Panel Attachment
Instructions for passing the throttle rod, clamping, and securing the front panel to the bracket.
Calibrating the Pointer
Steps to loosen pointer collar set screws and position the pointer to "5" on the Flame Height Index Scale.
STUCCO APPLICATION
Stucco Application Overview
Depicts stucco application and notes minimum clearances and coating thickness.
Traditional Stucco Mix
Provides the traditional stucco mix ratio (1 part cement, 1 part regular cement, 5 parts sand).
Minimum Stucco Thickness
Specifies a minimum stucco application thickness of 1 inch over exposed metal lathing.
CONTROLLER
Controller Functions Overview
Explains the functions of the power, dome flame, and hearth heat indicator lights.
Display and Button Functions
Details the Hearth Temperature/Set Point displays and the On/Off button functionality.
Arrow Buttons and Unit Selector
Describes the arrow buttons for temperature adjustment and the unit selector for °F/°C.
INITIAL START-UP
Oven Start-Up Procedure
Outlines the critical initial start-up procedure to drive out moisture and prevent cracking.
Pre-Start Checks
Ensures main gas supply is on, control valves are ON, and venting is tested and approved.
First Day Firing Schedule
Details a step-by-step firing schedule for the first day, including flame height adjustments.
Turning Off the Oven
Instructions for turning off the oven and notes regarding restarting and oven cracks.
DAILY OPERATION
Oven Operation Overview
Provides a general overview of daily oven operation, noting it's not for solid fuel.
Adjusting Hearth Set Point
Instructions for setting the Hearth Set Point and adjusting the radiant flame for desired temperatures.
Adjusting Radiant (Dome) Flame
Explains how to adjust the radiant flame intensity using the Flame Height Control Knob.
Turning Off the Oven
Steps for turning off the oven and notes about restarting and condensation.
FLAME HEIGHT CONTROL
Determining Appropriate Flame Height
Explains how flame height relates to floor temperature and factors influencing it.
Using the Flame Height Indicator Scale
Details settings for Heat Up, Holding, and Cooking flames using the indicator scale.
Cooking Flame Purposes
Outlines the two main purposes of the cooking flame: top baking and heat replacement.
MAINTENANCE
Cleaning the Oven
Recommendations for cleaning oven debris using brushes and damp rags, avoiding chemicals.
Burner Area Warnings
Critical warnings against placing items in or above the flame or sweeping debris into the burner.
Oven Floor Cleaning Warning
Strict warning against using water or cleaning chemicals on the oven floor to prevent severe damage.
Night Heat Retention Doors
Explains the use of doors for heat retention and warns against operating the oven with them in place.
PERIODIC THERMAL CLEANING
Establishing a Thermal Cleaning Schedule
Guidance on when thermal cleaning is needed based on oven operating temperatures and buildup.
Thermal Cleaning Procedure
Steps for removing grease buildup by using the radiant flame at high settings to reach 600°F.
TROUBLESHOOTING GUIDE
Controller Not Turning On
Solutions for power issues, including checking breakers, wall switches, and interlocks.
Radiant Flame Not Lighting
Troubleshooting steps for the radiant flame not lighting, including gas supply and debris checks.
Underfloor Burner Operation
Addresses the "Hearth Heat" light being off and the underfloor burner not firing.
Hearth Temperature Status
Explains normal hearth temperature readings and the role of the radiant burner vs. set point.
"Chec" Display on Controller
Troubleshooting for the underfloor IR burner not firing when the floor temperature drops below the set point.
Service and Support Contact
Provides contact information and hours for service and technical support from Wood Stone.
OPERATION SEQUENCE
Burner Operation Sequence Overview
Details the sequence of operations for the RFG-IR oven with a Type 2 controller.
Power On and Pilot Ignition
Describes the initial steps of powering on, SV-2 valve operation, and pilot ignition sequence.
Burner Firing and Temperature Control
Explains the firing of burners based on floor temperature relative to the Hearth Set Point.
120 VAC ELECTRICAL DIAGRAM
RFG-IR 120 VAC Model Wiring
Provides the wire diagram for RFG-IR 120 VAC models with a Type 2 controller.
Temperature Controller Connections
Details connections for the temperature controller, including thermocouple and terminal blocks.
SV1 and SV2 Component Wiring
Shows wiring for the SV1 Infrared and SV2 Radiant components.
240 VAC ELECTRICAL DIAGRAM
RFG-IR 240 VAC Model Wiring
Presents the wire diagram for RFG-IR 240 VAC models with a Type 2 controller.
Transformer and Controller Wiring
Illustrates the wiring of the transformer, temperature controller, and SV components for 240V.
INTERLOCK DIAGRAM
Oven Control to Exhaust Fan Interlock
Explains the connection to interrupt oven power until the exhaust fan is turned on.
DPST Switch Functionality
Details the function of the Double Pole, Single Throw (DPST) switch for safety interlock.
LIMITED WARRANTY
Warranty Service and Contact Information
Outlines the warranty period, service requirements, and contact details for Wood Stone.
Warranty Exclusions
Lists specific instances where the provided warranty does not apply, such as improper installation or use.
Limitations of Liability
States limitations on Wood Stone's liability and the purchaser's rights regarding claims.
Need help?
Do you have a question about the MT. ADAMS WS-MS-5-RFG-IR and is the answer not in the manual?
Questions and answers