Advertisement
- 1 Introduction
- 2 Before using your refrigerator/freezer
- 3 Setting up and building in
- 4 Installation in a cold room
- 5 Electrical connection
- 6 You can change the door from righthand to lefthand - hinged or vice versa yourself
- 7 Starting up
- 8 Electronic control
- 9 Temperature setting
- 10 Changing the temperature
- 11 Freezing down
- 12 Power failure
- 13 Alarm
- 14 Emergency programme
- 15 Short-lived temperature deviations
- 16 Switching off for cleaning/defrosting
- 17 Using the refrigeration compartment and accessories
- 18 Using the freezing compartment and accessories
- 19 Defrosting
- 20 Cleaning
- 21 Useful hints
- 22 Spare parts
- 23 Replacing the bulb in the tabletop
- 24 List of signals
- 25 List of signals
- 26 Documents / Resources
Introduction
Please note that these instructions apply to all KF models and therefore the accessories/equipment described can vary from model to model.

Old refrigerators and freezers are often fitted with complicated latches that can only be opened from the outside. If you have an old unit like this stored away somewhere, or if you scrap it, remember to destroy the latch to prevent children from being exposed to danger by getting locked inside the unit. Note! Please also observe the environmental rules on disposal. See section "Disposal".
Before using your refrigerator/freezer
Please read the sections on setting up and building in, starting up, temperature control and electrical connection before using your refrigerator/freezer.
On receipt, check to ensure that the freezer has not become damaged in transport. Transport damage should be reported to the local supplier before the refrigerator/freezer is put to use.
Fold out the final pages with illustrations. You will then be able to follow text and pictures at the same time.
Setting up and building in
For safety and operational reasons, do not set up the refrigerator/freezer outdoors.
Your refrigerator/freezer should be placed in a dry room.
The refrigerator/freezer is designed for tempera-ture class N in accordance with European standard EN 153. The surface on which the appliance is placed must be plane. Do not use a plinth or similar.
Never place the refrigerator/freezer close to sources of heat such as ovens or radiators, and avoid placing it in direct sunlight.
It is important that the fridge/freezer stands completely level and that there is good air circulation over, under and around it.
The dimensions give the actual size of the opening. (The figures in brackets apply when KF 345, KFL 315 & KF 355 units are built in.). Single cabinets require a circulation area of at least 200 cm2, combination units 300 cm2.

-
- Building in with ventilation grill in a standard kitchen element with sufficient ventilation for the compressor.
- Building into a refrigerator element with integral ventilation. Air flows in through the plinth and is led to the rear of the cabinet.
Installation in a cold room
If the refrigerator/freezer is to stand in a room where the temperature can be less than 16°C (e.g. in an unheated part of a building), problems might arise if the appliance has only one compressor and one control.
The temperature sensor will register a temperature that is sufficiently low and therefore no further cold output will be produced for the refrigeration compartment. This means that the freezing compartment will not be cold enough either and there is a risk of frozen items in the cabinet thawing out.
Electrical connection
The refrigerator/freezer is intended for connection to alternating current. The connection values for voltage (V) and frequency (Hz) are given on the nameplate  in the cabinet.

Power must be connected via a wall socket with switch. The wall socket should be easily accessible.
All earthing requirements stipulated by the local electricity authority must be observed. The freezer plug and wall socket should then give correct earthing. If in doubt, approach your local supplier or authorised electrician.
The flexible cord fitted to this appliance has three cores for use with a 3-pin 13amp or 3-pin 15-amp plug. If a B.S. 1363 (13-amp) fused plug is used, it should be fitted with a 13-amp fuse.

The wires in this mains lead are coloured in accordance with the following code:
GREEN-AND-YELLOW: EARTH
BLUE: NEUTRAL
BROWN: LIVE
The colours of the wires in the mains lead of this appliance might not correspond with the colour marking identifying the terminals in your plug.
Proceed as follows:
Connect the GREEN-AND-YELLOW wire to the plug terminal marked "E" or by an earth symbol, or coloured GREEN or GREEN-AND-YELLOW. Connect the BLUE wire to the plug terminal marked "N" or coloured BLACK. Connect the BROWN wire to the plug terminal marked "L" or coloured RED.
You can change the door from righthand to lefthand - hinged or vice versa yourself
Illustration  shows how easy it is to change the door from righthand to lefthand-hinged - or vice versa.

Refrigerator/freezer with one door (drawing A)
Lay the cabinet on its back with door uppermost.
Take off the door handle  using an ordinary screwdriver.
To take off the door, remove the screws  with a key.
When the door is removed, one hinge remains attached to the door. This hinge must be removed before the door is refitted. Move the hinge pin  to the opposite side. Note that the pin must be fitted "opposite hand", i.e. it must be turned 1/4 of a turn (see drg C). It might be necessary to use pliers to draw the pin out from the top. Move the dummy hinge
  to the opposite side.
Now replace the door and fit the hinge accompanying the refrigerator/freezer where the dummy hinge was fastened. When refitting the door, a 9 mm spacer (wood or similar material) should be inserted at the lower hinge, between the front of the cabinet and the door edge, to create sufficient clearance for the sealing strip. Remember to place the correct number of washers beneath the lower hinge to ensure that the door is at the correct height. Refit the door handle.
Refrigerator/freezer with two doors (drawing B)
The procedure is the same as for models with one door, except that the middle hinge  must be removed and mounted on the opposite side after the upper door has been refitted. Fit the screw cap
  (removable with a knife) where the middle hinge was previously mounted.
Starting up
If during transport the refrigerator/freezer has been laid down, or if it has been stored in cold surroundings (colder than +5°C) it must be allowed to stabilise in the upright position for at least 1 hour before switching on.
Start the refrigerator/freezer by plugging the lead into a wall socket. On connection, an alarm will indicate that it is too warm and that there has just been a power failure. See "Alarm" for instruction on switching off the alarm. With models having two operating panels, i.e. one for the refrigeration compartment and one for the freezing compartment, the alarm must be deactivated on both panels.
Electronic control
The appliance can be operated with the two keys "TEMP." and "FREEZE". By pressing the key and holding it down, you will in a moment or two see the actual temperature setting on the display. This setting will remain on the display for about 3 seconds. By keeping the key pressed down it is possible to change the setting. See below.
Temperature setting
The refrigerator/freezer with one control is factory programmed to run under optimum conditions at +5°C.
In the refrigerator/freezer with two controls, the refrigeration compartment is factory programmed to run at +5°C, the freezing compartment at -18°C.
Changing the temperature
Press TEMP and keep it held down. You will in a moment or two see the actual setting on the display and the small lamps will light up, one after the other, along the scale. When the end of the scale is reached all lamps will go out for an instant before starting to light up again. Release the TEMP key when the lamp opposite to the temperature you require lights up. The refrigerator/freezer will now run at this new setting.
Freezing down
In refrigerator/freezers with only one control, the temperature in the freezing compartment follows the setting in the refrigeration compartment.
If rapid freezing down is required, the cabinet must be set to run at the lowest temperature. This setting affects both refrigeration and freezing compartments, and how long the setting and the low temperature are to remain can only be judged by experience. After goods have been frozen down, return the setting to normal again.
In models with two controls, activate the "FREEZE" key to start freezing down. When freezing down, it is necessary to choose whether freezing down is to run for one or for two days (24 or 48 hours). Press "FREEZE" and hold it down. In a moment or two you will see the actual setting. At the same time, in sequence, one, two or no lamps on the temperature scale will light up. The number of green lamps that light up indicates the number of freezingdown days. Release the key when the required number of days is indicated. The freezer will now run at this setting. The small yellow indicator lamp will light up for as long as the freezing-down process is running.
Freezing down is switched off automatically when the selected time has elapsed. The freezer then continues to run on the normal setting. An economy function ensures that during freezing down the temperature never falls below -28°C.
The freezing-down process can be stopped manually by pressing the "FREEZE" key as described above and then releasing it as soon as no lamps light up.
Note!
Pack your frozen items in airtight and waterproof containers to prevent drying out. Portions should be as flat as possible to ensure rapid freezing through.
To obtain effective freezing down of many items at the same time, start the freezing down process 24 hours before items are placed in the cabinet. If a smaller quantity of items is to be frozen the period can be made shorter. If only single packs are to be frozen, no prior freezing period is necessary.
Power failure
After power failure the cabinet starts automatically. As soon as power is restored, the cabinet runs and the alarm is activated (see section on alarm).
Alarm
The alarm activates if the power fails, or if the cabinet temperature remains 6°C higher than the setting for more than two hours. The alarm will continue even after the temperature has returned to normal, just to tell you that something went wrong.
Alarm on starting
Your new GRAM model has not been connected to a power supply since it was tested at the factory, therefore the electronic control "thinks" there has been a power failure when you connect up the freezer in your kitchen, and thus activates the alarm.
Deactivating the alarm Press TEMP and hold it down. In a moment or two the display will show the set temperature. To deactivate the alarm, release the key as soon as the setting appears.
Emergency programme
If the sensor fails, an emergency programme takes over the temperature control until the installer/service technician arrives.
Short-lived temperature deviations
Short-lived temperature deviations are normal. They occur when:
- the refrigerator is filled with fresh items,
- the door is left open longer than usual,
- the evaporator defrosts.
Some of the lamps on the temperature scale light up when the temperature deviates. Such deviations do not affect items of food stored in the refrigerator and the temperature quickly returns to normal.
Switching off for cleaning/defrosting
Press the TEMP key as under "Changing the temperature" and release the key the moment that all lamps go out - before they light up again. This switches off the refrigeration/freezing function and the refrigerator/freezer can be cleaned. It will still be possible to read off the actual temperature for about 2 hours, then this function too will cease automatically. Start the refrigerator again by setting a temperature. See "Changing the temperature".
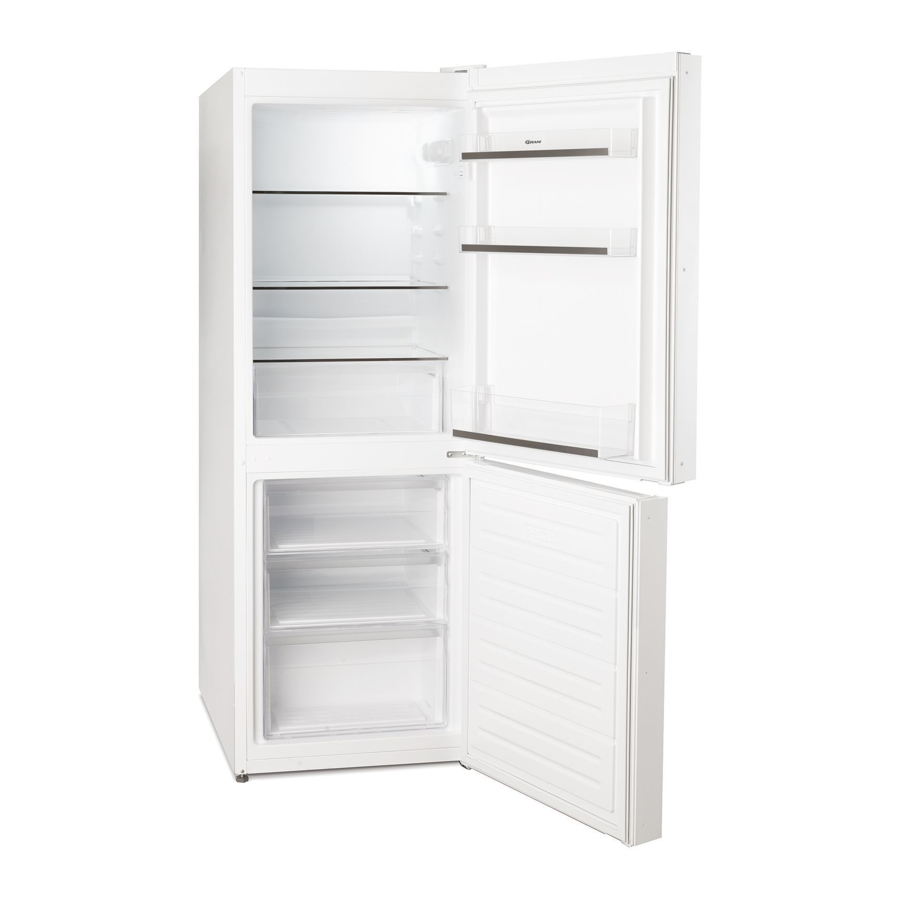
Using the refrigeration compartment and accessories
The short shelf  can be tilted and used as a bottle shelf. To tilt the shelf, lower the rear bearer down to the next shelf support.

Vegetable drawer/drawers The drawer/drawers in the bottom of the refrigeration compartment are very suitable for fruit and vegetables. The overlying shelf covers the drawer and prevents stored items from drying out.
Serving boxes in the door
The boxes are ideal for all kinds of food. The tight-fitting lids prevent drying out and save time in tedious wrapping and unwrapping.
The serving boxes are made of a material that remains unaffected by mineral oil, fats and weak acids. They withstand temperatures from below freezing up to 100°C and can be cleaned in a dishwasher, but must never be placed close to the heating element.
Additional serving boxes can also be purchased as accessories.
Bottle shelf/shelves in the door The bottle shelf can be adjusted in height by moving the special fitting to another set of holes in the shelf  . The bottle shelf can be adjusted in steps of 10 cm.

Using the freezing compartment and accessories
The whole freezing compartment can be used for freezing down and for the longterm storage of frozen goods. In models with more than one pull-out drawer, there is a freezing shelf at the top.
The shelf front is fitted with a grid that can be tilted so that items can be stacked right up to the front edge of the shelf. The grid must be lifted up before it can be titled down.
Defrosting
Refrigeration compartment
The refrigeration compartment has fully automatic defrosting, controlled by a sensor which starts refrigeration only when the evaporator has been completely defrosted.
Should an unusual amount of ice appear, defrost the compartment manually by switching off refrigeration.
When the evaporator has been defrosted and cleaned, restart refrigeration by setting the correct temperature. For stopping, restarting, setting procedures, see "Temperature setting".
Freezing compartment
Frost should be removed when it becomes more than 1/2 cm thick. Never use a sharp or pointed object that might damage the freezer. The cabinet should be completely defrosted about twice a year.
Place a bowl of hot water in the cabinet. Close the door and wait half an hour. Defrosting can be accelerated by blowing hot air into the cabinet with a hair drier. It then becomes easy to scrape off any remaining frost.
With models having a defrost water drain  pull out the spout. The water in the bottom of the cabinet will now run out and the freezing compartment can be cleaned.

Cleaning
The refrigerator/freezer is best cleaned with a weak soap solution (max. 85°C). Never use cleaning agents that might scratch. Clean the sealing strip around the door regularly to prevent discolouration and prolong its life.
Remove dust and threads from the compressor compartment with a vacuum cleaner.
Useful hints
Door sticking
Opening and closing the door(s) creates underpressure in the cabinet. If you need to open and close the door(s) repeatedly within a short period, lay something between the door sealing strip and cabinet front edge to create an air gap.
The freezer is to remain unused for a time
After the refrigerator/freezer has been defrosted and cleaned, leave the door slightly ajar. This will prevent bad smells.
Compressor does not run
- Check the temperature setting.
- Check to ensure that power is switched on and that the plug has been properly inserted into the wall socket.
Unfamiliar sounds
Can be caused by tubes in the appliance contacting each other or the outer cladding.
- Check to make sure the refrigerator/ freezer is standing level.
Liquid noise
Caused by circulating refrigerant. This is quite normal, even when the compressor is not running.
Note also
The compressor starting system often needs a pause before it can be restarted. The compressor will itself automatically decide how long the pause is to be.
Blocked defrost water drain
If blockage occurs, the most likely place is the plastic bend at the outlet inside the cabinet. Carefully remove the blockage, then for safety's sake clean the bend with a pipe cleaner or similar. If the problem persists, the blockage might be at the tube outlet into the defrost water tray. The tray is located above the compressor at the rear of the cabinet.
Spare parts
When ordering spare parts, please give the refrigerator/freezer type and number. This information is given on the nameplate  inside the cabinet.
Replacing the bulb in the tabletop
With a screwdriver, loosen the pins holding the lamp screen.  Lift the screen and replace the old bulb with a new one (max. 15 W) replace lamp screen.

List of signals

Normal condition. The panel shows the actual cabinet temperature, here +5°C.

Display of temperature setting: Press TEMP and hold it down. After a moment or two the display shows the temperature setting, in this case the factory setting of +5°C.

When all lamps in the scale light up, the temperature in the cabinet is + 9°C or higher than can be shown on the scale.

When the lamp under +2 lights up - and only this lamp - the cabinet temperature is lower than can be shown on the scale.

When the two lamps at either end of the scale flash alternately and the four middle lamps light up there is a fault in the temperature sensor. Call a service technician. (In the event of sensor fault an emergency program will take over control until the service technician arrives).

Alarm: The lamps light up one after the other along the scale, starting at the coldest end. An acoustic alarm is given at the same time.
List of signals

Normal condition. The panel shows the actual freezer temperature, here -18°C.

Temperature setting: Press TEMP and hold it down. In a moment or two the display will show the temperature setting, in this case the factory setting of -18°C.

When all lamps in the scale light up, the temperature in the freezer is -14°C or higher than can be shown on the scale.

When the lamp under -21 lights up - and only this lamp - the freezer temperature is lower than can be shown on the scale.

When the two lamps at either end of the scale flash alternately and the four middle lamps light up there is a fault in the temperature sensor. Call a service technician. (In the event of sensor fault an emergency program will take over control until the service technician arrives).

Alarm: The lamps light up one after the other along the scale, starting at the coldest end. An acoustic alarm is given at the same time.

When the lamp at the side of the FREEZE key lights up, freezing down is in progress. Freezing time setting: Press FREEZE and hold it down. In a moment or two, one lamp or two lamps on the display will light up. The number of lamps that light up indicates the selected number of freezing-down days.
Documents / ResourcesDownload manual
Here you can download full pdf version of manual, it may contain additional safety instructions, warranty information, FCC rules, etc.
Advertisement


Need help?
Do you have a question about the KF and is the answer not in the manual?
Questions and answers