Advertisement
- 1 NOTES ON BALANCING, CONFIGURING, AND OPERATING THE DJI RSC 2
- 2 COMPATIBLE CAMERA AND LENS COMBOS
- 3 KEY REFERENCES
- 4 DJI RSC 2 DIAGRAM
- 5 FOCUS MOTOR DIAGRAM
- 6 SETTING UP THE RSC 2
- 7 BALANCING THE RSC 2
- 8 OPERATION OF THE RSC 2
- 9 RSC 2 FOLLOW MODES
- 10 CUSTOM RSC 2 CONFIGURATION AND SAVING CONFIGURATIONS TO USER PROFILES M1, M2, M3
- 11 WRAPPING THE RSC 2
- 12 TIPS FOR MORE EFFECTIVE USE OF CAMERA MOVEMENT USING THE RSC 2
- 13 CONFIGURING AND USING THE FOCUS MOTOR
- 14 ESSENTIAL VIEWING
- 15 COMPONENTS IN THE KIT
- 16 BASIC KIT INVENTORY
- 17 ACCESSORY KIT INVENTORY
- 18 Documents / Resources
NOTES ON BALANCING, CONFIGURING, AND OPERATING THE DJI RSC 2
Thrown together by David Tamés, last revised on October 27, 2024 (r4), you may download the most recent versions of this document from: https://writingwithacamera.com/download/wwac-dji-rsc-2-notes.pdf
Do you have suggestions for improving these notes? Please send them to d.tames@northeastern.edu.
The DJI RSC 2 is a light and portable 3-axis gimbal made for
mirrorless cameras. These notes are designed to help you use this gimbal and provide a starting point for your own checklists and notes.
If this is your first time with the gimbal, read the safety information in the DJI RSC 2 manual (see KEY REFERENCES below). These notes are intended to supplement, not replace, the official manual and tutorials available from DJI. This document is released to the public domain; the author makes no warranty, expressed or implied, as to the suitability or accuracy of the information in this document.
COMPATIBLE CAMERA AND LENS COMBOS
RSC 2 compatibility information (cameras, lenses, and camera functions and required cables) may be found at: https://www.dji.com/support/compatibility?product=rsc-2 and it's important to realize this gimbal will not operate properly with payloads heavier than it was deigned for.
Combinations like the Sony a7iii with the Sigma 24-70 f/2.8 lens can be made to work on the RSC 2, however, this combination is not on DJI's recommended list. I suggest you will find it easier and more enjoyable to operate the RSC 2 with a lighter payload. This is why the Zeiss 35mm f/2.8 prime lens is currently included in the kits from the CAMD Media Center. I recommend this lens over the heavy zoom when using the RSC 2.
If you plan to purchase your own gimbal or you already have one, I suggest looking into custom gear rings for your lenses from Follow Focus Gears: https://followfocusgears.com/, this will enhance the use of the Follow Focus Motor if you are using one.
KEY REFERENCES
DJI has published a Tutorials Playlist on YouTube that offers excellent starting points using the RSC 2: https://youtube.com/playlist?list=PL65kukZorPdMczVNuGFN_mpfg1hucD7aM&si=vLRTco5CNqRZe5NF
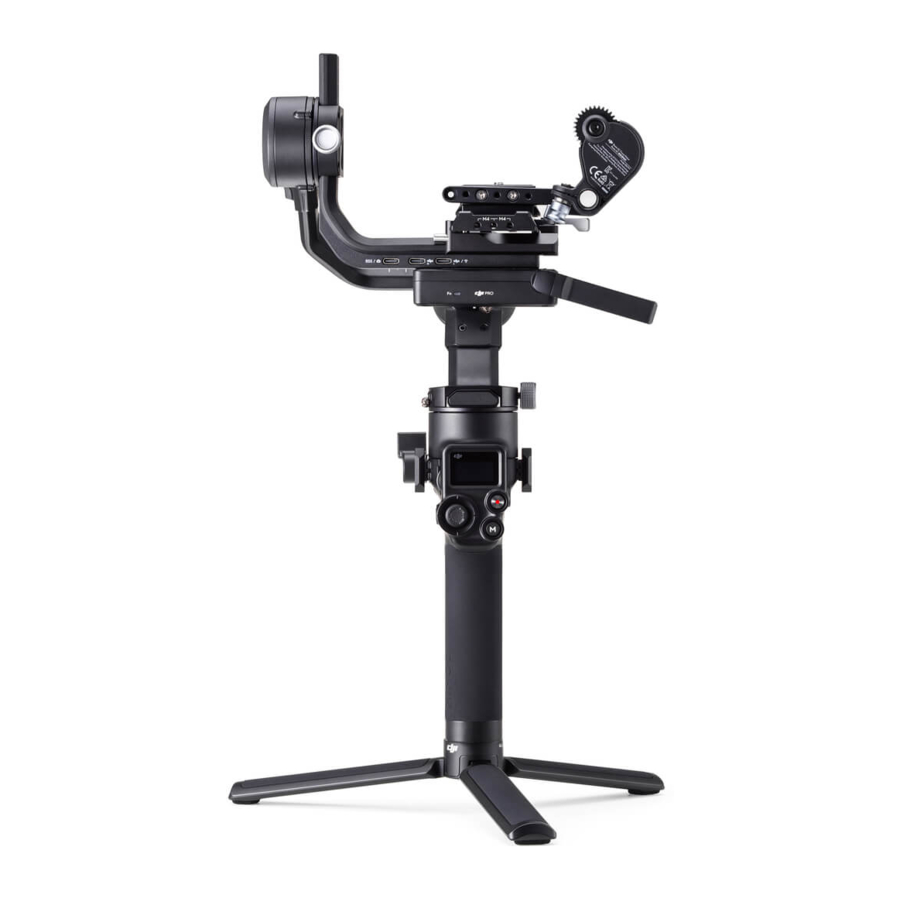
DJI RSC 2 DIAGRAM

- Tilt Motor
- Tilt Lock
- Screen
- Side Dial
- Camera Control Button
- M Button
- Joystick
- Extended Grip/Tripod
- Back Button
- M4/NATO Port
- Lock Knob
- Lower Quick-Release Plate
- Upper Quick-Release Plate
- Image Transmission/Focus Motor Port (USB-C)
- Focus Motor Port (USB-C)
- RSS Camera Control Port (USB-C)
- Front Dial
- Trigger
- Power Button
- Power Port (USB-C)
- Pan Lock
- Pan Motor
- Roll Lock
- Roll Motor
FOCUS MOTOR DIAGRAM

- Communication Port
- Status Indicator
- Lock Knob
- Gear
- 12mm Rod Mount
- 12mm Rod
- Gear Strip (for lenses without 0.8m gears)
SETTING UP THE RSC 2
- Install the DJI app on your smartphone (please do NOT change the default password of the gimbal)
- Unpack the gimbal, follow the steps in the RSC 2 | Unboxing tutorial:https://www.youtube.com/watch?v=0jnvTo81nTUif this is your first time.
- Attach tripod to the handle.
- Check battery level (displayed on the LCD display; start use with full battery (there is a USB socket on the top/side of the handle for charging)
- Install Camera on Camera Plate (with Riser if needed)
- Slide the Camera/Plate assembly onto the camera mount
- Install lens support for added stability
- Connect the appropriate camera control cable between the camera and the gimbal (this will enable camera functions like start/stop and trigger auto focus, depending on the camera) [For Sony a7iii use the USB-C Camera Control Cable]
- Configure your camera for remote control via USB [For Sony a7iii in Setup Menu Page 4 configure USB Control = PC Remote, you will be able to start/stop, trigger autofocus, set ISO/Shutter/Aperture, focus control will not work, so stick with autofocus]
- [OPTIONAL] Install Focus Motor, requires riser and rod (see CONFIGURING AND USING THE FOCUS MOTOR below) [when starting out stick with the "minimalist configuration" and use auto focus with the area select / spot or tracking features]
BALANCING THE RSC 2
If this is your first time balancing the gimbal, start by viewing the RSC 2 Balancing Tutorial: https://youtu.be/ eAUlOoywsTU?si=QpyNSHhTni0zYYFqand perform the balancing ritual.
Balancing. The gimbal is considered balanced when the camera mounted on the gimbal remains steady at any angle it moves along the three axes.
The order for balancing the axes is:
- Balance the vertical tilt;
- Balance depth for the tilt axis;
- Balance the roll axis;
- Balancing the pan axis.
Balance Test. After balancing the RSC 2 you should launch the DJI app, connect to the gimbal with the default password of "12345678" and then run the Balance Test. If the test fails, rebalance, the app will tell you which axis is out of balance.
Auto Tune. Once the gimbal passes the Balance Test, run Auto Tune and then you'll be good to go. Auto Tune can initiated without the app by pressing the trigger while holding down the M button and Auto Tune will begin.
Check Battery Level — The battery level is shown on the LCD display, check the battery level when you check out the gimbal and charge before using if necessary.
OPERATION OF THE RSC 2
If this is your first time with the gimbal, watch the How to Use DJI RSC 2 video: https://www.youtube.com/watch? v=OxWl_cAMW5sbefore doing anything else. The following summaries the function of the different buttons and controls on the RSC 2:

- Axis Locks — Always make sure that Pan Axis Lock, Tilt Axis Lock, and Roll Axis Lock are disengaged before powering on. Make sure they are re-engaged after power off and before packing or transport.
- Power Button — Press and hold the power button to power on and power off; when you hear a beep, the RSC 2 is powered on, it will make some adjustments. Press the power button twice to enter or exit sleep mode. Once powered on, the screen of the RSC 2 will automatically display the home page where you can view the current user mode, sleep mode icon, and the current battery level on the top status bar, as well as Follow Mode and Follow Speed.
- Back Button — Press to exit the current screen.
- Side Dial — Press to enter the menu, and turn to scroll the options, and press to make selections.
- Joystick — Use to control the movement of the gimbal.
- M Button — Press to select a user profile, three user profiles can be programmed, by default, they are configured as follows: M1 — PF, medium speed; M2 — PTF, medium speed; M3 — FPV, medium speed (see RSC 2 FOLLOW MODES below for an explanation of each mode).
- Camera Control Button — Press halfway to autofocus, press once to start or stop recording, or press and hold to take a photo. You must connect the camera to the gimbal using the appropriate Camera Control Cable.
- Trigger — Press once to start ActiveTrack; Press twice to recenter the gimbal; Press three times to turn the gimbal 180° and enter selfie mode.
- Front Dial — The default function of the front dial on DJI RSC 2 is to control camera focus. With additional settings, this dial can also be used to control focus motor, ISO, aperture, and the roll axis.
- How to Select Follow Mode — Press the side dial to the left of the screen to enter the main menu which includes the settings for Follow Mode, Auto Tune, the Joystick, Front Dial, and Advanced Settings
- Lock Mode — Press and hold the trigger to enter Lock mode. In this mode, the camera will keep facing the same direction no matter how the handle moves. Lock mode enables shots that involve tracking or pan follow.
- Re-Center Camera Orientation — Double press the trigger to re-center the camera to the original orientation.
- Sport mode — Press and hold the M button to enable Sport mode, in which the gimbal tracks a quickly moving subject. If you need to remain in Sport mode, tap the trigger twice while holding the M button. Perform the same action to exit Sport mode.
- Portrait mode — Tap the M button twice. The pan and tilt axes will rotate 90° so that the camera is vertical. Tap the M button twice to exit Portrait mode.
- 3D Roll 360 Mode — Press the M button three times to enable 3D Roll 360 or set the Follow Mode on the screen to 3D Roll 360. In this mode the tilt axis will rotate 90° upward and stand by for a 360° rotation. Push the joystick to the left or right, and the camera will make a 360° rotation. Push the joystick to the left or right twice, and the camera will keep rotating at a constant speed. Tap the trigger twice, and the gimbal will automatically stop once it is in a horizontal direction. Tap the trigger three times, and the gimbal will automatically stop once the camera view is inverted. Repeat to exit 3D Roll 360.
RSC 2 FOLLOW MODES
The RSC 2 supports the following Follow Modes:
- PF (M1 Default): pan follow; only the pan axis follows the movement of the grip, otherwise the camera stays still.
- PTF (M2 Default): pan and tilt follow; both the pan and tilt axes follow the movement of the grip.
- FPV (M3 Default): pan, tilt, and roll follow; all three axes follow the movement of the grip.
- 3D Roll 360: enable to shoot footage while rotating the camera 360°.
- Portrait: enable to shoot in portrait mode.
- Custom: enable or disable any axis follow as required.
CUSTOM RSC 2 CONFIGURATION AND SAVING CONFIGURATIONS TO USER PROFILES M1, M2, M3
Refer to the manual or tutorials for customizing the follow modes and follow speeds, as well as a variety of advanced settings and modes. You can customize the RSC 2 and save your configurations in three user profiles: M1, M2, and M3 which allows you to switch between custom configurations based on your preferences and shooting style, however, when you're starting out the defaults provide a pretty good starting point.
WRAPPING THE RSC 2
The kit comes with a lot of small parts, be careful not to lose them to avoid being charged a replacement fee. Small screws should go back into the plastic zip pouches.
Return all components to the same location and in the same configuration as you found then. Check the kit contents against the parts inventory upon check out, setting up, and wrapping.
TIPS FOR MORE EFFECTIVE USE OF CAMERA MOVEMENT USING THE RSC 2
- Perform slow movements — unless fast for a reason
- Perform smooth movements — avoid bobbing motion when walking, walk smoothly, keep knees bent and walk heel to toe (practice this)
- Ask yourself, why movement in the first place? Think about foreground, subject, and background, what is the movement doing metaphorically? Why are you moving the camera? What are you revealing? What are you hiding? What does the movement mean?
- Underslung mode is good for keeping the gimbal low off the ground
- Set Modes for custom settings; the responsiveness of the gimbal has a huge effect on your videos
- Consider shooting through, under, around objects, again, use them as part of your moving composition, ask yourself, what does this movement mean? Why are you moving?
CONFIGURING AND USING THE FOCUS MOTOR
This section has not yet been written but the manual is straightforward on this or take a look at How to Use the DJI Ronin Focus Motor tutorial: https://www.youtube.com/watch?v=3yQJ_9T7na4
ESSENTIAL VIEWING
- Mercedes Magic Body Control, commercial, the basic idea behind three-axis gimbals,https:// www.youtube.com/watch?v=nLwML2PagbY
- Jaguar vs. Chicken, commercial, every good commercial deserves a response from the competition,https:// www.youtube.com/watch?v=FAGOcyvBap0
- How To Get Good Gimbal Shots (Peter Lindgren)https://www.youtube.com/watch?v=vM0At-S8F3U
- Film yourself with TRACK MODE on the RONIN-S / RONIN-SC (MAKE. ART. NOW.)https:// www.youtube.com/watch?v=b1TtaTlhj7I
- 7 CREATIVE Cinematic GIMBAL Shot Ideas (Sean Kitching),https://www.youtube.com/watch?v=epzsBiiEpZo
- Don't buy a gimbal! Tips for shooting video handheld (Jesse Driftwood)https://www.youtube.com/watch? v=Bj24pdXrGx4&t=3s
Have you come across a tutorial video you really like that's not listed in these notes that you think should be on this list? Please share!
COMPONENTS IN THE KIT
Items inside the outline are in the Basic Kit available from the CAMD Media Center.
Please check with CAMD Media Center staff for details since inventory is subject to change.

BASIC KIT INVENTORY
Zeiss 35mm f/2.8 lens (Sony E mount)
DJI Ronin-SC 2 Gimbal with built-in battery
Extended Grip/Tripod
Lens Stabilizer and Mounting Screw
Quick Release Plate (Arca Swiss/Manfrotto) Camera Riser and 1/4-20 × 1 Screw Video Cable Pack:
Mini-HDMI to HDMI Cable (7.9")
Mini-HDMI to Mini-HDMI Cable (7.9")
Mini-HDMI to Micro-HDMI Cable (7.9")
USB Type C to USB Type A Charging Cable
Multicamera Control Cable (USB Type-C)
Carry Case
ACCESSORY KIT INVENTORY
Additional items in the "Additional Accessories Kit"
RavenEye Image Transmission System
Focus Motor
15mm Rod for Focus Motor
15mm Rod Holder
Focus Gear Strips (2-Pack)
Hook and Loop Strap (2-Pack)
Phone Holder
Lens Stabilizer and Mounting Screw Quick Release Plate (Arca Swiss/Manfrotto) Screws:
3mm Allen Wrench
D-Ring Camera Mounting Screw (1/4"-20) × 2
M4 Screw × 6 RSC 2 Axis Arm Knob × 2
Video Cables:
Mini-HDMI to HDMI Cable (7.9")
Mini-HDMI to Mini-HDMI Cable (7.9") Mini-HDMI to Micro-HDMI Cable (7.9") Camera Control Cables:
Multicamera Control Cable (Sony Multi)
Multicamera Control Cable (Micro-USB)
Multicamera Control Cable (Mini-USB)
Carry Case
Documents / Resources
References
![writingwithacamera.com]() https://writingwithacamera.com/download/wwac-dji-rsc-2-notes.pdf
https://writingwithacamera.com/download/wwac-dji-rsc-2-notes.pdf![www.dji.com]() Ronin Series Compatibility - DJI
Ronin Series Compatibility - DJI![followfocusgears.com]() Follow Focus Gears
Follow Focus Gears![youtube.com]() RS 2 / RSC 2 Tutorials - YouTube
RS 2 / RSC 2 Tutorials - YouTube![www.youtube.com]() DJI RSC 2 | Unboxing - YouTube
DJI RSC 2 | Unboxing - YouTube![youtu.be]() DJI RSC 2 | How to Perfectly Balance Your Gimbal With Few Steps - YouTube
DJI RSC 2 | How to Perfectly Balance Your Gimbal With Few Steps - YouTube![www.youtube.com]() DJI RSC 2 | How to Use DJI RSC 2 - YouTube
DJI RSC 2 | How to Use DJI RSC 2 - YouTube![www.youtube.com]() DJI Ronin | How to Use the DJI Ronin Focus Motor - YouTube
DJI Ronin | How to Use the DJI Ronin Focus Motor - YouTube![www.youtube.com]() Mercedes-Benz “Chicken” MAGIC BODY CONTROL TV commercial - YouTube
Mercedes-Benz “Chicken” MAGIC BODY CONTROL TV commercial - YouTube![www.youtube.com]() Jaguar vs Chicken - Reply ad to Mercedes - Funny commercial - YouTube
Jaguar vs Chicken - Reply ad to Mercedes - Funny commercial - YouTube![www.youtube.com]() How To Get Good Gimbal Shots - YouTube
How To Get Good Gimbal Shots - YouTube![www.youtube.com]() Film yourself with TRACK MODE on the RONIN-S / RONIN-SC - YouTube
Film yourself with TRACK MODE on the RONIN-S / RONIN-SC - YouTube![www.youtube.com]() 7 CREATIVE Cinematic GIMBAL Shot Ideas - For EPIC Videos - YouTube
7 CREATIVE Cinematic GIMBAL Shot Ideas - For EPIC Videos - YouTube![www.youtube.com]() Don’t buy a gimbal! Tips for shooting video handheld. - YouTube
Don’t buy a gimbal! Tips for shooting video handheld. - YouTube
Download manual
Here you can download full pdf version of manual, it may contain additional safety instructions, warranty information, FCC rules, etc.
Advertisement


Need help?
Do you have a question about the RSC 2 and is the answer not in the manual?
Questions and answers