dji RONIN 2 User Manual
Hide thumbs
Also See for RONIN 2:
- User manual (40 pages) ,
- Quick start manual (19 pages) ,
- Manual (4 pages)
Table of Contents
Advertisement
Advertisement
Table of Contents

Related Manuals for dji RONIN 2


Summary of Contents for dji RONIN 2
- Page 1 User Manual RONIN 2 V1.0 2017.09...
- Page 2 Searching for Keywords Search for keywords such as “battery” and “install” to find a topic. If you are using Adobe Acrobat Reader to read this document, press Ctrl+F on Windows or Command+F on Mac to begin a search. Navigating to a Topic View a complete list of topics in the table of contents.
-
Page 3: Using This Manual
DJI or a DJI authorized dealer. Download the Ronin 2 App Download and install the Ronin 2 App. Search “Ronin 2” in the App Store or Google Play and then follow instructions for installation. iOS 9.0 or above Android 4.4 or above Ronin 2 App * Ronin 2 app supports iOS 9.0 (or later) or Android 4.4 (or later). -
Page 4: Table Of Contents
Remote Controller Diagram Binding the Remote Controller Charging Calibrating the Control Joystick and Roll Knob Operation Modes 3-Axis Mode Pan Lock Mode Usage with a DJI A3 Flight Controller and Lightbridge Maintenance Specifications © 2017 DJI OSMO All Rights Reserved. -
Page 5: Introduction
• Angular vibration is within ±0.02°, and the built-in GPS module improves the gimbal accuracy, making it extremely stabile even while shooting at high speeds. • Adjusting settings is easier with the built-in touch panel, and it also displays the Ronin 2’s working status. -
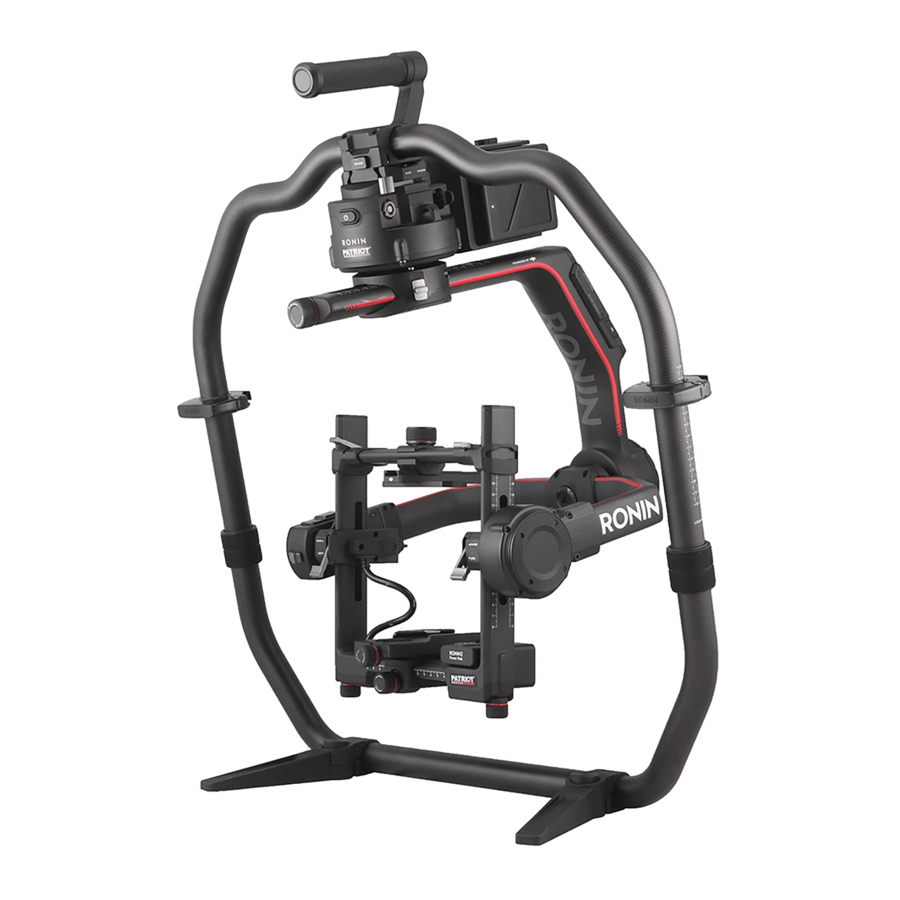
Page 6: Ronin 2 Diagram
21. 14.4 V P-Tap Port 22. 22.8 V DC-out Port 23. Built-in Touch Panel 24. Built-in Antennas 25. D-Bus Port 26. 14.4 V Accessory Power Port 27. DC-in Port 28. 14.4 V Accessory Power Port © 2017 DJI OSMO All Rights Reserved. -
Page 7: Getting Started
Getting Started Assembling the Grip Use the Grip to hold the Ronin 2 during setup or operation. Follow the steps below to assemble the Ronin 2 Grip. 1. Press the button on the Grip Feet and extend them outwards. 2. Attach the upper and lower parts of the Grip and then tighten them 3. -
Page 8: Installing The Grip Onto The Gimbal
Then lock the lever. To remove the gimbal, toggle the lever to the unlocked position and press down the safety lock. Then slide the gimbal off the dovetail mount. © 2017 DJI OSMO All Rights Reserved. -
Page 9: Mounting The Camera
Optimo DP 16-42, 30-80 Type EZ Series Please note that not all camera and lens combinations will fit on the Ronin 2. For example, the ARRI ALEXA XT and XK6x 20 T3.5 is too long as a combination, so they cannot be used on Ronin 2 simultaneously. - Page 10 Make sure the camera is powered off during installation. It is recommended to use soft connection cables to avoid obstructing camera movement. Mounting a Camera 1. Unlock the levers and remove the upper crossbar © 2017 DJI OSMO All Rights Reserved.
- Page 11 6. Attach the upper crossbar and tighten the securing knob to the camera, then lock the levers It is recommended to adjust the camera’s center of gravity further back and down. © 2017 DJI OSMO All Rights Reserved.
-
Page 12: Extending The Roll Axis Arm
1B 4+2pin Male SDI IN Cable BNC Male BNC Male SDI OUT Cable BNC Male BNC Male USB Type-C Cable USB Type-C USB Type-A UART to D-BUS Cable DJI 4pin 3pin Servo Cable © 2017 DJI OSMO All Rights Reserved. - Page 13 Ronin 2 User Manual The Top Mounting Block replaces the center handle on the Ronin 2 Grip. It has 1/4"-20 holes allowing third party handles and accessories to be attached. The Universal Mount offers an attachment point for the gimbal allowing it to be mounted to various platforms such as a jib, vehicle mount, or cable cam.
-
Page 14: Balancing
To obtain the best performance from the Ronin 2, proper balancing is essential. Accurate balance is critical for shots where the Ronin 2 will be subjected to fast motion or acceleration (running, biking, moving in cars, attached to aircraft, etc.). Proper balance will also offer longer battery runtimes. -
Page 15: Step 2: Balancing Depth For The Tilt Axis
4. Lock the roll axis. Recheck the tilt axis balance. Loosen the securing knob and adjust the camera's position if the tilt axis is not balanced. © 2017 DJI OSMO All Rights Reserved. -
Page 16: Step 4: Balancing The Pan Axis
It is necessary to use the optional Counterweights if mounting a longer camera system and the MotionBlock cannot be mounted due to the pan axis balancing position. Visit the official DJI Online Store to learn more. 1. Unlock the pan axis. Lift up one side of the Grip. -
Page 17: Intelligent Battery
Intelligent Battery The Ronin 2 comes with a hot-swappable dual battery system, allowing the gimbal work continuously without suspending shooting. The TB50 Intelligent Battery has a capacity of 4280 mAh, a voltage of 22.8 V, and a variety of power management functions. When the Intelligent Battery is fully charged, it can power the whole system, including the gimbal, camera, Focus system, and monitor for approximately 2.5 hours. -
Page 18: Charging The Intelligent Battery
Charging the Intelligent Battery The Ronin 2 Quad Charging Hub is designed for use with the Ronin 2 Battery Charger. It charges up to four Intelligent Batteries simultaneously. The battery pair with more stored power will be charged first. - Page 19 “Speaker Beeping Descriptions” for more information about Speaker beeping patterns. Press the Release button to detach batteries after charging is complete. DO NOT leave metal terminals exposed to open air when not in use. © 2017 DJI OSMO All Rights Reserved.
- Page 20 LED3 blinks three Over-voltage charger times per second detected LED4 blinks twice Charging temperature is too per second low (<0° C) LED4 blinks three Charging temperature is too times per second high (>40° C) © 2017 DJI OSMO All Rights Reserved.
-
Page 21: Mounting The Intelligent Battery
3. The Battery Mount can also be separated from the Ronin 2 during usage. Power the Ronin 2 by connecting the 22.8 V DC-Out Port on the Battery Mount to the Power Port of the gimbal using the provided Ronin 2 Power Cable. -
Page 22: Using The Intelligent Battery
Press the Battery Level button once to check the battery level. Powering ON/OFF Press and hold the Power button on the gimbal or Battery Mount to turn on the Ronin 2. Make sure you unlock the pan, tilt, and roll axes before powering on the Ronin 2. -
Page 23: Gimbal Settings
Follow Mode: When Follow mode is enabled, the camera operator can “steer” the Ronin 2 on a selected axis. When the Grip is rotated left or right, the camera will smoothly follow the user’s input and stop at the appropriate angle. The SmoothTrack settings are applied in this mode, and the settings for the pan, roll, and tilt axes can be independently adjusted. - Page 24 Used to update the firmware via a USB connection. Top Bar Icon Description 1. Bluetooth Connection Status : Indicates the Ronin 2 App is connected. 2. Remote Controller Signal Strength : Displays the remote controller signal strength. 3. GPS Signal Strength : Shows the current GPS signal strength.
- Page 25 : Follow mode. : FPV mode. : Recenter mode. 8. Working Battery number : Shows the number of batteries currently working. The Ronin 2 can operate with one or two batteries. 9. Battery Level :Displays the current battery level. Basic Settings Motor Settings 0º...
- Page 26 Ronin 2’s attitude error. This parameter affects how quickly the Ronin 2 will react to changes in orientation. If you see any unusual attitude errors (more than 1 in the readings), you may minimize it by increasing the corresponding motor’s strength.
- Page 27 Basic More and then press the OK button to confirm. The Ronin 2 will record this new position and the pan axis will stay at the Set power-on position recorded position when restarted.
- Page 28 1.4º 1.4º 4.5º 2. Device Displays the connection status with other devices, such as the remote controller, GPS, Flight Controller, DJI Focus, etc. 3. Log Displays any abnormal status information of the gimbal. Remote Control Settings 0º...
- Page 29 Calibrate System: Use only if you notice drift on any of the axes. To calibrate the system, place the Ronin 2 on the Grip and make sure it is completely steady. Be sure the camera can rotate 90° with the lens pointing straight down, without any interference from any wires.
- Page 30 Ronin 2 User Manual 3. More Access Log File: Internal storage is built into the Ronin 2 for recording data. If the gimbal is acting abnormally, contact DJI Support. If the provided solutions are not successful, DJI Support will request log files for further analysis. Access log files only when instructed by a DJI Support specialist.
-
Page 31: Ronin 2 App
The Ronin 2 app allows you to adjust gimbal settings remotely. Also, new intelligent features have been added to the Create menu such as Track, CamAnchor, and more. Use the Ronin 2 app to activate the Ronin 2 for the very first time. An internet connection is required for product activation. - Page 32 Create The Create menu includes the Video, Track, and CamAnchor features. Ensure the Ronin 2 is in Follow or Free mode when using Create features. It is recommended to mount the Ronin 2 onto a tripod when using Create features.
- Page 33 Record Button: Tap to start recording. Switch to the other target position, and the camera will move to that position at the set speed. Monitor Displays the real-time status of the motors, IMU, attitude, GPS, connected devices, and batteries. © 2017 DJI OSMO All Rights Reserved.
- Page 34 Ronin 2 User Manual About Displays your account information, firmware version, and more. © 2017 DJI OSMO All Rights Reserved.
-
Page 35: Remote Controller
9. Control Joystick Push the Control Joystick up or down to control tilt axis movement. Push the Control Joystick left or right to control pan axis movement (default settings can also be changed). © 2017 DJI OSMO All Rights Reserved. -
Page 36: Binding The Remote Controller
RONIN Speaker Axis Mode 3-axis POWERED BY When using the remote controller, ensure that the antenna is at least 20 cm away from any person or object to provide the best wireless connection. © 2017 DJI OSMO All Rights Reserved. -
Page 37: Charging
2. Pull and push the control joystick and rotate the roll knob several times to the endpoints. 3. Press and hold the C1+C2 buttons again to exit calibration. The controller will beep if calibration is successful. If calibration fails and there is no beep emitted, repeat the steps above. © 2017 DJI OSMO All Rights Reserved. -
Page 38: Operation Modes
Operation Modes There are two operation modes for the Ronin 2: 3-Axis mode and Pan Lock mode. 3-Axis Mode 3-Axis mode is the standard, default mode. The Ronin 2 can be used in this mode without any adjustments. Pan Lock Mode Pan Lock mode is specially designed for using the Ronin 2 with Steadicams. -
Page 39: Specifications
Upright Mode Briefcase Mode Handheld, Car Mount, Aerial, Tripod, & Steadicam Mode Built-in, independent IMU modules DJI Advanced 32-Bit ARM Processor DJI Specialized Gimbal Drive Motors with Encoders Dual Battery System Bluetooth Module D-Bus Receiver Supported 2.4 GHz/5.8 GHz Receiver... - Page 40 Range Tilt axis control: ±135 ° Roll axis control: ± 45 ° * The Ronin 2's power/data ports are not waterproof. Be sure to protect them from harmful dust and water during use, otherwise damage may occur. © 2017 DJI OSMO All Rights Reserved.
- Page 41 Contents are subject to change. Download the latest version from http://www.dji.com/product/ronin-2 If you have any questions about this document, please contact DJI by sending a message to DocSupport@dji.com. © RONIN is a trademark of DJI OSMO. Copyright 2017 DJI OSMO All Rights Reserved.
Need help?
Do you have a question about the RONIN 2 and is the answer not in the manual?
Questions and answers