Table of Contents
Advertisement
Available languages
Available languages
Quick Links
Item # 1001 517 503
Model # IOL466BK-HD
USE AND CARE GUIDE
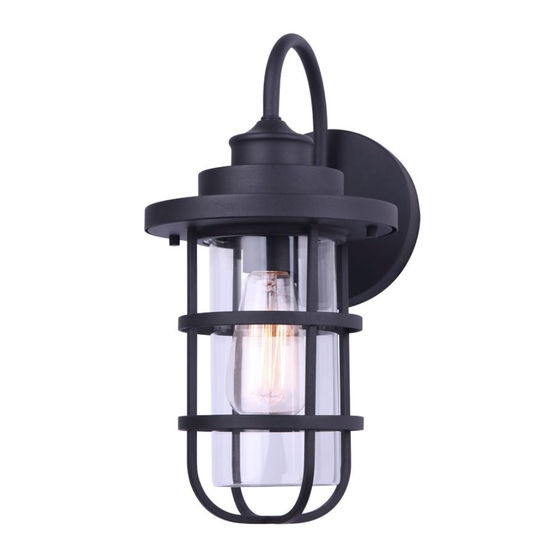
MERI 1-LIGHT BLACK OUTDOOR WALL
LIGHT WITH CLEAR GLASS
Questions, problems, missing parts? Before returning to the store,
call Hampton Bay Customer Service
8 a.m. - 6 p.m., EST, Monday - Friday
1-855-HD-HAMPTON
HOMEDEPOT.CA
THANK YOU
We appreciate the trust and confidence you have placed in Hampton Bay through the purchase of this light fixture.
We strive to continually create quality products designed to enhance your home. Visit us online to see our full line of
products available for your home improvement needs. Thank you for choosing Hampton Bay!
Advertisement
Table of Contents

Related Manuals for HAMPTON BAY IOL466BK-HD


Summary of Contents for HAMPTON BAY IOL466BK-HD
- Page 1 THANK YOU We appreciate the trust and confidence you have placed in Hampton Bay through the purchase of this light fixture. We strive to continually create quality products designed to enhance your home. Visit us online to see our full line of...
-
Page 2: Table Of Contents
Table of Contents Table of Contents............2 Pre-Installation ............3 Safety Information.............2 Installation ..............5 Warranty..............2 Care and Cleaning .............6 What is Covered.............2 What is Not Covered..........2 Safety Information □ Turn off the electrical power before starting DANGER: Turn off the electrical current to the outlet installation of this light fixture. -
Page 3: Pre-Installation
Pre-Installation PLANNING INSTALLATION Read through this instruction manual thoroughly prior to the installation and use of the fixture. TOOLS REQUIRED Adjustable Safety Phillips wrench goggles screwdriver HARDWARE INCLUDED NOTE: Hardware not shown to actual size. Part Description Quantity Wire nut Easy Connect™... - Page 4 Pre-Installation (continued) PACKAGE CONTENTS Part Description Quantity Fixture Glass Guard...
-
Page 5: Installation
Installation Preparing the mounting Installing the mounting bracket bracket □ Attach the Easy Connect™ mounting bracket (BB) DANGER: Turn off the electrical power before starting to the electrical box with electrical box screws installation. (not included). □ Loosen the nuts, and adjust the mounting bracket studs to the desired length. -
Page 6: Installing The Fixture
Installation (continued) Connecting the light fixture Installing the fixture □ □ Connect (push) electrical wires from the Tuck electrical wires into the electrical box and fixture (A) into the correct inserts. position the fixture (A) over studs on the mounting bracket (BB) assembly. -
Page 7: Installing The Guard
Installation (continued) Installing the guard Applying caulk □ After installation, seal around the top and side □ Install the guard (C) with star washers ( CC) and perimeter between the fixture and the wall surface nuts (DD). with weather resistant caulking. The bottom should be left un-caulked to prevent moisture build-up. - Page 8 Questions, problems, missing parts? Before returning to the store, call Hampton Bay Customer Service 8 a.m. - 6 p.m., EST, Monday - Friday 1-855-HD-HAMPTON HOMEDEPOT.CA Retain this manual for future use.
-
Page 9: Manuel D'utilisation Et D'entretien
HOMEDEPOT.CA MERCI! Nous apprécions la loyauté et la confiance que vous avez témoignées à Hampton Bay avec l’achat de ce luminaire. Nous nous efforçons de créer continuellement des produits de qualité, créés tout spécialement pour mettre en valeur votre maison. Rendez-nous visite en ligne pour découvrir la ligne complète de nos produits conçus pour remplir les... -
Page 10: Informations Sur La Sécurité
Table des matières Table des matières ............ 2 Pré-installation ............3 Informations sur la sécurité ........2 Installation ..............5 Garantie..............2 Entretien et nettoyage ..........6 Ce qu’elle couvre ..........2 Ce qu’elle ne couvre pas ........2 Informations sur la sécurité □ Coupez l’alimentation électrique avant de DANGER : Couper l'alimentation électrique à... -
Page 11: Préparation De L'installation
Pré-installation PRÉPARATION DE L’INSTALLATION Veuillez lire attentivement le manuel de l’utilisateur avant l’installation et l’utilisation du luminaire. OUTILS REQUIS Clé à Lunettes Tournevis molette de sécurité Phillips QUINCAILLERIE INCLUSE REMARQUE : Les éléments montrés ne sont pas à l’échelle. Pièce Description Quantité... -
Page 12: Contenu De L'emballage
Pré-installation (suite) CONTENU DE L’EMBALLAGE Pièce Description Quantité Luminaire Vitre Grillage... - Page 13 Installation Préparation du dispositif de Installation de la ferrure de montage fixation □ Posez la ferrure de montage Easy Connect™ (BB) DANGER : Couper l’alimentation électrique avant de à la boîte électrique à l'aide des vis de la boîte commencer l’installation. électrique (en sus).
- Page 14 Installation (suite) Branchez le luminaire Installation du luminaire □ Branchez (poussez) les fils électriques du □ Poussez délicatement les fils à l’intérieur de luminaire (A) dans les insertions appropriées. la boîte électrique et placez le luminaire (A) sur les goujons sur la ferrure de montage (BB). Serrez le luminaire (A) en place à...
-
Page 15: Entretien Et Nettoyage
Installation (suite) Installation de la cage Application du calfeutrage □ □ Poser les grillage (C) à l’aide des rondelles Après l’installation, scellez autour des périmètres étoilées (CC) et des écrous (DD). du haut et des cotés avec un scellant contre les intempéries. - Page 16 Des questions, des problèmes, des pièces manquantes ? Avant de retourner au magasin, appelez le service à la clientèle Hampton Bay entre 8h et 18h, HNE, du lundi au vendredi. 1-855-HD-HAMPTON HOMEDEPOT.CA Conservez ce manuel pour toute utilisation ultérieure.
Need help?
Do you have a question about the IOL466BK-HD and is the answer not in the manual?
Questions and answers