
Related Manuals for Chipsee BBB-EXP7H


Summary of Contents for Chipsee BBB-EXP7H
- Page 1 Industrial PC BBB-EXP7H PN: BBB-EXP7H Content can change at anytime, check our website for latest information of this product. www.chipsee.com...
-
Page 2: Table Of Contents
Contents BBB-EXP7H 1. Hardware Features 2. How to connect BBB-EXP7H with BeagleBone Black 3. How to connect Power to the System 4. How to change Boot Method 5. Power and Reset Button 6. User Keys and user LED 7. Audio Input and Output 8. -
Page 3: Bbb-Exp7H
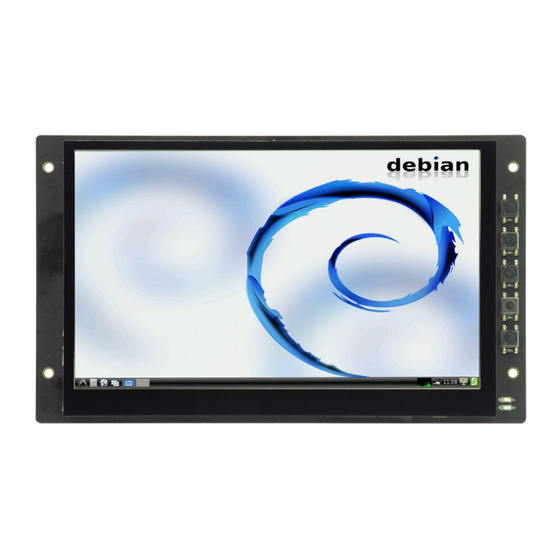
BBB-EXP7H BBB-EXP7H Front View Chipsee Page 3 of 22... -
Page 4: Rear View
BBB-EXP7H Rear View Chipsee Page 4 of 22... -
Page 5: Side View
BBB-EXP7H Side View 1 Chipsee Page 5 of 22... - Page 6 BBB-EXP7H Side View 2 Chipsee Page 6 of 22...
- Page 7 BBB-EXP7H BeagleBone Black 7 Inch LCD Expansion board (Abbreviate as BBB-EXP7H) designed by Chipsee. It has two versions: Capacitive Touch Version and Resistive Touch Version. • Download Archived Software Manual: Chipsee_Beagle_Bone_Black_User_Manual_V1.0.2.pdf Chipsee Page 7 of 22...
-
Page 8: Hardware Features
2 Channels, COM2 and COM4 1 Channel, CAN0 Buzzer 5 User defined keys, 1 Reset Key, 1 Power Key 2 User defined LEDs Sensor Three-Axis Digital Accelerometer Power 5V, 3W power Consumption Key Features Figure 1 BBB-EXP7H (Capacitive,Android 4.2) Chipsee Page 8 of 22... - Page 9 BBB-EXP7H Hardware Features Figure 2 BBB-EXP7H Back-Side View (Capacitive) Chipsee Page 9 of 22...
-
Page 10: How To Connect Bbb-Exp7H With Beaglebone Black
How to connect BBB-EXP7H with BeagleBone Black How to connect BBB-EXP7H with BeagleBone Black When connect BBB-EXP7H with BeagleBone Black, Figure 3 shows the right connects direction. If connect on the wrong direction, the Beaglebone Black can’t be push down to connect tightly: The LAN connector on Beaglebone Black will conflict with the Audio connector on the BBB-EXP7H. -
Page 11: How To Connect Power To The System
RS485 connector. User can provide 5V power to the power connector on the BBB-EXP7H connector P4 ONLY as Figure 4 shows. This 5V power will be connect to Beaglebone Black. 5V/2A power adapter will be necessary. -
Page 12: How To Change Boot Method
BeagleBone Black will boot from uSD card, or it will boot from eMMC by default. When connect with BBB-EXP7H, the Button S2 on the Beaglebone black will be hide and not easy to touch. BBB-EXP7H connect this boot signal to switch SW8 as Figure 5 shows. When user switch it to upside, the system will boot from uSD card, when user switch it to downside, the system will boot from eMMC. -
Page 13: Power And Reset Button
Power and Reset Button BeagleBone Black use Button S3 as Power button, BBB-EXP7H connect this signal to Button SW6 as Figure 6 shows. So BBB-EXP7H button SW6 will have the same effect with S3 on the BeagleBone Black. BeagleBone Black use Button S1 as Reset button, BBB-EXP7H connect this signal to Button SW7 as Figure 6 shows. -
Page 14: User Keys And User Led
User Keys and user LED User Keys and user LED BBB-EXP7H have add 5 user keys as SW1 to SW5 as Figure 7 shows, User can define the key function in software, ChipSee have define it in Android as: •... -
Page 15: Audio Input And Output
Audio Input and Output Audio Input and Output BBB-EXP7H has audio input and output as Figure 8 shows. The expansion board use standard 3.5mm connector. Blue Connector P8 is output, Pink Connect P9 is input. User can connect the output to any other speaker. As for the Input, it’s “MIC in”, NOT “Line In”, that means user can connect Microphone to the connector directly. -
Page 16: About Rtc
About RTC About RTC BBB-EXP7H adds RTC support, and adds Lithium Battery CR1220 to keep the time as Figure 9 shows. That means the system time will not lost when power off. Be attention the Battery CR1220 is NOT Mount on by default because of International shipment Limitation. User should purchase this Lithium battery and mount on by themselves. -
Page 17: About The Rs232 , Rs485 And Can On Expansion Board
About the RS232 , RS485 and CAN on Expansion board About the RS232 , RS485 and CAN on Expansion board BBB-EXP7H have add RS232 ,RS485, CAN function to the connector P10, P12 and P13 as Figure 2 shows. DB9 Connector P10 connects to the CPU UART0, It use RS232 Level... - Page 18 BBB-EXP7H About the RS232 , RS485 and CAN on Expansion board P12 Definition Pin Number Definition CPU Function CAN0_L DCAN0, CPU PIN D17 and D18 CAN0_H RS485_2+ UART4, CPU PIN T17 and U17 RS485_2- RS485_1+ UART2, CPU PIN A15 and B17...
- Page 19 BBB-EXP7H About the RS232 , RS485 and CAN on Expansion board Figure 10 The RS232_0 signals have been connect to the DB9 connector P10 and connector P12 Pin8 and Pin9 at the same time. They are totally the same. As for this function, you can use one connector one time.
-
Page 20: Mechanical Dimension
BBB-EXP7H Mechanical Dimension Mechanical Dimension Figure 11 Chipsee Page 20 of 22... -
Page 21: Product Video
BBB-EXP7H Product Video Product Video Android 4.1 http://youtu.be/FebYqMws0g4 WindowsCE 6.0 http://youtu.be/S2Ttujf6cWU Chipsee Page 21 of 22... -
Page 22: Disclaimer
If you cannot find the solution you’re looking for, feel free to contact us. Please email Chipsee Technical Support at support@chipsee.com, providing all relevant information. We value your queries and suggestions and are committed to providing you with the assistance you require.
Need help?
Do you have a question about the BBB-EXP7H and is the answer not in the manual?
Questions and answers