Sign In
Upload
Download
Table of Contents
Contents
Add to my manuals
Delete from my manuals
Share
URL of this page:
HTML Link:
Bookmark this page
Add
Manual will be automatically added to "My Manuals"
Print this page
×
Bookmark added
×
Added to my manuals
Manuals
Brands
KERN Manuals
Microscope
OBN 132
User instructions
KERN OBN 132 User Instructions
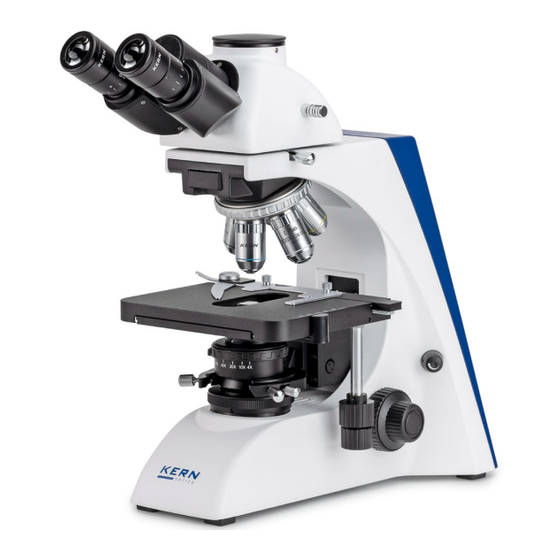
Transmitted light laboratory microscope
Hide thumbs
Also See for OBN 132
:
User instructions
(29 pages)
1
Table Of Contents
2
3
4
5
6
7
8
9
10
11
12
13
14
15
16
17
18
19
20
21
22
23
24
25
26
27
28
29
30
31
32
33
34
35
36
37
38
39
40
41
42
43
44
45
46
47
page
of
47
Go
/
47
Contents
Table of Contents
Troubleshooting
Bookmarks
Table of Contents
Table of Contents
Technical Data
Declaration of Conformity
Device Overview
Before Use
General Information
Basic Information (General)
General Information on Warnings
Intended Use
Improper Use
Warranty
Notes on the Electrical System
Storage and Transportation
Basic Warnings and Safety Instructions
Observe the Notes in the Operating Instructions
Staff Training
Safety
Unpacking and Commissioning
Unpacking
Assembly
Microscope Head
Objectives
Eyepieces
Colour Filter ( OBN 132 )
Condenser
Operation and Function of the Microscope
Pre-) Focusing
Adjusting the Interpupillary Distance
Dioptre Adjusment
Adjusting the Magnification
Adjusting the Koehler Illumination
Using the Eyecups
Use Oil Immersion Lenses
Changing the Bulb
Changing the Fuse (OBN 132)
Use of Optional Accessories
Polarization Unit
Camera Connection
Dark Field Units
Phase Contrast Units
Fluorescence Reflected Light Unit
Troubleshooting
Service
Power Supply
Mains Connection
Maintenance, Servicing and Disposal
Maintenance and Cleaning
Waste Disposal
Further Information
Advertisement
Quick Links
Download this manual
User instructions
Transmitted light laboratory microscope
KERN
OBN-13
Version 1.1
2025-02
EN
1
KERN & Sohn GmbH
Ziegelei 1
D-72336 Balingen
E-mail: info@kern-sohn.com
OBN 132, OBN 135
Tel: +49-[0]7433- 9933-0
Fax: +49-[0]7433-9933-149
Internet: www.kern-sohn.com
OBN-13-BA-e-2511
Table of
Contents
Previous
Page
Next
Page
1
2
3
4
5
Advertisement
Table of Contents
Need help?
Do you have a question about the OBN 132 and is the answer not in the manual?
Ask a question
Questions and answers
Related Manuals for KERN OBN 132
Microscope KERN OBL-14 User Instructions
Transmitted light phase contrast microscope (29 pages)
Microscope KERN OBE 112 User Instructions
Compound laboratory microscope (14 pages)
Microscope KERN OBE-1 User Instructions
Transmitted light laboratory microscope (26 pages)
Microscope KERN OBL 146 User Instructions
Transmitted light phase contrast microscope (26 pages)
Microscope KERN OBN 135 User Instructions
Transmitted light laboratory microscope (47 pages)
Microscope KERN OBS-1 User Instructions
Transmitted light school microscope (23 pages)
Microscope KERN OBN-15 User Instructions
Transmitted light phase contrast microscope (29 pages)
Microscope KERN OBN-14 User Instructions
Fluorescence microscope (43 pages)
Microscope KERN OBL 156 User Instructions
Transmitted light phase contrast microscope (26 pages)
Microscope KERN OBD 127 User Instructions
Compound laboratory microscope (18 pages)
Microscope KERN OZL 445 User Instructions
Stereo zoom microscope ozl-44 series (21 pages)
Microscope KERN OSF 438 User Instructions
(17 pages)
Microscope KERN OPO-1 Operating Instructions Manual
Polarizing microscope (31 pages)
Microscope KERN OSE 409 User Instructions
Stereo microscope (17 pages)
Microscope KERN OIV-3 Instruction Manual
Video microscope (18 pages)
Microscope KERN OZM 953 User Instructions
(21 pages)
This manual is also suitable for:
Obn 135
Tobn 135-a
Table of Contents
Print
Rename the bookmark
Delete bookmark?
Delete from my manuals?
Login
Sign In
OR
Sign in with Facebook
Sign in with Google
Upload manual
Upload from disk
Upload from URL


Need help?
Do you have a question about the OBN 132 and is the answer not in the manual?
Questions and answers