Table of Contents
Advertisement
Quick Links
Advertisement
Table of Contents

Subscribe to Our Youtube Channel
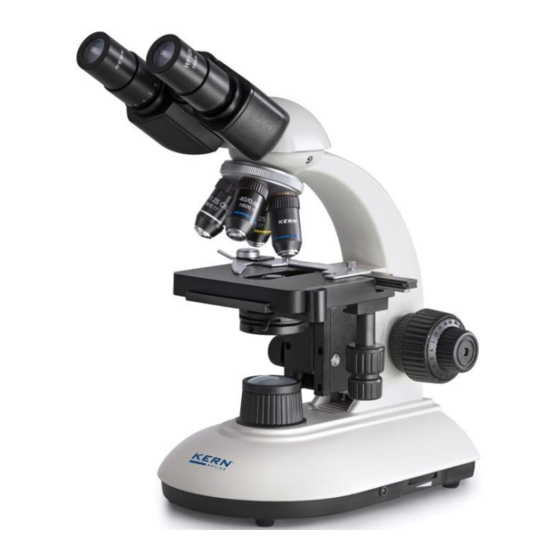
Summary of Contents for KERN OBE 112
- Page 1 KERN & Sohn GmbH Ziegelei 1 Tel: +49-[0]7433- 9933-0 D-72336 Balingen Fax: +49-[0]7433-9933-149 E-mail: info@kern-sohn.com Internet: www.kern-sohn.com User instructions Compound laboratory microscope KERN OBE 111, OBE 112, OBE 113 Version 1.0 01/2015 OBE-1-BA-e-1510...
-
Page 2: Table Of Contents
Head ............................8 Eyepieces ..........................8 Operation ..................9 Getting started .......................... 9 Adjust the gap between the eyes (only for OBE 112, OBE 113) .......... 9 Adjusting the magnification ....................9 Adjust the brightness......................10 Dioptre compensation and focussing .................. 10 Storage .................. -
Page 3: Before Use
1 Before use 1.1 General notes You must open the packaging carefully, to make sure that none of the accessories in the packaging fall on the floor and get broken. In general, microscopes should always be handled carefully because they are sensitive precision instruments. -
Page 4: Storage
Special cleaner for optical lenses Special optical cleaning cloths Bellows Brush When handled correctly and checked regularly, the microscope should give many years of efficient service. Should repairs still be necessary, please contact your KERN dealer or our Technical Department. OBE-1-BA-e-1510... -
Page 5: Nomenclature
Nomenclature Lens barrel connectors Eyepiece Head Adjusting screw Lens revolving unit Head Lens Coarse adjustment Object holder knob Specimen stage Fine Condenser adjustment knob Aperture adjustment Control dial Condenser X – Y axis Specimen Field lens stage Main On/Off switch + dimmer OBE-1-BA-e-1510... - Page 6 Rear view Example OBE 111 monocular Coarse adjustment knob Fine adjustment knob Adjusting ring torque Fuse Mains connection Condenser Focus dial OBE-1-BA-e-1510...
-
Page 7: Technical Data / Model Outfit
3 Technical data / model outfit OBE-1-BA-e-1510... -
Page 8: Assembly
4 Assembly 4.1 Lenses The lenses are screwed into the lens revolving unit in such a way that when you turn the revolving unit, the next lens for stronger magnification moves into position. Please make sure that you do not touch the lenses with your fingers and that no dust enters the apertures. -
Page 9: Operation
(at the beginning, select a low level of brightnesss. 5.2 Adjust the gap between the eyes (only for OBE 112, OBE 113) Different users have different gaps between the eyes. So each time a different person uses the microscope, the gap between the two eyepieces must be re- adjusted. -
Page 10: Adjust The Brightness
5.4 Adjust the brightness Adjust condenser aperture Adjust the height of the condenser until the image from the field diaphragm appears clearly in the visual field. For some microscopes there is a risk that you will lift the condenser up so high that it collides with the object holder. Care is needed when doing this. -
Page 11: Storage
These microscopes are generally maintenance-free. Service work should be limited to the replacement of bulbs, light sources and electrical fuses. Should a defect occur, please contact your dealer or KERN Service. 7.1 Changing the bulb The devices in the OBE range all have LED lighting. In general, LEDs are very long- lasting. -
Page 12: Trouble Shooting
8 Trouble shooting Problem Possible causes The mains plug is not correctly plugged The bulb does not light There is no power at the socket Defective bulb / LED Defective fuse The specified The bulb blows immediately bulb or fuse has not been used. The aperture diaphragm is not opened The visual field is dark wide enough... - Page 13 The aperture diaphragm is not opened Blurred details wide enough Bad image The condenser is too low. The lens does not belong to this Bad contrast microscope. The front lens of the lens unit is Vignetted visual field dirty. An immersion object has been used without immersion oil The immersion oil contains air bubbles The recommended immersion oil has not...
-
Page 14: Service
The device may only be opened by trained service engineers who have been authorised by KERN. 10 Disposal The packaging is made of environmentally-friendly materials, which you can dispose of at your local recycling centre.


Need help?
Do you have a question about the OBE 112 and is the answer not in the manual?
Questions and answers