Table of Contents
Advertisement
Quick Links
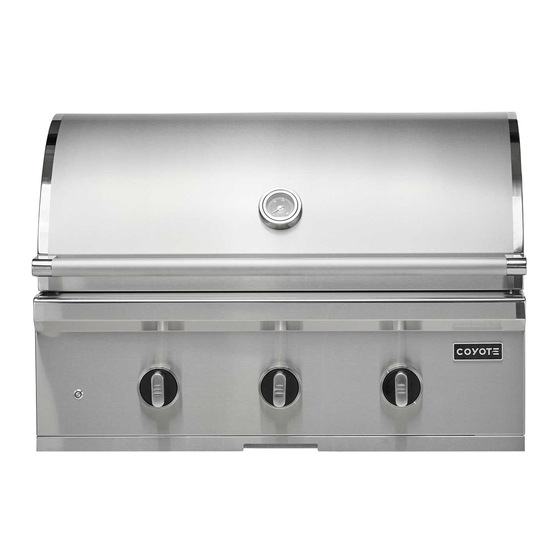
Coyote Stainless Steel Gas Grill
C3C34LP
C3C34NG
C3SL30LP
C3SL30NG
FOR OUTDOOR USE ONLY
Conforms to ANSI STD Z21.58
Certified to CSA STD 1.6 Outdoor Cooking Gas Appliances
CSA/ANSI Z21.58:22·CSA1.6:22 0utdoor Cooking Gas Appliances
IMPORTANT: Read all instructions and warnings carefully before using this product.
Like any outdoor grill, using this product involves potential risks from high
temperatures and exposure to smoke and fumes. Please exercise caution and
common sense to ensure safe operation.
•
For the Installer or Assembler: Leave this manual with the grill for the consumer's future
reference.
For the Consumer: Retain this manual for future reference as it contains essential warnings and
•
instructions.
COYOTE OUTDOOR LIVING, INC.
2615 E. Beltline Rd. Suite 160, Carrollton, TX 75006, USA
Use & Care Manual
C3CL36LP
C3CL36NG
C3SL36LP
C3SL36NG
C3CL42LP
C3CL42NG
C3SL42LP
C3SL42NG
4004477
Advertisement
Table of Contents

Related Manuals for Coyote C3C34LP


Summary of Contents for Coyote C3C34LP
- Page 1 Coyote Stainless Steel Gas Grill Use & Care Manual C3C34LP C3CL36LP C3CL42LP C3C34NG C3CL36NG C3CL42NG C3SL42LP C3SL30LP C3SL36LP C3SL42NG C3SL30NG C3SL36NG FOR OUTDOOR USE ONLY Conforms to ANSI STD Z21.58 Certified to CSA STD 1.6 Outdoor Cooking Gas Appliances CSA/ANSI Z21.58:22·CSA1.6:22 0utdoor Cooking Gas Appliances IMPORTANT: Read all instructions and warnings carefully before using this product.
- Page 2 1. Download a replacement at www.CoyoteOutdoor.com 2. Contact Customer Support at 855-520-1559 for assistance. Thank you for choosing Coyote Outdoor Living. We are confident you will enjoy cooking with your new gas grill for years! Welcome to the Coyote family!
-
Page 3: Table Of Contents
Contents Important Warnings and Safety Instructions ..................3 Limited Warranty ........................... 5 Grill Models ............................7 Locating the Grill ............................ 8 Gas Requirements ..........................12 Liquid Propane (LP) Gas Guidelines ....................12 Natural Gas (NG) Guidelines ......................14 Operating the Grill ..........................18 Care and Maintenance ......................... -
Page 4: Important Warnings And Safety Instructions
General Safety Instructions for Coyote Grills Intended Use • Coyote grills are designed exclusively for outdoor use and must not be used indoors or in enclosed spaces such as garages, sheds, or breezeways. • These grills are intended for residential use by the original purchaser (homeowner) and are unsuitable for commercial applications. - Page 5 Operation and Maintenance • Use Only Approved Accessories. • Do not use lighter fluid or other accelerants in a gas grill. • Electrical Safety: Keep electrical cords away from water and hot surfaces. • Use only a Ground Fault Interrupter (GFI)-protected circuit for outdoor cooking appliances. •...
-
Page 6: Limited Warranty
Electric/Plastic Components Coyote's Obligations Coyote Outdoor Living, Inc. will repair or replace defective components at its discretion during the warranty period. Replacement or repair is the exclusive remedy under this warranty. Liability under this warranty is limited to the cost of the replacement part or repair. Labor and labor-related charges are not covered, and customers are responsible for shipping and handling fees for replacement parts. - Page 7 Coyote Outdoor may require defective parts to be returned for examination. Customers are responsible for prepaying shipping charges. If the part is deemed defective, Coyote Outdoor will approve the claim and issue replacement parts at no charge. Shipping and handling costs for replacement parts remain the customer's responsibility.
-
Page 8: Grill Models
The grill is optimized for fuel efficiency and cooking performance so that the actual BTU output may vary based on operating conditions and settings. If you have questions about BTU output or performance, please call Coyote Customer Support at 855- 520-1559 for detailed information. -
Page 9: Locating The Grill
Check for Gas Leaks: If you smell gas, check for leaks using a soap and water solution. Never inspect leaks with an open flame. Notice: Professional installation of your Coyote Grill is highly recommended. These instructions provide the necessary measurements for constructing a masonry structure to house your outdoor gas grill. - Page 10 1/2 psi (3.5 kPa). Ventilation Requirements Proper ventilation allows heat and gas to escape, ensuring safe and efficient operation. Failure to meet ventilation requirements will void the Coyote warranty and pose a risk of injury or death. 1. Ventilation for Built-in Islands: •...
- Page 11 Store LP tanks in a separate, ventilated compartment with bottom vents for proper airflow. High-Elevation Use Coyote Grills are optimized for operation at 0-2000 feet above sea level elevations. • • Performance remains stable between 2000-4000 feet, though more gas combusts due to reduced oxygen levels.
- Page 12 Cutout Dimensions Cabinets with any gas supply or connection must have at least two vents, ideally four for optimal performance. Each vent should be a minimum of 20 square inches and provide direct access to outside or fresh air. To ensure adequate airflow and ventilation, it's advisable to install two vents on each side of the cabinet.
-
Page 13: Gas Requirements
Gas Requirements Note: Coyote strongly recommends that a qualified service technician perform the initial installation and all conversions or modifications to the gas supply. Never attach an unregulated gas line to the appliance. Connection to an unregulated gas line can cause excessive heat or fire and the risk of property damage, bodily injury, or death. - Page 14 • Cylinder Specifications: • Use only cylinders 12 inches in diameter and 18 inches high, with a maximum capacity of 20 lbs. of propane (80% full). • (Except model C3SL42LP, use with a 30lbs of propane only.) • Ensure cylinders comply with DOT or CSA B339 standards and include overfilling prevention devices.
-
Page 15: Natural Gas (Ng) Guidelines
In-Line Convertible Regulator Model # CINLNREG Coyote sells a separate inline regulator for whole-home propane systems. This regulator can be used for Natural Gas (NG) or Propane (LP). It comes pre-set for Natural Gas, and you must convert it to Propane by performing the steps below. - Page 16 6. Leak Testing: • Test all connections with the soap and water solution as described above. Liability Disclaimer Coyote is not responsible for the selection, performance, or workmanship of contractors or installers who connect the natural gas supply to the grill.
- Page 17 Gas Conversion Guidelines Gas Conversions: Natural Gas (NG) and Propane (LP) Coyote grills are designed to be convertible between liquid propane (LP) and natural gas (NG). To ensure proper and safe conversion: 1. Use the Correct Conversion Kit: Obtain the appropriate Coyote conversion kit, available through your dealer or Coyote's Customer Support Department.
- Page 18 Check each burner, including the rear and sear, for proper ignition and flame performance. Following these steps and ensuring proper installation, you can safely convert your Coyote grill between propane and natural gas while maintaining its performance and warranty. For additional assistance, contact Coyote Customer Support.
-
Page 19: Operating The Grill
Operating the Grill Failure to open the barbecue lid before igniting the burners or to wait at least 5 • minutes for gas to dissipate if the barbecue fails to light can lead to an explosive flare- up, posing a serious risk of severe injury or death. •... - Page 20 4. If the Rear IR Burner Fails to Ignite: • Turn the knob to the "Off" position and let the gas clear for 5 minutes before trying again. • If the ignition fails, shut off the gas supply and contact Coyote Customer Support for assistance.
- Page 21 If the burner struggles to stay lit, the thermocouple attached to the valve may need to be replaced. • Professional Assistance: For persistent issues, do not attempt repairs yourself. Contact your local technician or Coyote Customer Support for help. Key Safety and Maintenance Notes Gas Leaks: •...
- Page 22 2. Detach the Thermocouple Bracket: • Locate the thermocouple bracket near the grill burner. • Use a Phillips head screwdriver to remove the screw securing the bracket. Set the bracket aside for future use. 3. Slide Out the Thermocouple: • Gently slide the thermocouple forward out of the bracket.
- Page 23 • Handle (attach securely for safe handling) 4. Prepare the Prong Forks: • Slide one Prong Fork onto the Spit Rod with the prongs facing away from the handle. • Secure the meat or poultry on the Spit Rod with the second Prong Fork. •...
- Page 24 The knob lights transition from dark to bright orange as you adjust the grill to higher heat settings. • A Coyote logo projection light is displayed in front of the grill. Steps to Turn on the Lights 1. Locate the light button on the left side of the control panel.
- Page 25 • Keep uncooked foods refrigerated until ready to grill. • Marinate meat in the refrigerator and discard excess marinade—never reuse it. 2. Preventing Cross-Contamination: • Use separate plates and utensils for raw and cooked food. • Never place cooked food on a plate that previously held raw food. •...
-
Page 26: Care And Maintenance
Care and Maintenance Comprehensive Grill Maintenance and Care Instructions Drip Tray Maintenance • Cleaning: The drip tray below the grill should be cleaned periodically to prevent debris and grease buildup. • Cooling: Allow the drip tray to cool completely before cleaning it. •... - Page 27 5. Inspect and clean burners for insect nests or blockages to prevent fires beneath the grill. Avoiding Rust and Scratches • Rust Prevention: Use a Coyote Grill cover for protection against contaminants. • Keep the grill covered during masonry work or near splashing pool chemicals.
-
Page 28: Troubleshooting Your Grill
4. Burners make popping noises. Troubleshooting Guide If the grill is not functioning correctly, use the information below for guidance. Safety First: If you cannot resolve the issue, contact Coyote Customer Support at 855-520-1559. The grill will not ignite. •... - Page 29 • Relocate the grill to a less windy area, especially in cold or windy weather. • Check for sufficient fuel. Confirm that the cylinder valve is open and that the cylinder contains fuel. Low heat on the "HIGH" setting • Inspect the fuel hose for kinks or bends.
-
Page 30: Parts Listing
Parts Listing C3C34 Parts List... - Page 31 C3CL36 Parts List...
- Page 32 C3CL42 Parts List...
- Page 33 C3SL30 Parts List...
- Page 34 C3SL36 Parts List...
- Page 35 C3SL42 Parts List...
Need help?
Do you have a question about the C3C34LP and is the answer not in the manual?
Questions and answers