Advertisement
IN THE BOX

SPECIFICATIONS

* The green beam level is Class 3R, obeying the standard IEC60825-1 requirement.
* All above specifications are test results based on ANSI/NEMA FL1 Standard. The tests are performed when the built-in battery is fully charged.
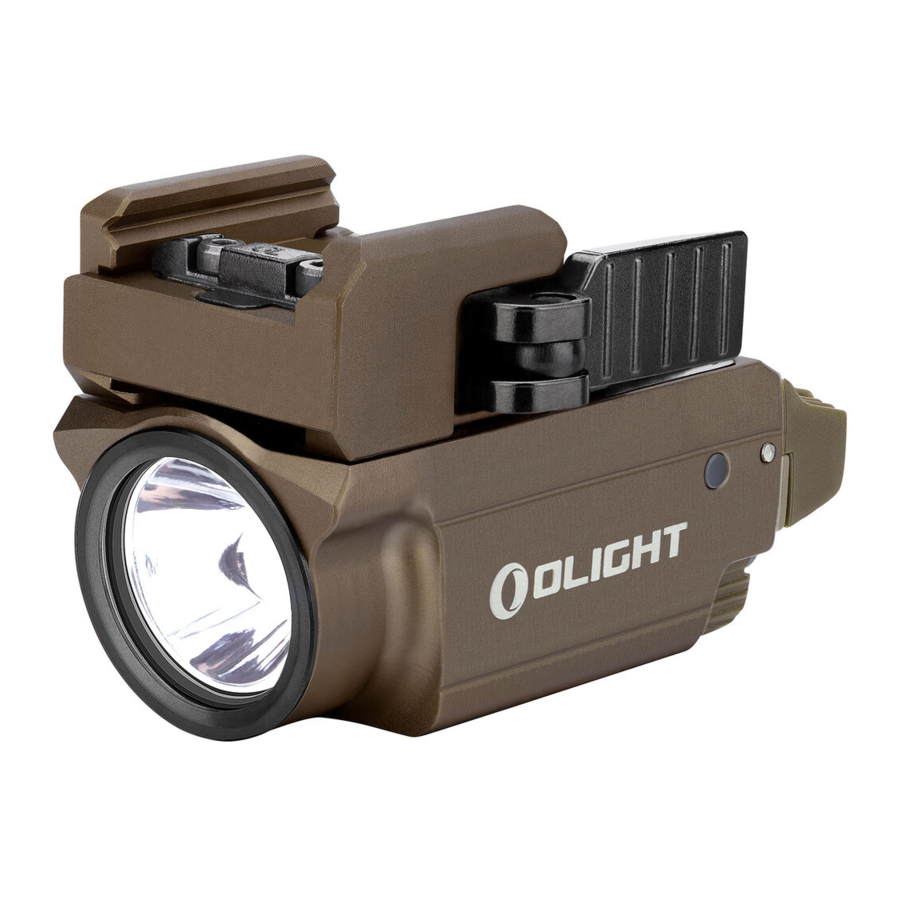
PRODUCT OVERVIEW

BEFORE FIRST USE

*The low battery indicator will turn red when the light is working and the battery level is less than 10%.
*Connect the USB end of the charging cable to an external USB power source, then attach the other end of the magnetic charging cable to the charging port of the light. It takes no more than 1 hour to fully charge the light (For reference only. When the USB power supply is insufficient to provide 5V 0 35A power capacity, the charging time will be longer).
*Before first use please fully charge the product.
UNIT INSTALLATION
Flip up the swing arm to unlock it as shown below, slide the light on the rail mount, and slide it back and forth to fix it in a desired position, then flip down the swing arm to lock it.

Pull open the swing arm

Slide the light to adjust the position

Close the swing arm

| ICON | LIGHT SETTING |
 | LIGHT |
 | LIGHT&GREEN BEAM |
 | GREEN BEAM |
COMPATIBILITY CHECK
The BALDR Mini can be used on most Glock or Picatinny (mil-std-1913) type rails. The Glock adapter labelled "GL "is already installed and a Picatinny (mil-std-1913) adapter is included in the package. To install the light on Picatinny (mil-std-1913) rails, the user needs to replace the "GL" adapter with the included 1913 adapter using the screws and wrench provided in the package.
GREEN BEAM CALIBRATION
Use the included hex wrench to rotate the adjustment screws on the side of the light to calibrate the vertical or horizontal angle of the green beam, and finally sight in the green beam for accurate use.
NOTE: A backup set of NYLOK adjustable screws is included.
*The NYLOK cone point set screw is used for vertical angle calibration.
*The NYLOK oval point set screw is used for horizontal angle calibration.
OPERATION
THREE LIGHT SETTINGS AVAILABLE: As the mark shows, push the setting switch from left, middle, right to select green beam only, white LED/green beam combined, white LED only accordingly.
The ambidextrous switch on the BALDR Mini can only be pressed down to activate the light. Pressing the side or front of the switch will not turn it on.
Momentary ON: Press and hold down either switch for momentary on. The light will stay on until the switch is released.
On/Off: Single click either switch for constant on. Single click again to turn the light off.
WARNINGS

- DO NOT throw the light directly into human eyes. This may cause temporary blindness, or permanent damage to the eyes.
- DO NOT charge this product with other charging cables except the one included in the original package.
- DO NOT cover the light head, or place the light head down on the ground when the light is on. The radiation energy of the light may cause damage to the light itself, or even result in burning to other materials.
- DO NOT leave the light in any type of fabric bag or fusible plastic container under high temperature

- Keep out of reach of children.
- Green beam light is bright and blinding - DO NOT shine at aircraft or vehicles at any distance.
- If the light is stored for a long time or transported, please turn the light setting switch to the Green Beam Only position.
NOTICE
- The setting switch is magnetically sensitive, when close to magnet, interference may occur.
- Fully charge the battery before storing the light for a long period of time.
- Please keep the charging port clean. Wipe any dust off before charging.
- Please wipe the lens regularly. If the green beam spot is abnormal, please wipe and clean the lens.
- The LED light will work for one minute at the top output mode and gradually step down to 100 lumens within 2 minutes.
- The two switches can only be activated by pushing downward. Pushing forward or on the side of the switch will not activate the light.
- Always attach the light on the rail could better protect the switch and avoid damage caused by falling.
- The BALDR Mini can only be charged with the included MCC special charging cable, not compatible with other MCC cables.
Documents / ResourcesDownload manual
Here you can download full pdf version of manual, it may contain additional safety instructions, warranty information, FCC rules, etc.
Advertisement


Need help?
Do you have a question about the BALDR Mini and is the answer not in the manual?
Questions and answers