Advertisement
INSIDE THE BOX

SPECIFICATIONS
Material: 6061-T6 aluminum alloy structure, Type Ⅲ hard anodizing.

Note:
- The light delivers 1,500 lumens in high mode, this output will last for about 1 minute, and then gradually drops to 600 lumens within 0.5 minutes.
- The maximum output brightness varies with the battery level. When the battery level drops to about 40%, the maximum output brightness reaches 600 lumens. When it continues to drop to about 10%, the maximum output brightness reaches 300 lumens.
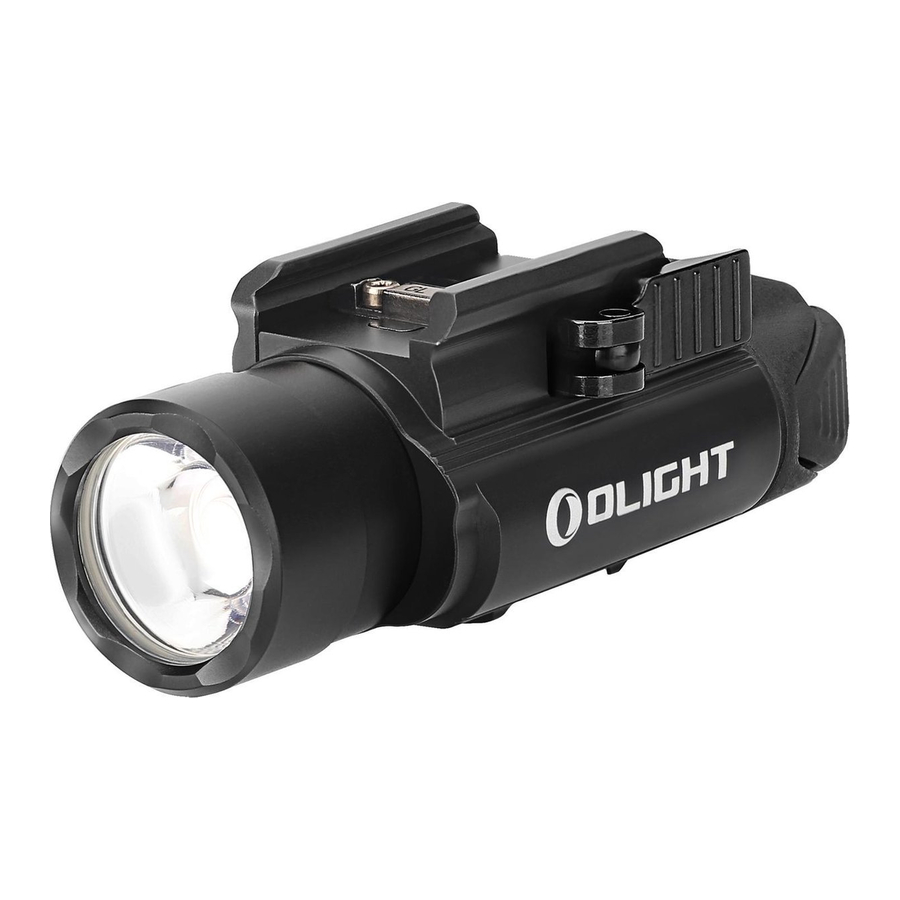
PRODUCT OVERVIEW


BEFORE FIRST USE
The PL-PRO ships in Lockout mode. Before first use, please press and hold both switches at the same time for about two seconds until the brightness increases, indicating it has exited lockout mode.
CHARGING

When the battery is low, the red indicator at the bottom will light up, signaling about 5 minutes of battery life remaining.

The indicator on the charging cable is red while charging and will turn green when fully charged.
Note: The USB charging cable is not compatible with the PL-MINI.
LIGHT INSTALLATION
Check your rearm compatibility and choose the correct sized rail adapter:
This light can be installed on a mil-std-1913 or Glock style rail with an available notch. The Glock adapter labeled GL is already installed, which can be immediately used on all Glock sized rails. For firearms using Picatinny (mil-std-1913) rails, the user must replace the GL adapter with the included 1913 adapter using the screws and socket head wrench provided in the package.
INSTALLATION
Open the swing arm as shown below. Make sure that the insert fits inside your rails notch. Close the swing arm once it is aligned.


OPERATION
Constant on: Quick single click either switch to turn the light on with the memorized brightness level. Single click again to turn off the light. When the light is turned off, quick double click either switch to enter high mode.
Momentary on: Press and hold either switch to turn on the light, release the switch to turn the light off.
Change brightness: Quick double click either switch to change the brightness between high and low mode.
Strobe: Press both switches at the same time to enter strobe. Under the strobe mode, single click either switch or press both switches at the same time to turn the light off.
Lockout/Unlockout: Press and hold either switch for about half a second, then press and hold another switch for about two seconds till the light turns off. Under lockout mode, click either switch, and the light enters into momentary on (about 100 lumens); Under lockout mode, press and hold both switches at the same time for about two seconds till the brightness increases, then you have left lockout mode.

- DO NOT throw the light directly into human eyes. This may cause temporary blindness, or permanent damage to the eyes.
- DO NOT cover the light head when the light is on, or place the light head on the ground. The radiation energy of the light may cause damage to the light itself, or even result in burning to other materials.
NOTICE
- Fully charge the battery before storing the light for a long period of time.
- Please keep the charging port clean. Wipe any dust off before the charge.
- Always keep the LED light firmly attached to the firearm to protect from any damage or misuse.
WARRANTY
Within 30 days of purchase: Contact the original seller for repair or replacement.
Within 2 years of purchase: Contact Olight for repair or replacement.
This warranty does not cover normal wear and tear, modifications, misuse, disintegrations, negligence, accidents, improper maintenance, or repair by anyone other than an Authorized retailer or Olight itself.
EU-DECLARATION OF CONFORMITY

EU-Declaration of Conformity can be found here
CE: https://olightworld.com/ec-declaration
USA Customer Support
cs@olightstore.com
Global Customer Support
Customer-service@olightworld.com
Visit www.olightworld.com to see our complete product line of portable illumination tools.
Olight Technology Co., Limited
5th Floor, Building A2, Fuhai Information
Harbor, Fuhai Subdistrict, Bao'an District,
Shenzhen, China 518103
Made In China

3.0034.6010.9990 V1. 05. 10. 2019

Documents / Resources
References
Olightworld.com.Olight Flashlights, Tactical Light, Outdoor Light, Weapon Light
Olightworld.com.Olight Flashlights, Tactical Light, Outdoor Light, Weapon Light
Olight Manual & Datasheet Library
Download manual
Here you can download full pdf version of manual, it may contain additional safety instructions, warranty information, FCC rules, etc.
Download OLIGHT PL-PRO VALKYRIE - 1500 Lumens Flashlight Manual
Advertisement


Need help?
Do you have a question about the PL-PRO VALKYRIE and is the answer not in the manual?
Questions and answers