
Related Manuals for JEOL JSM-6060LV


Summary of Contents for JEOL JSM-6060LV
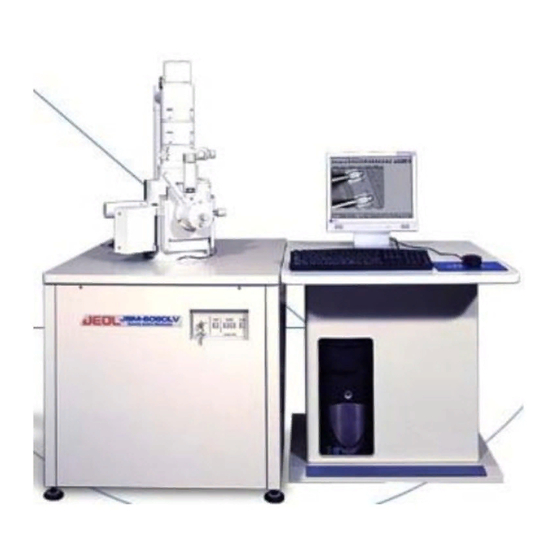
- Page 1 JEOL JSM-6060LV SCANNING ELECTRON MICROSCOPE Insert Nickname Here Operating Instructions...
-
Page 2: Table Of Contents
J E O L J S M - 6 0 6 0 L V S C A N N I N G T able of Contents I N T R O D U C T I O N Safety B A C K G R O U N D Background Information References S A M P L E S... -
Page 3: Safety
S C A N N I N G Introduction he JEOL JSM-6060LV is a state-of-the-art scanning electron microscope that features a low vacuum for observation of non-conductive specimens, a fully automated electron gun, a backscattered electron detector for atomic number contrast imaging, fully integrated digital control, motorized x-y stage, and a NORAN System 6 elemental analysis system (see separate operating instructions for the NORAN system). -
Page 4: Background
J E O L J S M - 6 0 6 0 L V S C A N N I N G Background The scanning electron microscope (SEM) is one of the most versatile instruments for the examination and analysis of the microstructural characteristics of solids. Although the SEM and optical microscope share the same primary function –... -
Page 5: References
J E O L J S M - 6 0 6 0 L V S C A N N I N G E L E C T R O N M I C R O S C O P E The basic components of a SEM are the vacuum system, electron gun, lens system, electron detector, imaging system, and the electronics associated with these components. -
Page 6: Samples
S C A N N I N G Samples he JEOL JSM-6060LV in standard high vacuum operating mode can handle a variety of sample types. The low vacuum mode enables the instrument to handle non- conductive samples, including organic materials (polymers, etc.), ceramics and glasses, and biological samples. -
Page 7: Sample Preparation
J E O L J S M - 6 0 6 0 L V S C A N N I N G Remove excess lint, dust, moisture, and other debris from your specimen, unless you want to examine those things. Use the sputter coater to create a conductive gold coating on the surface of your sample. -
Page 8: Instrument Operation
Turn on the SEM by turning and releasing the key on the front panel of the instrument (it’s just like starting a car). Turn on the Dell computer on the left and hit the ENTER key at the log on screen (no password necessary). -
Page 9: Getting An Image
J E O L J S M - 6 0 6 0 L V S C A N N I N G Close the chamber door by gently pushing it forward until it stops. Press and hold the EVAC button (on the front of the instrument) until it lights up green. WAIT for evacuation of the chamber (about 1 minute). -
Page 10: Image Scanning
J E O L J S M - 6 0 6 0 L V S C A N N I N G Tilt. Turn the knob at the lower right side of the chamber door assembly to tilt your specimen. BE CAREFUL when adjusting the sample tilt – you don’t want to run your sample into anything inside the column. -
Page 11: Photography
J E O L J S M - 6 0 6 0 L V S C A N N I N G Photography cquiring an image from the SEM is relatively easy, but there are quite a few options for live image scanning and corresponding image resolution. This section outlines several options for acquiring digital images of different resolutions, and it provides a few general tips for good SEM photos. -
Page 12: Higher Resolution (Slower) Photos
J E O L J S M - 6 0 6 0 L V S C A N N I N G Once the image is frozen, click the Save button above the image, select a save directory, type a filename, select a file format, and click Save. Higher Resolution (slower) Photos Press the green Scan2 button on the toolbar.
Need help?
Do you have a question about the JSM-6060LV and is the answer not in the manual?
Questions and answers