Advertisement
- 1 What's in the Box
- 2 Product Introduction
- 3 Download and Register APP
- 4 Register Account
- 5 Choice SIM card
- 6 Insert the SIM Card
- 7 Power On the Unit
- 8 Add the Unit On the Phone
- 9 APN Settings
- 10 Charge the Product
- 11 Install the Device
- 12 Install the Solar Panel
- 13 How do Others Use the Unit
- 14 Video Management
- 15 PIR Detection and Message Push
- 16 FAQs
- 17 Battery Life and Safety Instructions
- 18 Important Instructions Before Using
- 19 Documents / Resources
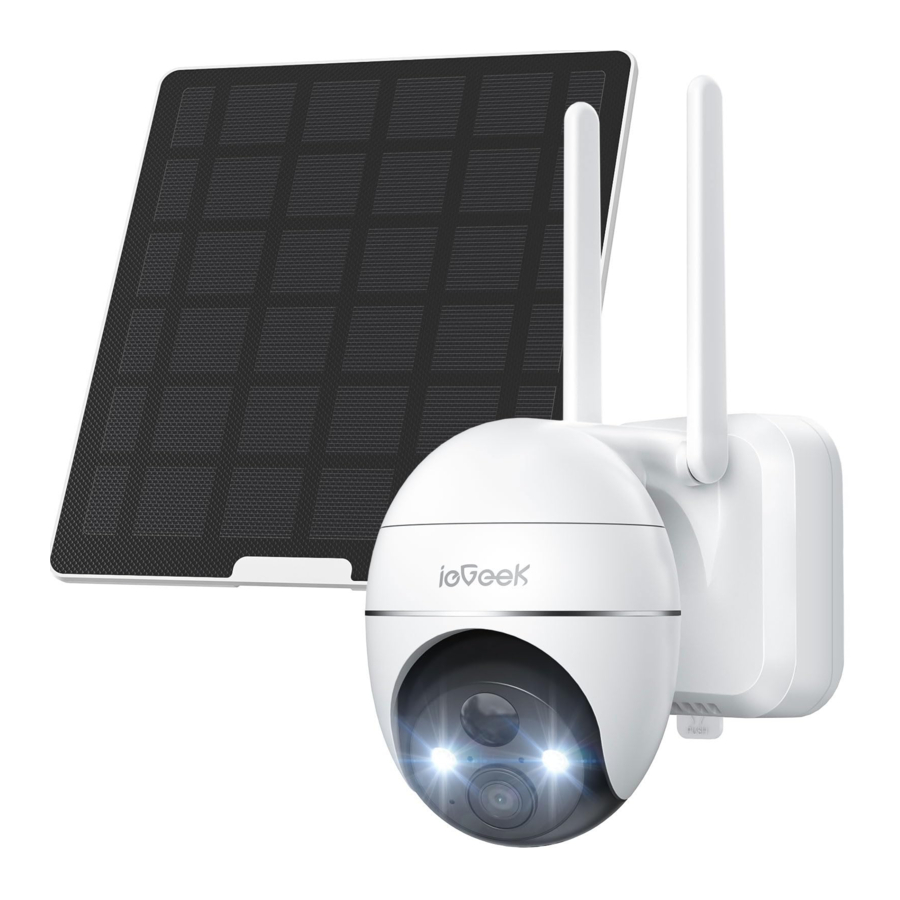
What's in the Box

Product Introduction

- Antenna
- Built in PIR Sensor
- working LED
- Charging LED
- Spotlight
- Lens
- Microphone

- Charging Port
- Speaker
- Reset Key
- Power Key
- SD Card Slot
- Nano SIM Slot
| Reset Key | Press and hold RESET for 5 seconds to reset the device (If you have modified the settings, they will revert to the factory default settings) |
| SD Card Slot | Support local SD card storage (up to 128G) |
| SIM Card Slot | Support Nona SIM Card |
| Lens | Support QHD 2K resolution |
| Power Light | Red means charging is in progress Blue means charging is complete |
| Microphone | Capture sound for your videos |
| PIR Sensor | Can detect moving objects up to 10 meters away |
| Working Status Light | Red light continuously on: camera network abnormal Red light flashing: waiting for network connection Red and blue lights flash alternately: SIM card recognition failed Blue light flashing slowly: SIM card recognition is successful |
| Speaker | Two-way voice cal sound output |
| Charge Port | Use 5V/2A power supply to charge the camera |
| Thumb Screw | For fixing the camera and the bottom bracket |
| Antenna | 4G dedicated signal antenna |
Download and Register APP
Download ieGeek Cam APP
Search "ieGeek Cam" in App Store or Google Play, or scan the QR code below to download and install it on your smartphone.


Note: For old users, please update the APP to the latest version.
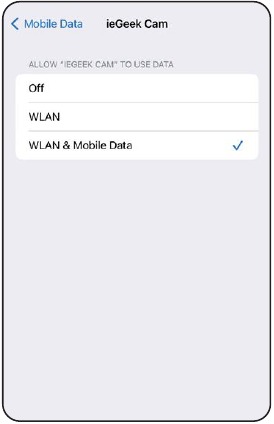
APP Permission Settinqs
When using the application for the first time, please turn on the following 2 permissions.
- Allow "ieGeek Cam" to access mobile cellular data and WLAN, otherwise you will not be able to add devices.
![]()
- Allow "ieGeek Cam" to receive messages, otherwise the phone will not receive alert push notifications when motion detection or audible alerts are triggered.
![]()

The above is a screenshot of IOS cell phone operation, Android cell phone permissions open method is basically the same as this method.
Register Account
New users must register by email, the concrete steps are as follows:
- Click on "Register";
- Follow the steps to complete your account registration;
- Login.
Tip:
- Please use the correct e-mail.
- Please select the correct country code.
- When registering for a new account, please select the region where you are actually located.
Choice SIM card
A SIM card is included in the camera box, and this card supports the major carrier networks in your country.
It has the advantages of easy installation and use, fast and convenient data recharge, strong network compatibility, strong 4G signal, strong compatibility with the camera, no need to sign an agreement with the operator, etc. It is recommended for you to use it.
Note: This SIM card is only compatible with this camera, please do not insert it into a smartphone or other electronic products.
If you need to configure a SIM card of a local operator, please refer to the following list to choose:
| Country | Recommended Carriers | 3/4G Frequency Bands Supported by the Camera |
| United States | Verizon/AT&T/T-Mobile | LTE FDD:B2/B4/B5/B12/ B13/B14/B66/B71 WCDMA:B2/B4/B5 |
| Unites Kingdom | O2/ Vodafone/EE/Three | LTE-FDD: B1/B3/B5/B7/B8/B20/B28 LTE-TDD: B38/B40 WCDMA: B1/B5/B8 |
| Germany | Telekom/vodafone/Telefönica | |
| France | Orange/Bouygue/SFR/Free | |
| Spain | Vodafone/orange/Movistar | |
| Italy | Vodafone/TIM/WindTre/lliad | |
| Other Countries of Europe | Choose from local mainstream operators |
Note:
- The camera does not guarantee the compatibility of the SIM cards of carriers other than those listed in the above list, please choose carefully. The camera only uses data traffic and will not use services such as calls/texts.
- Some cards have a PIN code that you can disable first with your smartphone. Do not insert an IOT or M2M SIM card into your smartphone.
- Cameras purchased in this country cannot be used in other countries because of different 4G frequency bands. Cameras purchased in Europe are supported by the countries marked on the SIM card manual.
Insert the SIM Card

The SIM card slot is located in the rubber cover under the camera lens, please remove the rubber cover first.
When choosing a Nona SIM card to insert it into the SIM card slot, please remember: the side with the gold contacts is facing up, and you need to push the trimmed notch into the SIM card slot and press it all the way in.
If it is difficult to operate, please use the SIM card tweezers in the camera box.
Note: Do not insert the SIM card into the card slot backwards. It will cause the SIM card not to be recognized, and the SIM card will be stuck inside and cannot be pulled out.
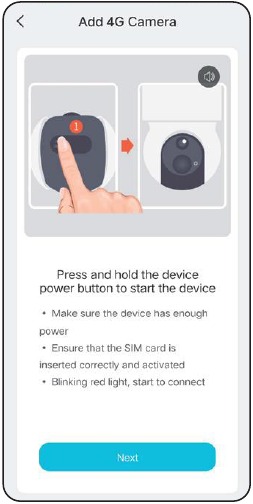
Power On the Unit

After inserting the SIM card, press and hold the power button of the camera for 5 seconds until the working indicator on the side of the lens lights up in red, then let go.
Wait for about 30 seconds until the working indicator turns blue light flashing, you will hear the voice prompt "Waiting to connect", which means the camera has successfully connected to the 4G network, and the next step is to add the camera in the APP.
Add the Unit On the Phone
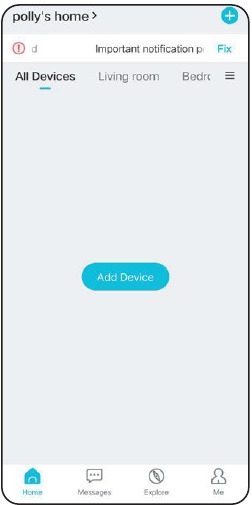
Tap '+' to Add Device
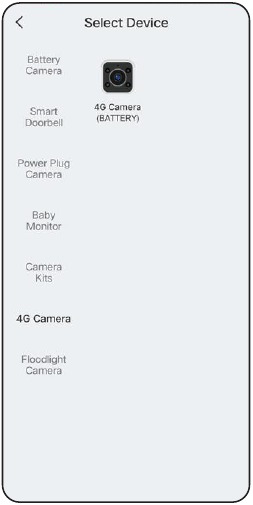
Select 4G Camera
Power on Camera
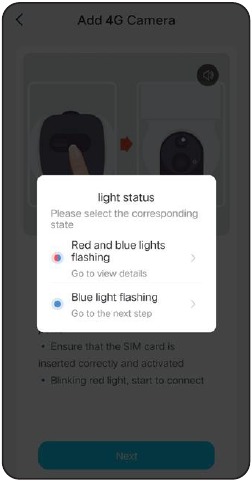
Wait for SIM card recognition
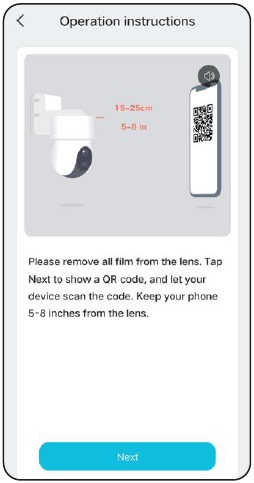
Scan QR Code
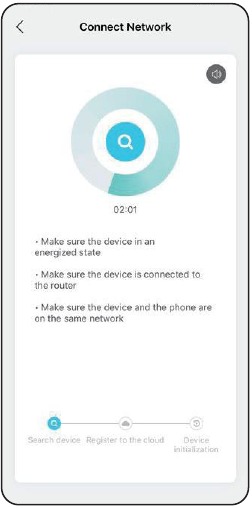
Wait for Connection
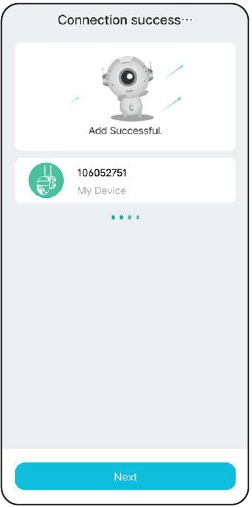
Device Added
Add failed? Please refer to the following to resolve the issues:
| Camera voice prompt: Wait for connection time out | Solutions: Press the power button to restart. |
| Working light status: Indicator light off | |
| Camera status: If the network is not configured for a long time, the device will automatically sleep | |
| Camera voice prompt: SIM card not found | Solutions:
|
| Working light status: The red and blue lights flash alternately and then turn off | |
| Camera status: The camera does not recognize this SIM card | |
| Camera voice prompt: SIM card cannot be used | Solutions:
|
| Working light status: Red and blue lights flash alternately | |
| Camera status: Camera cannot register to carrier network | |
| Camera voice prompt: No LTE signal | Solutions:
|
| Working light status: Red light keeps flashing | |
| Camera status: SIM card has no data plan or 4G signal difference | |
| Camera voice prompt: APN not matched | Solutions: Please import the APN of the SIM card into the camera in the APP (for details, please refer to the following content) |
| Working light status: Red and blue lights flash alternately | |
| Camera status: The camera is not compatible with the APN of the SIM card |
Note: If you try to add a camera several times and still fail, please contact the brand's customer service staff for help.
APN Settings
Only using the local SIM card, there is a probability that the APN cannot be recognized. You need to manually import APN information to the camera
- When the camera plays the voice of "Unrecognized APN", turn to the page of "Home" → tap '+' to add device select "4G Camera" and click it → click "Next" → click "Red and blue lights flashing" → click "Enter the current SIM card APN information" to enter the APN setting page.

- Just enter the corresponding information in the first three columns "MCC", "MNC" and "APN". If you do not know the APN information of the SIM card, please consult the card operator for assistance. Or insert the SIM card into the smart phone and obtain APN information in the phone system


After successfully importing the APN, please re-add the 4G camera.
Charge the Product
It is recommended to fully charge the camera battery before installing the camera outdoors.

Charge the camera with a standard and high-quality 5V power adapter (not included).

Use the solar panel to charge the camera.
Charging indicator (at the top left of the lens):
Red LED: Charging
Blue LED: Charging completed
Note: For better weather resistance, insert the charging port of the solar panel into the rubber plug, and the rubber plug fully covers the charging port.
Safety Reminder: Do not use a non 5V power adapter to charge the camera, and do not charge near fire and heaters. If the battery emits odor, heat, deformation and other abnormal conditions during the charging process, please stop charging or using it immediately.
Install the Device

Notes before installation:
- In order to ensure that the camera can obtain a good network signal, please install the camera in a location with good signal and no signal interference.
- In order to avoid frequent alarms and rapid battery consumption, do not point the camera directly at the road or in crowded places.
- Make sure there are no reflections within 5 feet (1.5 meters) of the PIR sensor, otherwise it will interfere with the normal function of the sensor.
- For outdoor use, the camera must be installed forward for better waterproof performance and better PIR motion sensor efficiency.
- In order to ensure better waterproof performance, after installation, please ensure that all rubber plugs on the surface of the camera are covered.
- In order to better connect the 4G network, it is recommended to install the antenna upward or horizontally.
- Install the camera 2-3 meters (7-10ft) above the ground. This height maximizes the detection range of the PIR motion sensor.
- Do not place the camera exactly in the direction of the intruder's movement. The angle formed by the connection between the PIR sensor and the intruder and the intruder's walking route must be greater than 20 degrees.
Note: As shown in the picture, the red dotted line is the usual intrusion path of the intruder, then point A is the best installation location for the camera, if it is installed at point B, it may cause a missed alarm.
Installation Step:
- Use Power Drill and two screws to fix the camera bracket on the wall. It is recommended that the bracket be 7-10 ft above the ground (2-3 meters)

- Clip the camera base into the bracket from top to bottom, and the installation is completed


Note: To remove the camera from the wall, press the snap position under the bracket with your finger, and then pull out the camera.
Install the Solar Panel
Please use the plastic brackets and screws included in the box to install the solar panel.
- Using the power rill and screws, fasten the plastic bracket of the solar panel to the wall.
Note: In order to obtain the best charging efficiency, the solar panel must be installed in a location with sufficient sunlight (it is recommended that there be no light shielding around), and the daily light time can be guaranteed to be more than 4 hours.

- Align the screw cap of the bracket with the screw hole on the back of the solar panel and rotate it clockwise to fix it.

- Adjust the angle of the solar panel according to the actual environment, and ensure that the front of the panel is facing up (45° angle is the best inclination angle).

- Unplug the rubber plug on the surface of the camera charging port, insert the solar panel charging head through the hole on the rubber plug, and then insert it into the camera charging port correctly.

- For better waterproof performance, please cover the charging port completely with the rubber plug.


Note: To ensure the charging efficiency of the solar panel, please clean the panel surface regularly.
Note: In rainy days and cold winters, the charging efficiency of the solar panel will be very low. If the battery of the camera will run out, please remove the camera, take it indoors and use the 5V power adapter to fully charge it, and then install it back.
How do Others Use the Unit
In order to ensure the security of the camera, the camera is only allowed to be added by one account. If others need to access the camera simultaneously, they can use the "Device Share" function.
Sharing Steps:
- Others first download and install the camera's APP, register a new account and log in (the country selected during registration must be the same as your choice).
- You click "Device Share" in the APP, please watch the operation video first, and follow the video steps to complete the sharing.
Tip: When sharing, you need to select the permission of the camera, please choose according to actual needs. - He will receive a push message on his APP, click "Accept" to complete the sharing.
Video Management
The camera needs a Micro SD card to store video files. Insert the Micro SD card into the SD card slot of the camera correctly.
SD card requirements:
- Recommend the use of brand name cards such as San Disk, Samsung, etc.
- Support 2-128GB capacity;
- Recommend the use o standard Class 10 SD cards.
- Only FAT32 format is supported (you can select FAT32 to format the SD card after inserting the SD card into the computer).
When the camera detects an intruder, it will automatically save the video file to the SD card.
How to download SD card video to mobile phone or computer?
- When playing the historical video in the APP, select the video clip you want to download, and click Download.
- After inserting the SD card into the computer or mobile phone, look for the required video files. The video file is in MP4 format, and you can play it directly with the player.
PIR Detection and Message Push
In order to obtain the alarm message push function, please enable the push permission of the APP in the mobile phone system.
The camera has a wealth of motion detection setting options, including: "motion detection sensitivity", "work mode", "alarm plan", "alarm area setting", "AI humanoid detection" and other functions.
Enter the application, select the device, and enter 'Parameter Settings" → "Alarm Management" to flexibly set the camera's alarm detection function.
Introduction to PIR motion detection sensitivity
1-3 belongs to the low gear sensitivity, motion detection distance of 3-5 meters.
4-7 belongs to the medium gear sensitivity, motion detection distance of 5-7 meters.
8-10 belongs to the high gear sensitivity, motion detection distance of 7-10 meters.
Introduction of AI humanoid detection function:
In "Alarm Management" → "Custom Mode", there are two options of "Daytime Humanoid Detection" and "Night Humanoid Detectlon", and the camera is turned on by default. After the humanoid detection function is turned on, the camera will start an alarm when only humanoids are moving, and vehicles/animals will not be detected. If you need the camera to detect vehicles and animals normally, please turn off human detection.
You may encounter the following situations:
| Problems and failures | Solutions |
The phone receives frequent alarm messages |
|
There are no moving objects in the alarm picture |
|
Someone passed by without alarms |
|
Frequent leakage alarms at night |
|
Mobile alarm is not timely/obviously delayed |
|
FAQs
For more detailed FAQs, please log in the APP, "Me"-"Help"-"4G Camera".
The unit cannot be turned on
- Make sure the camera is fully charged. Please use the 5V power adapter to fully charge the camera before turning it on.
- If the camera is faulty or water has entered, please contact the customer service staff of the brand manufacturer for help.
Failed to add the unit
Please refer to "Add the Unit On the Phone" section to find solutions, or contact the customer service personnel of the brand for help.
After the first use for a period of time, the camera fails to connect to the internet?
- If you use the SIM card that comes with the camera, only a 100M data plan will be given for free. To avoid running out of data, please replenish the data plan in the APP in time.
- Please check whether the SIM card data p an is normal, such as arrears, excessive data usage, etc., and regularly supplement the data plan for the SIM card.
- Please check whether the 4G network signal around the camera is good, and avoid signal interference around.
- Check whether the SIM card is loose.
The unit drops frequently and cannot be connected
- Please check whether the 4G network signal around the camera is good, and avoid signal interference around.
- Check whether the SIM card is loose.
- Check whether the 4G network of your SIM card operator covers the installation location of the camera. It is recommended to try the SIM card that comes with the camera.
Mobile phone can't receive the alarm push message
- Check whether the message push permission of the app has been enabled in the system settings of the mobile phone.
- Restart the phone, and the Android phone will try to clear the cache.
- Check whether the camera has the motion detection function enabled.
- Check whether the network of the camera and mobile phone is good.
- Check whether the camera is online, and check whether the SIM card data plan is normal, such as arrears, excessive data usage, etc.
Motion detection missed alarm
- Increase the motion detection sensitivity of the camera.
- Please install the camera correctly to avoid intruders from walking vertically to the camera. (For the solution, please refer to the text of "Installing the Device" in the manual).
- If you need to detect vehicles or animals, please turn off the "AI humanoid detection" function.
Can the unit connect to Wi-Fi?
Wi-Fi is not supported, only 4G network is supported.
How much data does the device consume per month
The traffic consumed by the camera depends on the resolution you select when viewing. The higher the resolution, the greater the traffic consumption. The longer the preview video and video playback time, the greater the data consumption. The more times the PIR sensor is triggered, the greater the flow digestion. We recommend that you subscribe to a 2-4G/month data plan package.
The subscription data plan package does not take effect, or do I need to transfer the package and refund the fee?
- If you use the camera's own SIM card, please contact the customer service staff of the camera's brand manufacturer for help.
- If using a local SIM card, please contact the operator for assistance.
If you tried all steps, but still no luck, please message your order and problem to service@iegeek.com
Battery Life and Safety Instructions
This camera is not designed for 24/7 operation and 24/7 recording, but designed for recording motion detection, which can be viewed remotely only when you need it.
| Reasons for short battery life | Solutions to improve battery life |
| The PIR sensor is frequently triggered, repeatedly waking up the camera to work. |
|
| Frequent and long term remote viewing of videos on mobile phones | Reduce the frequency and time of watching videos remotely |
| The network is very poor, causing the camera to search the network frequently and automatically | Determine whether the 4G network signal around the camera is poor, avoid objects that interfere with the signal around, and move the camera to a position with better signal |
| In low temperature and cold weather, battery performance will be reduced and solar charging efficiency will decrease | In cold weather, reduce the sensitivity of motion detection, turn on the humanoid detection function, set the alarm area, and reduce the working time of the camera |
| Inefficient or no charging of solar panels |
|
| Camera consumes power faster than solar charging efficiency | Refer to the solution above |
Reminder: If the above attempts still cannot solve the problem of short battery life, please contact the customer service staff of the brand manufacturer for help.
Important Instructions Before Using
- Although every effort is made to make the manuals complete and accurate, there may be some discrepancies due to product updates.
- Please insert or pull out the SIM card only when the camera is turned off.
- In order to ensure that the camera can obtain a good mobile network, it is recommended that you use the SIM card that comes with the camera.
- The SIM card that comes with the camera only provides 100M of data for free. Please add the data plan in the APP in time after adding the camera successfully.
- To ensure the continuous use of the camera, please ensure that the SIM card has sufficient data, and continue to supplement the data plan for the SIM card.
- The camera is specially designed for motion detection and does not support 24/7 video streaming and recording.
- In order to ensure the battery life, it is not recommended to point the camera directly at the road or in a place with a lot of people/vehicles
Sales Email: service@iegeek.com
Official website: https://www.iegeek.com
Documents / Resources
References
Download manual
Here you can download full pdf version of manual, it may contain additional safety instructions, warranty information, FCC rules, etc.
Advertisement


Need help?
Do you have a question about the ZY-G1 and is the answer not in the manual?
Questions and answers