Advertisement
- 1 After-sale Support
- 2 What's in the Box
- 3 Meet the Doorbell
- 4 Meet the Chime
- 5 APP Installation and Account Registration
- 6 How to Add Doorbell to APP
- 7 Live viewing
- 8 Playback
- 9 Leave Voice Messages
- 10 ShareYour Device
- 11 Connect the Chime
- 12 Installation
- 13 How to Reduce False Alarms
- 14 Troubleshooting
- 15 Documents / Resources
After-sale Support
We provide 24 months warranty. If you have any problems or suggestions, please feel free to contact us by Amazon message or send e-mails to our official mailbox best service will be offered to you.
NOTE:
- The smart video doorbell only supports 2.43Hz WIFI, it doesn't support 5GHz WIFI,
- please ensure that the Wi-Fi signal strength is to be over 85%; if the smart video doorbell is far away from the signal source, it won't be connected successfully for the first time.
- If your router is connected to too many devices, the smart video doorbell will fail to connect to Wi-Fi because of the IP address conflict,
- It will consume the battery's power if you watch live footage or recorded videos from the SD card.
- Manually snapshot and recording files are saved on mobile. Events snapshot files are saved in Cloud, Events recording files are saved on Micro SD card,
- pay attention to the positive and negative poles of the battery when installing and removing the battery to prevent explosion.
- This smart video doorbell does not support PC Browser and Software.
- Video playback works in ieGeek Cam APP only. It does not support the 3rd party player.
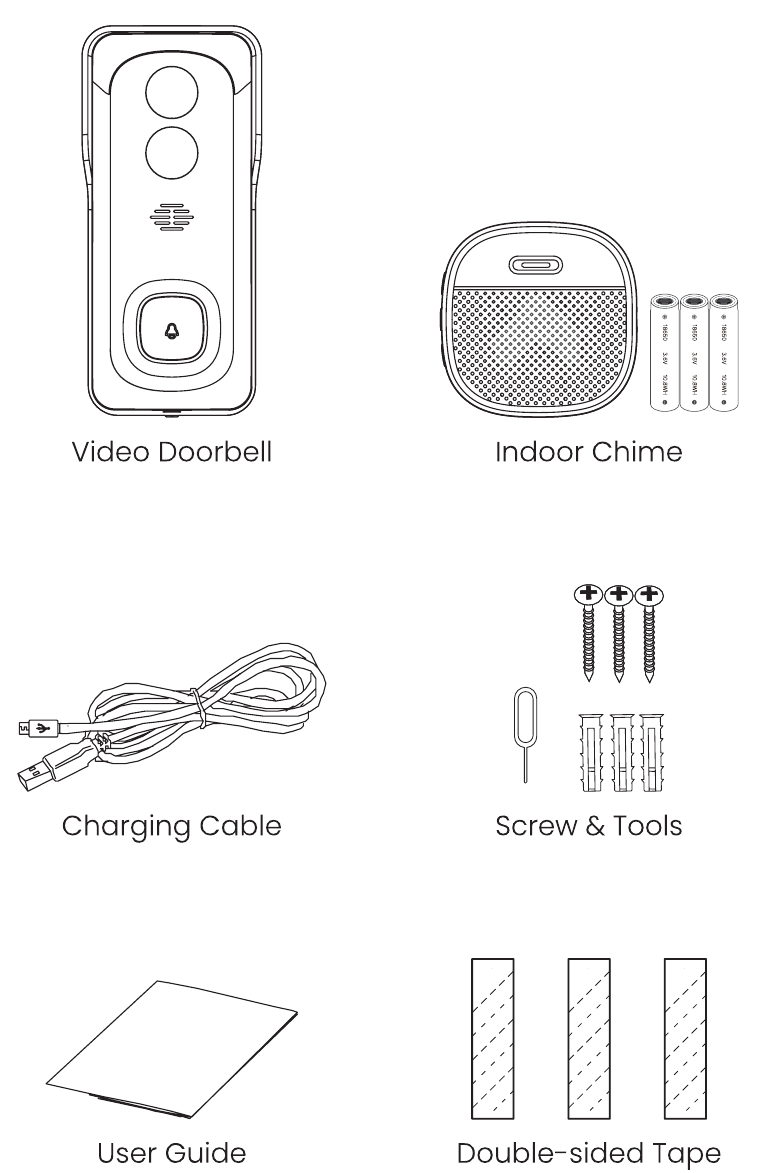
What's in the Box
Please consult below checklist for all the components.
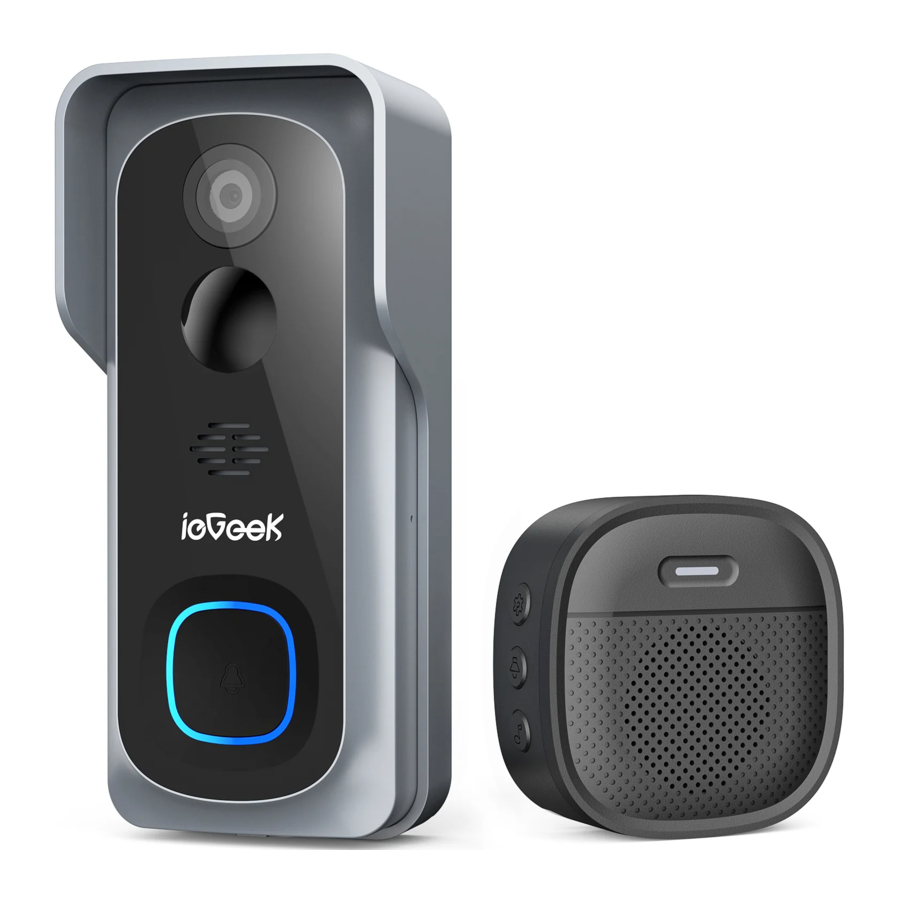
Meet the Doorbell

- Lens
- Motion Sensor
- Speakers
- Doorbell Button
- LED Indicator
- Base Switch
- Built-in Battery
- Micro-SD Card Slot
- Charging Indicator
- Charging Port
- Reset Button
NOTE:
| Doorbell Keys | Operations |
| Reset key | Press and hold for 5s to reset or restore to factory settings |
| Reset key | Quick press 1 second to enter AP distribution network mode |
| LED Condition | Meaning |
| Slow flickering Red | Awaiting Wi-Fi connection and start adding devices |
| Fast flickering Red | Wi-Fi connecting |
| Solid on Red | Network is abnormal |
| Solid on Blue | Wi-Fi connected successfully, the doorbell running normally |
| Slow flickering Blue | AP mode |
| Charging Indicator | Meaning |
| Solid on Red | Battery is charging |
Meet the Chime

- LED Indicator
- Speakers
- Reset
- Volume
- Ringtone
APP Installation and Account Registration
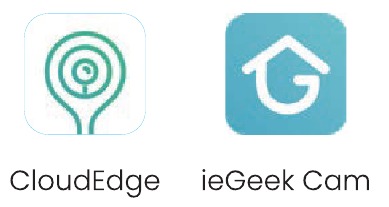
DOWNLOAD 'CLOUDEDGE' APP
Method 1:Download "ieGeekCam' or CloudEdge APP from APP Store (iOS) or PlayStore (Android);


Method 2: Scan ieGeek Cam APP QR code to download it.
Tips: please turn on the 2 permissions below when using this APP for the first time.

- Allow 'ieGeek Cam' APP to access mobile cellular data and wireless LAN, or it will be failed to add doorbell.
- Allow 'ieGeek Cam' APP to receive pushed messages, or the cellphone will not receive alarm push when motion detection or audible alarm is triggered.
REGISTER ACCOUNT
New users need to register by e-mail, click 'Register, and follow the steps to complete the registration of the account, then log in.
NOTE:
- When registering a new account, please choose the region in which you are actually in. (Different registered regions can't share the doorbell.)
- Please choose to register by e-mail
How to Add Doorbell to APP
INSTALL MICRO SD CARD
Please insert Micro SD card to record videos when motion is detected and playback. (The SD card is not included; the doorbell supports up to 128Gg memory card)

NOTE: please insert the Micro SD card before powering on, otherwise the SD card can not be detected.
BATTERY CHARGING
The batteries inside the doorbell are not fully charged in accordance with transportation safety regulations. Please charge the batteries with a compatible wall charger (not included)and the provided dedicated charging cable for about 8-10 hours prior to installation.

WI-Fl SET UP
Before you start the Wi-Fi configuration, please note below:
- The doorbell works with 2.4 GHz Wi-Fi, but not with 5 GHz Wi-Fi
- Avoid using special characters or symbols like
![]() either in your Wi-Fi name or password
either in your Wi-Fi name or password - Perform the configuration near your Wi-Fi router.
- Make sure the range between the device and your router is within 10 meters or 33 feet,
- Check if your router is up and functioning
- Check your device is away from all devices that cause interference (such as microwaves, baby monitors, or other electronic devices),
 either in your Wi-Fi name or password
Launch the 'ieGeek Cam' App and register an account with your mobile phone number or email ID. Start the Wi- Fi configuration by following the in-App instructions or referring to the following guiding steps.
Guiding steps:
- Tap to add device


- Select doorbell


- Check power status


- Activate the doorbell


- Reset device


- Input Wi-Fi password


- Prepare code scanning


- Generate QR code


- Wait for connection


- Adding device complete


RUN A TEST
After setup, tap on the live view window in the App for a test. Then take your doorbell outside to the installation spot and run a test there. Make sure the installation spot is covered by strong 24 GHz Wi-Fi signal.
NOTE:
If the video quality from the doorbell outside is not as good as it was indoors, you may need to move your router closer to your installation spot or invest in a Wi-Fi extender.
Live viewing

- Quit Live Viewing
- Setting Menu
- Volume on/off
- Pixel Selection
- Full Screen Display
- Battery Status
- Stream Bit Rate
- Wi-Fi Signal Status
- Video Playback
- Cloud Storage Service
- Screenshot Button
- Speak to Visitor
- Voice Changer
- Record on the Phone
- Motion Detection on/of
- Alarm
- Photo Album
NOTE: Live viewing will not trigger video recording.
Playback
You can also back up video to the cloud if you have activated the cloud storage service (7-Days Free Trial available).

Search video clips by date

Playback interface

Search video clips by events

Cloud storage Interface
Leave Voice Messages
Maximum 3 voice messages (Max.10seconds each) can be pre-recorded into the doorbell, which enables you to quickly respond to your visitors when you are not convenient to answer the doorbell call.
STEPS: Setting > Voice Message > Press and hold this icon  to record voice messages > Push doorbell button > Play the selected voice message in reply to doorbell call.


ShareYour Device
Sharing by account searching
STEPS : Settings>Device Share> Tap on "Add" > Tap on "Account" > Type in account ID > Confirm Sharing.


Sharing by QR code scanning
The new users can show their QR codes to the administrator, and share device by QR Code scanning.
Find your QR code: Run CloudEdge App > Tap on  > "User Name" > "My QR Code" > Let the administrator scan your QR Code

NOTE:

- Guide your family members to download and install the CloudEdge App, and register an account prior to device-sharing.
- There is no limitation on the number of users sharing one device.
- Only the administrator got access to the setting menu. Other users can only live view & playback.
- All users will receive doorbell calls and alarm notifications.
- Many users can access to the doorbell simultanously, to live view or playback.
Connect the Chime
Put the included Battery into the chime
The chime is wireless, Powered by 3 units of AAA Batteries, which is already included in the package. You can install it anywhere in your home.

Click the reset button
Click the RESET button on the wireless chime only once, and you will see the LED indicator flashing red, indicating the chime is in pairing mode.

Press the doorbell button
Press the doorbell button, and the Chime will sound to react pairing succeeds, and the indicator on the chime will be in solid blue.

Chime settings
You can enter into the chime setting page following the below setting steps, so as to unbind the connection with the doorbell.


NOTE:
- Your doorbell communicates with the chime via Radio Frequency, but not WiFi. You can even do the pairing prior to doorbell configuration.
- You can add many chimes to one doorbell, and vice versa.
- Press and hold RESET button on the chime for 5 seconds till the indicator flashes red 3 times, and you can also release the connection between the chime and its connected doorbell.
Installation
Select location
It is suggested to mount your doorbell at least 5 feet (160 cm) above the ground for the best angle of view and motion detection performance.

Go wireless installation
- Detach the doorbell from the bracket by using a thimble.


- Bracket installation' Mount the bracket on the wall with screws & anchors or the double-sided adhesive tape.


- Mount your doorbell to the fixed bracket. Make sure it reaches the bottom when you can hear a click.


- All set, congratulations! Now you can press the doorbell button to try it out


How to Reduce False Alarms
To reduce false alarms, please note that:
- Do not install the doorbell in a position facing any objects with bright lights, including sunshine, bright lamp lights, etc.
- Do not place the doorbell too close to a place where there are frequently moving vehicles. Based on numerous tests, the recommended distance between the doorbell and vehicles is 15 meters (55 ft).
- Stay away from the outlets, including air conditioner vents, humidifier outlets, the heat transfer vents of the projectors, etc.
- Do not let the doorbell face the mirror, glass or wall directly.
- Keep the doorbell at least I meter away from any wireless devices in order to avoid wireless interference, including Wi-Fi routers and phones.
Troubleshooting
Why did i fail to set up Wi-Fi for the doorbell?
- Device works with 2.4GHz Wi-Fi only, but does not support 5GHz Wi-Fi.
- Wi- Fi network is not good, try to keep the camera near the Wi- Fi router when setting up.
- The Wi-Fi password is wrong. Please check if there are special characters in the password, or the network is specially encrypted
How do know if have 2.4G or 5G Wifi?
Please check the user manual of your Router or call the network operator for help,
It has to be on the same WiFi to see the camera, Or is it over internet from anywhere?
You can view the camera from anywhere, if your camera is well connected to the internet
Do any of the recordings get saved to the cloud?
It supports SD card recording as well as cloud storage. You can activate the cloud storage service in App.
What happens when the SD is full?
When the memory card is full, the camera automatically erases the oldest footage.
Why does it lose connection to Wifi?
please check the network connection of your phone and the Wi-Fi router, If the network signal is not strong, you may need to move your router closer to the device, or invest in an extender.
Can motion detection be disabled?
Yes, sure, The recording is triggered by detected motions, You can set up the sensitivity or disable motion detection in the setting menu.
Do we get a charger for the batteries?
Battery charger is not included Please charge the batteries with a compatible charger (DC5V 1A-2A)for about 8-10 hours.
Can we have 2 or more doorbells at the same residence?
Yes, you can add more than one device at the same residence.
Documents / Resources
References
Download manual
Here you can download full pdf version of manual, it may contain additional safety instructions, warranty information, FCC rules, etc.
Advertisement


Need help?
Do you have a question about the Bell J1 and is the answer not in the manual?
Questions and answers