EUFY S1 Pro Manual
- Quick start manual (42 pages) ,
- User manual (32 pages) ,
- Manual (16 pages)
Advertisement
- 1 What's in the Box
- 2 Overview
- 3 Preparing Your S1 Pro
- 4 Using Your S1 Pro
- 5 More Features
-
6
Cleaning and Maintenance
- 6.1 Maintenance Frequency
-
6.2
Clean the Parts
- 6.2.1 Clean the Dirty Water Reservoir
- 6.2.2 Clean the Dust Bin and Filters
- 6.2.3 Replace the Rolling Mop
- 6.2.4 Clean the Swivel Wheel
- 6.2.5 Clean the Side Brushes
- 6.2.6 Clean the Rolling Brush
- 6.2.7 Clean the Sensors and Charging Contact Pins
- 6.2.8 Clean the Wheels
- 6.2.9 Clean the Dirty Water Tank
- 6.2.10 Clean the Filter Tray
- 6.2.11 Replace the Dust Bag
- 7 FAQs
- 8 Specs
- 9 Customer Service
- 10 Documents / Resources
What's in the Box

Overview
Exterior

- 3D MATRIX EYE™ Sensor
- TrueAI Sensor
- Bumper
- Recharge Button
- Press to pause cleaning, then press again to return Robot to the station
- Start/Pause Button
- Press to start/pause cleaning Mop Indicator Light

- Recharge Sensors (×2)
- Charging Contact Pins (×2)
- Wall-Following Sensor
Interior

- Light Ring Indicator
- Dust Bin
- Magnetic Cover
- Wi-Fi LED Indicator
- Flashing slowly: Wi-Fi disconnected or waiting for connection
- Flashing quickly: Wi-Fi connecting
- Steady on: Wi-Fi connected
- Reset Button
- Reset Wi-Fi connection: After pressing once, you'll hear a voice prompt "Wi-Fi has been reset", and the indicator light will flash slowly
- Restore factory settings: Press and hold for 5 seconds until you hear the voice prompt, then the Robot will restore factory settings
- Power Switch
- "I" indicates the Robot is on
- "O" indicates the Robot is off

- dToF LiDAR
Bottom

- Rolling Mop
- Wheels (×2)
- Brush Guard
- Side Brushes (×2)
- Rolling Brush
- Swivel Wheel
- Carpet Detection Sensor
Dirty Water Reservoir

- Robot Water Sink Filter
- Robot Water Sink
- Dirty Water Reservoir Release Buttons
- Dirty Water Reservoir Filters (×3)
- Dirty Water Reservoir
Dust Bin

- Dust Bin Handle
- Release Latch of Back Cover
- Open to clean the interior of dust bin
- Pre-Filter
- High-performance Filter
- Release Latch of Top Cover
- Open to take out the High-performance Filter

- Anti-Drop Sensors (×6)
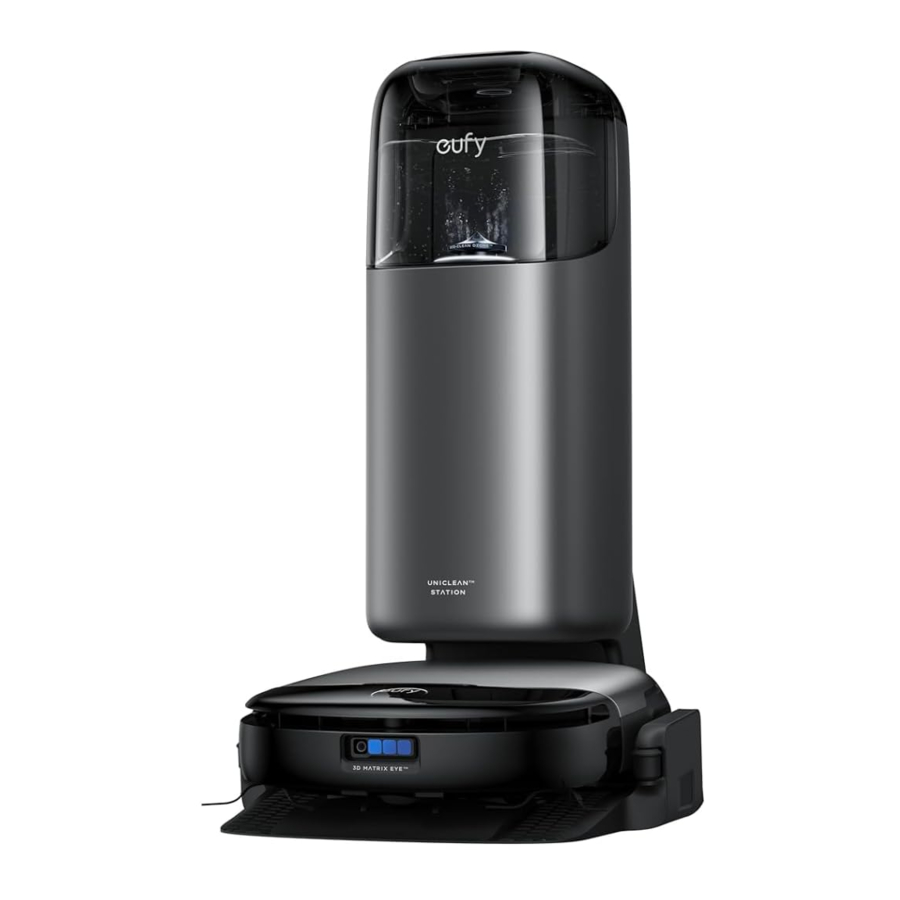
Uniclean™ Station

- Clean Water Tank
- Water Inlet
- Dirty Water Tank
- Dirty Water Tank Cover
- LCD Screen
- Hard Floor Cleaner
- Filter Tray
- Automatic Water Filling Interface
- Charging Contact Pins (×2)
- Recharge Sensors (×4)
- Dust Bag Handle
- Dust Bag

- Touch Buttons
- Recharge Button
![]()
- Press to return to the Uniclean™ Station
- Start/Pause Button
![]()
- Press to start/pause cleaning
- Mode Switch Button
![]()
- Press to switch between Vacuum Only mode and Mop mode » Press and hold for 3 seconds to activate an additional cleaning of the rolling mop
- Recharge Button

 Press and hold the
  and
and  simultaneously for 3 seconds to enable or disable Child Safety Lock.

- Cord Cover
- Power Socket
- Cord Winding Groove
Preparing Your S1 Pro
Remove Stickers and Foam Packaging
Before using, remove stickers and foam packaging from the robot and Uniclean™ Station.

The foam packaging comes with an additional rolling mop inside.
Install Side Brushes
Make sure the brushes marked 1 (red) and 2 (gray) are correctly installed based on the diagram below. You will hear a "click" when the side brushes are in place.

Connect to Power Supply
Remove the cord cover and firmly insert the power cord as shown in the diagram. Tuck any excess cable into the winding groove, then reinstall the cover.
Once the base station is connected to power, the LCD screen will light up.

Place the Station
Place the station on a hard and level surface against a wall. Ensure a clearance of at least 4.95 ft (1.5 m) in front and 1.65 ft (0.5 m) at the sides. Place the station in a location with a strong Wi-Fi signal (Frequency band: 2.4GHz).

Avoid placing the station in areas exposed to direct sunlight.
Install Hard Floor Cleaner
Follow the diagram to remove the clean water tank. Peel off the sticker from the station, then insert the cartridge into the cleaner slot. You will hear a "click" when the floor cleaner is securely installed.

Only use floor cleaner specified by eufy. Using other cleaners may damage the product, and will not be covered by the warranty.
Add Clean Water
Remove the clean water tank from the station, add clean water until it reaches the MAX water line, and then reinsert the clean water tank.

- To ensure optimal electrolysis, use tap water; distilled or mineral water is not recommended.
- Do not add any third-party disinfectants, cleaning agents, or hot water to the water tank, as this may damage the device and such damage will not be covered under warranty.
Turn On the Robot
Open the magnetic cover of the robot and toggle the switch to "I" to power up the robot. Once powered on, the robot will play a voice prompt.

Download the eufy Clean App
To enjoy all the available features, it is recommended to control your robot via the eufy Clean app. You can try the following methods:
- Download the eufy Clean app from the App Store (iOS devices) or Google Play (Android devices), or by clicking this link: https://dl-eufy.eufylife.com/qcdl/index.html?flow=eufy.
![information]() Make sure your smartphone is running iOS 12.0 (or above) or Android 7.0 (or above).
Make sure your smartphone is running iOS 12.0 (or above) or Android 7.0 (or above).


- After opening the magnetic cover of the robot, scan the QR code on the main unit.
Once you've downloaded and finished installing the app, please register and log into your own eufy account.
Set Up the Wi-Fi Connection
Press the reset button once. When you hear the voice prompt, "Wi-Fi has been reset", follow the in-app instructions to add your robot and complete the connection.

Enable Bluetooth on your mobile phone, tap "Add Device" on the main screen of the app, and select S1 Pro from the device list. After the device appears on the list, tap "Add" to start connecting to the robot.
Select the 2.4G Wi-Fi network at your home and enter the password, then tap "Next".

- Use a 2.4GHz or dual-band 2.4/5GHz network.
- The router must support 802.11b/g/n and IPv4 protocols.
- Do not use a VPN (Virtual Private Network) or proxy servers.
- Do not connect to hidden networks.
- The device supports WPA and WPA2 encryption with TKIP, PSK, AES/CCMP; WPA3 is not supported.
- WEP EAP (Enterprise Authentication Protocol) is not supported.
- If using a network extender/repeater, ensure the SSID and password match the main network.
If the Wi-Fi name does not autofill, tap "Select Wi-Fi" next to the input field and choose your home network. Make sure your phone is connected to your home Wi-Fi before adding the device in the app again. Upon successful connection, the robot will sound a voice prompt, and then you can name the robot.
Wi-Fi names cannot include special characters.
If the device fails to connect to the network:
- Verify the accuracy of Wi-Fi name or password, including case sensitivity.
- Check your router's internet connection and resolve any issues.
- If your router has whitelist mode enabled, disable it temporarily.
- If your router uses WPA3 encryption, switch to WPA2.
Upon successful connection, you can customize the robot's name, select cleaning modes, adjust settings, edit maps, and schedule cleanings.
Place the Robot
Attach the robot to the by aligning the charging contact pins.
Once the robot successfully docks with the station, it will automatically start charging and sound a voice prompt. Meanwhile, the LCD screen on the station will play a charging animation.

Using Your S1 Pro
Important Tips Before Use
- Ensure all interior doors are open and remove any power cords and small objects from the floor that could entangle the robot.
![]()
- Fold tasseled edges of rugs underneath to prevent tangling the robot. Avoid cleaning high-pile rugs or rugs thicker than 0.79 in/20 mm as they may cause the robot to malfunction.
![]()
- It is strongly recommended to place physical barriers or set a "No-Go Zone"/"Virtual Wall" via the eufy Clean app in front of fireplaces and certain areas (i.e. air vents) that may cause damage to the robot if entered.
![]()
- Do not use the robot to clean if there are burning materials such as cigarette butts, standing water or sticky substances, hard or sharp objects on the ground, so as to prevent safety incidents or damage to the robot.
![]()
- The robot may climb on top of objects less than 0.79 in/20 mm in height. Remove these objects if possible.
![]()
- Anti-drop sensors will prevent the robot from tumbling down stairs and steep drops in most cases, but sensors are less effective if dirty or used on carpeted/reflective/dark floors. Place physical barriers or set a "No-Go Zone"/"Virtual Wall" to block off areas where the robot may fall.
![]()


Mapping
Before using your robot for the first time, create a map of the new environment to start cleaning tasks. To start mapping, tap the  on the LCD screen of the station or tap "Mapping" in the app.

Ensure all interior doors are open and remove obstacles like power cords on the ground for a complete map.
Start Cleaning
Select Cleaning Mode
The robot offers two modes: Vacuum Only and Mop. In Mop mode, it simultaneously vacuums and mops, automatically wetting and scrubbing the rolling mop and collecting dirty water. When carpets are detected, it automatically lifts the mop to prevent wetting them. You can switch cleaning modes by tapping the  on the LCD screen or by tapping "Mode" in the app.

To improve mopping performance, it's recommended to use the Vacuum Only mode 1-3 times before switching to Mop mode in a new environment.
Start a Cleaning Task
You can start a cleaning task by:
- Tapping the
![]() on the LCD screen of the base station.
on the LCD screen of the base station. - Press the
![]() on the robot.
on the robot. - Tap
![]() in the app's main interface.
in the app's main interface.
The robot will start cleaning based on the selected mode and settings.
Wash the Mop
- Mop pre-moistening: The robot will dampen a dry mop at the base station before mopping begins.
- Mid-cleaning rinse: Activate this feature in the app's Base Station Settings to have the robot periodically rinse the mop at the station during cleaning.
- Deep cleaning: The robot will automatically determine if the mop requires washing and drying after the cleaning task.
- Manual trigger: Touch and hold the
![]() for 3 seconds or tap
for 3 seconds or tap ![]() in the app to manually start a mop wash. If the robot is outside of the base station at that time, it will trigger a mid-cleaning rinse; if the robot is docked to the base station, it will trigger a wash and dry cycle.
in the app to manually start a mop wash. If the robot is outside of the base station at that time, it will trigger a mid-cleaning rinse; if the robot is docked to the base station, it will trigger a wash and dry cycle.
 in the app to manually start a mop wash. If the robot is outside of the base station at that time, it will trigger a mid-cleaning rinse; if the robot is docked to the base station, it will trigger a wash and dry cycle.
 For optimal mop cleanliness and odor prevention, set the rinse frequency to once every 35 to 65 square meters.
End a Cleaning Task
After completing a task or when the battery falls below 10%, the robot will automatically return to the base station for dust collection, mop washing, drying, and recharging. You can also manually end the task by:
- Tapping the
![]() on the LCD screen of the station.
on the LCD screen of the station. - Pressing the
![]() on the robot once, and pressing it again.
on the robot once, and pressing it again. - Tapping
![]() in the app.
in the app.
 in the app.
Enable Dust Collection
The robot will automatically initiate dust collection at the base station after cleaning more than 45 square meters.
- Mid-cleaning dust collection: If "Auto Empty by Cleaning Area" is selected in the "Base Station Settings" of the app, the robot will periodically return to the station for dust collection at the pre-set frequency during the cleaning process, and then continue cleaning after dust collection is complete.
![]()
- Manual trigger: Tap
![]() in the bottom right corner of the app home screen to manually enable dust collection.
in the bottom right corner of the app home screen to manually enable dust collection.

- For homes with multiple pets, it's recommended to adjust the dust collection frequency to once every 35 to 65 square meters based on your needs.
- If the dust collection feature has not been used for a long time, please manually clean the dust bin to avoid blockage, or the cleaning performance will be affected.
- Avoid triggering dust collection repeatedly in a short time.
- Certain noises will arise during dust collection. If the noise disturbs you, enable "Do Not Disturb" in the app.
Dry the Mop
After mopping, the robot will automatically dry the mop.
- Drying mode: You can switch the drying mode through the "Base Station Settings" in the app. Standard Dry is suitable for most households, while Quick Dry is suitable for areas with a dry climate.
![]()
- Manual trigger: Tap
![]() in the bottom right corner of the app home screen to manually trigger a drying cycle.
in the bottom right corner of the app home screen to manually trigger a drying cycle.

- Please be cautious to select the quick drying mode, as it may not completely dry the mop, thereby leading to mold and odor.
- During the drying cycle, you can easily begin a new cleaning task by tapping
![]() in the app, which will automatically end the drying process and switch to cleaning mode.
in the app, which will automatically end the drying process and switch to cleaning mode.
 in the app, which will automatically end the drying process and switch to cleaning mode.
More Features
Multi-Floor Cleaning
To clean across multiple floors, move the robot to the desired floor, then navigate to "Settings" > "Manage Map" > "Create New Map" to create a map for the new floor in the app. During the drying cycle, you can easily begin a new cleaning task by pressing the start/pause button on the robot or base station, or tapping ![]() in the app.
in the app.

To mop across floors, ensure the robot completes a mop washing task before moving it to a different floor for cleaning.
Smart Speaker Connection
S1 Pro can connect to your home's smart speaker for voice-controlled cleaning tasks. It currently supports Amazon Alexa and Google Home Speaker.
Firmware Update
Whenever a new firmware is available, you can update in the following ways:
- Tap the update icon in the app's device interface.
- Tap the update notification on the app's home screen.
- Go to "Firmware Update" in Settings.
After enabling firmware update, the robot will automatically download and install the new firmware. The update takes approximately 10-20 minutes; ensure the robot and the station are powered on and connected to network.
- It's normal for the robot and the station to restart automatically during the firmware update.
- Ensure stable network connection of the robot during firmware update. If the update fails, restart the robot and try again.
Ozone Water Preparation
The base station automatically prepares ozone water with disinfectant properties, which creates dense bubbles and a slight odor.
- You can choose to disable ozone water preparation in the "Base Station Settings" in the app.
- For optimal electrolysis, use tap water instead of distilled or mineral water.
Automatic Water Drainage
To empty the water for transport or storage:
- Place the robot into the station, remove the clean water tank, then tap and hold the start and
![]() on the LCD screen simultaneously for 3 seconds to drain the water.
on the LCD screen simultaneously for 3 seconds to drain the water. - Empty any remaining water from the robot's dirty water reservoir and the dirty water tank of the station.
- Remove the floor cleaner and mop, then store them properly.
Cleaning and Maintenance
Maintenance Frequency
To ensure optimal performance of S1 Pro, we recommend regular maintenance of its components.
| Module | Components | Cleaning Frequency | Replacement Frequency |
| Robot | Dirty Water Reservoir | Clean it when prompted by the App, about every 1-2 weeks | - |
| Rolling Mop | Every 60 hours | Every 6 months (or when visibly worn) | |
| High-Performance Filter | Every 60 hours | Every 3 months | |
| Dust Bin | Every 60 hours | - | |
| Side Brush | Every 180 hours | - | |
| Rolling Brush | Every 180 hours | Every 6 months (or when visbly worn) | |
| Sensors | Every 360 hours | - | |
| Dirty Water Reservoir Filter | Every 360 hours | - | |
| Swivel Wheel | Clean it based on actual conditions | - | |
| Base Station | Floor Cleaner | - | Every month |
| Dust Bag | - | Replace as needed | |
| Bottom | Every month | - | |
| Filter Tray | Every 30 hours | - | |
| Clean Water Tank | Clean it based on actual conditions | - | |
| Dirty Water Tank | Clean it based on actual conditions | - |
Clean the Parts
Clean the Dirty Water Reservoir
- Remove the robot's magnetic cover. Press the release buttons on both sides of the dirty water reservoir, and pull it out.
![]()
- Take out the water sink and sink filter.
![]()
- Air dry the water sink and sink filter.
![]()
- Use the cleaning tool to scrub the water sink and sink filter clean with running water.
![]()
- After air drying, reassemble the water sink and sink filter into the dirty water reservoir.
![]()
- Reinstall the dirty water reservoir into the robot properlly, and place the magnetic cover back.
![]()


- Clean the water sink and sink filter of the dirty water reservoir regularly.
- If you find there is dirty water leakage or decrease in cleaning performance, please check for blockages in the water sink and sink filter, and clean the dirty water reservoir as needed.
Clean the Dust Bin and Filters
Dust Bin
- Remove the robot's magnetic cover and lift the handle to take out the dust bin.
![]()
- Press the release latch to open the back cover.
![]()
- Empty the dust bin.
![]()


Filters
- Press the release latch to open the top cover of the dust bin.
![]()
- Take out the high-performance filter.
![]()
- Use the provided cleaning tool to clean the high-performance filter and the pre-filter. If the high-performance filter cannot be cleaned thoroughly, replace it with a new one.
![]()
![information]() Make sure to clean both sides of the pre-filter.
Make sure to clean both sides of the pre-filter. - After cleaning, air dry the high-performance filter and dust bin completely. Once they are dry, reinstall the filter into the dust bin.
![]()
- Once they are dry, reinstall the filter into the dust bin.
![]()
- Close the dust bin's top and back covers, and reinstall the dust bin into the robot.
![]()
![information]() Regularly check the high-performance filter for blockages and clean if necessary.
Regularly check the high-performance filter for blockages and clean if necessary.


Replace the Rolling Mop
- With the robot powered on, remove the magnetic cover and take out the dirty water reservoir, then the rolling mop will automatically descend.
![]()
- Flip the robot over, press the rolling mop release button.
![]()
- Remove the rolling mop.
![]()
- Lift the roller drive motor and insert the new roller into the motor, adjust the motor until the rolling mop is properly in place. Press down on the roller until you hear a click.
![]()


If you find there is dirty water leakage or decrease in cleaning performance, please check if the rolling mop is dirty and replace it when necessary.
Clean the Swivel Wheel
- Use the provided cleaning tool to pry up the swivel wheel.
![]()
- Clean any hair and debris from its surface and cavity.
![]()
- Insert the wheel into the installation slot, and press down on the wheel until you hear a click.
![]()


Clean the Side Brushes
- Grap the side brushes with both hands and pull them out. If the brushes are entangled with hair, clean them manually.
![]()
- Reinstall the red side brush into the red slot, press it down until you hear a click. Reinstall the grey side brush in the same manner.
![]()


Clean the Rolling Brush
- Press the brush guard release button.
![]()
- Remove the brush guard and take out the rolling brush.
![]()
- Remove the hair entangled on the rolling brush.
![]()
- Pull out the red axle of the rolling brush and use the provided cleaning tool to remove the hair from both ends of the rolling brush.
![]()
- After cleaning, reinsert the red axle.
![]()
- Reinstall the rolling brush and brush guard.
![]()


Ensure the side brush is not trapped under the brush guard during reinstallation.
Clean the Sensors and Charging Contact Pins
Wipe the 3D MATRIX EYE™ Sensor, wall sensors, charging contact pins, cliff sensors, and carpet detection sensor with a damp cloth.

Clean these sensors regularly to prevent slipping, charging issues, or abnormal carpet detection.
Clean the Wheels
Wipe the dirt off the robot's wheels with a damp cloth.

If the robot experiences slipping or reduced obstacle-crossing ability, please clean the wheels or check if they are stuck on obstacles.
Clean the Dirty Water Tank
- Remove the dirty water tank.
![]()
- Open and empty the dirty water tank.
![]()
- Rinse the dirty water tank thoroughly with water.
![]()
- Reinstall the dirty water tank into the station. An animation will display on the LCD screen when the dirty water tank is properly installed.
![]()


Clean the Filter Tray
- Take out the filter tray from the base station.
![]()
- Use the provided cleaning tool to clean the trash from the tray.
![]()
- Air dry the filter tray.
![]()
- After drying, place it back into the station.
![]()


Replace the Dust Bag
- Remove the clean water tank, open the dust cover, and pull out the dust bag.
![]()
- Discard the used dust bag.
![]()
- Install a new dust bag and make sure it is properly in place, then close the dust cover.
![]()


FAQs
| Module | Problems | Possible Causes | Solutions |
| App | eufy Clean app indicates that the robot is offline. |
|
|
| Map is lost in the eufy Clean app. |
|
| |
| Firmware update failed. |
|
| |
| Robot unable to connect to network. |
|
| |
| Robot | Robot is stuck and cannot move. |
|
|
| Robot makes abnormal noise during operation. |
|
| |
| Robot has no suction or reduced suction. |
|
| |
| Robot reports "Abnormal clean water level". |
|
| |
| Robot cannot be charged. |
|
| |
| Robot's cleaning path is disorganized, and the cleaning efficiency is low, etc. |
|
| |
| Robot keeps moving back and forth in one place. |
|
| |
| Robot leaks clean water during operation. |
|
| |
| Robot leaks dirty water during operation. |
|
| |
| Robot drops debris during operation. |
|
| |
| Robot unable to move, spining in one place. |
|
| |
| Robot does not avoid low obstacles. |
|
| |
| Robot falls from steps or drops over the height of over 5cm. |
|
| |
| Unpleasant odor during robot's operation. |
|
| |
| Uniclean™ Station | Dust bag leakage from the station. |
|
|
| Robot does not enable auto dust collection when it has returned to the base station. |
|
| |
| Robot reports "Dirty water tank is full". |
|
|
If the problem persists after you've tried the recommended solutions, please contact our customer service staff.
Specs
 | Dimensions | 347*325*96mm |
| Weight | 4.78kg | |
| Battery | 4600mAh, 21.6v | |
| Input Power | 25V ⎓ 1.5A | |
| Rated Power Consumption | Max 61.7W | |
| Cleaning Time | Vacuum-Only Mode: Up to 277 minutes Vacuum and Mop Mode: Up to 184 minutes | |
| Charging Time | 3.6h (15%-100%) | |
| Charging Temperature | 5-40℃ | |
 | Dimensions | 467*383*670mm |
| Weight | 11.6kg | |
| Rated Input | 100 ~ 240V | |
| Rated Output | 25V ⎓ 1.5A | |
| Clean Water Tank Capacity | 3.0L | |
| Dirty Water Tank Capacity | 2.0L | |
| Dust Bag Capacity | 2.5L |
Customer Service
Contact Us:
support@eufy.com
www.eufy.com
(US/CA) +1 (800)994 3056
(UK) +44 (0) 1604 936 200
(DE) +49 (0) 69 9579 7960
(JP) +81 03 4455 7823
(CN) +86 400 0550 036
For video tutorials, FAQs, warranty policies, and more information, please visit: https://support.eufy.com/
Documents / Resources
References
![dl-eufy.eufylife.com]() 下载 App
下载 App![www.apple.com]() App Store - Apple
App Store - Apple![play.google.com]() Google Play
Google Play![www.eufy.com]() eufy - Built with Care | Home Security System & Robovacs - eufy US
eufy - Built with Care | Home Security System & Robovacs - eufy US![support.eufy.com]() eufy Support
eufy Support
Download manual
Here you can download full pdf version of manual, it may contain additional safety instructions, warranty information, FCC rules, etc.
Advertisement


Need help?
Do you have a question about the S1 Pro and is the answer not in the manual?
Questions and answers