EUFY RoboVac - Vacuum Cleaning Robot Manual
- Owner's manual (58 pages) ,
- Quick start manual (11 pages) ,
- Quick start manual (2 pages)
Advertisement
- 1 About Your Product
- 2 Using Your Device
- 3 Cleaning and Maintenance
-
4
Troubleshooting
- 4.1 The unit cannot be activated
- 4.2 The remote control does not work
- 4.3 The unit stops working suddenly
- 4.4 You cannot schedule cleanings
- 4.5 Suction power is weak
- 4.6 The unit cannot be charged
- 4.7 Device cannot return to the Charging Base
- 4.8 The rolling brush does not rotate
- 4.9 Device movements or travel path are abnormal
- 5 Error Tones
- 6 Specifications
- 7 Important Safety Instructions
- 8 Customer Service
- 9 Documents / Resources
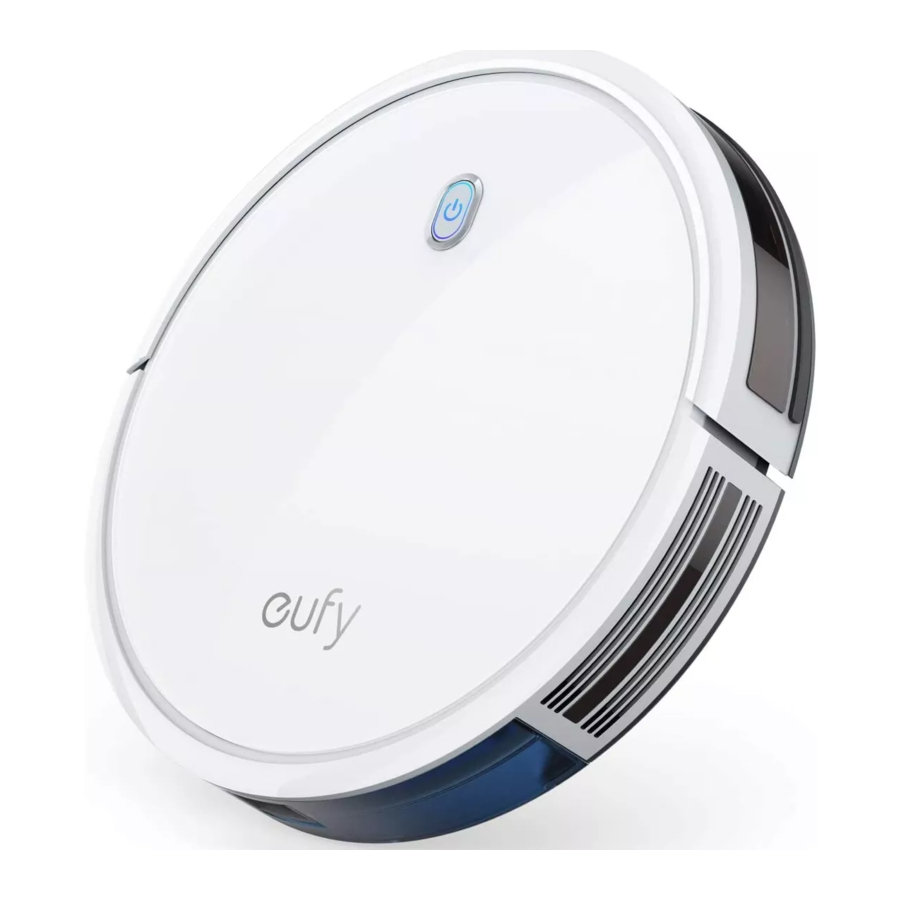
About Your Product
What's in the Box

Device Anatomy
Top & Side

Bottom

Dust Collector

Suction Inlet

Charging Base

Remote Control

- Start Auto cleaning
- Start Auto cleaning
- Stop cleaning
- Start Spot cleaning
- Start Edge cleaning
- Adjust time
- Adjust suction power level in Auto/Single Room Cleaning mode
- Control cleaning direction manually
Adjust the hour and minute - Start Single Room cleaning
- Return RoboVac to Charging Base
- Schedule Auto cleaning start time
Remote Control Display

- Returning to Charging Base
- Auto cleaning mode selected
- Spot cleaning mode selected
- Edge cleaning mode selected
- Single Room cleaning mode selected
- Clock
- Standard suction power enabled
- BoostIQ dynamic suction power enabled
- Max suction power enabled
- Scheduled cleaning time
 Install 2 AAA batteries before using the remote control for the first time. Make sure the positive and negative ends are facing the correct polarity direction as marked in the battery compartment.
LED Indication
You can see the status of RoboVac from the LED indicator.
 (Status Light) (Status Light) | Status |
| Breathing orange | Charging |
| Solid blue | Standby / Cleaning / Fully charged |
| Solid orange | Low power and returning to Charging Base |
| Off |
|
| Flashing / Solid red + Beeping | RoboVac has an error. Refer to the "Troubleshooting>Error Tone" section in this manual for solutions. |
Using Your Device
Important Tips Before Use
- Remove power cords and small objects from the floor that may entangle RoboVac. Use the provided cable ties to organize your wires and power cords.
![]()
- Fold tasseled edges of area rugs underneath to prevent tangling RoboVac. Avoid cleaning very dark-colored high-pile rugs or rugs thicker than 1.02 in/26 mm as they may cause RoboVac to malfunction.
![]()
- We strongly recommend placing physical barriers in front of fireplaces and certain areas (i.e. air vents) that may cause damage to RoboVac if entered.
![]()
- Keep RoboVac away from wet areas during cleaning.
![]()
- RoboVac may climb on top of objects less than 0.63 in/16 mm in height. Remove these objects if possible.
![]()
- Anti-drop sensors prevent RoboVac from tumbling down stairs and steep drops. They may work less effectively if dirty or used on reflective/very dark-colored floors. It is recommended to place physical barriers to block off areas where RoboVac may fall, such as stairs covered by carpets or the rounded edges of wood floors.
![]()


Preparation
- Install the side brushes before use.
![]()
- Turn on the main power switch on the bottom of RoboVac.


Remove the sticker next to the power switch, and the foam blocks beside the bumper before use.
- Place the Charging Base on a hard, level surface and against a wall.

- Remove objects within 3 ft/1 m of the left and right side and within 6 ft/2 m of the front of the Charging Base. If you cannot remove the objects, check whether RoboVac can return to the Charging Base normally; if not, contact eufy customer service for help.

- Connect the round connector of the adapter into the power socket on the Charging Base and the other end into a wall outlet.

- When the Charging Base connects to AC power, the LED indicator on the Charging Base is SOLID WHITE.


- Install the Charging Base in a location that RoboVac can easily access. It is recommended to place the Charging Base against a wall, and on a hard-level surface rather than on rugs or carpets.
- Always keep the Charging Base plugged in, otherwise RoboVac will not automatically return to it.
Charge Your Unit
- RoboVac has a pre-installed rechargeable battery that has to be fully charged before use.
- RoboVac returns to the Charging Base at the end of a cleaning cycle or when its battery is running low.

Method 1: Attach RoboVac to the Charging Base by aligning its charging pins with the charging pins on the base.

Method 2: Press ![]() on the remote control to return RoboVac to the Charging Base.
on the remote control to return RoboVac to the Charging Base.
Turn off the main power switch if RoboVac will not be used for a long period of time. To preserve the battery's lifespan, recharge at least once every 6 months.
Start/Stop Cleaning
Make sure the main power switch on the bottom of RoboVac is turned on before use.
- Press
![]() on RoboVac or
on RoboVac or ![]() on the remote control to start cleaning in Auto Mode.
on the remote control to start cleaning in Auto Mode.

- Press
![]() on RoboVac or
on RoboVac or ![]() on the remote control to stop cleaning.
on the remote control to stop cleaning.

 on the remote control to start cleaning in Auto Mode.
 on the remote control to stop cleaning.
Select a Cleaning Mode
- Auto cleaning
RoboVac optimizes its cleaning path by selecting different cleaning modes automatically until cleaning is complete. This is the most commonly used cleaning mode.
Press![]() on RoboVac or
on RoboVac or ![]() on the remote control to start cleaning in Auto Mode.
on the remote control to start cleaning in Auto Mode.

 on the remote control to start cleaning in Auto Mode.
- RoboVac will return to the Charging Base automatically when the battery level becomes low or when RoboVac finishes cleaning.
- By default, RoboVac starts in Auto cleaning mode when it is turned on.
BoostIQ Feature
When the BoostIQ feature is enabled, RoboVac will automatically increase the suction power if it detects stronger power is needed to ensure the best clean. BoostIQ is ideal for cleaning thicker carpets and hard-to-sweep messes, which will reduce the total cleaning time, but increase the noise level. If the vacuuming noise caused by BoostIQ disturbs you, you can disable this feature. This feature only works in Auto and Single Room cleaning modes.
In Auto or Single Room cleaning mode, press ![]() on the remote control repeatedly to adjust the suction power level.
on the remote control repeatedly to adjust the suction power level.
- The corresponding icon is displayed on the remote control.
| Icon | Suction Power Level |
 Standard Standard | Standard power |
 BoostIQ BoostIQ | Automatically switches between Standard and Enhanced power (default) |
 Max Max | Maximum power |
When RoboVac starts cleaning in Auto or Single Room mode the next time, it will clean according to the suction power level you previously selected.
- Spot cleaning
RoboVac intensively cleans a specific area in a spiral, useful if there is a concentrated area of dust or debris. In Spot mode, RoboVac will stop cleaning after 2 minutes.
Press![]() on the remote control to start cleaning in Spot mode.
on the remote control to start cleaning in Spot mode.

- Edge cleaning
RoboVac reduces its speed when it detects a wall and then follows the wall to ensure the edge is cleaned thoroughly. In Edge mode, RoboVac will clean for 20 minutes and return to the Charging Base.
Press![]() on the remote control to start cleaning in Edge mode.
on the remote control to start cleaning in Edge mode.

- Single Room cleaning
RoboVac intensively cleans one single room and stops after 30 minutes. Select this mode only when one specific room needs to be cleaned. Make sure to confine RoboVac to the room by closing the door.
Press![]() on the remote control to start cleaning in Single Room Mode.
on the remote control to start cleaning in Single Room Mode.

- Manual cleaning
You can direct RoboVac to clean a particular area by using the directional buttons on the remote control.


 on the remote control to start cleaning in Single Room Mode.

Set Time and Scheduled Cleaning
Set Time
Make sure the time is set correctly to your local time before setting a scheduled cleaning.

- Make sure the main power switch on the bottom of RoboVac is turned on.
- Press
![]() on the remote control. The time will blink on the display.
on the remote control. The time will blink on the display. - Press
![]() to set the "hour" and "minute".
to set the "hour" and "minute".
Note: Make sure AM/PM is set correctly. - Press
![]() or
or ![]() to save the setting. RoboVac will BEEP ONCE to indicate the time has been set.
to save the setting. RoboVac will BEEP ONCE to indicate the time has been set.
 on the remote control. The time will blink on the display.
 to set the "hour" and "minute".
 to save the setting. RoboVac will BEEP ONCE to indicate the time has been set.
 To ensure the time is set successfully, make sure RoboVac is turned on. You will hear a beep when the time has been set.
Set a Scheduled Cleaning
You can schedule RoboVac to start cleaning at a specified time.
Note: Before setting a scheduled cleaning, make sure the time has been set correctly to your local time; refer to the previous section "Set Time" for how to set the time.

- Make sure the main power switch on the bottom of RoboVac is turned on.
- Press
![]() on the remote control.
on the remote control. ![]() will blink on the display.
will blink on the display. - Press
![]() to set the "hour" and "minute".
to set the "hour" and "minute".
Note: Make sure AM/PM is set correctly. - Press
![]() or
or ![]() to save the setting. RoboVac will BEEP ONCE to indicate the schedule has been set.
to save the setting. RoboVac will BEEP ONCE to indicate the schedule has been set. - To cancel a previously scheduled cleaning, press and hold
![]() for 3 seconds until RoboVac beeps twice and
for 3 seconds until RoboVac beeps twice and ![]() disappears.
disappears.
 on the remote control.
  to set the "hour" and "minute".
 to save the setting. RoboVac will BEEP ONCE to indicate the schedule has been set.
 To ensure the schedule is set successfully, make sure RoboVac is turned on. You will hear a beep when the schedule has been set.
Cleaning and Maintenance
For optimal performance, follow the instructions below to clean and maintain RoboVac regularly. The cleaning/replacement frequency will depend on your usage habits of RoboVac.
| Recommended cleaning/replacement frequency: | ||
| RoboVac Part | Cleaning Frequency | Replacement Frequency |
| Dust Collector | After each use | - |
| Filters | Once every week | Every 2 months |
| Rolling Brush | Once every week | Every 6-12 months |
| Side Brushes | Once every month | Every 3-6 months (or when visibly worn) |
| Brush Guard | Once every month | Every 3-6 months (or when the silicone rubber strip on the brush guard becomes visibly worn) |
| Sensors | Once every month | - |
| Charging Pins | Once every month | - |
| Swivel Wheel | Once every month | - |
Clean the Dust Collector and Filters
- Press the dust collector release button to pull the dust collector out.
![]()
- Open and empty the dust collector.
![]()
- Remove the pre-filter by pulling the hooks as shown. Be careful not to pull the hook with too much force as it may damage the pre-filter.

- Carefully remove the foam filter and high-performance filter.

- Clean the dust collector and filters with a vacuum cleaner or a cleaning brush.

- Put the filters and pre-filter back together in the dust collector.

- Push the dust collector back into the main unit.
![]()


- You can wash the dust collector, pre-filter and foam filter with water. Be sure to wash them with care and air-dry them thoroughly before reassembling.
- Do not wash the high-performance filter with water, as it may damage the filter and reduce the suction power.
Clean the Rolling Brush
- Pull on the release tabs to unlock the brush guard as shown.
![]()
- Lift the rolling brush to remove.
![]()
- Clean the rolling brush with the provided cleaning tool or a vacuum cleaner.

- Reinstall the rolling brush by inserting the fixed protruding end first and then clicking into place.
![]()
- Press down to snap the brush guard into place.
![]()


Clean the Side Brushes
Foreign substances, such as hair, can easily get tangled in the side brushes, and dirt may adhere to them. Be sure to clean them regularly.
- Remove the side brushes.
- Carefully unwind and pull off any hair or string that is wrapped between the main unit and the side brushes.
- Use a cloth dampened with warm water to remove dust from the brushes or to gently reshape them.


Only use the side brushes when they are completely dry.
Replace the Side Brushes

The side brushes may become bent or damaged after being used for a period of time. Follow the instructions above to replace them.
Pull off the old side brushes and snap the new ones into place until you hear a click.
Clean the Bumper/Sensors and Charging Pins
To maintain the best performance, clean the bumper, sensors and charging pins regularly.
- Dust off the bumper, sensors and charging contact pins using a cloth or cleaning brush.


Clean the Swivel Wheel
Hair or dust particles can easily get entangled in the swivel wheel. Be sure to clean the swivel wheel periodically and as needed.

- Pull out the swivel wheel.
![]()
- Clean any hair or debris wrapped around the wheel or entangled inside the wheel cavity.
- Reinstall the wheel and push in until it clicks into place.

- You can clean the swivel wheel with water.
- Use the swivel wheel only when it is completely dry.
Troubleshooting
Frequently asked questions
The solutions below are for general questions. If your problem persists, visit www.eufylife.com or contact support@eufylife.com for help.
| Problems | Solutions |
The unit cannot be activated |
|
The remote control does not work |
|
The unit stops working suddenly |
|
You cannot schedule cleanings |
|
Suction power is weak |
|
The unit cannot be charged |
|
Device cannot return to the Charging Base |
|
The rolling brush does not rotate |
|
Device movements or travel path are abnormal |
|
Error Tones
When RoboVac is in trouble, it will emit a series of short or long beeps and the red indicator on RoboVac will be solid or flashing.
| Flashing red indicator light | ||
| Error Tone | Cause | Solution |
One beep | RoboVac is stuck and one of the wheels is not making contact with the floor (hanging in mid-air). | Restart cleaning in a new location. |
Two beeps | RoboVac's bumper is stuck. | Tap RoboVac's bumper several times to dislodge any debris that may be trapped underneath. |
Three beeps | RoboVac can get stuck in the following scenarios:
|
|
Four beeps | RoboVac's power level is too low. | Manually charge RoboVac for at least 5 hours. |
| Solid red indicator light | ||
| Error Tone | Cause | Solution |
One beep | RoboVac's left/right wheel is stuck. | Turn off RoboVac and remove any hair or debris from the left/right wheel. |
Two beeps | RoboVac's side brush is stuck. | Turn off RoboVac and remove any hair or debris from the side brush. |
Three beeps | RoboVac's suction fan is stuck. |
|
Four beeps | RoboVac's rolling brush is stuck. | Turn off RoboVac and remove any hair or debris from the rolling brush. |
Specifications
 | Input | 19 V  0.6 A 0.6 A | ||
| Battery Voltage | DC 14.4 V | |||
| Power Consumption | 25 W | |||
| Battery Type | DC 14.4 V Li-ion 2600 mAh | |||
| Dust Collector Capacity | 0.6 L | |||
| Cleaning Time | Max. 100 mins | |||
| Charging Time | 300 - 360 mins | |||
| Charging Temperature | 5°C - 40°C | |||
| Storage Temperature | -20°C - 60°C | |||
 | Input | 19 V  | 0.6 A | |
| Output | 19 V | 0.6 A | ||
Important Safety Instructions
To reduce the risk of injury or damage, read these safety instructions carefully and keep them at hand when setting up, using, and maintaining this device.
WARNING SYMBOLS USED
 This is the safety alert symbol. This symbol alerts you to potential hazards that could result in property damage and/or serious bodily harm or death.


To reduce the risk of fire or injury:
- For household use only.
- Use only as described in this manual. Only use attachments recommended by the manufacturer.
- Do not unplug the device by pulling on cord. To unplug, grasp the plug, not the cord.
- Do not handle the plug or the device with wet hands.
- Keep hair, loose clothing, fingers, and all parts of your body away from open and moving parts.
- Use extra care when cleaning on stairs.
- Do not use to pick up flammable or combustible liquids, such as gasoline, or use in areas where they may be present.
- Do not use the device on wet surfaces.
- Do not use without the dust collector and/or filters in place.
- Prevent unintentional starting by ensuring the switch is in the offposition before picking up or carrying the device.
![]()
Under extreme conditions, liquid may eject from the battery; if this occurs, avoid all contact. If contact accidentally occurs, thoroughly wash with water and soap. If the liquid makes contact with your eyes, seek medical help immediately. Liquid from the battery may cause irritation or burns.- Do not expose the device to fire or excessive temperatures. Exposure to fire or temperatures above 130°C / 265°F may cause explosion.
![burn hazard]() Follow the charging instructions in this manual and do not charge the battery pack or appliance outside of the temperature range specified. Charging improperly or at temperatures outside of the specified range may damage the battery and increase the risk of fire.
Follow the charging instructions in this manual and do not charge the battery pack or appliance outside of the temperature range specified. Charging improperly or at temperatures outside of the specified range may damage the battery and increase the risk of fire.- Have servicing performed by a qualified repair person using only identical replacement parts. This will ensure that the safety of the product is maintained.
- Do not modify or attempt to repair the device except as indicated in the instructions for use and care.
- The plug must be removed from the socket-outlet before cleaning or maintaining the device.
- The device contains a battery that is only replaceable by a skilled professional.
- The device must be disconnected from the supply mains when removing the battery.
![burn hazard]() Do not use a battery pack or appliance that is damaged or modified. Damaged or modified batteries may exhibit unpredictable behavior resulting in fire, explosion or risk of injury.
Do not use a battery pack or appliance that is damaged or modified. Damaged or modified batteries may exhibit unpredictable behavior resulting in fire, explosion or risk of injury.- The device can be used by children aged from 8 years and above and persons with reduced physical, sensory or mental capabilities or lack of experience and knowledge if they have been given supervision or instruction concerning use of the device in a safe way and understand the hazards involved.
- Children should be supervised to ensure they do not play with the device.
- Cleaning and maintenance shall not be performed by children without adult supervision.
- For the purposes of recharging the battery, only use the detachable power supply unit (US: GSCU0600S019V12E EU: GSCV0600S019V12E UK: GSCB0600S019V12E AU: GSCS0600S019V12E) provided with the device.
- The battery must be removed before the device is disposed of. To remove the battery from the device, unscrew the battery cover on the bottom using a screwdriver.
- The used battery should be placed in a sealed plastic bag and disposed of safely according to local environmental regulations.
- The external flexible cable or cord of the power supply unit cannot be replaced; if the cord is damaged, the power supply unit shall be disposed of.
- The device is for indoor use only.
- The device is not a toy. Do not sit or stand on the device. Small children and pets should be supervised when the device is operating.
- Clean with a cloth dampened with water only.
- Do not use the device to pick up anything that is burning or smoking.
- Do not use the device to clean up spills of bleach, paint, chemicals, or anything wet.
- Before using the device, pick up objects like clothing and loose paper. Lift up cords for blinds or curtains, and move power cords and fragile objects out of the way. If the device passes over a power cord and drags it, an object could be pulled off a table or shelf.
- If the room to be cleaned has a balcony, a physical barrier should be used to prevent access to the balcony and to ensure safe operation.
- Do not place anything on top of the device.
- Be aware that the device moves around on its own. Take care when walking in the area where the device is operating to avoid stepping on it.
- Do not operate the device in areas with exposed electrical outlets on the floor.
- Do not expose the electronics of the device, its battery, or the integrated Charging Base. There are no user-serviceable parts inside.
- Do not use the device on an unfinished, unsealed, waxed or rough floor. It may result in damage to the floor and the device. Use only on hard floor surfaces or low-pile carpet.
- The device has been designed to be used on floors without scratching them. We still recommend that you test the device on a small area of the room to be cleaned to ensure no scratches are made before cleaning the whole room.

SAVE THESE INSTRUCTIONS
Customer Service
For tutorial videos, FAQs, manuals, and more information, please visit: support.eufylife.com.
Contact Us
support@eufylife.com
www.eufylife.com
(US) +1 (800) 988 7973
Mon-Fri 6:15 - 17:00 (PT);
Sat-Sun 6:30-16:30 (PT)
(UK) +44 (0) 1604 936200
Mon-Sun 6:00 - 17:00;
Sat-Sun 6:00-14:00
(DE) +49 (0) 69 9579 7960
Mo-Fr 8:00 - 16:00
(日本) 03 4455 7823 月-金
9:00 - 17:00
For more support phone numbers, please visit:
support.eufylife.com/s/phonecontactus
Or scan the QR code below:


@EufyOfficial
Anker Innovations Limited
Room 1318-19, Hollywood Plaza, 610 Nathan Road, Mongkok, Kowloon, Hong Kong
For FAQs and more information, please visit:
www.eufylife.com
Documents / Resources
References
Download manual
Here you can download full pdf version of manual, it may contain additional safety instructions, warranty information, FCC rules, etc.
Advertisement


Need help?
Do you have a question about the RoboVac and is the answer not in the manual?
Questions and answers