Advertisement
What's in the Box & Parts Overview

Assembly Instructions
Before Assembly
- Please read this manual thoroughly and follow its instructions.
- Make sure all parts are intact.
- Do not turn on the e-bike until it is fully assembled.
- If you have any questions or can't find the information you need in the manual, please email us.
Install the front wheel
- Find the front wheel.
![]()
- Sit the front wheel on the front wheel. Make sure the brake rotor is located in the brake caliper.

- Install the safety and ordinary washers in sequence on the front wheel axle. Make sure the safety washers hook into the holes above the front fork dropouts. Then, tighten the nuts with wrenches.


 Check if the front wheel is securely installed on the front fork.
Install the front fender
- Remove the bolt pre-installed on the joint of the front fork legs and steerer tube.

- Find the front fender. Pass the bolt through the washer, fender bracket, and front fender mounting hole in sequence. Tighten the nut with an appropriate hex wrench and open-end wrench.

- Tighten the bolts holding the front fender stay with a hex wrench.


Install the pedals
- Differentiate the left pedal from the right pedal according to the "R" and "L" marks on the pedals.


- Hand tighten the pedals by turning the right pedal clockwise and the left pedal counterclockwise. Then use the supplied wrench to fully tighten the pedals.


Install the handlebar
- Use an appropriate wrench to loosen the bolts of the handlebar clamp and then remove clamp cover.

- Place the handlebar into the clamp.

- Replace the clamp cover and re-tighten the bolts.

- Adjust it so that the handlebar can be installed vertically to the front wheel later.


- Open the folding latch and fold down the handle post. Tighten the locking bolt with an appropriate wrench.

- Unfold the handle post upright and close the folding latch tightly.


Install the seat
- Open the quick-release lever of the seat clamp, insert the seat post into the seat tube, and adjust the seat to a desired height.

- Close the quick-release lever of the seat clamp to fasten the seat.


Charging Instructions
Charge the E-bike with the battery on the bike

- Open the rubber cover of the charging port on the side of the E-bike.
- Power off the E-bike.
- Insert the DC connector of the charger cable into the battery charging port.
![warning]() Note: Place the charger on a flat and safe surface during charging.
Note: Place the charger on a flat and safe surface during charging. - Plug the AC connector of the charger cable into an outlet. The LED indicator on the charger is red during charging and turns green after the battery is fully charged.
- After charging, unplug the AC connector before unplugging the DC connector from the charging port.
Battery Safety
- Please fully charge the battery before first use.
- Periodically visually inspect the battery connector and charging cable.
- Always keep the charging environment clean and dry.
- Do not charge the E-bike if there is liquid on the charging port.
- Avoid charging your E-bike in extremely hot or cold environments to take full advantage of the battery's maximum efficiency. Under no circumstances should you use the bike while it is charging or connected to the charger.
- The charging time is about 4-5 hours. Prolonged charging may reduce battery life and performance.
- Only use the charger that comes with the U1 E-bike. If the official charger is lost or damaged, please contact customer service for a replacement.
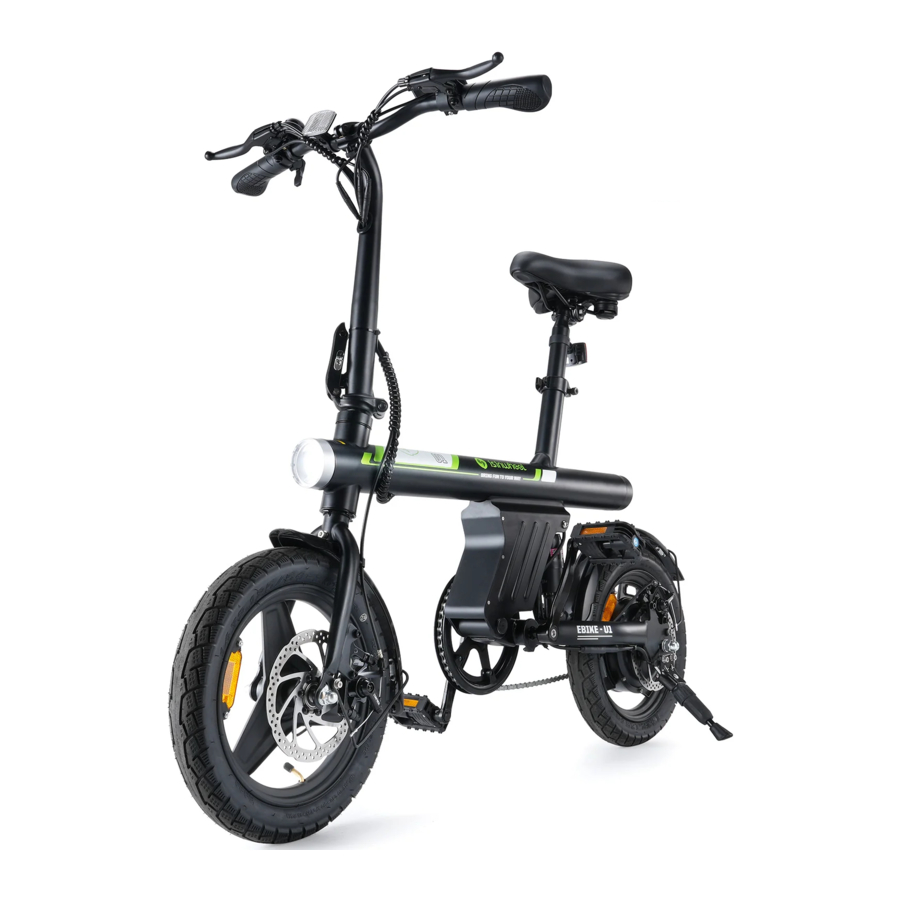
Product Overview (Bike & Computer)
")
| Speed Modes | Full Throttle | Pedal Assist |
| 0 |  | |
| 1-3 |  | |
| Display OFF | | |
Full throttle mode:
After powering on the E-bike, you can press the throttle to move forward and adjust the speed level from 1 to 3 by pressing the "+" and "-" buttons.
PAS mode:
After powering on the E-bike, you can adjust the PAS level from 1 to 3 by pressing the "+" and "-" buttons.
Normal bike mode:
After powering off the E-bike, you can ride it like a normal bike.
- Before riding, fully charge the battery.
- Press and hold the power button for 2 seconds to power on the E-bike.
- The maximum speed is 20 mph (32 km/h).
- Switch the speed level by pressing the "+" or "-" button.
- To stop the E-bike: release the throttle and squeeze the brake levers to decelerate the front and rear wheels until the bike stops.
Display and Buttons
Computer Display

Function Description
Functions
- On the screen
Speed, Battery Level, Error Code, Total Distance, and Trip Distance - Controls and settings
Power on/off, set wheel diameter, set auto sleep time, set backlight brightness, set power on method, set drive mode, set voltage level, set controller current limit - Communication protocol: UART
Displays all data for 1 second after startup.
What's on the screen

Settings
P01: Travel distance unit (0 means KM and 1 means MILE)
P02: Controller cruise control (0 means cruise control off and 1 means cruise control on)
P03: Backlight brightness (1 means the weakest and 3 means the brightest)
P04: Odometer resetting (00 means no need to reset, 01 means to reset)
Buttons
- In the power-off state, press and hold
![]() to power on the bike; after power-on, press
to power on the bike; after power-on, press ![]() to switch between ODO, TRIP, VOL, and TIME.
to switch between ODO, TRIP, VOL, and TIME. - In the power-on state, press
![]() and hold to power off the bike, press
and hold to power off the bike, press ![]() to increase the PAS level by 1 and
to increase the PAS level by 1 and ![]() to decrease the PAS level by 1.
to decrease the PAS level by 1. - Press and hold
![]() and
and ![]() to enter settings
to enter settings
In the status of a certain parameter, press![]() to switch parameters, press
to switch parameters, press ![]() to increase the value, press
to increase the value, press ![]() to decrease the value. After setting the value, press
to decrease the value. After setting the value, press ![]() to save the value and then switch to the next parameter; after setting the parameters, hold
to save the value and then switch to the next parameter; after setting the parameters, hold ![]() and
and ![]() to exit the settings interface or wait for 8 seconds and it will automatically exit and save the settings.
to exit the settings interface or wait for 8 seconds and it will automatically exit and save the settings.
 and hold to power off the bike, press
  to decrease the value. After setting the value, press
  to save the value and then switch to the next parameter; after setting the parameters, hold
  and
and  to exit the settings interface or wait for 8 seconds and it will automatically exit and save the settings.
Walk mode (walk assist)
Press and hold  to activate the walk mode. The bike will move forward at a constant speed of 3 mph and
 ![]() will appear on the display.
will appear on the display.
Release and the motor will stop output immediately and the bike will return to the mode before the walk mode.
Front light switch
Press and hold ![]() to turn on/off the front light.
to turn on/off the front light.
Attached Table 1: Fault code names and definitions
| Fault codes of YL-02 protocols | |||
| Name | Fault | Name | Fault |
| E001 | controller fault | E004 | throttle fault |
| E002 | communication fault | E005 | brake lever fault |
| E003 | Hall sensor fault | E006 | motor phase loss fault |
Battery Maintenance
A well-maintained battery performs well even after high mileage. Charge the battery after each ride to prevent the battery from draining from a full charge. Batteries perform best when used at room temperature (70°F [22°C]). However, Using it at temperatures below 32°F (0°C) will degrade performance. In general, at -4°F (-20°C), battery performance drops to half of that at 70°F (22°C). When the temperature rises, battery life will resume.
Refer to local laws and regulations regarding battery recycling and/or disposal.
Under normal circumstances, a fully charged battery can hold power for 90 days in standby mode. Remember to charge the battery after each use. Draining the battery may cause permanent damage to the battery. Electronics inside the battery record the charge and discharge of the battery. Damages due to over-discharge or over-discharge are not covered by the warranty.
 Notice
- Do not perform any maintenance while the E-bike is powered on or charged.
- Do not store or charge the battery within the temperature range of 20°C-25°C / 68°F-77°F. Do not pierce the battery.
- Do not attempt to disassemble the battery to avoid fire.
- When the ambient temperature exceeds the maximum operating temperature (see instruction manual), do not ride the electric bike.
- Temperature will limit maximum power/torque. Otherwise, personal injury or property damage may occur. Before cleaning, make sure the power is turned off and the charging cable is unplugged. Otherwise, you may damage electronic components. Proper cleaning of your E-bike can guarantee a longer lifespan and a smoother ride.
- Wipe the outer body of the E-bike with a soft and dry microfiber cloth.
- Check around the wheel to make sure there are no foreign objects. The design of this electric bike makes wheel maintenance easy.
- The E-Bike has IPX4 water resistance, which means it can withstand splashes. However, don't submerge the E-bike in water.
- Do not use alcohol, gasoline, acetone, or other corrosive/volatile solvents to clean the bike. These substances can damage the exterior and the internal structure of the bike.
- Do not allow water and liquids to enter the electric parts or battery of the E-bike.
Storage
The bike should be fully charged before storage to prevent the battery from being over-discharged after long-term storage.
If the electric bike is to be stored for more than a month, discharge and charge the battery at least once a month.
Notice
- Do not store the electric bike outdoors for extended periods of time. Exposure to sunlight and extreme temperatures (both hot and cold) accelerates the aging process of plastic parts and can reduce battery life.
- Store in a cool dry place.
- Do not store in dusty environments as damage may occur over time. Cover the bike to prevent dust from entering.
Specification
| Item | Meaning |
| Model Name | U1 |
| Net Weight | 52.2LBS / 23.7KG |
| Product Dimensions | 47.2*22.8*39.4 IN. / 120*58*100 CM |
| Max. Incline | 11° (Rider Weighs 220.4 LBS / 100 KG) |
| Max. Capacity | 264 LBS / 120 KG |
| Max. Speed | 20 MPH / 32 KM/H |
| Range | 18.6-24.9 Miles / 30-40 KM |
| Motor | 500W |
| Battery Voltage | 36V 7.8Ah |
| Charge Voltage | 100-240V/2A |
| Wheel Size | 14 IN. |
| Charge Time | 4-5 Hours |
| Water Resistance | IPX4 |
| Storage Temperature | 20°C~25°C / 68°F~77°F |
| Operating Temperature | -4°F~140°F /-20°C~60°C |
| Charging Temperature | 32°F~104°F / 0°C~40°C |
| Warranty | 1 Year Limited |
Contact Us
Contact us if you experience issues relating to riding, maintenance and safety, or errors / faults with your is in wheel U1 electric bike.
 @isinwheelOfficial
 isinwheel_official
 isinwheelOfficial
E-mail Service: support@isinwheel.com
US Based Support
+1 (888) 496 8123
Mon-Fri: 8AM-4PM (PDT)
For your safety
For safe riding, please read the following information carefully. Before riding, be sure to check that your brakes are working properly.
Before Your First Ride
- Check whether the quick-release screws and seat are firm, and whether the brakes are effective.
- Check seat, gears, and tire pressure. Proper tire inflation can reduce flat tires and improve performance, including distance traveled per inflation.
- Check the handlebar and screws at least weekly.
- Performing the above routine checks before and after each ride can help you keep your bike performing at peak performance and spot potential problems before they become a safety hazard.
Bike Mechanic Check Every Six Months
- Bikes require regular maintenance. Take your bike to your local bike shop twice a year for tuning. Critical components should be inspected frequently, repaired and adjusted by an experienced mechanic.
Notice
- Wear an approved helmet and other protective equipment to reduce any possible injury.
- Helmets can reduce serious head injuries by 85%.
- Elbow pads can reduce elbow injuries by 82%.
- Knee pads can reduce knee injuries by 32%.

- To avoid accidental movement while waiting at a traffic light, set the speed mode to zero, or apply brakes.
- When riding, make sure your feet are always on the pedals and your hands on the handlebars. It is dangerous to take your feet off the pedals in riding.
- Never ride the electric bike for dangerous actions. Failure to exercise good judgment or heed the above warning increases the risk of serious injury and, In rare cases, death.
- Make sure the battery is fully charged, especially for long trips.
- For your own safety and the safety of others, obey the speed limit, ride at a speed you are comfortable with, and be prepared to stop at any time.
- Keep a safe distance from other riders to avoid collisions.
- Be aware of your surroundings and avoid obstacles and unsafe surfaces.
- Ride in the open and flat. Try to avoid slopes or places with many pedestrians.
- Do not ride at high speeds, on uneven terrains, in bad weather or in other unsafe conditions.
- Never use the electric bike for anything that could cause personal injury or property damage.
- Do not attempt to carry passengers or heavy objects. This bike can only hold the weight of one person at a time. Do not exceed the weight limit.
- Ride E-bikes only where permitted. You must obey local laws and be courteous to pedestrians.
Documents / Resources
References
Download manual
Here you can download full pdf version of manual, it may contain additional safety instructions, warranty information, FCC rules, etc.
Advertisement


Need help?
Do you have a question about the U1 and is the answer not in the manual?
Questions and answers