Table of Contents
Advertisement
Quick Links
'
Owner
s Manual
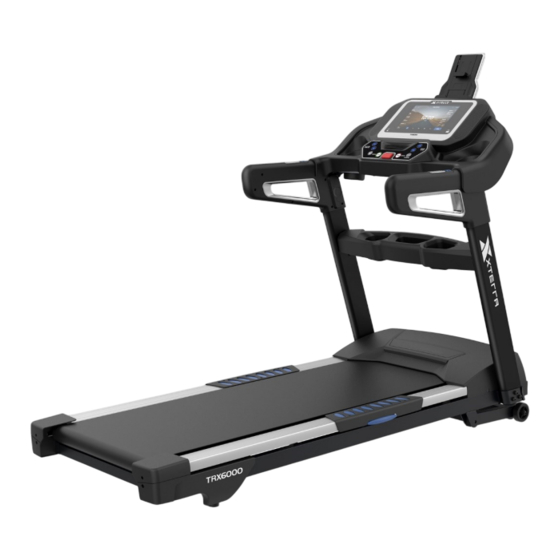
TRX6000 Treadmill
16004406000US
- Assembly
- Operation
bbb
- Adjustments
- Parts
- Warranty
CAUTION:
You must read and
understand this
owner's manual
before operating unit.
Keep this manual for
future reference.
Serial number
Write the serial
number in the space
above for reference.
Serial number can be
found at the front
bottom section of the
Treadmill.
PLEASE CAREFULLY READ THIS ENTIRE MANUAL BEFORE OPERATING
YOUR NEW TREADMILL!
Advertisement
Table of Contents

Related Manuals for Xterra TRX6000


Summary of Contents for Xterra TRX6000
- Page 1 ’ Owner s Manual TRX6000 Treadmill 16004406000US - Assembly - Operation - Adjustments - Parts - Warranty CAUTION: You must read and understand this owner’s manual before operating unit. Keep this manual for future reference. Serial number Write the serial number in the space above for reference.
-
Page 2: Table Of Contents
TABLE OF CONTENTS Before You Begin ....................2 Important Safety Instructions ................3 Important Electrical Instructions ............... 5 Important Operation Instructions ..............6 Assembly Instructions ..................9 Transport Instructions ..................13 Treadmill Operation..................14 Touch Screen Operation ................. 18 Charging devices using the USB port ............29 General Maintenance.................. -
Page 3: Before You Begin
If you have any questions or problems with the parts included with your XTERRA TRX6000 Treadmill, please do not return the product. Contact us FIRST! If a part is missing or defective, call us toll-free at 1-888-707-1880. -
Page 4: Important Safety Instructions
IMPORTANT SAFETY INSTRUCTIONS WARNING - Read all instructions before using this equipment. DANGER - To reduce the risk of electric shock, always unplug this treadmill from the electrical outlet before cleaning and/or service work. WARNING - To reduce the risk of burns, fire, electric shock, or injury to persons, install the treadmill on a flat level surface with access to a 120-volt~60 Hertz, 15-amp grounded outlet. - Page 5 19. Never allow more than one person on the treadmill at once. 20. Warm up 5 to 10 minutes before each workout and cool down 5 to 10 minutes afterward. This allows your heart rate to gradually increase and decrease and will help prevent straining muscles. 21.
-
Page 6: Important Electrical Instructions
IMPORTANT ELECTRICAL INSTRUCTIONS WARNING! Route the power cord away from any moving part of the treadmill, including the elevation mechanism and transport wheels. NEVER remove any cover without first disconnecting AC power. If voltage varies by ten percent (10%) or more, the performance of your treadmill may be affected. Such conditions are not covered under your warranty. -
Page 7: Important Operation Instructions
IMPORTANT OPERATION INSTRUCTIONS NEVER operate this treadmill without reading and completely understanding the results ● of any operational change you request from the computer. Understand that changes in speed and incline do not occur immediately. Set your desired ● speed on the computer console and release the adjustment key. The computer will obey the command gradually. - Page 8 WARNING DECAL REPLACEMENT Serial Number Decal The decals shown have been placed on the treadmill. If a decal is missing or illegible, please call our Customer Service Department, to order a free replacement decal (see ORDERING REPLACEMENT PARTS). Apply the decal in the location shown. Customer Service 1-888-707-1880 Dyaco Canada Inc.
-
Page 9: Assembly Pack Checklist
ASSEMBLY PACK CHECKLIST HARDWARE STEP 3 # 87. 3/8" × 3/4" # 122. Ø10 × Ø23 × 1.5T # 114. 3/8" × 2-1/2" Button Head Socket Bolt (2pcs) Curved Washer (2pcs) Button Head Socket Bolt (6pcs) " # 113. Ø10 × 1.5T # 134. -
Page 10: Assembly Instructions
ASSEMBLY INSTRUCTIONS Step 1. Remove the treadmill from the carton and lay it aside on the smooth ground. Step 2. Unscrew the 4 pcs of 3/8" × 2-1/2"_Button Head Socket Bolt (114) with the M6_L Allen Wrench (132),And remove the Fixing Plate Stabilizer (8). Customer Service 1-888-707-1880 Dyaco Canada Inc. - Page 11 Step 3. Connect the Computer Cable (Lower) (50) with the Computer Cable (Middle) (49). Step 4. After placing the Left Upright (5) and Right Upright (4) tubes against the left and right sides of the Main Frame (1), use the M6_L Allen Wrench (132) to lock 2pcs of 3/8" × 3/4"_Button Head Socket Bolts (87) and 2 pcs of Ø10 ×...
- Page 12 Step 5. Connect the Computer Cable (Middle) (49) with the Computer Cable (Upper) (58). Connect the Speed Cable (Upper) 3P (77) with the Speed/Hand Pulse Complex 3P (54). Connect the Handpulse Wire (Upper) 2P (21-20) with the Speed/Hand Pulse Complex 2P (54). Connect the Incline Cable (Upper) 3P (78) with the Incline/Hand Pulse Complex 3P (55).
- Page 13 ASSEMBLY INSTRUCTIONS FOR TABLET HOLDER STEP 1. Unscrew the 5/16" × 3/4"_Button Head Socket Bolts (159) and Ø5/16" × 19 × 1.5T_Curved Washers (166) from the Console Support (6) with the M5 Allen Wrench & Phillips Head Screwdriver (131). Take the PAD Handrail Support (118) out of the cardboard box. Attach the PAD Handrail Support (118) to the Console Support (6), and then screw the bolts that were removed STEP 2.
-
Page 14: Transportation Instructions
TRANSPORTATION INSTRUCTIONS Start the treadmill and set the maximum incline level to 15. Remove the safety key once you have reached the maximum level of incline (15). Unplug the power cord. Due to the size and weight of the treadmill, moving it will require 2 people. Tip the treadmill back until it rolls freely on the wheels. -
Page 15: Treadmill Operation
TREADMILL OPERATION Your treadmill features a walking belt coated with lubricant. IMPORTANT: Never apply silicone spray or other substances to the walking belt or walking board. Such substances will deteriorate the walking belt and cause excessive wear. How to plug in the power cord. GROUNDING INSTRUCTIONS. -
Page 16: Operation Of Your Treadmill
OPERATION OF YOUR TREADMILL This Class (B) digital apparatus complies with Canadian ICES-003. Operation is subject to the following two conditions: (1) this device may not cause interference, and (2) this device must accept any interference, including interference that may cause undesired operation of the device GETTING STARTED: Caution: Before operating the console, read the following precautions:... -
Page 17: Quick-Start Operation
TO OPERATE TREADMILL CAUTION: To avoid injury, hold onto the handrails while mounting and dismounting the treadmill. Hold onto the handrails and place your feet on the side rails before starting. Step onto the walking belt only at the slowest speed. Always hold on to a handrail or hand bar while making control changes (incline, speed, etc.). -
Page 18: Heart Rate Features
PAUSE / STOP 1. Press the Stop button once, the belt will slow down gradually until fully stopped. After 5 minutes, the display will reset and show the workout summary on the screen. 2. Press the Resume button to continue the workout from pause. Press the Finish button to end the workout. -
Page 19: Touchscreen Operation
TOUCHSCREEN OPERATION SET UP Once the console is powered on, connect to the available WiFi network either by pressing the Signal icon in the top right corner or from the SETTINGS menu in the bottom right corner. Without WiFi, saving workout data to the cloud, using apps and casting content will not be available. -
Page 20: Workout Programs
WORKOUT PROGRAMS In this section, there are 2 program categories available: Programs (programs with predefined speed and incline changing profiles) and Templates (regular programs, saved with your adjustments). Tap on the workout categories to switch between them. To get more info on each program, tap on the program preview. In this mode, you can scroll to the side to see all the program descriptions of the selected category. - Page 21 PRESET PROGRAM DISPLAYS P1 to P30 programs have speed and incline-changing profiles, which you can find on the program preview. Time and maximum speed settings are required. Once you choose your maximum speed, the program intensity will adapt accordingly. Press START to begin the workout. Speed Incline Speed...
- Page 22 Speed Incline Speed Incline Speed Incline Speed Incline Speed Incline Speed Incline Speed Incline Speed Incline Speed Incline Speed Incline Speed Incline Speed Incline Speed Incline Speed Incline Customer Service 1-888-707-1880 Dyaco Canada Inc. 2024 Email: customerservice@dyaco.ca...
- Page 23 HEART RATE program will calculate your maximum heart rate based on your age. Set the target time for your workout, then adjust your speed manually while running to maintain the target heart rate. The incline will be controlled by the treadmill automatically. An HR monitoring device is required.
- Page 24 Any program can be labelled as FAVORITE. Favourite programs appear on the Home screen, so you can access them anytime you want. Customer Service 1-888-707-1880 Dyaco Canada Inc. 2024 Email: customerservice@dyaco.ca...
- Page 25 PROFILE To create a new profile, press + button on the start screen. If you already have an XTERRA + APP ACCOUNT, you can scan the QR code appearing on the screen. This action will not only upload your already existing personal info to the machine but also link two profiles together, so your workout history will be fully displayed in the XTERRA + App.
-
Page 26: Internet & Apps
INTERNET & APPS In this section, there are a variety of third-party apps to keep you entertained during your workout. To use them, connect to the WiFi and choose the app icon. Press to enter the full screen mode. Press to exit full-screen mode. - Page 27 SETTINGS • Tap on WIFI for internet connection settings. • Tap on DATE or TIME to change the machine’s time settings. The time and date settings define the time information in the workout summary. Both 12- and 24-hours formats are available.
-
Page 28: Profile View
WORKOUT VIEWS Once the workout has started, after the short countdown, the console will appear in its workout mode. Warm-up and cool-down phases may be skipped by pressing Skip. The panel on the left is fixed and shows your current WORKOUT STATS. More related stats can be revealed by pressing the + icon. -
Page 29: Track View
TRACK VIEW: After the workout is finished, the workout summary will appear. Slide to the left to get more details or press Done to go back to the Home screen. You can also save the completed program as a template from here if you press the Save as button. The workout record will appear in the History tab of the Profile section. -
Page 30: Charging Devices Using The Usb Port
CHARGE PORTABLE DEVICES WITH USB PORT USB Port Charging function: Charge your device during your workout using the fitness equipment's on-console USB port. To charge your mobile electronics make sure the fitness equipment power is on. Step 1: Connect your USB charging cable (not included) to the USB Power Port and your device. Step 2: Check to make sure your device icon indicates it is charging. -
Page 31: Using Heart Rate Transmitter (Optional)
USING HEART RATE TRANSMITTER (OPTIONAL) This ISM device complies with Canadian ICES-001. How to wear your wireless chest strap transmitter: 1. Attach the transmitter to the elastic strap using the locking arts. 2. Adjust the strap as tightly as possible as long as the strap is not too tight to remain comfortable. -
Page 32: Heart Rate Programs
HEART RATE PROGRAMS The old motto, "no pain, no gain," is a myth that has been overpowered by the benefits of exercising comfortably. A great deal of this success has been promoted by the use of heart rate monitors. With the proper use of a heart rate monitor, many people find that their usual choice of exercise intensity is either too high or too low, and exercise is much more enjoyable by maintaining their heart rate in the desired benefit range. -
Page 33: Rate Of Perceived Exertion
RATE OF PERCEIVED EXERTION Heart rate is important but listening to your body also has a lot of advantages. There are more variables involved in how hard you should workout than just heart rate. Your stress level, physical health, emotional health, temperature, humidity, the time of day, the last time you ate and what you ate, all contribute to the intensity at which you should workout. -
Page 34: General Maintenance
GENERAL MAINTENANCE The safety and integrity designed into the machine can only be maintained when the equipment is regularly examined for damage and repaired. It is the sole responsibility of the user/owner or facility operator to ensure that regular maintenance is performed. Worn or damaged components shall be replaced immediately or the equipment removed from service until the repair is made. - Page 35 TREAD-BELT TRACKING ADJUSTMENT The treadmill is designed so that the tread-belt remains reasonably centered while in use. It is normal for some belts to drift near one side while in use, depending on a user's gait and if they favour one leg. But if during use, the belt continues to move toward one side, adjustments are necessary.
- Page 36 BELT / DECK LUBRICATION: Do not lubricate with other than DYACO CANADA INC approved lubricant. Your treadmill comes with one tube of lubricant, and extra tubes can be ordered directly from DYACO CANADA INC. There are commercially available lube kits, but the only one currently approved by DYACO CANADA INC is Lube-N-Walk.
- Page 37 Bluetooth® transceiver that will allow it to interact with selected phones or tablet computers via the Xterra + App. Just download the free Xterra + App from the Apple Store or Google Play, and then follow the instructions in the App to sync with your exercise machine. Now you can view current workout data on three different Display screens on your device.
-
Page 38: Reset Switch Resetting
RESET SWITCH RESETTING • If your treadmill loses power or will not start, check the reset switch located on the front of the frame. • If the white tab of the reset switch is not showing, then the reset switch has not been tripped. -
Page 39: Service Checklist - Diagnosis Guide
Service Checklist – Diagnosis Guide Before contacting your dealer for aid, please review the following information. It may save you both time and expense. This list includes common problems that may not be covered under the treadmill's warranty. PROBLEM SOLUTION/CAUSE 1. -
Page 40: Exploded View Diagram
EXPLODED VIEW DIAGRAM Customer Service 1-888-707-1880 Dyaco Canada Inc. 2024 Email: customerservice@dyaco.ca... -
Page 41: Parts Lists
PARTS LIST KEY NO. DESCRIPTION Q'TY Main Frame Incline Bracket Handrail Support Right Upright Left Upright Console Support Deck Cross Brace Fixing Plate Stabilizer Drive Belt Console Assembly 21-20 Handpulse Wire (Upper) 2-Pin 21-21 Handpulse Wire (Upper) 2-Pin Running Deck 560 ×... - Page 42 KEY NO. DESCRIPTION Q'TY Handlebar Cover Inner (L) Front Inner Handlebar Cover (L) Handlebar Cover Outer(R) Handlebar Cover Inner (R) Front Inner Handlebar Cover (R) Rear Adjustment Base (L) Rear Adjustment Base (R) Motor Cover Anchor(D) Nylon Washer (A) Nylon Washer (B) Adjustment Foot Pad Square Safety Key Belt Guide...
- Page 43 KEY NO. DESCRIPTION Q'TY 3.5 × 16mm_Tapping Screw Wire Clamp M5_Allen Wrench Head Screw Wrench M6_L Allen Wrench Lubricant 400mm_Console Ground Wire M5 × 15mm_Phillips Head Screw Cushion Spacer Top Motor Cover Plate Pedal Cover (Top) Pedal Ø3.5 × 18mm_Sheet Metal Screw Beverage Holder 5/16"...
-
Page 44: Training Guidelines
TRAINING GUIDELINES EXERCISE Exercise is one of the most important factors in the overall health of an individual. Listed among its benefits are: Increased capacity for physical work (strength endurance) Increased cardiovascular (heart and arteries/veins) and respiratory efficiency ... -
Page 45: Heart Rate
SPECIFICITY Different forms of exercise produce different results. The type of exercise that is carried out is specific both to the muscle groups being used and to the energy source involved. There is little transfer of the effects of exercise, i.e. from strength training to cardiovascular fitness. That is why it is important to have an exercise program tailored to your specific needs. -
Page 46: Pulse Count
PULSE COUNT The pulse count (on your wrist or carotid artery in the neck, taken with two index fingers) is done for ten seconds, taken a few seconds after you stop exercising. This is for two reasons: (a) 10 seconds is long enough for accuracy, and (b) the pulse count is to approximate your BPM rate at the time you are exercising. -
Page 47: What To Wear
WHAT TO WEAR Wear clothing that will not restrict your movement in any way while exercising. Clothes should be light enough to allow the body to cool. Excessive clothing that causes you to perspire more than you normally would while exercising gives you no advantage. The extra weight you lose is body fluid and will be replaced with the next glass of water you drink. -
Page 48: Stretching
STRETCHING Stretching should be included in both your warm-up and cool-down and should be performed after 3-5 minutes of low-intensity aerobic activity or callisthenic-type exercise. Movements should be performed slowly and smoothly, with no bouncing or jerking. Move into the stretch until slight tension; no pain is felt in the muscle and hold for 20-30 seconds. Breathing should be slow, rhythmical and under control, making sure never to hold your breath. - Page 49 INNER THIGH STRETCH TOE TOUCHES Sit with the soles of your feet together with Slowly bend forward from your waist, your knees pointing outward. Pull your feet letting your back and shoulders relax as as close to your groin as possible. Gently you stretch toward your toes.
-
Page 50: Manufacturer's Limited Warranty
MANUFACTURER'S LIMITED WARRANTY Dyaco Canada Inc. warrants all its treadmill parts for a period listed below from the date of retail sale, as determined by the sales receipt. Dyaco Canada Inc.'s responsibilities include providing new or remanufactured parts at Dyaco Canada Inc.'s option and technical support to our independent dealers and servicing organizations. - Page 51 Please visit us online for information about our other brands and products manufactured and distributed by Dyaco Canada Inc. spiritfitness.ca solefitness.ca xterrafitness.ca dyaco.ca/everlast.html dyaco.ca/UFC/UFC-home.html cikada.ca agiocanada.ca trainorsports.ca For more information, please contact Dyaco Canada Inc. T: 1-888-707-1880 ⏐ 5955 Don Murie St., Niagara Falls, Ontario L2G 0A9 ⏐ sales@dyaco.ca...
Need help?
Do you have a question about the TRX6000 and is the answer not in the manual?
Questions and answers