
Related Manuals for Xterra TR260


Summary of Contents for Xterra TR260
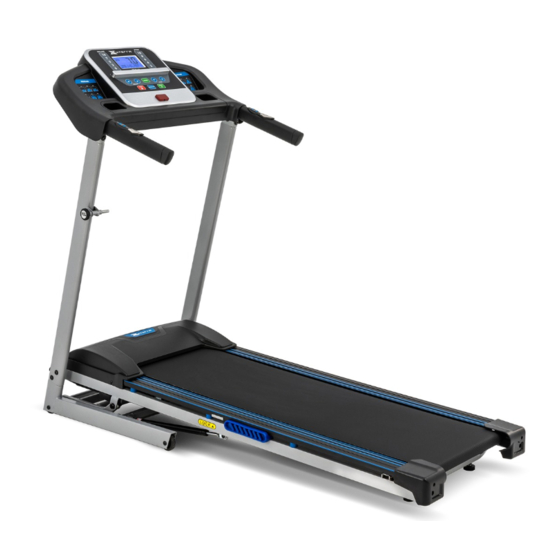
- Page 1 FITNESS TR260 Treadmill OWNER’S MANUAL PLEASE CAREFULLY READ THIS ENTIRE MANUAL BEFORE OPERATING YOUR NEW TREADMILL...
-
Page 2: Table Of Contents
TABLE OF CONTENTS PRODUCT REGISTRATION IMPORTANT SAFETY INSTRUCTIONS IMPORTANT ELECTRICAL INSTRUCTIONS IMPORTANT OPERATION INSTRUCTIONS TR260 ASSEMBLY INSTRUCTIONS OPERATION OF YOUR CONSOLE PROGRAMMABLE FEATURES GENERAL MAINTENANCE TROUBLE SHOOTING MANUFACTURER’S LIMITED WARRANTY ATTENTION THIS TREADMILL IS INTENDED FOR RESIDENTIAL USE ONLY AND IS WARRANTED FOR THIS APPLICATION. - Page 3 XTERRA Fitness will do all we can to make your ownership experience as pleasant as possible for many years to come. If you have questions, or if parts are missing or damaged, or you require customer service, call (870) 336- 4286.
-
Page 4: Important Safety Instructions
IMPORTANT SAFETY INSTRUCTIONS When using an electrical appliance, basic precautions should always be followed, including the following: Read all instructions before using this appliance. DANGER To reduce the risk of electric shock: Always unplug this appliance from the electrical outlet immediately after using and before cleaning. WARNING To reduce the risk of burns, fire, electric shock, or injury to persons: •... - Page 5 Failure to follow all guidelines may compromise the effectiveness of the exercise experience, expose yourself (and possibly others) to injury, and reduce the longevity of the equipment. SAVE THESE INSTRUCTIONS - THINK SAFETY! IMPORTANT ELECTRICAL INFORMATION WARNING Route the power cord away from any moving part of the treadmill including the elevation mechanism and transport wheels. NEVER remove any cover without first disconnecting AC power.
-
Page 6: Important Operation Instructions
• NEVER mount or dismount the treadmill while the belt is moving. XTERRA Fitness treadmills start with at a very low speed and it is unnecessary to straddle the belt during start up. Simply standing on the belt during slow acceleration is proper after you have learned to operate the unit. - Page 7 TR260 ASSEMBLY PACK CHECKLIST #79 Ø8 x Ø18 x 1.5T #87 5/16" x UNC18 x 1/2" #88 Ø8 x Ø23 x 1.5T Flat Washer Button Head Socket Bolt Curved Washer (6 pcs) (12 pcs) (6 pcs) #104 Combination M5 Allen Wrench &...
- Page 8 組 組 立 立 步 步 驟 驟 ASSEMBLY STEP 1 ■步 步 驟 驟 1. 將機台由紙箱中取出,並放置於平坦之地面上。 Remove the unit from the box and put it on a flat and level floor. HARDWARE ■步 步 驟 驟 2. No Hardware required for 連接控制線中段...
- Page 9 (請先將螺絲固定,不要鎖緊) Insert the Uprights (L, R)(3,4) into the Frame Base (2) with the 6pcs of 5/16" × ASSEMBLY STEP 3 1/2" Button Head Socket Bolts (87), 4pcs of Ø8 × Ø18 × 1.5T Flat Washers (79) and 2pcs of Ø8 × Ø23 × 1.5T Curved Washers (88)by using the M5_Allen Wrench Head Screw Wrench (104).
- Page 10 ASSEMBLY STEP 4 HARDWARE No Hardware required for this step ■ 步 步 驟 驟 5 NOTE: this step may work better with a second person assisting. 將錶架組(5) 插入左右立管(3,4)後,使用 M5 L 型六角十字板手(104) , 1. Connect the UPPER COMPUTER CABLE (37) with the MIDDLE 把...
- Page 11 ASSEMBLY STEP 5 HARDWARE HARDWARE Bolt (87) Qty: 6 Curved Washer (88) Qty: 4 Flat Washer (87) Qty: 2 注 注 意 意 : 請在所有零件組裝完成後,請鎖緊全部的螺絲。 NOTE: Be careful not to pinch the computer cables when attaching the console. NOTE: Please Tighten All Screws After All Components Assembly Comple 1.
- Page 12 CAUTION: Do not attempt to move the unit unless it is in the folded and locked position. Remove the power cord from the front of the unit to avoid possible damage. Use both handrails to maneuver the unit to the desired position. OPERATION OF YOUR TREADMILL TR260 CONSOLE...
- Page 13 GETTING STARTED Power the treadmill on by plugging it into an appropriate wall outlet, then turn on the power switch located at the front of the treadmill below the motor hood. Ensure that the safety key is installed, as the treadmill will not operate without it. The treadmill will then enter idle mode, which is the starting point for operation.
- Page 14 HEART RATE FEATURES Any time when the treadmill is operating, grasping handgrip shows treadmill pulse feature and the heart beat value is displayed. Grasp firmly while using this feature otherwise the value fluc- tuates. It will also pick up wireless heart rate transmitters that Bluetooth compatible. KILOMETER AND MILE SWITCHING FUNCTION In the standby state, press the speed deceleration key and the program key at the same time, and the buzzer will sound twice to switch successfully.
-
Page 15: Programmable Features
Key: Incline PROGRAMMABLE FEATURES The TR260 Treadmill provides 12 programs (P1,P2,P3……P12). Each program has its specific speed variations. To Select and Start a Preset Program 1. Make sure the machine is in the stop position, single press Stop to enter into resetting state. - Page 16 2. Open the App on your device (phone or tablet) and make sure Bluetooth® is enabled on your device(phone or tablet). 3. In the App click the Bluetooth icon in the top right corner to search for your Xterra + equip- ment.
-
Page 17: General Maintenance
GENERAL MAINTENANCE Belt and Deck - Your treadmill uses a very high-efficient low-friction deck. Performance is maximized when the deck is kept as clean as possible. Use a soft, damp cloth or paper towel to wipe the area between the frame and 6 - 8” under the belt. This should be done once ev- ery other month to extend belt and deck life. - Page 18 Do not lubricate with anything other than XTERRA Fitness approved lubricant. Your treadmill comes with one tube of treadmill belt lubricant. Extra tubes can be ordered directly from: www.xterrafitness.com, or by calling our customer service department at (870) 336-4286.
- Page 19 To lubricate your treadmill belt: 1. Ensure that your machine is off, and unplugged to minimize risk of injury. 2. Reach between the belt and the top of the treadmill base to verify that lubrication is present. 3. While kneeling beside your treadmill deck, use one hand to hold the treadmill belt up and away from the treadmill base just enough so you can use your other hand to reach the lubrication underneath.
- Page 20 SERVICE CHECKLIST - DIAGNOSIS GUIDE Before contacting us for aid, please review the following information. It may save you both time and expense. This list includes common problems that may not be covered under the treadmill’s warranty. Problem Meaning Solution/Cause Console Reminder to check 1.
-
Page 21: Manufacturer's Limited Warranty
Effective August 24, 2022- TREADMILL LIMITED WARRANTY XTERRA Fitness Inc. warrants all its home use treadmill parts for a period of time listed below, from the date of retail sale, as determined by a sales receipt or in the absence of a sales receipt, eighteen (18) months from the original factory shipping date. XTERRA Fitness’s responsibilities include providing new or remanufactured parts, at XTERRA Fitness’s option, and technical support to our independent... - Page 23 Main Frame Frame Base Left Upright Right Upright Console Support Incline Bracket Folding Release Pin L-Plate Wheel Sleeve Belt Guide Motor Bracket Drive Motor Drive Belt Running Deck Running Belt Front Roller W/Pulley Rear Roller Incline Motor 020-01 Console Outer Cover 020-02 Console Top Cover 020-03...
- Page 24 Foot Rail Power Socket Breaker AC Electronic Module Power Cord End Cap Handgrip Foam Motor Controller 1000m/m_Computer Cable (Upper) 1150m/m_Computer Cable (Middle) 1000m/m_Computer Cable (Lower) Square Safety Key 100m/m_Connecting Wire (Black) 300m/m_Connecting Wire (White) Frame Base Front Wheel 5/16" × 1-1/2"_Button Head Socket Bolt Transportation Wheel M6 ×...
- Page 25 M5 × 15m/m_Phillips Head Screw M5 × 10m/m_Phillips Head Screw Ø5 × 1.5T_Split Washer M5_Star Washer Ø5 × 16m/m_Tapping Screw 5/16" × 1-3/4"_Button Head Socket Bolt Console Bracket Anchor Ø5/16" × Ø18 × 1.5T_Flat Washer 4 × 12m/m_Sheet Metal Screw 1200m/m_Speed/Hand Pulse Complex 081-01 1200m/m_Incline/Hand Pulse Complex...
- Page 28 3000 Nestle Road Jonesboro, AR 72401 - Phone:870-336-4286 - Fax:870-935-7611 www.xterrafitness.com ©2022 All Rights Reserved. TR260 Owner’s Manual...
Need help?
Do you have a question about the TR260 and is the answer not in the manual?
Questions and answers
Instruction on how to move Xterra 260 to another room
To move the Xterra TR260 to another room, follow these steps:
1. Fold and lock the treadmill in the upright position.
2. Remove the power cord from the front of the unit to prevent damage.
3. Lean the treadmill back until the transport wheels touch the floor.
4. Use both handrails to carefully maneuver the treadmill to the desired location.
Caution: Do not attempt to move the treadmill unless it is folded and locked.
This answer is automatically generated