Hikmicro FALCON 2.0 Series User Manual
Thermal monocular
Hide thumbs
Also See for FALCON 2.0 Series:
- Quick start manual (144 pages) ,
- Quick start manual (24 pages)
Table of Contents
Advertisement
Quick Links
Advertisement
Table of Contents

Related Manuals for Hikmicro FALCON 2.0 Series


Summary of Contents for Hikmicro FALCON 2.0 Series
- Page 1 User Manual Thermal Monocular FALCON 2.0 SERIES V5.5.116 202412 Contact Us...
-
Page 2: Table Of Contents
Thermal Monocular User Manual CONTENTS Overview ..........................1 Device Description ..........................1 Main Function ............................1 Appearance ............................. 1 Preparation ........................5 Install Battery ............................5 2.1.1 Battery Instruction ..........................5 2.1.2 Battery Installation ..........................5 Cable Connection ........................... 6 Attach Neck Strap .......................... - Page 3 Record Video ............................ 30 6.6.4 View Local Album ..........................31 Export Files ............................32 6.7.1 Export Files via HIKMICRO Sight ..................... 32 6.7.2 Export Files via PC ........................... 33 System Settings ......................34 Adjust Date ............................34 Adjust Time ............................34 Set Language ............................
-
Page 4: Overview
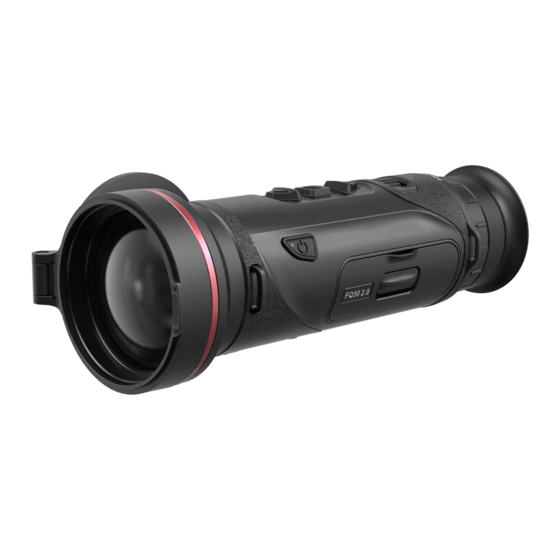
Thermal Monocular User Manual Overview Device Description HIKMICRO FALCON 2.0 series is a powerful and innovative thermal monocular equipped with a high-end infrared detector. With less than 15 mK NETD and shutterless image system, it ensures a seamless observing experience of ultra-clear image quality and detail recognition without being disturbed by the shutter. - Page 5 Thermal Monocular User Manual Figure 1-1 Appearance Table 1-1 Component Descriptions Component Description The piece placed closest to the eye to Eyepiece view the target. 2, 5, Strap Attachment Attaches the neck strap or hand strap. 15, 18 Point Flashing Red & Green: Error occurred. Charging Status ...
- Page 6 Thermal Monocular User Manual Component Description Diopter Adjusts the dioptric setting. Adjustment Ring Tripod Mount Mounts the tripod. Microphone To record audio. Thermal Lens For thermal imaging. The magnetic lens cover can protect lens from scratch. Laser Range LRF module in the lens. Measures the Finder distance to the target with laser.
- Page 7 Thermal Monocular User Manual Note The power indicator stays solid red when the device is on. When the auto screen off function is enabled, if you press to enter standby mode, you can also tilt or rotate the device to wake up the Auto Screen Off device.
-
Page 8: Preparation
Thermal Monocular User Manual Preparation Install Battery 2.1.1 Battery Instruction The device supports removable Li-ion 21700 battery, and the battery size should be 22.3 mm × 76 mm. The battery rated voltage and capacity is 3.59 V/5500 mAh. Charge the battery with the battery charger for more than 4 hours before first use. -
Page 9: Cable Connection
Thermal Monocular User Manual Figure 2-3 Close the Cover Cable Connection Before You Start Make sure the battery is installed in the battery compartment of the device before charging the device with a type-C cable. Steps 1. Lift the type-C interface cover. 2. - Page 10 Thermal Monocular User Manual 1. Thread one end of the neck strap through a neck strap attachment point. Figure 2-6 Thread Neck Strap through Attachment Point 2. Thread the neck strap through the strap buckle and fasten the neck strap, as is shown in the picture. Figure 2-7 Thread Neck Strap through Strap Buckle 3.
-
Page 11: Attach Hand Strap
Thermal Monocular User Manual Figure 2-8 Thread Neck Strap through Strap Keeper 4. Repeat above steps to finish mounting, and adjust the length of neck strap as needed. Attach Hand Strap Steps 1. Thread one end of the hand strap through a strap attachment point. 2. -
Page 12: Power On/Off
Thermal Monocular User Manual Figure 2-10 Attach the Safety Strap to the Bag The carrying bag can be attached to other MOLLE-compatible backpack using the MOLLE straps for extra carrying capacity and easy access. The carrying bag can be attached to a tactical belt or a regular one as a waist pack. -
Page 13: Auto Screen Off
When the low power note shows, charge the battery. The auto power off takes effect only when the device isn’t in operation or connected with HIKMICRO Sight app. The auto power off countdown will start again when the device exits standby mode, or the device is restarted. -
Page 14: Menu Description
Figure 2-11 Device Menu (Round Screen Style) Figure 2-12 Device Menu (Square Screen Style) App Connection Connect the device to the HIKMICRO Sight app via hotspot, and then you can capture picture, record video, or configure parameters on your phone. Steps... -
Page 15: Firmware Status
Thermal Monocular User Manual 1. Search the HIKMICRO Sight app on App Store (iOS System) or Google Play™ (Android System) to download it, or scan the QR code to download and install the app. Android System iOS System 2. Hold to show the menu. -
Page 16: Upgrade Device
2.10.2 Upgrade Device Upgrade Device via HIKMICRO Sight Steps 1. Open HIKMICRO Sight app and connect your device to the app. 2. Tap the upgrade prompt to enter the firmware upgrade interface. 3. Tap Upgrade to start upgrade. Note The upgrading operation may vary due to app updates. Please take the actual app version for reference. - Page 17 Thermal Monocular User Manual 8. Reboot the device, and the device upgrades automatically. The upgrading process will be displayed in the main interface. Caution During the upgrade package transmission, make sure the device is connected to your PC. Otherwise, it may cause unnecessary upgrade failure, firmware damage, etc.
-
Page 18: Image Settings
Thermal Monocular User Manual Image Settings Adjust Diopter Make sure the eyepiece covers your eye and aim at the target. Adjust the diopter adjustment ring until the OSD text or image is clear. Figure 3-1 Adjust Diopter Note When adjusting diopter, DO NOT touch the surface of lens to avoid smearing the lens. -
Page 19: Adjust Contrast
Thermal Monocular User Manual 2. Press to select and press to confirm. 3. Press to adjust display brightness. 4. Hold to save the settings and exit. Adjust Contrast Steps 1. Hold to show the menu. 2. Press to select and press to confirm. -
Page 20: Adjust Sharpness
Thermal Monocular User Manual Figure 3-3 Adjust Tone Adjust Sharpness Steps 1. Hold to show the menu. 2. Press to select and press to confirm. 3. Press to adjust sharpness. 4. Hold to save and exit. Figure 3-4 Sharpness Comparison Select Scene Mode You can select proper scene according to actual using scene to improve the display effect. -
Page 21: Set Palettes
Thermal Monocular User Manual 3. Press to select scene modes, and press to confirm. Observation: Observation mode is recommended in normal scene. Detection: Detection mode is recommended in hunting environment. 4. Hold to save settings and exit. Set Palettes You can select different palettes to display the same scene in different effects. - Page 22 Thermal Monocular User Manual Black Hot The hot part is black-colored in view. The higher the temperature is, the darker the color is. Red Hot The hot part is red-colored in view. The higher the temperature is, the redder the color is. Fusion From high temperature to low temperature, the image is colored in from white, yellow, red, pink to purple.
- Page 23 Thermal Monocular User Manual Red Monochrome The whole image is red colored. The higher the temperature is, the lighter the color is. Green Monochrome The whole image is green colored. The higher the temperature is, the lighter the color is.
-
Page 24: Adjust Digital Zoom
Thermal Monocular User Manual Adjust Digital Zoom You can zoom in and out the image by using this function. Press the live view interface to switch the digital zoom ratio, and the actual zoom ratio switches between 1×, 2×, 4×, and 8×. Note ... -
Page 25: Zoom Pro
Thermal Monocular User Manual Note If the PIP function is enabled, only the PIP view zooms when adjusting the digital zoom ratio. The PIP view temporarily displays the zoom ratio when adjusting the digital zoom of the device . 3.11 Zoom Pro Zoom Pro refers to zoomed image detail enhancement. - Page 26 Thermal Monocular User Manual 4. Press to select the X or Y axis, and press to set the coordinates until the cursor reaches the defective pixel. If you select X, the cursor moves left and right; if you select Y, the cursor moves up and down.
-
Page 27: Measure Distance (Lrf Model)
Thermal Monocular User Manual Measure Distance (LRF Model) The device with an LRF module in the lens can detect the distance between the target and the observation position with laser. Before You Start When measuring the distance, keep the hand and the position steady. Otherwise, the accuracy may be affected. - Page 28 Thermal Monocular User Manual Figure 4-1 Distance Measurement Result means the straight-line distance, and means the horizontal distance. Caution The laser radiation emitted from the device can cause eye injuries, burning of skin or inflammable substances. Before enabling the laser ranging function, make sure no human or inflammable substances are in front of the laser lens.
-
Page 29: Measure Distance (Non-Lrf Model)
Thermal Monocular User Manual Measure Distance (Non-LRF Model) The device can detect the distance between the target and the observation position. Before You Start When measuring the distance, keep the hand and the position steady. Otherwise, the accuracy may be affected. Steps 1. - Page 30 Thermal Monocular User Manual Figure 5-1 Measurement Result...
-
Page 31: General Settings
Thermal Monocular User Manual General Settings Set OSD You can choose whether to display the OSD information on the live view interface. Steps 1. Hold to show the menu. 2. Go to Advanced Settings, and press to select 3. Press to enter OSD setting interface. -
Page 32: Burning Prevention
Thermal Monocular User Manual 2. Go to Advanced Settings, and press to select 3. Press to enable or disable Brand Logo. 4. Hold to save the settings and exit. Result The brand logo is displayed at the bottom left of the image. Burning Prevention Avoid direct sunlight and enable the Burning Prevention function to reduce the risk of sensor damage from the heat. -
Page 33: Capture And Video
Thermal Monocular User Manual Figure 6-1 Hot Tracking Capture and Video 6.6.1 Capture Picture In the live view interface, for non-LRF model, press to capture pictures. For LRF model, press at the same time to capture pictures. Note When capturing succeeds, the image freezes for 1 second and a prompt shows on the display. -
Page 34: View Local Album
Thermal Monocular User Manual Figure 6-2 Record Video 2. Hold again to stop recording. 6.6.4 View Local Album Captured images and recorded videos are automatically stored in the device, and you can view the files in local albums. Steps 1. Hold to show the menu. -
Page 35: Export Files
Before You Start Install HIKMICRO Sight on your mobile phone. Steps Menu 1. Open HIKMICRO Sight and connect your device to the app. See Description In the live view interface, hold to show the menu. Figure 6-3 Device Menu (Round Screen Style) - Page 36 Thermal Monocular User Manual Figure 6-4 Device Menu (Square Screen Style) 2. App Connection. 3. Tap Media to access device albums. Figure 6-5 Access Device Albums 4. Tap Local or Device to view the photos and videos. Local: You can view the previous files on the app. ...
-
Page 37: Export Files Via Pc
Thermal Monocular User Manual live view interface. The exporting operation may vary due to app updates. Please take the actual app version for reference. 6.7.2 Export Files via PC This function is used to export recorded videos and captured pictures. Before You Start Make sure the device is turned on when connecting the cable. -
Page 38: System Settings
Thermal Monocular User Manual System Settings Adjust Date Steps 1. Hold to show the menu. 2. Go to Advanced Settings, and press to select 3. Press to enter the configuration interface. 4. Press to select the day, month, or year to be synchronized, and press to change the number, then press again to... -
Page 39: Cast Device Screen To Pc
Thermal Monocular User Manual 4. Press to select the language as required, and press to confirm. 5. Hold to save settings and exit. Cast Device Screen to PC The device supports casting screen to PC via a UVC protocol-based streaming media player. You can view the device image on the PC display for details. -
Page 40: View Device Information
Thermal Monocular User Manual 1. Hold to show the menu. 2. Go to Advanced Settings, and press to select 3. Press to enable the function. The device will start to collect and record the device log. 4. Press to disable the function when the collection is finished. Note ... -
Page 41: Reset Device
Thermal Monocular User Manual Reset Device This function erases all content and settings, including basic settings, storage, and hotspot password. Steps 1. Hold to show the menu. 2. Go to Advanced Settings, and press to select 3. Press to restore the device to defaults according to the prompt. -
Page 42: Frequently Asked Questions
Thermal Monocular User Manual Frequently Asked Questions Why does the charge indicator flash improperly? Check the following items. Check whether the device is charged with standard power adapter and the charging temperature is above 0 °C (32 °F). Charge the device in power off status. Why is the power indicator off? ... -
Page 43: Legal Information
The information contained in the Manual is subject to change, without notice, due to firmware updates or other reasons. Please find the latest version of this Manual at the HIKMICRO website (www.hikmicrotech.com). Please use this Manual with the guidance and assistance of professionals trained in supporting the Product. - Page 44 OTHER DAMAGES RESULTING FROM CYBER-ATTACK, HACKER ATTACK, VIRUS INFECTION, OR OTHER INTERNET SECURITY RISKS; HOWEVER, HIKMICRO WILL PROVIDE TIMELY TECHNICAL SUPPORT IF REQUIRED. YOU AGREE TO USE THIS PRODUCT IN COMPLIANCE WITH ALL APPLICABLE LAWS, AND YOU ARE SOLELY RESPONSIBLE FOR ENSURING THAT YOUR USE CONFORMS TO THE APPLICABLE LAW.
-
Page 45: Regulatory Information
Thermal Monocular User Manual Regulatory Information These clauses apply only to the products bearing the corresponding mark or information. EU Conformity Statement This product and - if applicable - the supplied accessories too are marked with "CE" and comply therefore with the applicable harmonized European standards listed under the Directive 2014/30/EU (EMCD), Directive 2014/35/EU (LVD), Directive 2011/65/EU (RoHS), Directive 2014/53/EU. - Page 46 Thermal Monocular User Manual Regulation (EU) 2023/1542 (Battery Regulation): This product contains a battery and it is in conformity with the Regulation (EU) 2023/1542. The battery cannot be disposed of as unsorted municipal waste in the European Union. See the product documentation for specific battery information. The battery is marked with this symbol, which may include lettering to indicate cadmium (Cd), or lead (Pb).
- Page 47 Thermal Monocular User Manual Fernkommunikationsmitteln, wenn die Lager- und Versandflächen für Elektro- und Elektronikgeräte mindestens 400 m² betragen oder die gesamten Lager- und Versandflächen mindestens 800 m² betragen. Vertreiber haben die Rücknahme grundsätzlich durch geeignete Rückgabemöglichkeiten in zumutbarer Entfernung zum jeweiligen Endnutzer zu gewährleisten.
-
Page 48: Symbol Conventions
Thermal Monocular User Manual Symbol Conventions The symbols that may be found in this document are defined as follows. Symbol Description Provides additional information to emphasize or Note supplement important points of the main text. Indicates a potentially hazardous situation, which if not Caution avoided, could result in equipment damage, data loss, performance degradation, or unexpected results. -
Page 49: Safety Instruction
Thermal Monocular User Manual Safety Instruction These instructions are intended to ensure that user can use the product correctly to avoid danger or property loss. Please read all the safety information carefully before using. Transportation Keep the device in original or similar packaging while transporting it. ... -
Page 50: Maintenance
Thermal Monocular User Manual Use the battery provided by qualified manufacturer. Refer to the product specification for detailed battery requirements. Dispose of used batteries according to the instructions. Remove the battery if you do not use the device for a long time. ... -
Page 51: Using Environment
Thermal Monocular User Manual the protection provided by the device may be impaired. Wipe the exterior surfaces of device with a clean cloth. Do not use chemically active substances, solvents, etc. as these may damage the paint. Clean the electrical contacts of the removable battery on the device using a non-greasy organic solvent. -
Page 52: Limited Warranty
Thermal Monocular User Manual Limited Warranty Scan the QR code for the product warranty policy. Manufacture Address Room 313, Unit B, Building 2, 399 Danfeng Road, Xixing Subdistrict, Binjiang District, Hangzhou, Zhejiang 310052, China Hangzhou Microimage Software Co., Ltd. COMPLIANCE NOTICE: The thermal series products might be subject to export controls in various countries or regions, including without limitation, the United States, European Union, United Kingdom and/or other member countries of the Wassenaar Arrangement. - Page 53 UD40711B...
Need help?
Do you have a question about the FALCON 2.0 Series and is the answer not in the manual?
Questions and answers