Advertisement
Quick Links
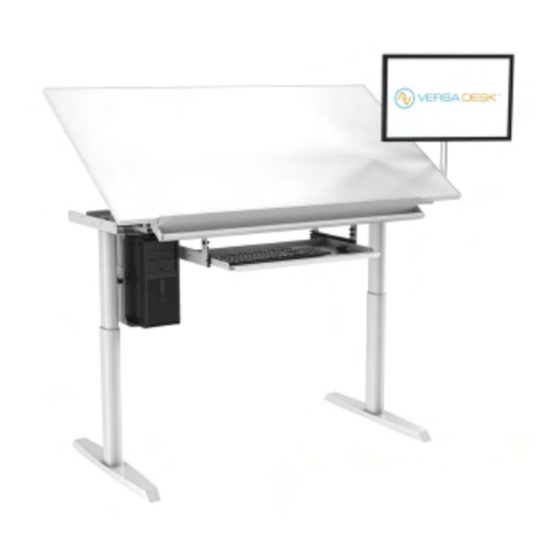
PowerLift Electric Drafting Table
PEDT 48" / 60"
How can we improve our assembly instructions?
Your comments and suggestions are important to us.
Please e-mail us at: support@versaproducts.com
14105 Avalon Boulevard, Los Angeles, CA 90061 | Tel 800-465-1660 x1 | Fax 310-353-7109
www.Versatables.com
Assembly Instructions
REV 04082024
MADE IN
AMERICA
Advertisement

Subscribe to Our Youtube Channel
Related Manuals for Versa Desk PowerLift PEDT 48


Summary of Contents for Versa Desk PowerLift PEDT 48
- Page 1 PowerLift Electric Drafting Table Assembly Instructions PEDT 48” / 60” REV 04082024 How can we improve our assembly instructions? MADE IN Your comments and suggestions are important to us. AMERICA Please e-mail us at: support@versaproducts.com 14105 Avalon Boulevard, Los Angeles, CA 90061 | Tel 800-465-1660 x1 | Fax 310-353-7109 www.Versatables.com...
- Page 2 Parts Drafting Surface & Frame (1 pc) (Pre-Assembled) Foot (2 pc) Leg with Bracket (2 pc) https://www.zenstores.com/help/how-con gure-zebra-gk420d-printer-print Pencil Tray (1 pc) Lift Linkage Assembly (1 pc) Lift Actuator (1 pc) 14105 Avalon Boulevard, Los Angeles, CA 90061 | Tel 800-465-1660 x1 | Fax 310-353-7109 www.Versatables.com...
-
Page 3: Additional Tools Required
Parts Control Switch (1 pc) Control Box (1 pc) Extension Cord (1 pc) Power Cord (1 pc) Hardware M6 x 1.0 x 12mm (8 pc) M6 x 1.0 x 25mm (8 pc) 1/4-20 x 20mm Furniture Bolt (4 pc) 5/16 x 1 7/8” 5/16 x 2 1/8”... - Page 4 Assembly Step 1 Legs Insert (4) M6 x 12mm Screws into each Leg. The red circles indicate where to place the screws. Once completed, make sure to align each Leg with the cutouts on the frame shown below. M6 x 12mm Screw Step 2 Legs Once the screws from Step 1 have...
- Page 5 Assembly Step 3 Leg Connection With the legs inserted into place, connect each of the legs to the extension cords as shwon below ( Step 4 Legs Use a total of (4) 20mm Furniture Bolts to fasten the (2) Leg with Bracket assemblies to each side of the frame.
- Page 6 Assembly Step 5 Feet Attach the Feet to the legs using (8) M6 x 1.0 x 25mm screws. M6 x 25mm Screw Step 6 Leg Actuator Switch Attach the Leg Actuator Control Switch to the Surface using (2) 10A x 5/8”...
- Page 7 Assembly Step 7 Pencil Tray Pencil Tray Attach the Pencil Tray to the Drafting Surface Drafting Surface using (6) 10A x 5/8” Wood Screws and (6) Small washers. The wood screws will go into the pre-drilled holes that are circled in red below. Wood Screw Small Washer Step 8...
- Page 8 Assembly Step 9 Lift Link Assembly Lift Link Assembly Place the Lift Linkage Assembly into both the welded bracket and the Lift Actuator. Attach the assembly to the Main Frame and Actuator using (1) 5/16 x 1 7/8” and (1) 5/16 x 2 1/8” Clevis Pins and (2) Cotter Pins.
- Page 9 Assembly Step 11 Complete Carefully ip the table over. You will need help from one other person. Your table should now be ready for use! Enjoy! w%20to%20con gure%20the%20Zebra%20GK420D%20printer%20for,your%20Royal%20Mail%202D%20barcode%20labels nstores.com/help/how-con gure-zebra-gk420d-printer-printing-royal-mails-2d-barcode-labels/#:~:text=How%20to%20con re%20the%20Zebra%20GK420D%20printer%20for,your%20Royal%20Mail%202D%20barcode%20labels%20in%20Zenstore https://www.zenstores.com/help/how-con gure-zebra-gk420d-printer-printing-royal-mails-2d-barcode-labels/#:~:text=H https://www.zenstores.com/help/how-con gure-zebra-gk420d-printer-printing-royal-mail https://www 14105 Avalon Boulevard, Los Angeles, CA 90061 | Tel 800-465-1660 x1 | Fax 310-353-7109 www.Versatables.com w.zenstores.com/help/how-con gure-zebra-gk420d-printer-printing-royal-mails-2d-barcode-labels/#:~:text=How%20to%20 20con gure%20the%20Zebra%20GK420D%20printer%20for,your%20Royal%20Mail%202D%20barcode%20labels%20in%20...
-
Page 10: Wiring Diagram
Wiring Diagram 20D%20printer%20for,your%20Royal%20Mail%202D%20barcode%20labels%20in%20Zenstores. m/help/how-con gure-zebra-gk420d-printer-printing-royal-mails-2d-barcode-labels/#:~:text=How%20to%20con gure%20 ure-zebra-gk420d-printer-printing-royal-mails-2d-barcode-labels/#:~:text=How%20to%20con gure%20the%20Zebra%20G %20Zebra%20GK420D%20printer%20for,your%20Royal%20Mail%202D%20barcode%20labels%20in%20Zenstores. w%20to%20con gure%20the%20Zebra%20GK420D%20printer%20for,your%20Royal%20Mail%202D%20barcode%20labe https://www.zenstores.com/help/how-con gure-zebra-gk420d-printer-printing-royal-mails-2d-barcode-labels/#:~:text= https://www.zenstores.com/help/how-con gure-zebra-gk420d-printer-printing-royal- https://www.zenstores.com/help/how-con https://www.zenstores Control Switch to HC on Control Box (HC - Orange) Power Cord to AC on Control Box (AC - Green) Legs to Control Box - 1, - 2) Lift Actuator to Control Box... - Page 11 Control Switch Operation Instructions Tilt Down Display Save M1 M2 Down Tilt Up 14105 Avalon Boulevard, Los Angeles, CA 90061 | Tel 800-465-1660 x1 | Fax 310-353-7109 www.Versatables.com 20con gure%20the%20Zebra%20GK420D%20printer%20for,your%20Royal%20Mail%202D%20barcode%20labels%20in%20 https://www.zenstores.com/help/how-con gure-zebra-gk420d-printer-printing-royal-mails-2d-barcode-labels/#:~:text=Ho https://www.zenstores.com/help/how-con gure-zebra-gk420d-printer-printing-royal-mails-2d-barcode-labels/...
- Page 12 Assembly CAUTION Pinch Point Hazard. Please keep hands clear of the areas circled in red. https://www.zenstores.com/help/how-con gure-zebra-gk420d-printer-print 14105 Avalon Boulevard, Los Angeles, CA 90061 | Tel 800-465-1660 x1 | Fax 310-353-7109 www.Versatables.com 20con gure%20the%20Zebra%20GK420D%20printer%20for,your%20Royal%20Mail%202D%20barcode%20labels%20in%20 %20the%20Zebra%20GK420D%20printer%20for,your%20Royal%20Mail%202D%20barcode%20labels%20in%20Zenstores. https://www.zenstores.com/help/how-con gure-zebra-gk420d-printer-printing-royal-mails-2d-barcode-labels/#:~:text=Ho https://www.zenstores.com/help/how-con gure-zebra-gk420d-printer-printing-royal-mails-2d-barco...
- Page 13 Add-on: Sit to Stand Keyboard Arm and Tray Tools Parts Phillips Head Screwdriver Left Keyboard Bracket Right Keyboard Bracket Button Head Screw Keyboard Tray Assembly Step 1 Attach both Keyboard Brackets to the Main Frame using (8) 1/4-20 x 1/2” Button Head Screws as shown.
- Page 14 Add-on: Sit to Stand Keyboard Arm and Tray Assembly Step 2 Slide the Keyboard Tray into Keyboard Brackets the Keyboard Brackets as shown. Keyboard Tray w%20to%20con gure%20the%20Zebra%20GK420D%20printer%20for,your%20Royal%20Mail%202D%20barcode%20labels nstores.com/help/how-con gure-zebra-gk420d-printer-printing-royal-mails-2d-barcode-labels/#:~:text=How%20to%20con re%20the%20Zebra%20GK420D%20printer%20for,your%20Royal%20Mail%202D%20barcode%20labels%20in%20Zenstore https://www.zenstores.com/help/how-con gure-zebra-gk420d-printer-printing-royal-mails-2d-barcode-labels/#:~:text=H https://www.zenstores.com/help/how-con gure-zebra-gk420d-printer-printing-royal-m https://www 14105 Avalon Boulevard, Los Angeles, CA 90061 | Tel 800-465-1660 x1 | Fax 310-353-7109 www.Versatables.com w.zenstores.com/help/how-con gure-zebra-gk420d-printer-printing-royal-mails-2d-barcode-labels/#:~:text=How%20to%20 ebra%20GK420D%20printer%20for,your%20Royal%20Mail%202D%20barcode%20labels%20in%20Zenstores.
- Page 15 Add-on: CPU Holder Tools Parts Mounting Bracket Hex Head Screw Phillips Head Screwdriver CPU Holder 1/4-20 x 13mm Button Head Screw Truss Hd Screw Assembly Step 1 Decide which side you would like to place your CPU Holder on. The circles marked in red are where the CPU Holder can be mounted.
- Page 16 Add-on: CPU Holder Assembly Step 2 CPU Mount Attach the CPU Mount Plate Plate to the Main Frame using (4) 1/4-20 x 1/2” Button Head Screws as shown. 1/4-20 x 1/2 Button Head Screw Main Frame Step 3 Place the CPU Holder on top CPU Holder of the CPU Mount Plate.
- Page 17 Add-on: CPU Holder Assembly Step 4 Attach the bottom frame and Bottom Frame the side frame of the CPU Holder to the top frame of the CPU Holder as shown. The frames are designed to simply slide into one another. Use (4) Head Hex Screws to secure both frames to the Top Frame as shown.
- Page 18 Add-on: CPU Holder Adjustability ~:text=How%20to%20con gure%20the%20Zebra%20GK420D%20printer%20for,your%20Royal%20Mail%202D%20barcode https://www.zenstores.com/help/how-con gure-zebra-gk420d-printer-printing-royal-mails-2d-barcode-labels https://www.zenstores.com/help/how-con gure-zebra-gk420d-printer-printing-royal-mail 20con gure%20the%20Zebra%20GK420D%20printer%20for,your%20Royal%20Mail%202D%20barcode%20labels%20in%20 ebra%20GK420D%20printer%20for,your%20Royal%20Mail%202D%20barcode%20labels%20in%20Zenstores. https://www.zenstores.com/help/how-con gure-zebra-gk420d-printer-printing-royal-mails-2d-barcode-labels/#:~:text=Ho https://www.zenstores.com/help/how-con gure-zebra-gk420d-printer-printing-royal-mails-2d-barcode-labels https://www.zenstores.com/help/how-con gure-zebra-gk420d-printer-printing-royal-mails-2d-barco 14105 Avalon Boulevard, Los Angeles, CA 90061 | Tel 800-465-1660 x1 | Fax 310-353-7109 www.Versatables.com...
- Page 19 Add-on: Side Monitor Platform Tools Parts Phillips Head Screwdriver Side Platform Surface Side Platform Mount and/or Hand Drill Washer Phillips Bolt Acorn Nut 12mm Furniture Bolt Assembly Step 1 Attach the Side Platform Mount to the frame on either the left or right side using (4) Phillips Bolts, (4) Acorn Nuts and (4) Washers.
- Page 20 Add-on: Side Monitor Platform Assembly Step 2 Side Platform Place the Side Platform Surface on top of the platform mount. Make sure to align all 8 holes as shown to the right. Then, use (8) 12mm Furniture Bolts to attach both parts together. Platform Mount 12mm Furniture Bolt...
Need help?
Do you have a question about the PowerLift PEDT 48 and is the answer not in the manual?
Questions and answers