Table of Contents
Advertisement
Quick Links
Advertisement
Table of Contents

Related Manuals for Impecca IWA08-LR24


Summary of Contents for Impecca IWA08-LR24
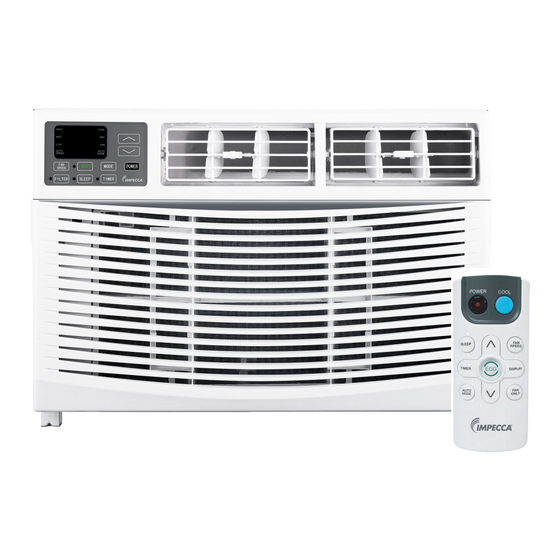
- Page 1 Window Air Conditioner User’s Guide MODEL www.impecca.com...
-
Page 3: Table Of Contents
TABLE OF CONTENTS WELCOME IMPORTANT SAFETY INSTRUCTIONS ELECTRICAL REQUIREMENTS PACKING LIST INSTALLATION & ASSEMBLY INSTRUCTIONS HOW TO INSTALL USING YOUR AIR CONDITIONER ELECTRONIC CONTROL PANEL REMOTE CONTROL CARE AND CLEANING TROUBLESHOOTING CUSTOMER SUPPORT ONE-YEAR LIMITED APPLIANCE WARRANTY (US) -
Page 4: Welcome
WELCOME Thank you for purchasing this Window Air Conditioner Before operating this unit, please read these instructions completely and keep the manual ready for further reference IMPORTANT SAFETY INSTRUCTIONS Before installing and using your air conditioner, please read this owner's manual carefully Store thismanual in a safe place for future reference Your safety and the safety of others is very important to us Please pay attention to all safety messages outlined in this user manual... - Page 5 INTRODUCTION TO REFRIGERANTS R32 The refrigerants used for air conditioners are environmentally friendly hydrocarbons R32 This kind of erant is combustible and odorless Moreover, it can burn and explode under certain condition However, there will be no risk of burning and explosion if you comply with the following table to install your air conditioner in a room with an appropriate area and use it correctly Compared with ordinary refrigerants, Refrigerant R32 is environmentally friendly and...
-
Page 6: Electrical Requirements
ELECTRICAL REQUIREMENTS WARNING ELECTRICAL SHOCK • Hazard Plug into a grounded 3 prong outlet • Do not remove the ground prong • Do not use an adapter • Do not use an extension cord • Failure to follow these instructions can result in death, fire, or electrical shock The electrical ratings for your air conditioner are listed on the model and serial number label located on the front left side of the unit (when facing the front) Specific electrical requirements are listed in the chart below Follow the requirements below for the type... - Page 7 LCDI POWER CORD AND PLUG This air conditioner is equipped with an LCDI (Leakage Current Detection and Interruption) power cord that is requiredby UL This power supply cord contains state- of-the-art electronics that sense leakage current If the cord is damaged and leakage occurs, power will be disconnected from the unit The LCDI power cord and plug will remove the supply source via electrical disconnect (circuit trip) if the nominal current leakage between the cord shield and either load...
-
Page 8: Packing List
PACKING LIST ❶ 1. Window Air Conditioner (1) 2. Remote Control (1) 3. Remote Control Battery *2 4. Top Rail (With sponge) (1) 5. Sash Lock (Two holes) (1) 6. Filler Panels (2) (With "Left" & "Right" remark on the front face) 7. -
Page 9: Installation & Assembly Instructions
INSTALLATION & ASSEMBLY INSTRUCTIONS Some assembly is required for your new air conditioner Please read and follow these instructions carefully • This air conditioner is designed to be installed in a standard double-hung window with a window width between 23" and 36" (584mm-914 mm) for 8000btu~10000btu, or a window width between 26"... - Page 10 Top Rail Assembly (Optional) The top rail must be assembled prior to installing the air conditioner in the window Tools Needed: Phillips Head Screw Driver Attaching the Top Rail to the Air Conditioner • Remove the air conditioner from the box and place on a hard and flat surface •...
-
Page 11: How To Install
HOW TO INSTALL NOTE: Top Rail and Sliding Panels at each side are offset to provide the proper pitch to the rear of (5/16") This is necessary for proper condensed water utilization and drainage If you are not using the Side Panels forany reason, this pitch to the rear must be maintained! 1 Place unit on floor, a bench or a table There is a Left and Right Window Filler Panelbe sure to use the proper panel for each side When installed the flange for... - Page 12 2 Keep a firm grip on the air conditioner, carefully place the unit into the window opening so the bottom of the air conditioner frame is against the window sill (Fig 5) Carefully close the window behindthe top rail of the unit (Suggest to keep a downward oblique, to let accumulated rain water to drain out, from back side of the unit bottom ) 3 Extend the side panels out against the window frame (Fig 6)
- Page 13 5 Drive 1/2" (12 7mm) locking screws through frame holes into window sash (Fig 9 Fig10) 6 To secure lower sash in place, attach right angle sash lock with 3/4" (19 mm) screw as shown (Fig 11) 7 Cut foam seal and insert in the space between the upper and lower sashes (Fig 12)
-
Page 14: Air Conditioner Use
If AC is Blocked by Storm Window Add wood as shown in Fig 13, or remove stormwindow before air conditioner is installed If Storm Window Frame must remain, be sure the drain holes or slots are not caulked or painted shut Accumulated Rain Water or Condensation must be allowed to drain Removing the Air Conditioner from the Window •... - Page 15 Introduction to Refrigerants R32 Before installing the appliance, you must read the manual carefully to get the safety information and notes When filling the combustible refrigerant, any of your rude operations may cause serious injury or injuries to human body or bodies and object or objects A leak test must be done after the installation is completed It is a must to do the safety inspection before maintaining or repairing an air conditioner using combustible refrigerant in order to ensure that the fire risk is...
-
Page 16: Using Your Air Conditioner
Please note that: • The installation site should be in a well-ventilated condition • The sites for installing and maintaining an air conditioner using Refrigerant R32 should be free from open fire or welding, smoking, drying oven or any o ther heat source higher than 548°C which easily produces open fire •... -
Page 17: Electronic Control Panel
ELECTRONIC CONTROL PANEL NOTE: This display always shows the room temperature in Fan Mode except when setting the Set temperature or the Timer NOTE: * means only available for WIFI modes, For more information, please see the WIFI manual 1. Digital Display: Without timer setting, the operation mode is Cooling, Dry, Fan and Auto, and the set temperature will be displayed Time will be displayed under timer setting Button:... -
Page 18: Timer Button
Dry Mode: This function reduces the humidity of the air to make the room more comfortable Press the MODE button to set the DRY mode An automatic function of alternating cooling cycles and air fan is activated Fan Mode: This function only works when the airconditioner is vented Press the MODE button to set the FAN mode With pressing the FAN SPEED button, the speed changes in the following sequence: HIGH, MED, LOW in FAN mode The remote control also stories the speed that was set in the previous mode of operation... -
Page 19: Filter Button
7. Sleep Button: Press the SLEEP button, all of the display lights will turn off after a while, but the Sleep light is always on In SLEEP mode, the air conditioner will automatically adjust the temperature and fan speed to make the room more comfortable during the night The set temperature will automatically raise or decrease based on the room temperature and the duration of sleep 8. -
Page 20: Remote Control
REMOTE CONTROL 1. POWER Turn the air conditioner on and off 2. Cool Press the COOL button to COOL mode Use these buttons on the control panel and remote to increase or decrease the Set Temperature or Timer Temperature range: 61°F ~88°F or 16°C ~31°C 4. -
Page 21: Auto Mode
Timer On: When the unit is off, press TIMER button at the first time, set the temperature with pressing the button Press TIMER button at the second time, set the rest time with pressing the button Press TIMER button at the third time, confirm the setting, then the rest time to next automatical switching-on could be read on the display of the machine Note: It can be set to automatically turn off or on in 0 5-24 hours Each press of the buttons will increase or decrease the timer The Timer can be set in 0 5... -
Page 22: Care And Cleaning
CARE AND CLEANING Air Filter Cleaning The air filter should be checked at least once every month to se e if it needs cleaing Trapped particles and dust can build up in the filter and may decrease airflow as well as cause the cooling coils to accumulate frost To clean the air filter: •... -
Page 23: Troubleshooting
TROUBLESHOOTING Problem Possible Cause Possible Solutions The Air Conditioner will not The air conditioner is Make sure the air conditioner start unplugged plug is pushed completely into the outlet The fuse is blown/circuit Check the house fuse/circuit breaker is tripped breaker box and replace the fuse or reset the breaker Power failure... - Page 24 Problem Possible Cause Possible Solutions The Air Conditioner is Ice blocks the air flow and Set the MODE dial to HIGH freezing up stops the air conditioner from FAN or HIGH COOL and set cooling the room the thermostat to a higher temperature The Remote Control is not The batteries are...
-
Page 25: Customer Support
If you wish to contact us by phone, please be sure to have your model number and serial number ready and call us between 9:00am and 6:00pm ET, at +1 866-954-4440 Keep tabs on Impecca’s newest innovations and enter contests via our social network feeds: www facebook com/Impecca/ ... -
Page 26: One-Year Limited Appliance Warranty (Us)
U.S.A. performed by unauthorized persons; use of non-genu- ine Impecca parts, etc. To obtain warranty service by an authorized Impecca™ ser- vice center, please email us at: service@impecca.com to ob- ALL IMPLIED WARRANTIES, INCLUDING IMPLIED WARRAN-...
Need help?
Do you have a question about the IWA08-LR24 and is the answer not in the manual?
Questions and answers