
Subscribe to Our Youtube Channel
Related Manuals for Impecca IWA12-KM15


Summary of Contents for Impecca IWA12-KM15
- Page 1 Window Air Conditioner—User Manual Models: IWA06-KM15 (6000 BTU) IWA08-KM15 (8000 BTU) IWA12-KM15 (12,000 BTU) www.impecca.com v.0.7...
- Page 2 WARNING: To avoid permanent damage to unit: Ensure it is in the upright position for a MINIMUM of 6 hours and a RECOMMENDED time of 24 hours before pow- ering on the first time. ADVERTENCIA: Para evitar daños permanentes a la unidad: Asegúrese de que está...
-
Page 3: Table Of Contents
TABLE OF CONTENTS Introduction ..........................6 Getting To Know Your Air Conditioner ..................7 Using Your Air Conditioner .....................8 Pre-Installation Instructions ....................8 Installation Instructions ....................... 10 Cleaning & Maintenance ...................... 13 Troubleshooting ........................14 Electrical Information ......................15 Customer Support ......................... 16 One-Year Limited Appliance Warranty (US) .............. - Page 4 READ THESE NOTICES CAREFULLY—THEY ARE IMPORTANT! WARNING Do not start or stop the unit by inserting or Do not damage power cord or replace Plug in power plug completely. pulling out the power plug. with a non-original power cord. •...
- Page 5 CAUTION Stop operation and remove unit from Hold the plug by the head of the power Unplug the power cord when not using window in severe storm or hurricane. plug when unplugging unit. the unit for extended periods of time. •...
-
Page 6: Introduction
INTRODUCTION Thank you for purchasing this quality Impecca window air conditioner unit. To ensure the longest life and highest energy efficiency of your unit, please carefully follow these operating instructions. Keep these instructions in a safe place and consult them as needed. Please... -
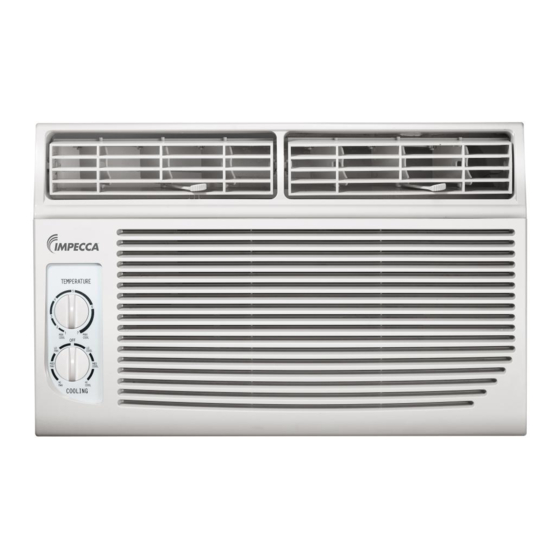
Page 7: Getting To Know Your Air Conditioner
• Never insert objects into the air conditioner. OPERATING CONDITIONS • The air conditioner must be operated within the temperature range of 62°F to 95°F (16°C to 35°C). • A perimeter of 12′′(30cm) around the air conditioner should be free of all objects. •... -
Page 8: Using Your Air Conditioner
USING YOUR AIR CONDITIONER OVERVIEW OF CONTROLS FUNCTIONS TEMPERATURE Note: The controls featured in this manual may be slightly different from yours. Cooling Mode The desired cool setting is selected by rotating the COOL- ING knob to the desired setting: “LO COOL”... - Page 9 INCLUDED PARTS & ACCESSORIES* 1. Air conditioning unit 6. Foam seal (with adhesive) 2. Flexible window filler panels 7. Upper Rail Screws (x4) 3. Upper Rail (may already be attached) 8. Screws (x6) 4. Upper Rail seal (may already be at- 9.
-
Page 10: Installation Instructions
INSTALLATION INSTRUCTIONS Use caution when unpacking and installing. Sharp edges can cause injury. Appearance of unit in these diagrams is for illustrative purposes only and may not precisely reflect your unit’s design. STEP 1: INSTALLING THE UPPER RAIL Upper Rail (IF NOT ALREADY ATTACHED) Upper Rail seal 1. - Page 11 STEP 3: FOAM SEAL ON WINDOW FRAME • Affix the foam seal (with adhesive z) to the bottom of the window sash. STEP 4: MOUNT THE UNIT IN THE WINDOW FRAME 1. With the help of another person, center the unit on the windowsill.
- Page 12 3. Fasten the upper rail and top corners of the window filler panels to the window frame with screws. Use the frame locks to attach the bottom corners to the window- sill. STEP 5: SECURING THE WINDOW • To keep the window from being unintentionally opened and risk damaging the unit or injuring passersby, use one type C screw to fasten the security bracket to the window.
-
Page 13: Cleaning & Maintenance
CLEANING & MAINTENANCE SAFETY WARNING To avoid electric shock, fire, damage, or injury while performing maintenance on your unit: • Always turn off and disconnect the air conditioner from electric power. • Never submerge the unit in water or spray liquids directly on the unit. •... -
Page 14: Troubleshooting
CLEANING THE FILTER For energy efficient operation, your filter should be cleaned at least once a month. Units in dusty environments may require more frequent filter cleaning. • The filter removal handle is located on the right side of the unit (see diagram D). •... -
Page 15: Electrical Information
The unit emits a strange smell • This may be caused by residue from cooking and cigarette smoke, etc. that remain in the air conditioning unit. Eliminated the source of the smell and clean the filter. The unit makes loud or unusual noises and vibrations •... -
Page 16: Customer Support
If you wish to contact us by phone, please be sure to have your model number and serial number ready and call us between 9:00am and 5:00pm ET, at +1 866-954-4440. Keep tabs on Impecca’s newest innovations & enter contests via our social network feeds: ... -
Page 17: One-Year Limited Appliance Warranty (Us)
Impecca™ hereby reserves the right to determine “Wear and Tear” on any and all products. Tampering or opening the product cast- No Impecca™ dealer, agent or employee is authorized to make any ing or shell will void this warranty in its entirety. - Page 18 Para obtener el servicio de garantía de un distribuidor autori- 14. Daños causados por cualquiera de las siguientes causas: zado de Impecca™ envíenos un correo electrónico a: service@ Actos de Dios, incendios, mal uso. accidentes, suministro impecca.com para obtener un número de Autorización de de energía incorrecto, servicio realizado por personal no...
- Page 19 L’usure normale de l’appareil n’est pas couverte par cette garan- un amendement de cette garantie sans le consentement écrit tie. Impecca™ se réserve le droit de déterminer le niveau d’usure et l’autorisation d’Impecca™. sur l’ensemble de ses appareils. Ouvrir le boîtier ou modifier l’appareil annule dans son entièreté...
- Page 20 © 2017 Impecca, a division of LT Inc., Wilkes Barre, PA...
Need help?
Do you have a question about the IWA12-KM15 and is the answer not in the manual?
Questions and answers