Table of Contents
Advertisement
Quick Links
Advertisement
Table of Contents

Summary of Contents for Impecca IWA06-KM15
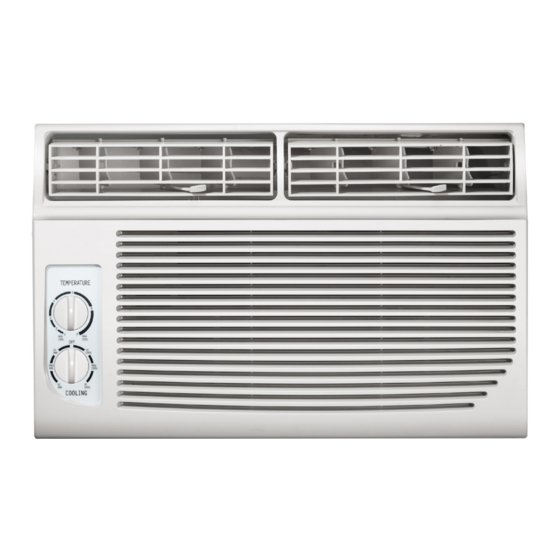
- Page 1 Window Air Conditioner—User Manual Models: IWA06-KM15, IWA08-KM15 www.impecca.com...
- Page 2 WARNING: To avoid permanent damage to unit: Ensure it is in the upright position for a MINIMUM of 6 hours and a RECOMMENDED time of 24 hours before pow- ering on the first time. ADVERTENCIA: Para evitar daños permanentes a la unidad: Asegúrese de que está...
-
Page 3: Table Of Contents
TABLE OF CONTENTS Important Safety Notices Introduction Getting to Know Your Air Conditioner Using your Air Conditioner Pre-Installation Instructions Installing Your Unit Cleaning & Maintenance Troubleshooting Customer Support –iii–... -
Page 4: Important Safety Notices
READ THESE NOTICES CAREFULLY—THEY ARE IMPORTANT! WARNING Do not start or stop the unit by inserting Do not damage power cord or replace Plug in power plug completely. or pulling out the power plug. with a non-original power cord. •... - Page 5 CAUTION Unplug the power cord when not Stop operation and remove unit from Hold the plug by the head of the power using the unit for extended periods window in severe storm or hurricane. plug when unplugging unit. of time.
-
Page 6: Introduction
INTRODUCTION Thank you for purchasing this quality Impecca window air conditioner unit. To ensure the longest life and highest energy efficiency of your unit, please carefully follow these operating instructions. Keep these instructions in a safe place and consult them as needed. Please note... -
Page 7: Getting To Know Your Air Conditioner
OPERATING CONDITIONS • The air conditioner must be operated within the temperature range of 62°F to 95°F (16°C to 35°C). • A perimeter of 12′′(30cm) around the air conditioner should be free of all objects. • Keep air inlet and air outlet clean and free of obstructing objects. •... -
Page 8: Using Your Air Conditioner
USING YOUR AIR CONDITIONER OVERVIEW OF CONTROLS TEMPERATURE FUNCTIONS Note: The controls featured in this manual may be slightly different from yours. Cooling Mode The desired cool setting is selected by rotating the COOL- ING knob to the desired setting: “LO COOL”... - Page 9 INCLUDED PARTS & ACCESSORIES* 1. Air conditioning unit 6. Foam seal (with adhesive) 2. Flexible window filler panels 7. Upper Rail Screws (x4) 3. Upper Rail (may already be attached) 8. Screws (x6) 4. Upper Rail seal (may already be at- 9.
-
Page 10: Installing Your Unit
INSTALLATION INSTRUCTIONS Use caution when unpacking and installing. Sharp edges can cause injury. Appearance of unit in these diagrams is for illustrative purposes only and may not precisely reflect your unit’s design. STEP 1: INSTALLING THE UPPER RAIL (IF Upper Rail NOT ALREADY ATTACHED) Upper Rail seal... - Page 11 STEP 3: FOAM SEAL ON WINDOW FRAME • Affix the foam seal (with adhesive z) to the bottom of the window sash. STEP 4: MOUNT THE UNIT IN THE WINDOW FRAME 1. With the help of another person, center the unit on the windowsill.
- Page 12 3. Fasten the upper rail and top corners of the window filler panels to the window frame with screws. Use the frame locks to attach the bottom corners to the win- dowsill. STEP 5: SECURING THE WINDOW • To keep the window from being unintentionally opened and risk damaging the unit or injuring passersby, use one type C screw to fasten the security bracket to the window.
-
Page 13: Cleaning & Maintenance
CLEANING & MAINTENANCE SAFETY WARNING To avoid electric shock, fire, damage, or injury while performing maintenance on your unit: • Always turn off and disconnect the air conditioner from electric power. • Never submerge the unit in water or spray liquids directly on the unit. •... -
Page 14: Troubleshooting
CLEANING THE FILTER For energy efficient operation, your filter should be cleaned at least once a month. Units in dusty environments may require more frequent filter cleaning. • The filter removal handle is located on the right side of the unit (see diagram D). •... -
Page 15: Customer Support
• The insulation of the power cable is ripped, shred or torn. • The unit controls do not work. • The unit produces abnormal noises. CUSTOMER SUPPORT For additional assistance, please visit our website or contact technical support. Web: www.impecca.com Phone: +1 866–954–4440 Email: service@impecca.com –15–... - Page 16 © 2016 Impecca, a division of LT Inc., Wilkes Barre, PA...


Need help?
Do you have a question about the IWA06-KM15 and is the answer not in the manual?
Questions and answers