Advertisement
Quick Links
Advertisement

Related Manuals for LuxenHome WHIF2216


Summary of Contents for LuxenHome WHIF2216
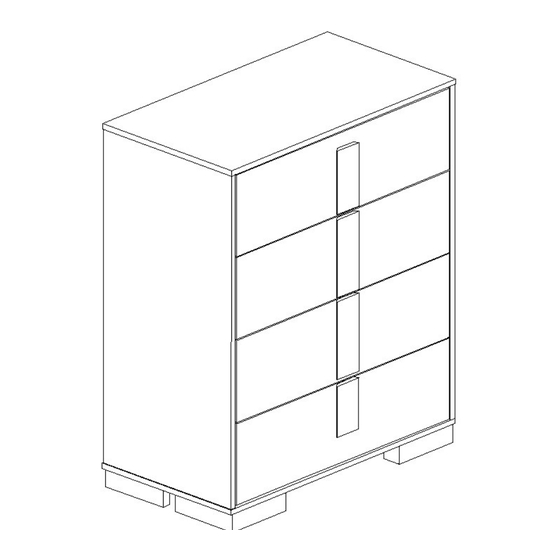
- Page 1 Vertical 4-Drawer Chest WHIF2216 ASSEMBLY INSTRUCTIONS...
- Page 2 Please save this manual for future reference...
- Page 3 Parts Hardware & Accessory Please save this manual for future reference...
- Page 4 Assembly Please save this manual for future reference...
- Page 5 Step 1 Install and tighten hardware H until the shoulder is flush with panels 1,2,3,4,7,8,9. Warning: To avoid scratch, make sure to put the panel on clean and soft surface. Please save this manual for future reference...
- Page 6 Step 2 Install hardware D and F to panels 2 and 3. Please save this manual for future reference...
- Page 7 Step 3 Connect panel 2 to the panel 6 using hardware G and J. Please save this manual for future reference...
- Page 8 Step 4 Connect panels 5 to the assembled section (panels 2, and 6) using hardware G and J. Please save this manual for future reference...
- Page 9 Step 5 Connect panel 3 to the assembled section (panels 5 and 6) using hardware G and J. Please save this manual for future reference...
- Page 10 Step 6 Flip the case good, connect panel 4 to the assembled section (panels 2 ,3 and 6) using hardware E, G and J and K. Please save this manual for future reference...
- Page 11 Step 7 Connect panel 15 and 16 to the panel 4 using hardware K. Please save this manual for future reference...
- Page 12 Step 8 Connect panel 1 to the assembled (panels 2,3 and 6) using hardware G and J. Please save this manual for future reference...
- Page 13 Step 9 Connect panels 10,11,12 and 14 using hardware E. Please save this manual for future reference...
- Page 14 Step 10 Install panel 13 into grooves on panel 10 and 11. Please save this manual for future reference...
- Page 15 Step 11 Connect panels 7,8 & 9 to the assembled sections (panel 10,11 and 14) using hardware G & I. Please save this manual for future reference...
- Page 16 Step 12 Install hardware F and tighten using hardware D on panels 10 and 11. Please save this manual for future reference...
- Page 17 Step 13 Install hardware A and tighten using hardware C on panels 7 & 8. Install hardware B and tighten using hardware C on panels 9. Please save this manual for future reference...
- Page 18 Step 14 Install Assembled panels 7,8,9. Please save this manual for future reference...
- Page 19 Step 15 Install hardware L on the wall and chest. Please save this manual for future reference...
- Page 20 Please save this manual for future reference...
- Page 21 Please save this manual for future reference...
- Page 22 Please save this manual for future reference...
Need help?
Do you have a question about the WHIF2216 and is the answer not in the manual?
Questions and answers