Table of Contents
Advertisement
Quick Links
Advertisement
Table of Contents

Related Manuals for R&S TS7124M


Summary of Contents for R&S TS7124M
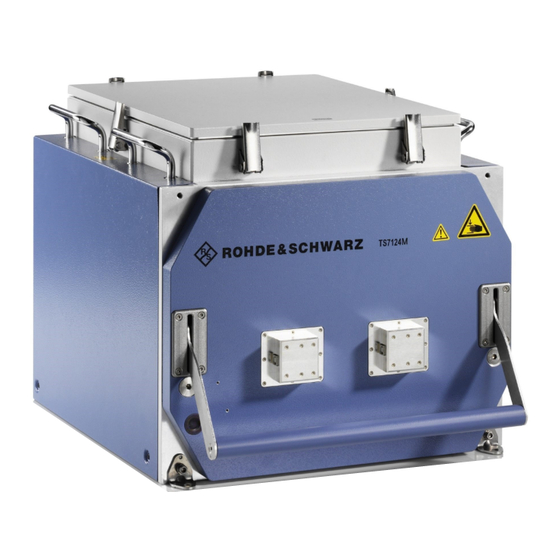
- Page 1 ® R&S TS7124M RF Shielded Box User Manual (?IÃì2) 1525539402 Version 05...
- Page 2 TS7124M models and options: ● ® R&S TS7124M (1525.8564.02) RF Shielded Box without Front Feedthrough Ports ● ® R&S TS7124M (1525.8564.12) RF Shielded Box with two Front Feedthrough Ports ● ® R&S TS-F24ABS (1525.8593.02) Basic Absorber ● ® R&S TS-F24P1 (1525.8664.02 / .04) DUT Holder Tray with Raster ●...
-
Page 3: Table Of Contents
® Contents R&S TS7124M Contents 1 Safety...................... 7 Safety instructions......................7 Labels on the product....................9 Warning messages in the documentation..............9 2 Welcome....................10 Key features.........................10 Documentation overview....................12 2.2.1 User manual........................12 2.2.2 Printed safety instructions..................... 12 2.2.3 Specifications and product brochures................12 2.2.4... - Page 4 ® Contents R&S TS7124M Antenna holders......................31 6.2.1 Half antenna ring R&S TS-F24-AH1................31 6.2.2 Half antenna ring with three Vivaldi antennas R&S TS-F24-AH3......... 33 6.2.3 Full antenna ring R&S TS-F24-AR................34 6.2.4 Full antenna ring with three Vivaldi antennas R&S TS-F24-AR3........37 6.2.5...
- Page 5 ® Contents R&S TS7124M Handling RF connections & applying correct torque..........75 RF interfaces....................... 76 Mounting a feedthrough..................... 76 Opening and closing the top cover................77 7.4.1 Opening the top cover....................78 7.4.2 Closing the top cover....................80 7.4.3 Adjusting the locking force of the cover................ 82 Mounting a DUT holder tray..................
- Page 6 ® Contents R&S TS7124M Checking........................153 Cleaning........................155 8.4.1 Cleaning the chamber....................155 8.4.2 Cleaning the gasket contact area................155 Storage........................155 Exchanging the trailing cable in the energy chain..........156 Contacting customer support..................161 9 Dismounting and disposal..............162 Disposal........................162 Glossary: List of Frequently Used Terms and Abbreviations..164 Index....................166...
-
Page 7: Safety
Intended use The R&S TS7124M RF shielded box is used in production, for service, repairs and other applications. It is intended for radiation testing of electronic devices. Use the device under test (DUT) only with the appropriate, specially manufactured cables and adapters. - Page 8 ® Safety R&S TS7124M Safety instructions Reconfigure or adjust the product only as described in the product documentation or the specifications document. Any other modifications can affect safety and are not per- mitted. Never open the casing of the product. Only service personnel authorized by Rohde &...
-
Page 9: Labels On The Product
® Safety R&S TS7124M Warning messages in the documentation 1.2 Labels on the product Labels with the following symbols point out areas of risk on the chamber. In addition, sections in this chapter which describe a specific risk are marked with the associated symbol in the margin. -
Page 10: Welcome
Key features 2 Welcome This user manual addresses every user of the R&S TS7124M. To use the chamber safely, first read and understand the user manual, which helps you to perform all inten- ded tasks. The chapter titles give a clear idea of the tasks described. If you are unsure about a topic, ask your supervisor or contact Rohde &... - Page 11 For radiation testing, the DUT is inserted into the chamber by a drawer, which is closed by a tightly sealing door. Antennas installed inside the R&S TS7124M then interact with the DUT by emitting or receiving electromagnetic radiation. You can position and orient the antennas in arbitrary geometrical arrangements.
-
Page 12: Documentation Overview
Documentation overview 2.2 Documentation overview This section provides an overview of the R&S TS7124M user documentation. Unless specified otherwise, you can find the documents on the R&S TS7124M product page www.rohde-schwarz.com/product/ts7124 2.2.1 User manual Contains the description of the hardware and its features, functions and operation. It describes mounting and configuration procedures. -
Page 13: Hardware Overview
® Hardware overview R&S TS7124M Front tour 3 Hardware overview This chapter describes all components of the chamber. Function and use of these com- ponents is described in Chapter 7, "Configuration", on page 74. Accessories for the chamber are described in Chapter 6, "Accessories",... - Page 14 ® Hardware overview R&S TS7124M Front tour Figure 3-2: Rear view of the drawer door 5 = Profile grooves for sealing the door 6 = RF absorber foam 7 = Upper position inside the drawer door for mounting the DUT holder tray 8 = Two openings in the absorber foam for accessing the feedthroughs (only in RF shielded box version 1525.8564.12)
- Page 15 ® Hardware overview R&S TS7124M Front tour Figure 3-3: Front view of the closed RF shielded box 10 = Handles for lifting the RF shielded box 11 = Only in RF shielded box version 1525.8564.12: two openings in the front door for optional feedthroughs...
-
Page 16: Rear Tour
77). The warranty seal (14) indicates that the R&S TS7124M is in its original delivery state, with a shielding effectiveness as given in the specifications document. For configura- tion of the interior of the RF shielded box, you must open the top cover and hence break the seal. -
Page 17: Rear Feedthroughs
® Hardware overview R&S TS7124M Rear tour on page 40), or for up to two antennas with dual polarization (see Chapter 6.3.3, "Cross-polarized Vivaldi antenna R&S TS-F24-V3", on page 44 ). Three metal cover plates (17) at the rear side of the chamber can optionally be... - Page 18 ® Hardware overview R&S TS7124M Rear tour Figure 3-6: Numbering of the RF feedthrough connectors on the rear side of the chamber When looking from the front into the shielded chamber, the numbering on the inside is clockwise, as shown in the next figure:...
-
Page 19: Transportation, Handling And Storage
® Transportation, handling and storage R&S TS7124M Securing 4 Transportation, handling and storage Familiarize yourself with residual risks and potentially dangerous situations. ● Lifting and carrying....................19 ● Packing........................19 ● Securing........................19 ● Transport.........................20 ● Storage........................21 4.1 Lifting and carrying Correct lifting and carrying 1. -
Page 20: Transport
® Transportation, handling and storage R&S TS7124M Transport After unpacking, there is no additional protection to prevent unintentional movement of the door. After unpacking, to prevent unintentional movement of the door, keep it locked by keeping the handle bar down. -
Page 21: Storage
® Transportation, handling and storage R&S TS7124M Storage 4.5 Storage Protect the product against dust. Ensure that the environmental conditions, e.g. tem- perature range and climatic load, meet the values specified in the specifications docu- ment. If you leave the chamber unused for some time (e.g. between production periods), con- sider the following: ►... -
Page 22: Installation And Commissioning
® Installation and commissioning R&S TS7124M Choosing the operating site 5 Installation and commissioning Familiarize yourself with residual risks and potentially dangerous situations. Chapter 1.1, "Safety instructions", on page 7. Execute these activities in the same order as given in this handbook: ●... -
Page 23: Unpacking
® Installation and commissioning R&S TS7124M Unpacking If class A equipment causes radio disturbances, take appropriate measures to eliminate them. 5.2 Unpacking Familiarize yourself with residual risks and potentially dangerous situations. Chapter 1.1, "Safety instructions", on page 7. To unpack the chamber 1. -
Page 24: Mounting The Chamber
® Installation and commissioning R&S TS7124M Mounting the chamber 5.3 Mounting the chamber Familiarize yourself with residual risks and potentially dangerous situations. Chapter 1.1, "Safety instructions", on page 7. Mount the chamber on a stable support that meets the following requirements: ●... -
Page 25: Rack Mounting
® Installation and commissioning R&S TS7124M Mounting the chamber 3. Position the chamber on a stable mounting space. Ensure that the following: ● There are sufficient room to open the drawer. ● The drawer, connectors and mounting brackets are easily accessible from all sides, including those on the rear side. - Page 26 ® Installation and commissioning R&S TS7124M Mounting the chamber Figure 5-3: Chamber fixed in a 19'' rack by the rack mounting kit Red arrows = Metal sheet of the rack mounting kit Inside the rack, the chamber must rest on stable rails that jointly can carry a load of at least 40 kg.
- Page 27 ® Installation and commissioning R&S TS7124M Mounting the chamber Make sure that from the level of the rails, a height of 10 HU (444.5 mm) is available for the chamber. 3. WARNING! Door of the chamber is heavy and can move. If the door slides open while you lift the chamber, the center of gravity shifts.
-
Page 28: Grounding The Rf Shielded Box
® Installation and commissioning R&S TS7124M Grounding the RF shielded box Figure 5-6: Matching the screws and washers to the various holes in the metal rack cover sheet 1 = Large washers, spring-lock washers and M6 screws (4 each) for fixing the metal sheet to the... - Page 29 ® Installation and commissioning R&S TS7124M Grounding the RF shielded box Figure 5-7: Ground connector in the rear left corner of the RF shielded box 1 = Connector for electrical grounding (earth) 2 = Mounting bracket, fixed to a stable bench or support The RF shielded box is now ready to be used.
-
Page 30: Accessories
® Accessories R&S TS7124M Basic absorber R&S TS-F24ABS 6 Accessories The following accessories are available for the R&S TS7124M: ● Basic absorber R&S TS-F24ABS................30 ● Antenna holders......................31 ● Antennas.........................40 ● Magnetic coil R&S TS-F24HML1................51 ● DUT holder tray R&S TS-F24P1................ -
Page 31: Antenna Holders
® Accessories R&S TS7124M Antenna holders Depending on the accessories installed inside the chamber, different configurations of absorber material are provided for the chamber's top cover: Figure 6-2: Different absorber material configurations on the inner side of the top cover. In these pic-... -
Page 32: Antenna Holders
® Accessories R&S TS7124M Antenna holders ● Vivaldi antenna R&S TS-F24-V2 ● Cross-polarized Vivaldi antenna R&S TS-F24-V3 ● Also, you can mount each Vivaldi antenna on the 45° adapter for lateral antenna tilt R&S TS-F2X-VH4, which is compatible also with the half antenna ring. -
Page 33: Half Antenna Ring With Three Vivaldi Antennas R&S Ts-F24-Ah3
® Accessories R&S TS7124M Antenna holders Figure 6-4: Half antenna ring with three Vivaldi antennas mounted on 45° adapters (here: not tilted) The procedure for mounting the half antenna ring into the chamber is described in Chapter 7.6, "Installing an antenna ring or holder",... -
Page 34: Full Antenna Ring R&S Ts-F24-Ar
® Accessories R&S TS7124M Antenna holders Figure 6-5: Half antenna ring with three Vivaldi antennas (V1 or V2) 3 = Vivaldi antenna on rail 2, top, position 3 (3 hole), rotation 90° 10 = Vivaldi antenna on rail 2, top, position 10 (10 hole), rotation 0°... - Page 35 ® Accessories R&S TS7124M Antenna holders differentiate it from the Half antenna ring R&S TS-F24-AH1 that fills the upper half of the chamber. The full antenna ring is compatible with the following antennas on their antenna fix- tures: ● Vivaldi antenna R&S TS-F24-V1 ●...
- Page 36 ® Accessories R&S TS7124M Antenna holders Figure 6-7: Antenna ring with six Vivaldi antennas, right: with two absorber brackets and absorbers Figure 6-8: Convention of numbering antenna ring bars (rails) in the full antenna ring Rail 1 = Antenna ring bar in 0° position Rail 2 = Antenna ring bar in 45°...
-
Page 37: Full Antenna Ring With Three Vivaldi Antennas R&S Ts-F24-Ar3
® Accessories R&S TS7124M Antenna holders Expanding rivets that keep most of the antenna ring components together are shown in Figure 7-55. Mounting and orientation of the antenna fixtures and antennas is shown in "To mount an antenna on the ring"... -
Page 38: 45° Adapter For Lateral Antenna Tilt R&S Ts-F2X-Vh4
® Accessories R&S TS7124M Antenna holders The antennas are mounted on the top center rail (rail 1), which is mounted in position 4 (top of the antenna ring). On the rail, the three antennas are mounted in positions/ holes 3, 10 and 23, as indicated in Figure 6-5. -
Page 39: Antenna Holder R&S Ts-F24-Ah2
® Accessories R&S TS7124M Antenna holders 6.2.6 Antenna holder R&S TS-F24-AH2 The R&S TS-F24-AH2, order no. 1525.8893.x2, is an optional antenna mounting struc- ture for one, two or three Vivaldi antennas. The antenna holder is compatible with the following antennas on their antenna fixtures: ●... -
Page 40: Antennas
® Accessories R&S TS7124M Antennas Figure 6-12: Antenna holder mounted inside the chamber at the rear wall with one Vivaldi antenna Left = Antenna holder with Vivaldi antenna R&S TS-F24-V1 Right = Antenna holder with Vivaldi antenna R&S TS-F24-V2 To mount a Vivaldi antenna onto its fixture (see... - Page 41 ® Accessories R&S TS7124M Antennas Two versions of the antenna are available: ● R&S TS-F24-V1 var.2, order no. 1525.8964.02, with a standard 40 cm and 55 cm RF cable ● R&S TS-F24-V1 var.3, order no. 1525.8964.03, with a special 55 cm RF cable that...
-
Page 42: Vivaldi Antenna R&S Ts-F24-V2
® Accessories R&S TS7124M Antennas Table 6-1: Vivaldi antenna specifications Parameter Value Frequency 700 MHz to 14 GHz VSWR (reflection coefficient) < 3.5 (at 0.7 GHz to 1 GHz) < 2 (at 1 GHz to 14 GHz) Gain -4 to 6 dBi (at 0.7 GHz to 2.7 GHz) 6 to 8 dBi (at 2.7 GHz to 14 GHz) - Page 43 ® Accessories R&S TS7124M Antennas Figure 6-14: Vivaldi antenna with SMP connector, mounted on an antenna fixture This Vivaldi antenna can be used as a communication antenna, allowing to transmit signals towards the DUT, and to receive signals from it.
-
Page 44: Cross-Polarized Vivaldi Antenna R&S Ts-F24-V3
® Accessories R&S TS7124M Antennas This Vivaldi antenna with antenna fixture is not a serviceable part. If it is defective, or if checking reveals that it is not working correctly, replace it. 6.3.3 Cross-polarized Vivaldi antenna R&S TS-F24-V3 The cross-polarized (CP) Vivaldi broadband antenna R&S TS-F24-V3 with two SMP connectors features excellent transmission properties in the frequency range from 1.7... - Page 45 ® Accessories R&S TS7124M Antennas Figure 6-15: Cross-polarized Vivaldi antenna (1.7 to 20 GHz) with two SMP connectors, mounted on a special antenna fixture This dual Vivaldi antenna can be used as a communication antenna, allowing to trans- mit signals towards the DUT, and to receive signals from it.
-
Page 46: Narrowband Antenna R&S Ts-F24Nb2
® Accessories R&S TS7124M Antennas Parameter Value Gain -1 to 6 dBi (at 1.7 to 5 GHz) 6 to 10 dBi (at 5 to 20 GHz) Max. input power 30 dBm (1 W) 50 Ω Impedance Polarization dual, cross-polarized linear (nom.) - Page 47 ® Accessories R&S TS7124M Antennas Figure 6-16: Narrowband antenna with SMP connector This narrowband antenna can be used as a communication antenna, allowing to trans- mit signals towards the DUT, and to receive signals from it. In this context, typical DUTs include mobile communication devices based on, e.g., selected UHF, GSM, UMTS and...
- Page 48 ® Accessories R&S TS7124M Antennas Figure 6-17: One narrowband antenna mounted in a low position on the right chamber wall Table 6-4: Narrowband antenna specifications (*) Parameter Value Frequency 700 MHz to 960 MHz VSWR (reflection coefficient) < 3 (at 700 MHz to 730 MHz) <...
-
Page 49: Wideband Antenna R&S Ts-F24Wa1
® Accessories R&S TS7124M Antennas 6.3.5 Wideband antenna R&S TS-F24WA1 The wideband spiral antenna R&S TS-F24WA1, order no. 1525.8670.02, features excellent transmission properties in the frequency range from 0.3 to 6 GHz. The antenna is based on a printed board with a structured metal coating that spreads out in a spiral shape. -
Page 50: Lf Loop Antenna R&S Ts-F24Hlf1
® Accessories R&S TS7124M Antennas Table 6-5: Wideband antenna specifications (*) Parameter Value Frequency 300 MHz to 6 GHz VSWR (reflection coefficient) < 2 (at 300 MHz to 4 GHz) < 2.3 (at 4 GHz to 6 GHz) Gain -7 to 2 dBi (at 400 MHz to 3 GHz) -15 to 0 dBi (at 3 GHz to 6 GHz) -
Page 51: Magnetic Coil R&S Ts-F24Hml1
® Accessories R&S TS7124M Magnetic coil R&S TS-F24HML1 Table 6-6: Loop antenna specifications Parameter Value Frequency range 20 kHz to 1 MHz 500 Ω @ 125 kHz Resistance R > 6 kΩ q 566 kHz > 1.5 kΩ q 1 MHz... - Page 52 ® Accessories R&S TS7124M Magnetic coil R&S TS-F24HML1 Figure 6-20: 3D magnetic Helmholtz coil with DUT holder Center = Polymer cube with three orthogonal pairs of coils Front = DUT holder with door mounting kit and DUT tray Left and right = Two mounting plates, each with four screws and spacers Each coil has three loops.
- Page 53 ® Accessories R&S TS7124M Magnetic coil R&S TS-F24HML1 = Normal vectors of the magnetic field in X, Y and Z direction X1, X2 = Pair of coils perpendicular to the X axis Y1, Y2 = Pair of coils perpendicular to the Y axis...
- Page 54 ® Accessories R&S TS7124M Magnetic coil R&S TS-F24HML1 Figure 6-22: Circuitry of the three pairs of coils = 12 Ω resistors X1 and X2 = Coils perpendicular to the X axis Y1 and Y2 = Coils perpendicular to the Y axis Z1 and Z2 = Coils perpendicular to the Z axis 1 ...
- Page 55 ® Accessories R&S TS7124M Magnetic coil R&S TS-F24HML1 Figure 6-23: View from above (top cover opened): wiring board, cables and connector The delivery includes: ● Polymer cube with 3x2 coils ● Two mounting plates that hold the cube in the chamber ●...
- Page 56 ® Accessories R&S TS7124M Magnetic coil R&S TS-F24HML1 Figure 6-24: View from front: opened chamber with magnetic Helmholtz coil mounted inside 1 = Polymer cube with copper wire coils 2 = DUT holder tray 3 = One of two polymer latches inside the cube for fixing a field probe The assembly is premounted in the chamber by the manufacturer.
-
Page 57: Dut Holder Tray R&S Ts-F24P1
® Accessories R&S TS7124M DUT holder tray R&S TS-F24P1 To measure the magnetic field inside a closed chamber, fix a field probe at one of the two latches, labeled (3) in Figure 6-24. Table 6-7: 3D magnetic Helmholtz coil specifications... - Page 58 ® Accessories R&S TS7124M DUT holder tray R&S TS-F24P1 Figure 6-26: DUT holder tray (R&S TS-F24P1) The DUT holder tray is mounted on the inside of the drawer door with two hexagon socket screws. To loosen or tighten the screws, use a 5 mm hex key with ball end:...
-
Page 59: Feedthroughs
® Accessories R&S TS7124M Feedthroughs The DUT holder tray is not a serviceable part. If it is defective or not working correctly, replace it. 6.6 Feedthroughs ● BNC feedthrough R&S TS-F1BCBBn..............59 ● Twin N-SMA feedthrough R&S TS-F1RFNM2............60 ●... -
Page 60: Twin N-Sma Feedthrough R&S Ts-F1Rfnm2
® Accessories R&S TS7124M Feedthroughs Figure 6-28: Feedthrough with one or two BNC connectors and protective caps 1 = Outside view of version .02 with one BNC connector 2 = Inside view of version .02 with one BNC connector 3 = Outside view of version .03 with two BNC connectors 4 = Inside view of version .03 with two BNC connectors... -
Page 61: Four Times Sma-Sma Feedthrough R&S Ts-F1Rfmm4
® Accessories R&S TS7124M Feedthroughs Figure 6-29: Two RF feedthroughs with N and SMA connectors Left = Outside view with two female N connectors Right = Inside view with two female SMA connectors Align the male and female connectors precisely. With a torque wrench, apply the cor- rect torque. -
Page 62: D-Sub Feedthrough R&S Ts-F1Sd259
® Accessories R&S TS7124M Feedthroughs The 4x SMA-SMA feedthrough is not a serviceable part. If it is defective or not working correctly, replace it. 6.6.4 D-Sub feedthrough R&S TS-F1SD259 The R&S TS-F1SD259, order no. 1525.8835.02, is an optional filtered feedthrough for serial bus interfaces with D-subminiature connectors (25 pin and 9 pin, respectively). -
Page 63: Usb 2.0 Type Ab Feedthrough R&S Ts-F1U2Ba1
® Accessories R&S TS7124M Feedthroughs The filtered D-Sub feedthrough is not a serviceable part. If it is defective or not working correctly, replace it. 6.6.5 USB 2.0 type AB feedthrough R&S TS-F1U2BA1 The R&S TS-F1U2BA1, order no. 1525.8735.02, is an optional filtered USB 2.0 feed- through with type A and B connectors. -
Page 64: Usb 3.2 Type C Feedthrough R&S Ts-F1U3Cc1
® Accessories R&S TS7124M Feedthroughs Figure 6-33: Filtered USB 3.2 feedthrough Left = Outside view with USB 3.2 type B female connector Right = Inside view with USB 3.2 type A female connector The filtered USB 3.2 feedthrough is not a serviceable part. If it is defective or not work- ing correctly, replace it. -
Page 65: Ethernet (Lan) Feedthrough R&S Ts-F1Etrr1
® Accessories R&S TS7124M Feedthroughs 6.6.8 Ethernet (LAN) feedthrough R&S TS-F1ETRR1 The R&S TS-F1ETRR1, order no. 1525.8729.02, is an optional filtered feedthrough for Gigabit Ethernet (LAN) interfaces with 8-pin 8P8C (RJ-45) connectors. Figure 6-35: Gigabit Ethernet feedthrough for a LAN connection... -
Page 66: Fiber-Optic Feedthrough R&S Ts-F1Opff4
6.6.10 Fiber-optic feedthrough R&S TS-F1OPFF4 The R&S TS-F1OPFF4, order no. 1525.8864.02, is an optional fiber-optic feedthrough for 4x FSMA. You can use it to connect optical components inside the R&S TS7124M to any compatible device outside the chamber. The feedthrough has four FSMA con- nectors inside and outside the chamber, respectively. -
Page 67: Dc Power Feedthrough R&S Ts-F1Podc1
® Accessories R&S TS7124M Feedthroughs Figure 6-37: Pneumatic feedthrough with four push-pull valve connectors Left = Outside view with four female push-pull valves (4 mm inner diameter) Right = Inside view with four female push-pull valves (4 mm inner diameter) -
Page 68: Dc Power Feedthrough R&S Ts-F1Pobb2
® Accessories R&S TS7124M Feedthroughs necting components with maximum current consumption of 3 A inside the chamber to a power source with maximum 16 V DC. It has no fuses. The integrated lowpass filter ensures high shielding effectiveness of the DC power supply. -
Page 69: Ac Power Feedthrough R&S Ts-F1Poac1
® Accessories R&S TS7124M Feedthroughs Risk of damaging the power feedthrough by mechanical shock The R&S TS-F1POBB2 contains mechanically sensitive filter elements. If the power feedthrough drops or receives a mechanical impact, these elements can easily break or be damaged. A damaged filter element can lead to a shortcut in the feedthrough. - Page 70 ® Accessories R&S TS7124M Feedthroughs Risk of damaging the power feedthrough by mechanical shock The R&S TS-F1POAC1 contains mechanically sensitive filter elements. If the power feedthrough drops or receives a mechanical impact, these elements can easily break or be damaged. A damaged filter element can lead to a shortcut in the feedthrough, which blows one or both fuses.
-
Page 71: Energy Chain R&S Ts-F24Ec
® Accessories R&S TS7124M Energy chain R&S TS-F24EC Figure 6-43: Connecting the power feedthrough 1 = Latch for releasing the fuse holder 2 = The two fuses (2 A, 250 V) 3 = Fuses inserted and power cord connected The power feedthrough is not a serviceable part. If it is defective or not working cor- rectly, replace it. - Page 72 ® Accessories R&S TS7124M Energy chain R&S TS-F24EC Figure 6-44: The energy chain guides cables from front feedthroughs to the rear of the chamber 1 = Rear connectors for 2x D-Sub 9 pin (on top) and below 2x Ethernet (LAN) and 2x USB 2.0 2 = View inside the opened chamber side wall (blue metal cover removed): While the drawer opens and closes, the connector assembly (green) at the front end of the trailing cable ("energy chain") moves...
- Page 73 ® Accessories R&S TS7124M Energy chain R&S TS-F24EC Figure 6-45: Allocations between rear connectors of the energy chain and front feedthroughs 1 = Upper rear D-Sub 9 socket is connected to front D-Sub 25 feedthrough (pins 1 to 9, only) 2 = Lower rear D-Sub 9 socket is connected to front D-Sub 9 feedthrough 3 = Upper rear LAN or USB 2.0 socket is connected to right front LAN or USB 2.0 feedthrough...
-
Page 74: Configuration
LF loop or Vivaldi antennas on one or two antenna holders. These options allow configuring the R&S TS7124M reproducibly for a comprehensive range of application-specific DUT test scenarios. -
Page 75: Handling Rf Connections & Applying Correct Torque
® Configuration R&S TS7124M Handling RF connections & applying correct torque 7.1 Handling RF connections & applying correct torque Handling RF connectors and cables correctly and carefully is crucial for system perfor- mance. ● Excessive tightening of the coaxial RF connectors can damage the cables and connectors. -
Page 76: Rf Interfaces
® Configuration R&S TS7124M Mounting a feedthrough 7.2 RF interfaces Figure 7-1: N connectors with blue protective caps (left), two caps removed (right) On the rear side of the RF shielded box, remove the protective caps from as many N connectors as required. -
Page 77: Opening And Closing The Top Cover
® Configuration R&S TS7124M Opening and closing the top cover Figure 7-2: Cover plate, fixed by eight Torx 8 screws 3. Remove the cover plate by carefully pushing it out from the inside of the chamber. 4. Remove the old RF sealing around the hole in the door or rear wall. -
Page 78: Opening The Top Cover
® Configuration R&S TS7124M Opening and closing the top cover Figure 7-3: Removing the top cover and putting it back on top of the RF shielded box ● Opening the top cover.....................78 ● Closing the top cover....................80 ● Adjusting the locking force of the cover.............. - Page 79 The top cover is open. When opening the top cover of the R&S TS7124M for the first time, its warranty seal has to be broken. The seal indicates that the chamber is in its original delivery state, with a shielding effectiveness as given in the specifications document.
-
Page 80: Closing The Top Cover
® Configuration R&S TS7124M Opening and closing the top cover Figure 7-5: RF shielded box with top cover opened. The gasket is marked in orange color 7.4.2 Closing the top cover To close the top cover 1. Clean the gasket as described in the Chapter 8.4.2, "Cleaning the gasket contact... - Page 81 ® Configuration R&S TS7124M Opening and closing the top cover 1 = Standard absorber for use with Narrowband antenna R&S TS-F24NB2 2 = Absorber for use with Half antenna ring R&S TS-F24-AH1 Full antenna ring R&S TS-F24-AR 3 = Absorber for use with Wideband antenna R&S TS-F24WA1...
-
Page 82: Adjusting The Locking Force Of The Cover
® Configuration R&S TS7124M Opening and closing the top cover Figure 7-8: Closing the top cover's quick clamps 1 = Lift the inner clamp out of the lever 2 = Bring the inner clamp closer to the retaining lug on the top cover's edge... - Page 83 ® Configuration R&S TS7124M Opening and closing the top cover Figure 7-9: Inside view of a quick clamp 1 = Adjustment screw, seen through a hole in the top cover's retaining lug 2 = Red seal: locking varnish on the inner clamp's holder screw...
-
Page 84: Mounting A Dut Holder Tray
7.5 Mounting a DUT holder tray The R&S TS7124M can optionally be equipped with the DUT holder tray R&S TS- F24P1 to be mounted to the inside of the drawer door. You can mount the tray either in a lower or in a higher position, depending on your intended application. - Page 85 ® Configuration R&S TS7124M Mounting a DUT holder tray Figure 7-11: DUT holder tray, here mounted in the higher position The following mounting instruction uses the DUT holder tray R&S TS-F24P1 as an example. Other DUT holder trays are mounted in a similar way.
- Page 86 ® Configuration R&S TS7124M Mounting a DUT holder tray Together with the full antenna ring, only mount the DUT tray in the higher posi- tion. Figure 7-13: Do not mount the DUT tray in the lower position, if the full antenna ring is in the chamber NOTICE! Risk of tray collision with Vivaldi antennas.
-
Page 87: Installing An Antenna Ring Or Holder
® Configuration R&S TS7124M Installing an antenna ring or holder Attach the DUT holder tray to the other position. 5. Use the two hexagon socket screws to pull the tray all the way into the notch. 6. To securely fix the tray to the front door, tighten the two screws with a torque of 8 Nm. - Page 88 ® Configuration R&S TS7124M Installing an antenna ring or holder 4. Remove the four polymer bolts (the short- and long-distance bolts shown in Fig- 7-23) that hold the half antenna ring, using a wrench No.13: Figure 7-15: Left: remove two long bolts (3) at the rear wall inside the chamber. Right: remove...
- Page 89 ® Configuration R&S TS7124M Installing an antenna ring or holder Figure 7-16: Take the half antenna ring out of the chamber 6. Place the antenna ring outside the chamber 7. Remove the cable guide clips (highlighted in Figure 7-17 by a red circle).
- Page 90 ® Configuration R&S TS7124M Installing an antenna ring or holder 8. Detach the cables from the cable guide holes and from the SMP connectors at the antennas. Figure 7-18: Detach the antenna cables 9. The antenna ring and antennas are now ready for configuration according to Chap- ter 7.10, "Configuring Vivaldi...
-
Page 91: Mounting The Half Antenna Ring Into The Chamber
® Configuration R&S TS7124M Installing an antenna ring or holder Figure 7-20: Detachable absorber pads re-installed at the chamber's rear wall 12. Optionally close the chamber's top cover (see Chapter 7.4.2, "Closing the top cover", on page 80), especially if the half antenna ring will remain outside of the chamber for an extended period of time. - Page 92 ® Configuration R&S TS7124M Installing an antenna ring or holder ● The empty chamber (empty except for the absorber material covering the walls). If spacers and disk fixtures (see Figure 7-22) are already installed in the RF shielded box, you can leave them there.
- Page 93 ® Configuration R&S TS7124M Installing an antenna ring or holder Figure 7-23: The short- and the long-distance bolt, the spacer and the long disk fixture To mount the half antenna ring into the chamber If not removed, also remove the top cover as described in Chapter 7.4.1, "Opening the...
- Page 94 ® Configuration R&S TS7124M Installing an antenna ring or holder Figure 7-25: Half antenna ring with some antennas and cables mounted (detail: cable guide clip) 6. Depending on the number of antenna cables to be connected, remove an appropri- ate number of detachable absorber pads from the rear wall inside the chamber.
- Page 95 ® Configuration R&S TS7124M Installing an antenna ring or holder Figure 7-27: Inserting the half antenna ring into the chamber 8. Fix the half antenna ring with the two long-distance bolts at the rear wall, and with the two short-distance bolts at the front wall. The bolts are shown in Figure 7-23.
- Page 96 ® Configuration R&S TS7124M Installing an antenna ring or holder 10. Insert the previously detached absorber pads into the gaps in the rear chamber wall. 11. Check the SMP connectors: verify that all antennas are properly connected to their cables.
-
Page 97: Taking The Full Antenna Ring Out Of The Chamber
® Configuration R&S TS7124M Installing an antenna ring or holder All three absorber material configurations are compatible with antennas mounted on Antenna holder R&S TS-F24-AH2. 7.6.3 Taking the full antenna ring out of the chamber To take the full antenna ring out of the chamber 1. - Page 98 ® Configuration R&S TS7124M Installing an antenna ring or holder 1 = Rear chamber wall 2 = Two spacers (do NOT remove) 3 = Two rear long-distance bolts (remove) 4 = Two disk fixtures (do NOT remove) 5 = Front chamber wall...
- Page 99 ® Configuration R&S TS7124M Installing an antenna ring or holder Figure 7-32: Antenna ring with some antennas and cables still mounted 8. Remove the cable guide clips (2 in Figure 7-33). Figure 7-33: The antenna cables can be detached User Manual 1525.5394.02 ─ 05...
- Page 100 ® Configuration R&S TS7124M Installing an antenna ring or holder 1 = SMP connector 2 = Cable guide clip 3 = Cable guide hole 9. Detach the cables from the cable guide holes (3 in Figure 7-33) and from the SMP connectors (1) at the antennas.
-
Page 101: Mounting The Full Antenna Ring Into The Chamber
® Configuration R&S TS7124M Installing an antenna ring or holder Figure 7-35: Full antenna ring with some antennas mounted 12. Attach the protective caps to the SMA connectors. 13. Insert the previously detached absorber pads into the gaps in the rear chamber wall. - Page 102 ® Configuration R&S TS7124M Installing an antenna ring or holder Figure 7-37: Full antenna ring with some antennas mounted ● The empty chamber (empty except for the absorber material covering the walls). If spacers and disk fixtures (see Figure 7-38) are already installed in the RF shielded box, you can leave them there.
- Page 103 ® Configuration R&S TS7124M Installing an antenna ring or holder Figure 7-38: Top view of the empty chamber, with four spacers as well as two long disk fixtures at the lower rear side Figure 7-39: The short- and the long-distance bolt, the spacer and the long disk fixture...
- Page 104 ® Configuration R&S TS7124M Installing an antenna ring or holder For the remainder of this procedure, remember to avoid touching the gasket that seals the top cover. 1. If the four spacers and two disk fixtures are not installed as in...
- Page 105 ® Configuration R&S TS7124M Installing an antenna ring or holder Figure 7-41: Connecting the antennas and attaching the antenna cables 1 = SMP connector 2 = Cable guide clip 3 = Cable guide hole 6. Fix the cables to the antenna ring bars (rails), using cable guide clips (2 in Fig- 7-41).
- Page 106 ® Configuration R&S TS7124M Installing an antenna ring or holder Before inserting the full antenna ring into the RF shielded box, make sure that the DUT holder is not within the chamber at the same time. Either manually pull the drawer open (while preventing the chamber from tilting) or make sure that the DUT holder is not attached to the drawer's door.
- Page 107 ® Configuration R&S TS7124M Installing an antenna ring or holder 1 = Two disk fixtures 12. Use the two long-distance bolts to fix the full antenna ring at the rear wall. Figure 7-44: Fixing the full antenna ring with the two long-distance bolts at the rear wall 2 = Two long-distance bolts 13.
- Page 108 ® Configuration R&S TS7124M Installing an antenna ring or holder Figure 7-45: Fixing the full antenna ring with the two short-distance bolts at the front wall 3 = Two short-distance bolts Figure 7-39 shows the short- and long-distance bolts. To screw the bolts into the spacers and tighten them, use a torque wrench No.13 with a torque of 2.8 Nm.
-
Page 109: Taking The Antenna Holder Out Of The Chamber
® Configuration R&S TS7124M Installing an antenna ring or holder Verify that no DUT holder tray (and no DUT on it) can potentially collide with any antenna inside the chamber, or with the antenna ring, once the drawer is closing. - Page 110 ® Configuration R&S TS7124M Installing an antenna ring or holder 3. Use an SMA wrench to disconnect the antenna cable from the SMA connector at the chamber's rear wall. 4. Attach a protective cap to the SMA connector at the rear chamber wall.
-
Page 111: Mounting The Antenna Holder Into The Chamber
® Configuration R&S TS7124M Installing an antenna ring or holder 8. Remove the two polymer spacers that held the antenna holder at the rear wall, using a wrench No.13: 9. Insert two round absorber pads into the spacers' gaps in the rear chamber wall. - Page 112 ® Configuration R&S TS7124M Installing an antenna ring or holder Chapter 7.10.2, "Defining antenna positions on the antenna holder", on page 128 Figure 7-49: Two views of an antenna holder with one antenna mounted ● The empty chamber (empty except for the absorber material covering the walls).
- Page 113 ® Configuration R&S TS7124M Installing an antenna ring or holder Figure 7-50: Top view of the empty chamber The following mounting instruction assumes one Vivaldi antenna mounted on one antenna holder. For multiple antennas or multiple holders, proceed accordingly. To mount the antenna holder into the chamber If not removed, also remove the top cover as described in Chapter 7.4.1, "Opening the...
- Page 114 ® Configuration R&S TS7124M Installing an antenna ring or holder Figure 7-51: Mounting two spacers at the rear chamber wall, here on the right side 3. Insert the antenna holder with antenna into the RF shielded box. 4. Use the two polymer bolts to screw the antenna holder to the two spacers, as...
- Page 115 ® Configuration R&S TS7124M Installing an antenna ring or holder 10. Connect the 20 cm SMA/SMP cable, delivered with the Antenna holder R&S TS- F24-AH2, to the SMP connector at the antenna: Figure 7-53: Connecting an antenna 11. Check the SMP connector: verify that the antenna is properly connected to its cable.
-
Page 116: Handling Expanding Rivets
® Configuration R&S TS7124M Handling expanding rivets 1 = Standard absorber for use with Narrowband antenna R&S TS-F24NB2 2 = Absorber for use with Half antenna ring R&S TS-F24-AH1 Full antenna ring R&S TS-F24-AR 3 = Absorber for use with Wideband antenna R&S TS-F24WA1... -
Page 117: Mounting Vivaldi Antennas On Fixtures
® Configuration R&S TS7124M Mounting Vivaldi antennas on fixtures Figure 7-56: Mounting an antenna on the antenna ring bar (or rail) step 4 step 5 step 6 To remove an expanding rivet 1. Carefully push back the drive pin from its far end. - Page 118 ® Configuration R&S TS7124M Mounting Vivaldi antennas on fixtures Figure 7-58: A Vivaldi antennas (left, with 4 holes) and its fixture (right) To mount a Vivaldi antenna on its fixture 1. Place the antenna on the fixture, with holes aligned, oriented as in Figure 7-58.
-
Page 119: Mounting Antenna Fixtures On The Antenna Ring
® Configuration R&S TS7124M Configuring Vivaldi antennas 7.9 Mounting antenna fixtures on the antenna ring The antenna ring's rail is designed for flexible and repeatable mounting of antennas. As a prerequisite, plan the mounting position and orientation with the following degrees of freedom: ●... - Page 120 ® Configuration R&S TS7124M Configuring Vivaldi antennas As soon as the configuration of the Vivaldi antennas is completed, insert the half or full antenna ring or the antenna holder back into the RF shielded box. ● Chapter 7.6.2, "Mounting the half antenna ring into the chamber",...
- Page 121 ® Configuration R&S TS7124M Configuring Vivaldi antennas Table 7-1: Explanation of the adjustment arrows both in the previous and the next figure Radial translation: Change the rail's position to increase or decrease the antenna's dis- tance from the DUT holder tray (see...
-
Page 122: Defining Rail And Antenna Positions On An Antenna Ring
® Configuration R&S TS7124M Configuring Vivaldi antennas holder. The antenna ring allows many different arrangements of the Vivaldi antennas. Details are provided in the following chapter. 7.10.1 Defining rail and antenna positions on an antenna ring For reproducible antenna configuration, the following positions and angles are defined: ●... - Page 123 ® Configuration R&S TS7124M Configuring Vivaldi antennas Figure 7-64: Positions of the rails on the full antenna ring (accordingly on the half antenna ring) Rail 1 and Rail 4 = Positions 1 – 4 = Positions 1 – 6 Rail 2, 3, 5, 6...
- Page 124 ® Configuration R&S TS7124M Configuring Vivaldi antennas ⍺ (alpha) of an antenna fixture on the rail (or on a 45° adapter, which is Figure 7-66: Angle of rotation mounted in a 0° position). The SMP connector (highlighted with a red disk in the figure...
- Page 125 ® Configuration R&S TS7124M Configuring Vivaldi antennas Figure 7-67: In this example, the full antenna ring stands on rail 6, to bring rail 3 up to the top side of the antenna ring. For configuring the antenna(s) mounted at rail 3, look at the rail from...
- Page 126 ® Configuration R&S TS7124M Configuring Vivaldi antennas β (beta) of a 45° adapter on the rail Figure 7-68: Angle of rotation In the most simple case, the antenna fixture is mounted on a rail. If instead the antenna fixture is mounted on a 45° adapter, the same definition as in...
- Page 127 ® Configuration R&S TS7124M Configuring Vivaldi antennas ɣ (gamma) of a 45° adapter Figure 7-69: Angle of tilting ɣ = +45° Figure 7-70: Antenna on fixture and 45° adapter, tilted at To illustrate the configuration of the angles ⍺, β and ɣ, two views of one given combina- tion of these angles are shown in the following figures: User Manual 1525.5394.02 ─...
-
Page 128: Defining Antenna Positions On The Antenna Holder
® Configuration R&S TS7124M Configuring Vivaldi antennas ⍺ = +45°, β = -90° and ɣ = -45°, seen from the side Figure 7-71: Constellation of ⍺ = +45°, β = -90° and ɣ = -45°, seen from below Figure 7-72: Constellation of 7.10.2 Defining antenna positions on the antenna holder... - Page 129 ® Configuration R&S TS7124M Configuring Vivaldi antennas ● Positions 1 to 11 on the antenna holder rail, of which positions 3 to 10 are through holes. Only these positions 3 to 10 can be occupied by the center hole (A) of an...
-
Page 130: Installing Narrowband Antennas
® Configuration R&S TS7124M Installing narrowband antennas ⍺ (alpha) of an antenna fixture on the antenna holder Figure 7-74: Angle of rotation The representation in Figure 7-74 is seen from behind the holder rail (or from the chamber's rear wall), to be compatible with the definition of angles on an antenna ring Figure 7-66. - Page 131 ® Configuration R&S TS7124M Installing narrowband antennas Figure 7-75: RF shielded box (open) with one narrowband antenna mounted Start with the following: ● The narrowband antenna mounting kit ● The empty chamber (empty except for the absorber material covering the walls).
- Page 132 ® Configuration R&S TS7124M Installing narrowband antennas Figure 7-76: Screws for mounting the narrowband antenna into the chamber 1 = Four spacers (transparent polymer with metal thread inset at one end) 2 = Four big screws (white polymer) 3 = Four small screws (white polymer) 4 = Four distance screws (black polymer) 2.
- Page 133 ® Configuration R&S TS7124M Installing narrowband antennas If you mount the antenna next to the lower edge of the acrylic glass sheet (close to the chamber's ground), orient this antenna's SMP connector pointing away from the edge. Hence, let the SMP connector point upwards, as the lower antenna in...
- Page 134 ® Configuration R&S TS7124M Installing narrowband antennas Figure 7-78: Bad examples: Avoid RF cables to cross other antennas, as shown here (red cir- cles) Instead, guide all cables around the antennas, as shown in Figure 7-79. Figure 7-79: Good example: RF cables do not cross other antennas, but bypass them 5.
- Page 135 ® Configuration R&S TS7124M Installing narrowband antennas Figure 7-80: Four spacers, the red arrows point to the metal-threaded ends 7. Mount the four spacers inside the chamber (either on the right or the left side wall, depending on the desired antenna position). To do so, insert the spacers with their metal thread, first, into the holes in the basic absorber on the wall.
- Page 136 ® Configuration R&S TS7124M Installing narrowband antennas 8. Attach the included absorber sheet to the chamber's wall, while meeting the four spacers. In doing so, take care not to place the absorber sheet upside down: The distances of the holes to the sheet's long edges are not the same. The edge that has to be at the upper end has a greater distance: User Manual 1525.5394.02 ─...
- Page 137 ® Configuration R&S TS7124M Installing narrowband antennas 1 = Bigger distance of the upper holes to the sheet's upper long edge 2 = Smaller distance of the lower holes to the sheet's lower long edge 9. Place the acrylic glass sheet with the pre-mounted narrowband antenna over the absorber sheet.
- Page 138 ® Configuration R&S TS7124M Installing narrowband antennas Make sure to make a note of the allocation of which antenna is connected to which SMA connector. 14. Use a torque wrench to tighten the cable's SMA connector, minding the torque rec- ommendation.
-
Page 139: Taking Narrowband Antennas Out Of The Chamber
® Configuration R&S TS7124M Installing narrowband antennas 7.11.2 Taking narrowband antennas out of the chamber To remove one or more narrowband antennas from the chamber 1. Remove the top cover as described in Chapter 7.4.1, "Opening the top cover", on page 78. - Page 140 ® Configuration R&S TS7124M Installing narrowband antennas 8. Remove the acrylic glass sheet and the absorber sheet from the chamber's wall. Note: It may be a bit difficult to detach the absorber sheet from the spacer in the lower corner, close to the door. In this case, try to squeeze your fingers between the absorber sheet and the absorber material on the chamber's ground, to be able to pull from underneath.
-
Page 141: Installing The Wideband Antenna
® Configuration R&S TS7124M Installing the wideband antenna Figure 7-83: Remove all the spacers 10. Optionally, disassemble the narrowband antenna(s) arrangement from the acrylic glass sheet. 11. If required, mount the wideband antenna (back) into the chamber, as described in Chapter 7.12.1, "Mounting the wideband antenna into the... -
Page 142: Mounting The Wideband Antenna Into The Chamber
® Configuration R&S TS7124M Installing the wideband antenna To remove the wideband antenna from the chamber, follow the procedure in Chap- ter 7.12.2, "Taking the wideband antenna out of the chamber", on page 145. 7.12.1 Mounting the wideband antenna into the chamber Wideband antenna R&S TS-F24WA1... - Page 143 ® Configuration R&S TS7124M Installing the wideband antenna 3. Inside the chamber, close to its top edge, remove the six rectangular absorber pads (three on each side). 4. In these openings, mount the six included anodized supports for the antenna holder.
- Page 144 ® Configuration R&S TS7124M Installing the wideband antenna 8. Remove a pad of detachable absorber material at one of the SMA connectors at the inside rear wall of the chamber. 9. Attach the cable's SMA connector to the SMA feedthrough connector at the rear wall, as shown below.
-
Page 145: Taking The Wideband Antenna Out Of The Chamber
® Configuration R&S TS7124M Installing the wideband antenna 7.12.2 Taking the wideband antenna out of the chamber To remove the wideband antenna from the chamber 1. Remove the top cover as described in Chapter 7.4.1, "Opening the top cover", on page 78. - Page 146 ® Configuration R&S TS7124M Installing the wideband antenna 8. Insert six rectangular absorber pads into the supports' gaps in the chamber walls. (Use the pads that were removed from there when the wideband antenna was mounted.) 9. Disconnect the cable from the wideband antenna's SMA connector, using a torque wrench.
-
Page 147: Installing The Lf Loop Antenna
® Configuration R&S TS7124M Installing the LF loop antenna 10. Close the top cover as described in Chapter 7.4.2, "Closing the top cover", on page 80. 7.13 Installing the LF loop antenna LF loop antenna R&S TS-F24HLF1 can be used inside the RF shielded box for a range of test scenarios. - Page 148 ® Configuration R&S TS7124M Installing the LF loop antenna – If an "empty" Antenna holder R&S TS-F24-AH2 is present in the chamber, and if its position suits you for installing the LF loop antenna, it can remain there. – If narrowband antennas or antennas mounted on an antenna holder are pres- ent in the chamber, they can remain there, if necessary.
- Page 149 ® Configuration R&S TS7124M Installing the LF loop antenna Figure 7-87: Mounting two spacers on the right side of the rear chamber wall 7. Use a torque wrench to attach the included RF cable to the antenna's SMA con- nector, minding the torque recommendation.
- Page 150 ® Configuration R&S TS7124M Installing the LF loop antenna 15. Use a torque wrench to tighten the cable's SMA connector, minding the torque rec- ommendation. 16. Insert the previously removed pad of absorber material at the SMA connector and around the cable.
-
Page 151: Taking The Lf Loop Antenna Out Of The Chamber
® Configuration R&S TS7124M Installing the LF loop antenna 7.13.2 Taking the LF loop antenna out of the chamber To remove the LF loop antenna out of the chamber 1. Remove the top cover as described in Chapter 7.4.1, "Opening the top cover",... -
Page 152: Maintenance
® Maintenance R&S TS7124M Maintenance intervals 8 Maintenance Familiarize yourself with the residual risks and potentially dangerous situations. The chamber has no factory default settings. ● Compliant maintenance..................152 ● Maintenance intervals................... 152 ● Checking....................... 153 ● Cleaning........................155 ● Storage........................155 ●... -
Page 153: Checking
® Maintenance R&S TS7124M Checking Maintenance Interval Maintenance Tasks After opening and closing the top Shielding effectiveness of the top cover cover • Check the tension force at the top cover Depending on amount of soiling RF shielded box cleaning •... - Page 154 ® Maintenance R&S TS7124M Checking Another option for checking is a measurement of the S11 parameters at all RF ports of the RF shielded box. If one or several antennas, cables or connectors do not seem to function properly, open the chamber (see Chapter 7.4, "Opening and closing the top...
-
Page 155: Cleaning
® Maintenance R&S TS7124M Storage If the gap is more than a fingernail's thickness, have it adjusted by Rohde & Schwarz Service. This may typically require an exchange of the gasket and of (parts of) the locking mechanism, or worst case of the complete door. -
Page 156: Exchanging The Trailing Cable In The Energy Chain
® Maintenance R&S TS7124M Exchanging the trailing cable in the energy chain 8.6 Exchanging the trailing cable in the energy chain The trailing cable in the Energy chain R&S TS-F24EC is a wearing part. By design, it endures at least 100,000 cycles of opening and closing of the door, before it fails. Typi- cally, failure will manifest in a break of one or more wires, which results in a loss of connection in one or more interfaces (D-Sub, USB, or LAN). - Page 157 ® Maintenance R&S TS7124M Exchanging the trailing cable in the energy chain 6. Drag the blue metal cover away from the rear side of the chamber in such a way that you can move it over the D-Sub connectors: 7. Lift the metal cover upwards to release the two latches that hold it to the chamber at the rear and front side, next to the handles.
- Page 158 Figure 8-2: Interior of the energy chain setup with replaceable trailing cable, see 6 and 7 = Circuit board with 2 rear D-Sub connectors (not available in R&S TS7124M) = Circuit board with 2 rear USB and two rear Ethernet connectors...
- Page 159 ® Maintenance R&S TS7124M Exchanging the trailing cable in the energy chain 1 = Front connector of the trailing cable 2 = First clamp for fixing the trailing cable 3 = Rear connector of the trailing cable 4 = Second clamp for fixing the trailing cable, prevents strain on the rear connector 5 = Fixation screw of the mounting clamp for the internal circuit board 10.
- Page 160 ® Maintenance R&S TS7124M Exchanging the trailing cable in the energy chain Figure 8-5: Use the available room for a smooth bend of the trailing cable 18. Fix the remaining part of the trailing cable as illustrated in the following figure:...
-
Page 161: Contacting Customer Support
® Maintenance R&S TS7124M Contacting customer support 8.7 Contacting customer support Technical support – where and when you need it For quick, expert help with any Rohde & Schwarz product, contact our customer sup- port center. A team of highly qualified engineers provides support and works with you to find a solution to your query on any aspect of the operation, programming or applica- tions of Rohde &... -
Page 162: Dismounting And Disposal
® Dismounting and disposal R&S TS7124M Disposal 9 Dismounting and disposal Familiarize yourself with residual risks and potentially dangerous situations. Chapter 1.1, "Safety instructions", on page 7. To dismount the chamber 1. WARNING! Risk of tilting. See Chapter 4.3, "Securing",... - Page 163 ® Dismounting and disposal R&S TS7124M Disposal Disposing of the chamber Avoid disposal of this product in normal household waste after it has come to the end of its life. Also, avoid disposal via the municipal collection points for waste electrical and electronic equipment.
-
Page 164: Glossary: List Of Frequently Used Terms And Abbreviations
® Glossary: List of Frequently Used Terms and Abbreviations R&S TS7124M Glossary: List of Frequently Used Terms and Abbreviations Symbols 8P8C: Eight-position eight-contacts connector type, typically used for Ethernet (LAN) cables. A popular variant of it is the RJ-45 connector. See also en.wikipedia.org/wiki/... - Page 165 ® Glossary: List of Frequently Used Terms and Abbreviations R&S TS7124M SMD: Surface mountable device USB: Universal serial bus, industrial connector standard VSWR: Voltage standing wave ratio, ratio of the maximum standing wave amplitude over the minimum standing wave amplitude...
-
Page 166: Index
® Index R&S TS7124M Index Antenna ring ..............31, 34 Bars (rails) ............36, 121 Absorber ................30 Configuration ........31, 33, 34, 37, 119 AC power feedthrough ............69 Mounting ............... 87, 91 Accessories With Vivaldi antennas ........... 33, 37 Absorber .............. - Page 167 ® Index R&S TS7124M Fiber-optic (FSMA) ............. 66 Front cables via energy chain ........71 LAN ................65 Rack mounting ..............25 Mounting ..............76 Rails (antenna ring bars) ........... 36, 121 Raster ................57 N-SMA ................ 60 Pneumatic ..............66 Mounting ..............
Need help?
Do you have a question about the TS7124M and is the answer not in the manual?
Questions and answers