
Related Manuals for Harbor Breeze HTD21017-WH


Summary of Contents for Harbor Breeze HTD21017-WH
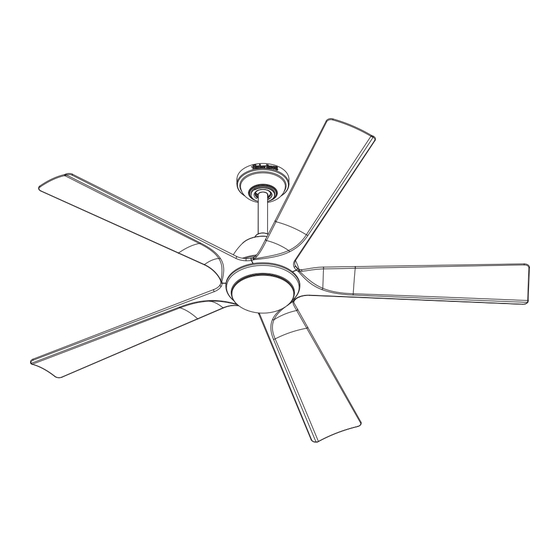
- Page 1 ITEM #4136494 MODEL #HTD21017-WH CARTERSVILLE CEILING FAN HARBOR BREEZE and logo design are trademarks or registered trademarks of Español p. 20 LF, LLC. All rights reserved. ATTACH YOUR RECEIPT HERE Serial Number Purchase Date SG241419...
- Page 2 TABLE OF CONTENTS Package Contents..........................Hardware Contents..........................Safety Information..........................Preparation ............................Initial Installation Instructions ........................ Standard/Angle-Mounting Instructions....................Wiring Instructions ..........................l l a ....
- Page 3 PACKAGE CONTENTS PART DESCRIPTION QUANTITY PART DESCRIPTION QUANTITY Clevis Pin [Preassembled on Mounting Bracket Downrod Assembly (B)] Hairpin Clip [Preassembled on Downrod Assembly Downrod Assembly (B)] Canopy Coupling Screw [Preassembled on Coupling (O)] Canopy Cover Coupling [Preassembled on Motor Assembly (F)] Coupling Cover Mounting Bracket Screw [Preassembled on Mounting Bracket (A)]...
- Page 4 HARDWARE CONTENTS (not shown actual size) Blade Screw Qty: 15 + 1 extra SAFETY INFORMATION READ AND SAVE THESE INSTRUCTIONS Please read and understand this entire manual before attempting to assemble, operate or install the product. All electrical connections must comply with local codes, ordinances or the National Electric Code (NEC). Contact your municipal building department to inquire about your local codes, permits and/or inspections.
- Page 5 WARNING Risk of fire. Most dwellings built before 1985 have supply wire rated for 140°F. Consult a qualified electrician before installation. To reduce the risk of fire or electric shock, do not use this fan with any solid state fan speed device or variable speed control.
- Page 6 INITIAL INSTALLATION INSTRUCTIONS 1. Turn off circuit breakers and wall switch to the fan supply line leads. Turn Off Power Source Failure to disconnect power supply prior to DANGER: installation may result in serious injury or death. 2. Choose the desired mounting method: A.
- Page 7 INITIAL INSTALLATION INSTRUCTIONS 4. Loosen the two coupling screws (N) preassembled in the coupling (O), but do not remove them. Remove the hairpin clip (M) and clevis pin (L) from the downrod assembly (B). Retain for later use. Note: Make sure to keep loose hardware separate to avoid confusion during installation.
- Page 8 STANDARD/ANGLE-MOUNTING INSTRUCTIONS 3. Cut off excess fixture wires, leaving approximately 6 to 9 inches above the top of the downrod assembly (B). Strip 1/2 inch of insulation from the end of each fixture 6 to 9 in wire. CAUTION: Ensure all screws are tight before moving to the next step.
- Page 9 WIRING INSTRUCTIONS WARNING: To avoid possible electrical shock, be sure electricity is turned off at the main fuse box before hanging. WARNING: If you are not sure if the outlet box is grounded, contact a licensed electrician for advice, as it must be grounded for safe operation. WARNING: If house wires are different colors than referred to in the following steps, stop immediately.
- Page 10 WIRING INSTRUCTIONS 2. Wrap electrical tape (not included) around each wire Outlet Box connector and make sure no bare wire or wire strands are visible after making connections. Then, turn wires upward and carefully push them into the outlet box; make sure the WHITE and GREEN connections are on GREEN one side and the BLACK connections are on the other...
- Page 11 FINAL INSTALLATION INSTRUCTIONS 3. Attach blade (G) to the motor assembly (F) with blade screws (AA) provided.Repeat for the other blades. Hardware Used Blade Screw x 15 FINAL INSTALLATION INSTRUCTIONS 4. Remove one of the mounting screws (Q) on mounting plate of motor assembly (F), then loosen the other two.
- Page 12 FINAL INSTALLATION INSTRUCTIONS 6. Remove one of three switch housing screws (R ) on the switch housing (H) and keep for later use, then loosen the other two. 7. Connect the 2 single pin connectors from the light kit (I) to the 2 single pin connectors from the motor assembly.
- Page 13 FINAL INSTALLATION INSTRUCTIONS 9. Secure the shade (J) to switch housing (H) by twisting in a clockwise direction. Do not over-tighten. OPERATIING INSTRUCTIONS 1. Slide the transmitter out of the transmitter holder. Select a location to install your transmitter holder. Attach the transmitter holder with screws provided.
- Page 14 OPERATIING INSTRUCTIONS 3. To make fan operational, install two 1.5 V AAA batteries (included). Replace the battery cover. NOTE: This remote control uses two 1.5 V AAA batteries. Replace batteries with the correct size and type of battery. Clean the battery contacts and area inside the device prior to installing new batteries.
- Page 15 OPERATING INSTRUCTIONS 5. Remote functions: Indicator light Buttons (1 to 6) : Fan speed. : Turns fan off. : Fan speed will modulate to simulate a natural breeze. : Fan turns forward or reverse. : Fan and light will turn off after 1 hour. : Fan and light will turn off after 3 hours.
- Page 16 TROUBLESHOOTING PROBLEM PROBABLE CAUSE CORRECTIVE ACTION 1. Set screws are loose. 1. Tighten all set screws. 2. Using non-approved speed 2. Some fan motors are sensitive to signals control. from solid-state varible speed controls. DO NOT USE a solid-state variable speed control.
- Page 17 TROUBLESHOOTING PROBLEM PROBABLE CAUSE CORRECTIVE ACTION 1.Turn power on, replace fuse or reset breaker. 1. Power turned off, fuse blown 2a. Turn power off and loosen canopy; check or circuit breaker tripped. Fan does not all connections according to section start.
- Page 18 FCC WARNING This device (including remote control and LED module) complies with Part 15 of the FCC Rules. Operation is subject to the following two conditions: (1) This device may not cause harmful interference, and (2) this device must accept any interference received, including interference that may cause undesired operation.
- Page 19 REPLACEMENT PART LIST For replacement parts, call our customer service department at 888-251-1003 , 8 a.m. -8 p.m., EST, Monday – Sunday. You could also contact us at ascs@lowes.com. PART DESCRIPTION PART# COVERED UNDER WARRANTY Mounting Bracket A102-0460084 Downrod Assembly A103-0443529 Canopy A101-0281529...
- Page 20 ARTÍCULO #4136494 MODELO #HTD21017-WH VENTILADOR DE TECHO CARTERSVILLE HARBOR BREEZE y el diseño del logotipo son marcas comerciales o ADJUNTE SU RECIBO AQUÍ marcas registradas de LF, LLC. Todos los derechos reservados. Número de serie Fecha de compra...
- Page 21 ÍNDICE Contenido del paquete ........................Aditamentos ............................Información de seguridad ........................Preparación ............................Instrucciones de instalación iniciales ....................Instrucciones estándar o de montaje en ángulo .................. Instrucciones de cableado ........................Instrucciones de instalación finales ..................... Instrucciones de funcionamiento ......................Cuidado y mantenimiento ........................Solución de problemas ........................
- Page 22 CONTENIDO DEL PAQUETE PIEZA DESCRIPCIÓN CANTIDAD PART DESCRIPTION QUANTITY Pasador de horquilla (preensamblado Soporte de montaje en el ensamble de la varilla [B]) Sujetador de horquilla (preensamblado Ensamble de la varilla en el ensamble de la varilla [B]) Tornillo para el acoplador Base (preensamblado en el acoplador [O]) Acoplador (preensamblado en el...
- Page 23 ADITAMENTOS (no se muestran en tamaño real) Tornillo para aspa Cantidad: 15 + 1 adicional INFORMACIÓN DE SEGURIDAD LEA Y GUARDE ESTAS INSTRUCCIONES Lea y comprenda por completo este manual antes de intentar ensamblar, usar o instalar el producto. inspecciones locales. como conductor con puesta a tierra, se lo debe conectar a un suministro de electricidad con puesta a tierra, se lo debe conectar a un suministro de electricidad con un conductor sin puesta a PELIGRO...
- Page 24 ADVERTENCIA Riesgo de incendio. para 60 °C. Consulte a un electricista calificado antes de la instalación. PRECAUCIÓN No use bombillas de un vataje mayor que el valor máximo establecido en la lámpara. La utilización de una bombilla de un vataje superior al especificado incrementará la temperatura del ensamble y aumentará...
- Page 25 INSTRUCCIONES DE INSTALACIÓN INICIALES 1. Interrumpa el suministro de energía del ventilador apagando los interruptores de circuito y el interruptor Apague la fuente de alimentación Apague la fuente de alimentación de pared. si no desconecta el suministro de la PELIGRO: instalación, pueden producirse lesiones graves o la muerte.
- Page 26 INSTRUCCIONES DE INSTALACIÓN INICIALES 4. Afloje los dos tornillos (N) preensamblados del acoplador (O), pero no los retire. Retire el sujetador de horquilla (M) y el pasador de horquilla (L) del ensamble de la varilla (B). Guárdelos para su posterior uso. Nota: asegúrese de mantener los aditamentos sueltos separados para evitar confundirlos durante la instalación.
- Page 27 INSTRUCCIONES ESTÁNDAR O DE MONTAJE EN ÁNGULO 3. Corte el excedente de conductores del ensamble a unos 15.24 cm a 22.86 cm aproximadamente por sobre la De 15.24 cm parte superior del ensamble de la varilla (B). Pele a 22.86 cm 12.7 mm del aislamiento del extremo de cada conductor del ensamble.
- Page 28 INSTRUCCIONES DE CABLEADO ADVERTENCIA: para evitar una posible descarga eléctrica, asegúrese de cortar la alimentación eléctrica de la caja de fusibles principal antes de colgar el ventilador. ADVERTENCIA: si no está seguro de si la caja de salida tiene puesta a tierra, póngase en contacto con un electricista certificado para solicitar asesoramiento, ya que debe tener puesta a tierra para un funcionamiento seguro.
- Page 29 INSTRUCCIONES DE CABLEADO 2. Coloque cinta aislante (no se incluye) alrededor de cada Caja de salida conector de conductores y asegúrese de que no haya conductores desnudos ni filamentos de conductores visibles después de hacer las conexiones. Luego, gire los conductores hacia arriba y, con cuidado, colóquelos VERDE dentro de la caja de salida.
- Page 30 INSTRUCCIONES DE INSTALACIÓN FINALES 3. Fije el aspa (G) al ensamble del motor (F) con los tornillos del aspa (AA) proporcionados. Repita con las otras aspas. Aditamentos utilizados Tornillo para aspa x 15 INSTRUCCIONES DE INSTALACIÓN FINALES 4. Retire uno de los tornillos de montaje (Q) de la placa de montaje del ensamble del motor (F) y luego suelte los otros dos.
- Page 31 INSTRUCCIONES DE INSTALACIÓN FINALES 6. Retire uno de los tres tornillos (R) de la carcasa del interruptor (H) y guárdelos para su uso posterior. Luego, afloje los otros dos. 7. Conecte los 2 conectores de un solo pasador del kit de iluminación (I) a los 2 conectores de un solo pasador del ensamble del motor.
- Page 32 INSTRUCCIONES DE INSTALACIÓN FINALES 9. Asegure la pantalla (J) a la carcasa del interruptor (H) y gire en dirección de las manecillas del reloj. No apriete demasiado. INSTRUCCIONES DE FUNCIONAMIENTO 1. Deslice el transmisor fuera del soporte. Seleccione una ubicación para instalar su soporte. Fije el soporte con los tornillos proporcionados.
- Page 33 INSTRUCCIONES DE FUNCIONAMIENTO 3. Para que el ventilador funcione, instale dos baterías AAA de 1.5 voltios (se incluye). Vuelva a colocar la cubierta de las baterías. NOTA: este control remoto utiliza dos baterías AAA de 1.5 voltios. Reemplace las baterías por otras del tamaño y el tipo correcto.
- Page 34 INSTRUCCIONES DE FUNCIONAMIENTO 5. Funciones del control remoto: Luz indicadora Botones (1 a 6): Velocidad del ventilador. : Apaga el ventilador : La velocidad del ventilador se modulará para simular una brisa natural. : El ventilador gira hacia delante o hacia atrás. : El ventilador y la luz se apagarán después de 1 hora.
- Page 35 SOLUCIÓN DE PROBLEMAS PROBLEMA CAUSA POSIBLE ACCIÓN CORRECTIVA 1. Los tornillos de fijación están 1. Apriete todos los tornillos de fijación. sueltos. 2. Se está usando un control de 2. Algunos motores de ventilador son sensibles velocidad no aprobado. a las señales de los controles de velocidad variable de estado sólido.
- Page 36 SOLUCIÓN DE PROBLEMAS PROBLEMA CAUSA POSIBLE ACCIÓN CORRECTIVA 6. Las aspas están desequilibradas. 6. Intercambie dos aspas adyacentes; esto redistribuirá el peso y podría hacer que funcione más suavemente. 7. El ventilador está demasiado 7. Baje o mueva el ventilador. Puede pedir cerca del techo de bóveda.
- Page 37 GARANTÍA LIMITADA DE POR VIDA El fabricante garantiza que este ventilador no presenta defectos en los materiales ni en la mano de obra presentes en el momento del transporte desde la fábrica, por un período de por vida (con limitaciones) a partir de la fecha de compra. Esta garantía es válida solo para el comprador original. El fabricante acepta reparar dichos defectos sin cargo o, según nuestro criterio, reemplazar el ventilador de techo por un modelo comparable o superior.
- Page 38 ADVERTENCIA DE LA FCC Este dispositivo (incluye control remoto y módulo LED) cumple con la sección 15 de las reglas de la FCC. El funcionamiento está sujeto a las siguientes dos condiciones: (1) Este dispositivo no debe causar interferencia perjudicial y (2) deberá aceptar cualquier interferencia recibida, incluida la interferencia que pudiese causar la operación no deseada.
- Page 39 LISTA DE PIEZAS DE REPUESTO Para obtener piezas de repuesto, llame a nuestro Departamento de Servicio al Cliente al 888-251-1003 de lunes a domingo de 8 a.m. a 8 p.m., hora estándar del Este. También puede ponerse en contacto con nosotros en ascs@lowes.com.
Need help?
Do you have a question about the HTD21017-WH and is the answer not in the manual?
Questions and answers