Table of Contents
Advertisement
G
I
G
n
u
u
s
í
i
a
d
t
e
a
d
l
d
e
l
'
a
i
i
t
n
n
i
s
s
o
t
t
n
a
a
l
l
l
G
a
a
u
c
t
i
i
i
o
d
ó
n
e
n
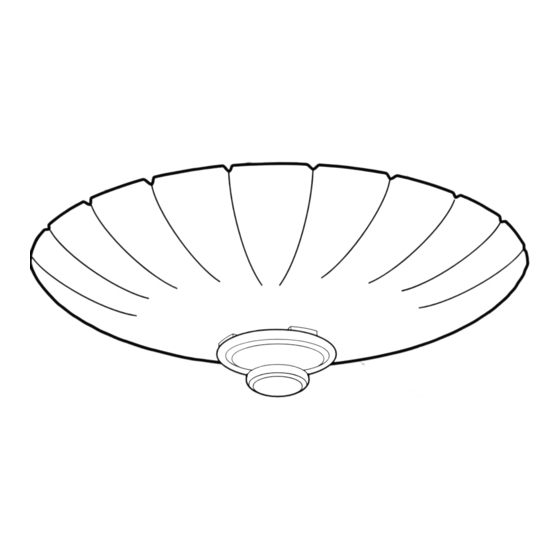
Model 80209 Bath Ventilator with Light
READ and SAVE THESE INSTRUCTIONS
Modelo 80209 Ventilador para baño con luz
LEA y CONSERVE ESTAS INSTRICCIONES
Model 80209 Ventilateur de salle de bain avec lumière
LIRE ET CONSERVER CES CONSIGNES
1
43039 - 04/01/2008
Advertisement
Table of Contents

Summary of Contents for Harbor Breeze 80209
- Page 1 Model 80209 Bath Ventilator with Light READ and SAVE THESE INSTRUCTIONS Modelo 80209 Ventilador para baño con luz LEA y CONSERVE ESTAS INSTRICCIONES Model 80209 Ventilateur de salle de bain avec lumière LIRE ET CONSERVER CES CONSIGNES 43039 - 04/01/2008...
-
Page 2: Preventative Maintenance
TO REDUCE THE RISK OF FIRE, ELECTRIC SHOCK, OR INJURY TO PERSONS, OBSERVE THE FOLLOWING: 1. Use this unit only in a manner intended by the manufacturer. If Engineers (ASHRAE), and the local code authorities. you have questions, contact the manufacturer. 5. - Page 3 PARA REDUCIR EL RIESGO DE INCENDIO, CHOQUE ELÉCTRICO O LESIONES A PERSONAS, OBSERVE LO SIGUIENTE: 1. Utilice esta unidad sólo de la manera indicada por el fabricante. normas de seguridad, como las de la Asociación Nacional de Si tiene alguna pregunta, contacte con el fabricante. Protección contra Incendios (NFPA), la Asociación de Ingenieros Americanos en Calefacción y Aire acondicionado (ASHRAE), y los 2.
-
Page 4: Entretien Préventif
M I S E G A R D E POUR RÉDUIRE LE RISQUE D’INCENDIE, DE DÉCHARGE ÉLECTRIQUE OU DE BLESSURES, VEUILLEz SUIVRE LES DIRECTIVES SUIVANTES : 1. Utiliser cet appareil seulement de la façon prévue par le fabri- l’association nationale de protection contre les incendies (NFPA, cant. - Page 5 Check all the parts. If damaged, call 1-888-830-1326 for replacements. Verifique todos los componentes. Si están dañados, llame al 1-866-405-3814 para obtener un reemplazo. Extra Screws / Tornillos adicionales / Vérifier toutes les pièces. Si certaines sont Vis supplémentaires endommagées, appeler le 1-866-405-3814 3/8”...
- Page 6 Before Installation / Antes de la instalación / Avant l’installation NOTE: Remove all packing materials NOTA: Retire todo el material de NOTE : Enlevez tous les matériaux before installation. embalaje antes de la instalación. d’emballage avant installation. Turn off the power source. Loosen screws.
- Page 7 Choose Installation Option For New Construction Attaching to joist ........7 For Existing Construction From below .
- Page 8 0 0 0 0 0 0 0 0 Reinstall the motor by inserting the tabs and pushing up into Connect wiring from the motor to the wiring cover plate. position. Make sure the wires are not pinched Secure the motor by tightening the 2 screws. between the motor and the housing.
- Page 9 Attach existing ducting to duct connector. Tape joints. Install the housing flush with the sheetrock and secure by Go to step F1 on page 12 to connect the wires as shown. If ducting does not fit securely, tightening the pre-loaded screws into the joist. an adapter may need to be purchased.
- Page 10 Attaching the grille / Fijar la rejilla / Fixation de la grille K K K Remove the strain relief bracket screw. Remove the thumbscrews. Connect wiring harness. Conecte el mazo de cables. NO PERMITA QUE EL Retire el tornillo del soporte del aliviador de tensiones. Retire los tornillos de mano.
- Page 11 Screw Finial into position Complete. Enrosque la cubierta ornamental Completo. Visser la finial en place. Compléter. 43039 - 04/01/2008...
- Page 12 Wiring the fan / Cableado del ventilador / Câblage du ventilateur Ground Black Green 2 Pin Bare Copper White Black Main Switch 1 (AC In) Fan Motor White White 3 Pin Black Light Light *Option Black Switch 2 (AC In) *Option Fan &...
-
Page 13: Troubleshooting
Problem: Fan does not come on. Solution: • Harbor Breeze Bath Ventilators are extremely quiet. To confirm that the fan is running, place your hand near the vents to feel the air movement. • Turn power on, replace fuse, or reset breaker. -
Page 14: Dépannage
Problème : Le ventilateur ne fonctionne Solution : pas. • Les ventilateurs de salle de bain Harbor Breeze sont très silencieux. Pour véri- fier que le ventilateur fonctionne, placez votre main près des évents pour sentir le mouvement de l’air. -
Page 15: Limited Warranty
If your Harbor Breeze bath exhaust fan motor fails at any time within five years after the date of sale to you due to a defect in material or work- manship, labor and materials to repair the defect will be provided free of charge. -
Page 16: Garantie Limitée
Vous devrez assumer les frais d’assurance et de transport à notre usine ou à notre centre de service. Nous vous retournerons votre ventila- teur de salle de bain Harbor Breeze en port prépayé. Votre ventilateur de calle de bain devra être emballé avec soin pour éviter tout dommage durant le transport puisque nous ne pourrons être tenus responsables d’un tel dommage. -
Page 17: Garantía Limitada
Devolveremos su Extractor de aire para baño Harbor Breeze con el flete prepagado. Su Extractor de aire para baño Harbor Breeze se debe embalar apropiadamente para evitar daños durante el trán- sito ya que no seremos responsables de dichos daños. - Page 18 43039 - 04/01/2008...
- Page 19 43039 - 04/01/2008...
- Page 20 © 2008 Hunter Fan Company 43039 - 04/01/2008...


Need help?
Do you have a question about the 80209 and is the answer not in the manual?
Questions and answers