Advertisement
Before you start
Read the entire document

- Installation must be carried out by a certified electrician and must comply with national and local electrical codes.
- To prevent severe shock or electrocution, always cut the power at the service panel before working with wiring.
- Use this thermostat for resistive loads only.
- Do NOT install the thermostat in an area where it can be exposed to water or rain.
- Avoid locations where there are air drafts (top of staircase, air outlet), dead air spots (behind a door), direct sunlight or concealed chimney or stove pipes.
- For a new installation, choose a location about 5 ft. (1.5 m) above the floor.
- Install the thermostat on an inside wall facing the heating system.
- Install the thermostat onto an electrical box.
- Use special CO/ALR solderless connectors if you connect the thermostat to aluminum wires.
- Keep the thermostat's top and bottom air vents (openings) clean and unobstructed at all times.
About your thermostat
This thermostat can be connected to an electric heater to control the room temperature.
Supplied Parts
- One (1) thermostat
- Two (2) mounting screws
- Four (4) solderless connectors for copper wires
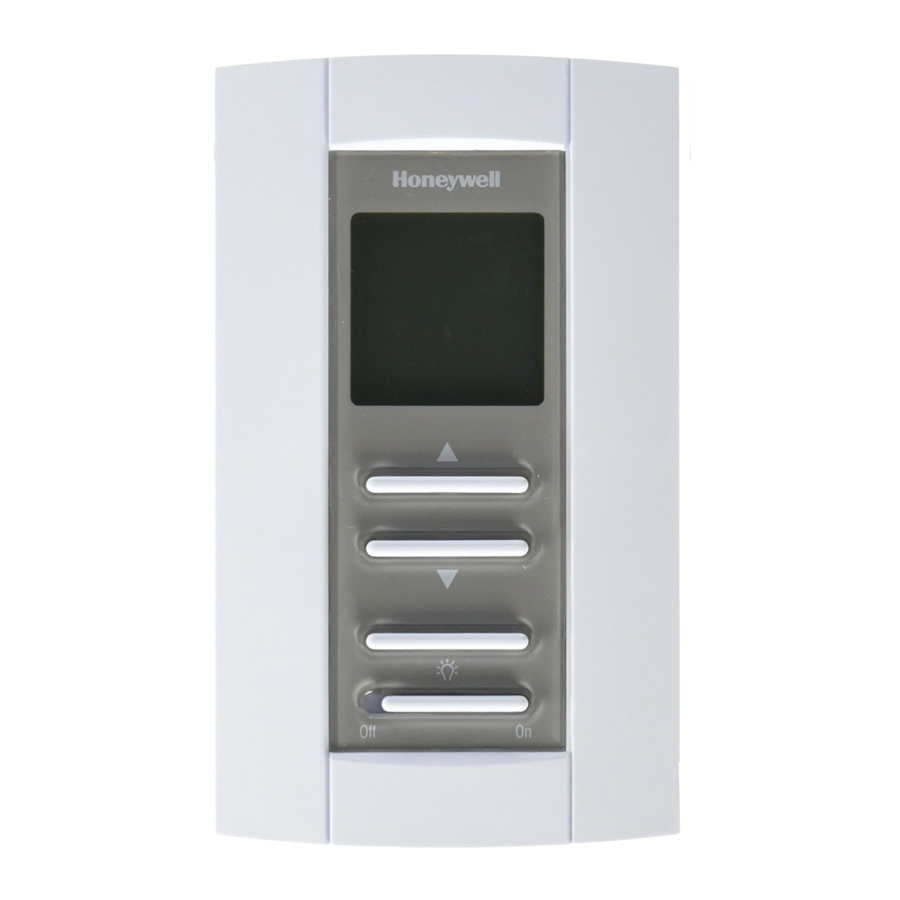
Controls and display

Temperature Display and Setting
The thermostat usually displays the room temperature. To view the set (desired) temperature, press either of the ![]() buttons once. The set temperature is displayed for 5 seconds.
buttons once. The set temperature is displayed for 5 seconds.
To set a new temperature, press one of the ![]() buttons repeatedly until the desired temperature is displayed. To scroll faster, press and hold the button.
buttons repeatedly until the desired temperature is displayed. To scroll faster, press and hold the button.
Backlight
The display illuminates for 5 seconds when the backlight button is pressed.
When either of the ![]() buttons is pressed, the display illuminates for 10 seconds. The setpoint temperature appears for the first 5 seconds, then the current temperature is displayed.
buttons is pressed, the display illuminates for 10 seconds. The setpoint temperature appears for the first 5 seconds, then the current temperature is displayed.
On/Off Switch
You can set the thermostat to Off to cut power to the heating system when it is not in use
(e.g. in summer). The thermostat screen becomes blank but all settings are saved.
Installing the thermostat

- Turn the heating system off at the main electrical panel.
- Loosen the bottom screw and remove the thermostat faceplate from its wallplate. (The screw cannot be completely removed.
- Ž Connect the thermostat to the load and to the power supply.
- Install the wallplate to an electrical box using the provided screws.
- Set the configuration switch.
- Install the faceplate back on the wallplate and tighten the screw. If there is a sticker on the screen, peel it off.
- Return power to the heating system at the main electrical panel.
Wiring diagram
 NOTE: Connect the wires using the provided solderless connectors for copper wires.

Setting the configuration switch
The configuration switch is located at the back of the control module (faceplate).
The switch allows you to select between °C and °F.

Error Messages
 | The measured temperature is below the display range. Heating is activated. |
 | The measured temperature is above the display range. Heating is deactivated. |
 | Verify the thermostat and sensor connections. Heating is deactivated. |
Technical Specifications
Power supply: 240/208 VAC, 50/60 Hz
Maximum load: 15 A (3600 W @ 240 VAC) (3120 W @ 208 VAC)
Heating cycle: 15 minutes
Setpoint range: 40°F to 86°F (5°C to 30°C)
Display range: 32°F to 122°F (0°C to 50°C)
Resolution: 1°F (0.5°C)
Data protection: Settings are saved during a power failure.
Need Help?
We are here to help. Call 1-800-468-1502.
Documents / ResourcesDownload manual
Here you can download full pdf version of manual, it may contain additional safety instructions, warranty information, FCC rules, etc.
Advertisement


Need help?
Do you have a question about the TL7235A and is the answer not in the manual?
Questions and answers