
Related Manuals for Honeywell Home T5 Smart


Summary of Contents for Honeywell Home T5 Smart
- Page 1 T5 Smart Thermostat Programmable Thermostat Quick Install Guide Menu RCHT8610WF, RCHT8612WF, RTH8800WF, Read before installing For more information visit honeywellhome.com...
- Page 2 Included in your box: Quick Install Guide Screws and anchors UWP™ Mounting System T5 Smart (UWP) Thermostat...
- Page 3 Get the most from T5 Smart Thermostat Multiple programming options that fit your lifestyle: Location-Based scheduling – The thermostat uses your smartphone’s location to know when you’re away, and saves you energy. Through geofence technology, it senses your return and helps make you comfortable upon arrival.
- Page 4 Tools you will need: Smartphone To install your thermostat and Phillips screwdriver photograph existing wiring. Small flat head screwdriver Pencil Level Home Wi-Fi Resideo app Password To configure your system and connect to your smartphone. You may need: Wire stripper Needle-nose pliers Drill and drill bit (7/32 in (5.6 mm))
- Page 5 • Does not support input (S terminals) for indoor and outdoor sensors • Does not support relay (U terminals) for ventilation • Android or iOS smartphone, tablet, or device For help, contact: WEB honeywellhome.com PHONE 1-800-633-3991 SOCIAL Twitter: @Honeywell_Home, Facebook: Honeywell Home...
-
Page 6: Removing Your Old Thermostat
Removing your old thermostat Turn power OFF To protect yourself and your equipment, Turn off the power at the breaker box or switch that controls your heating/ cooling system. Switch Breaker box Check that your system is off Change the temperature on your old thermostat. - Page 7 Make sure there are no 120/240V wires Do you have thick black wires with wire nuts? Is your thermostat 120V or higher? If you answered yes to either of these questions, you have a line voltage system and the thermostat will not work.
- Page 8 Record if you have wires in the following terminals Do not include jumpers as a part of your count. The thermostat does not need jumpers. Terminal Wire Color Write down the color of the wires Check mark the wires that are connected to terminals. Next to the check mark, write down the color of the wire.
- Page 9 Disconnect the wires and remove the old wall plate Use a screwdriver to release wires from terminals. Tip: To prevent wires from falling back into the wall, wrap the wires around a pencil.
- Page 10 Installing your T5 Smart Thermostat T5 Smart Thermostat Screws Mounting Anchors Wall System...
- Page 11 10 Bundle and insert wires through the UWP Pull open the UWP and insert the bundle of wires through the back of the UWP. Make sure at least 1/4-inch (6.4 mm) of each wire is exposed for easy insertion into the wire terminals. 11 Insert the wall anchors It is recommended that you use the wall anchors included in the box to...
- Page 12 12 Set R-switch position and insert R-wire or wires Set the R-switch up or down based on your wiring notes in Step 7. Insert wires into the inner holes of the terminals on the UWP. The tabs will stay down once the wire is inserted. If you have 1 R-wire (R, Rh, or Rc) Set R-switch to Insert your R-wire...
- Page 13 13 Connect remaining wires from Step 8 This wiring is just an example, actual wiring may vary. Tip: Do not mount the UWP to the wall prior to connecting the wires. Depress the tabs to put the wires into the inner holes of their corresponding terminals on the UWP (one wire per ter- minal) until it is firmly in place.
- Page 14 15 Attach your thermostat Align the thermostat onto the UWP and firmly snap it into place. 16 Turn your power ON Turn on the power at the breaker box or switch that controls the heating/ cooling system. Switch Breaker box 17 Return to the thermostat Return to the thermostat.
- Page 15 Found. Tap SET UP NOW as shown below to continue. If your thermostat doesn’t appear, create an account (if necessary), or sign in to your Resideo account. Then select the T5 Smart Thermostat to install. c.) The Resideo app will walk you through the rest of setup.
- Page 16 How to use your Resideo App Access the Thermostat menu MY HOME 72˚ FOLLOWING SCHEDULE Set desired temperature 72 ˚ Select Fan mode Auto/On/Circulate. Select System Schedule your home mode Auto/Heat/ comfort MODE SCHEDULE Cool/Off/EM Heat Interested in more Resideo products? Visit honeywellhome.com to learn about all available products connected by the Resideo App.
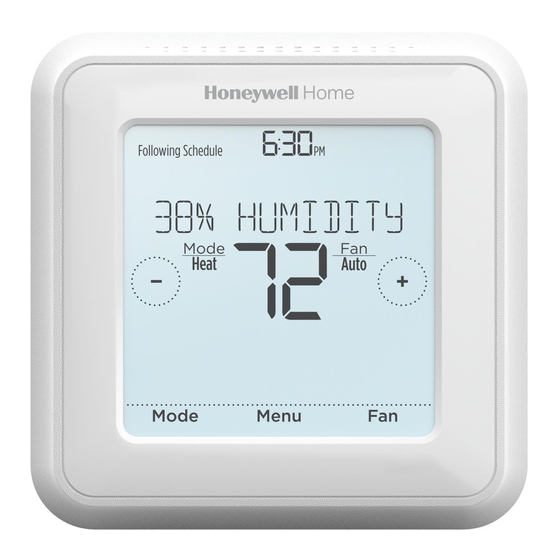
- Page 17 How to use your T5 Smart Thermostat Desired temperature Indoor Temperature Adjust temperature Displays desired Displays current Touch + or - to set indoor temperature. indoor temperature. your desired indoor temperature. Menu Mode Menu Select system mode Contains features: Select Fan mode...
-
Page 18: Manual Setup
Manual Setup If your Wi-Fi network is not working, you can alternatively setup your thermostat manually and connect your phone later. Start manual setup Touch START SETUP to begin. Select manual setup On the USE APP screen, touch No. Navigate and edit setup options to navigate through all the setup options. - Page 19 Manual Setup (cont.) Finish Setup Touch until you see Finish Setup. Touch Select or touch text area. Select Setup Wi-Fi At the end of setup process you will be prompted to SETUP WIFI. If your Wi-Fi is still not working, you have to manually set the time and date.
-
Page 20: Equipment Setup Options
Equipment Setup Options Option # Option Name Option Value (factory default in bold) Schedule Type No Schedule MO-SU = Every day the same MO-FR SA SU = 5-1-1 schedule MO-FR SA-SU = 5-2 schedule Each Day = Every day different Note: You can change default MO-FR, SA-SU schedule here. - Page 21 Equipment Setup Options Option # Option Name Option Value (factory default in bold) 0, 1, 2 Cool Stages/ Compressor Note: Select how many Cool or Compressor stages of your equipment Stages the thermostat will control. Maximum of 2 Cool/Compressor Stages. (#200=Conv./ #200=HP) Heat Stages/...
-
Page 22: Frequently Asked Questions
Most routers will broadcast two networks, one SSID on the 5.0 GHz radio and one SSID on the 2.4 GHz radio. A change was made on the Resideo app but it has not shown up on the T5 Smart thermostat. There may be a short delay after making temperature and setting changes in the Resideo app. -
Page 23: Regulatory Information
Frequently Asked Questions There is an alert that says Wi-Fi Signal Lost. What does that mean? The Wi-Fi signal to the thermostat has been lost. Wait for the thermostat to reconnect or select a new network within the Resideo app configuration menu. If the thermostat is unable to reconnect, you will need to troubleshoot the router to determine the cause. -
Page 24: Year Limited Warranty
Apple® HomeKit™ Setup Code The T5 Smart Thermostat supports Apple HomeKit. Open HomeKit app, follow the instructions and enter the code displayed on Thermostat when prompted. 2-Year Limited Warranty For Warranty information go to honeywellhome.com Use of the Works with Apple badge means that an accessory has been designed to work specifically with the technology identified in the badge and has been certified by the developer to meet Apple performance standards. -
Page 25: Guía De Instalación Rápida
Termostato inteligente T5 Termostato Programable Guía de instalación rápida Menu RCHT8610WF, RCHT8612WF, RTH8800WF, Leer antes de instalar Para obtener más información, visite honeywellhome.com... - Page 26 Esta caja incluye: Guía de instalación rápida Tornillos y tarugos Sistema de montaje con UWP™ Termostato (UWP) inteligente...
- Page 27 Aproveche al máximo el termostato inteligente T5 Múltiples opciones de programación que se adaptan a su estilo de vida: Programación según la ubicación: El termostato utiliza la ubicación de su teléfono inteligente para saber cuándo usted no está en casa y ahorrarle energía.
- Page 28 Herramientas que necesitará: Teléfono inteligente Para instalar su termostato Destornillador de estrella y fotografiar el cableado existente. Destornillador plano pequeño Lápiz Nivel Contraseña de Aplicación Resideo Para configurar su sistema WiFi del hogar y conectarlo a su teléfono inteligente. Es posible que necesite: Pelacables Pinzas de punta fina Taladro y broca (7/32 in (5.6mm))
- Page 29 No admite entradas (terminales S) para sensores interiores y exteriores • No admite relé (terminales U) para ventilación • Es compatible con tabletas, dispositivos o teléfonos inteligentes Android o iOS. Información de contacto para obtener ayuda: SITIO WEB honeywellhome.com TELÉFONO 1-800-633-3991 REDES SOCIALES Twitter: @Honeywell_Home, Facebook: Honeywell Home...
- Page 30 Extracción del termostato existente DESCONECTE el suministro de Encendido energía eléctrica Apagado Para protegerse a sí mismo y al equipo, desconecte el suministro eléctrico en la Apagado caja de interruptores o en el interruptor que controla el sistema de calefacción/ Interruptor refrigeración.
- Page 31 Asegúrese de que no haya cables de 120/240 V ¿Tiene cables negros gruesos con empalmes para cables? ¿Tiene su termostato 120 V o más? Si respondió afirmativamente a cualquiera de estas preguntas, tiene un sistema de voltaje en línea y el Empalme para cables termostato no funcionará.
- Page 32 Registre si tiene cables en las siguientes terminales No incluya los puentes como parte de su conteo. El termostato no necesita puentes. Terminal Color del cable Escriba el color de las cables Haga una marca de verificación en los cables que están conectados a los terminales.
- Page 33 Desconecte los cables y retire la placa de pared existente Utilice un destornillador para sacar los cables de los terminales. Consejo: Para evitar que los cables se caigan dentro de la pared, enrolle los cables alrededor de un lápiz.
- Page 34 Instalación de su termostato inteligente T5 Sistema de Termostato Tornillos montaje con Tarugos Pared inteligente T5...
- Page 35 Agrupe e inserte los cables a través de la UWP Hale para separar la UWP e inserte el grupo de cables a través de la parte posterior de la UWP. Compruebe que al menos 1/4 de pulgada (6.4 mm) quede expuesto para la inserción fácil en los terminales de cables.
- Page 36 12 Establezca la posición del interruptor R e inserte el cable R o los cables Coloque el interruptor R hacia arriba o hacia abajo en función de sus notas de cableado del paso 7. Inserte los cables en los agujeros internos de los terminales en la UWP. Las lengüetas estarán en la posición inferior una vez insertado el cable.
- Page 37 13 Conecte los cables restantes del Este cableado es solo un ejemplo; el cableado real puede paso 8 variar. Consejo: No monte la UWP en la pared antes de conectar los cables. Presione las lengüetas hacia abajo para poner los cables en los agujeros internos de sus correspondientes terminales en la UWP (un cable por terminal) hasta que esté...
- Page 38 15 Instale el termostato Alinee el termostato en la UWP y presiónelo para que calce en su lugar. Ence 16 CONECTE la energía eléctrica Active el suministro de electricidad Encedido en la caja de interruptores o en el Encedido interruptor que controla el sistema de calefacción/refrigeración.
- Page 39 Configurar usando la aplicación Resideo Inicie la configuración con la Seleccione configurar con la aplicación aplicación Toque START SETUP Toque Yes (Sí) en la pantalla USE APP (configurar la aplicación). (iniciar configuración) en el termostato. Back El termostato está listo para configurar usando la aplicación Resideo a.) Descargue la aplicación “Resideo”...
- Page 40 Cómo usar la aplicación Resideo Acceso al Thermostat menú MY HOME 72˚ FOLLOWING SCHEDULE Seleccione Configure la el modo del temperatura ventilador Auto 72 ˚ deseada (automático)/ On (activado)/ Circulate (circulación) Seleccione Programar la el modo del comodidad de su MODE SCHEDULE sistema: Auto...
- Page 41 Cómo usar el termostato inteligente T5 Temperatura deseada Temperatura interior Ajuste de la temperatura Muestra la Muestra la temperatura interior temperatura interior Toque + o - para deseada. actual. configurar su temperatura interior deseada. Menu Mode (Modo) Menu (Menú) Fan (Ventilador) Seleccione el modo Contiene las Seleccione el modo...
-
Page 42: Configuración Manual
Configuración manual Si su red WiFi no está funcionando, como alternati- va, puede configurar su termostato manualmente y conectar su teléfono más tarde. Inicie el modo de configuración manual Toque START SETUP (INICIAR CONFIGURACIÓN) para comenzar. Seleccione el modo de configuración manual En la pantalla USE APP (configurar la aplicación), toque No. - Page 43 Configuración manual (continuación) Finalice la configuración Avance hasta que lea Finish Setup (Finalizar configuración). Toque Select (seleccionar) o toque el área con texto. Select Configure el WiFi Al finalizar el proceso de configuración se le dirigirá a SETUP WIFI (Configuración de WiFi).
- Page 44 Opciones de configuración del equipo N.º de opción: Nombre de la Valor de la opción (las configuraciones predeterminadas de fábrica opción están en negrita) Tipo de pro- No Schedule (Sin programación) gramación MO-SU = Every day the same (LU.-DO. = Todos los días iguales) MO-FR SA SU = 5-1-1 schedule (LU.-VI.
- Page 45 Opciones de configuración del equipo N.º de opción: Nombre de la Valor de la opción (las configuraciones predeterminadas de fábrica opción están en negrita) Etapas de refrig- 0, 1, 2 eración/etapas Nota: Seleccione cuántas etapas de refrigeración o del compresor de su del compresor equipo controlará...
-
Page 46: Preguntas Frecuentes
Preguntas frecuentes ¿El termostato inteligente T5 sigue funcionando si se pierde la conexión wifi? Sí, la temperatura se puede ajustar directamente en el termostato. Sin embargo, algunas características, incluida la geovalla, solo pueden gestionarse a través de la aplicación Resideo y no funcionarán si se interrumpte la conexión. -
Page 47: Información Regulatoria
Preguntas frecuentes o seleccione una nueva red dentro del menú de configuración de la aplicación Resideo. Si el termostato no puede reconectarse, debe solucionar el problema con el enrutador para determinar la causa. ¿Por qué el termostato se muestra como desconectado (icono de WiFi tachado) en la esquina superior derecha de la pantalla? Si el termostato muestra un ícono de wifi tachado en la pantalla o aparece como fuera de línea en la aplicación Resideo significa que ha perdido conexión con la red. -
Page 48: Garantía Limitada De 2 Años
33-00363ES—09 M.S. Rev. 06-22 | Impreso en EE. UU. de Wi-Fi Alliance®. © 2022 Resideo Technologies, Inc. All rights reserved. The Honeywell Home trademark is used under license from Honeywell International, Inc. This product is manufactured by Resideo Technologies, Inc. and its affiliates.
Need help?
Do you have a question about the T5 Smart and is the answer not in the manual?
Questions and answers