Honeywell Home T3 Manual
Hide thumbs
Also See for T3:
- Quick start manual ,
- Quick start user manual (2 pages) ,
- Quick start installation manual (2 pages)
Advertisement
Quick Links
Honeywell T3 & T3M
Programmable Thermostat
Honeywell T3R
Programmable Thermostat
FEATURES
•
Minimalistic and modern design makes it easy to blend
in any type of homes.
•
Table stand or wall mounted thermostat options to fit
new and replacement installations.
•
Backlight for easier viewing in all light conditions.
•
Factory programmed daily, or 5+2 default heating
schedule.
•
Schedule options with 4 independent set‐points to suit
comfort needs.
•
Set‐point temperature always displayed.
•
OFF position has an integral frost protection setting at
minimum 5 °C so that pipes in the house will never
freeze.
•
Alert messages to assist in fault finding.
•
Timed override function allows to hold a targeted set
point for 1 hour..
•
Automatic time clock adjustment for "Daylight Saving
Time".
Honeywell Homes T3, T3M & T3R
PRODUCT SPECIFICATION SHEET
The T3, T3M & T3R thermostats are designed to provide
automatic time and temperature control of heating systems
in homes and apartments. The T3 It's compatible with 24‐
230V on/off appliances such as gas boilers, combi‐boilers and
heat pump. Also works with zone valve applications but not
with electric heating (240V). The T3M supports also
OpenTherm® appliances.
The T3and T3M are for wired on the wall installations and
the T3R for wireless installations. T3R exist of a thermostat
and a Receiver box.
The solution is designed with the installer in mind and
includes a receiver module with mounting options for
directly on the wall or on a wall box. Wiring can be from
below or from the back by lifting the terminal platform,
which makes installation quick and easy.
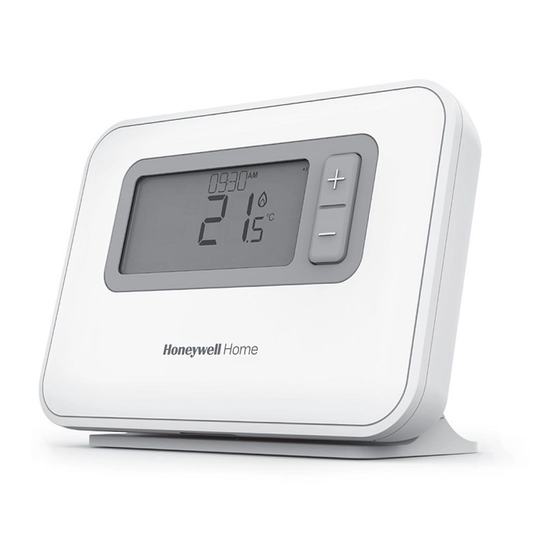
The thermostat has a large and clear fix segment display with
backlight, simple programming philosophy all to make it
easier to install and very user friendly.
The T3 product line is ideal for consumers who want to
control their comfort remotely with a modern design,
simple to program and easy to use product.
•
Receiver box with clear LED indication and override button.
•
On/Off or OpenTherm® (T3M) compatible control.
•
User menu allows extra functions to be set at the discretion
of the user:
•
Heating schedule
•
Date and time setting
•
Optimisation
•
Lock function
•
OpenTherm® alerts (T3M only)
•
Installer menu allows extra functions to be set at the
discretion of the installer to match the homeowner's
applications and needs:
•
•
•
•
•
•
•
•
•
•
•
•
•
Language selection
Cycle rate
Upper / Lower set point limit adjustment
Minimum ON/OFF time
Daily, weekly or 5+2 schedule option
4 periods a day
Wired remote sensor
Fail safe mode
Clock format
Daylight saving time change (DST)
Temperature display offset
Factory reset
Binding (T3R only)
Advertisement

Related Manuals for Honeywell Home T3


Summary of Contents for Honeywell Home T3
- Page 1 The thermostat has a large and clear fix segment display with backlight, simple programming philosophy all to make it easier to install and very user friendly. The T3 product line is ideal for consumers who want to Honeywell T3R control their comfort remotely with a modern design, Programmable Thermostat simple to program and easy to use product.
- Page 2 T3 PROGRAMMABLE THERMOSTAT THERMOSTAT DISPLAY/BUTTON LAYOUT Schedule Device icon alerts Time Battery low Signal alert Settings status Temperature Schedule adjustment Heating period Keypad lock 1 hour Menu Confirmation Device boost access Back mode Stand by icon button Manual override RECEIVER BOX INTERFACE Status LED ‐ Communication with thermostat ‐ Binding mode Binding/Manual override button Reset ‐ Delete binding...
-
Page 3: Specifications
T3 PROGRAMMABLE THERMOSTAT SPECIFICATIONS T3/T3M/T3R Thermostat Receiver box : Fuzzy Logic Control form : 230VAC Power : From 0 °C to 50 °C Room : 230V~, 50..60Hz, 0.5A to 5A resistence Electrical rating temperature 0.5A to 3A inductive (0.6 pf) display range 24V~, 50..60Hz, 0.5A to 5A resistence 0.5A to 3A inductive (0.6 pf : T3/T3M: 136 x 97 x 26 mm Dimensions T3R (Wireless) 136 x 98 x 62 mm (w x h x d) : Selectable by application (see installer Cycle rate set up : 24 hour or 12 hour AM/PM format Time display Wiring : Terminal block capable of accepting : +/‐ 10mins per year Time keeping wires up to 1.5 mm accuracy : From back via large wall box opening. Wire access : 5+2 or daily schedule with 4 daily time and Program From bottom with cable clamps. temperature level changes Mains wiring – left Low voltage wiring ‐... -
Page 4: Installer Menu
T3 PROGRAMMABLE THERMOSTAT INSTALLER MENU To enter the Installer menu press the button and then until the display changes (approx. after 3 secs) Specific Applications Setting What do you need to change? Minimum on Note: (cycle per hour) Time (min) To change cycle per hour b. To change minimum ON time Heating Gas Boilers No action required (30kW) Oil Boiler Set minimum ON time to 4 minutes. b. Set cycle per hour to 3. Thermal Set cycle per hour to 12. Actuator Zone valve No actions required Special Features Description Opentherm® By connecting the T3M to an OpenTherm® appliance various specific data can be viewed. The data is depending on what the appliance is providing. Heat range The normal lower temperature limit of 5 °C can be increased up to 21 °C to protect the inhabitants from cold. Useful if the inhabitants include the elderly, children or ... - Page 5 T3 PROGRAMMABLE THERMOSTAT Menu item Default What do you need to change? 1LA:Language 1=English 1=EN, 2=PL, 3=CZ, 4=BG, 5=RO, 6=SK, 7=HU, 8=TR 2CR:Cycle rate 3,6,9,12 3OT:Min on time 1,2,3,4 or 5 minutes 4LL:Lower Temperature 5 °C to 21°C 5UL:Upper Temperature 21°C to 35°C 1= 7 day (different schedule each day of the week) 2= 5+2 (weekday + weekend schedule) 6SO:Schedule options 8SS: Wired Sensor Input (For wired 0= Disable product only) 1= Enable 0= Deactivated 9LC:Fail safe mode 1= Activated 0= Deactivated 10BL:Backlight 1= Activated (only on demand) 0= 24h 11CL:Clock format 1= 12h (AM/PM) 0= Deactivate Daylight saving time change 12DS:Daylight saving time change 1= Automatically change time during DST...
- Page 6 T4 PROGRAMMABLE THERMOSTAT INSTALLATION To ensure your safety, always make sure mains power is switched OFF before accessing wiring. Before removing the old thermostat take a picture of the old thermostat’s wiring as a reference then proceed to installation. The T3 thermostat should not be placed near draughts, in direct sunlight or near heat sources. It should be at least 1.2 ‐ 1.5 meters from the floor. Prepare Receiver Box (T3R only) Needed during installation: • Cable with 2 wires from boiler to Receiver Box (R3H710RF0005). • The Receiver Box requires 230V power. Find a suitable location near the boiler. Leave at least 30cm distance from any metal objects including wall boxes and boiler housing. Loosen the front screw to remove cover or tighten it when the cover is back in position. Install Receiver Box (T3R only) C. Replace cover A. Wall box or Rear wiring B. Surface wiring Complete installation(T3R) Turn mains powers ON to the heating application and the receiver box After powering up both devices the status LED should be steady GREEN Press the manual override to check if the boiler switches ON. The button LED lights should light GREEN...
- Page 7 T3 PROGRAMMABLE THERMOSTAT Install Thermostat(T3 and T3M only) A. Wall plate B. Surface wiring C. Place thermostat Fit the flap on to the thermostat Mount the back‐plate to the wall. Attach the front cover to the Connect wires according to wiring back plate. diagrams. Power Up the Thermostat (T3 and T3R only) Insert the batteries Setup and Configuration After power up, the year selection is displayed on the thermostat’s screen. Press + or – to adjust the date and time and press to confirm BINDING(T3R only) The T3R thermostat wireless kit comes pre‐bound from the factory. The binding operation described below is only required if: • The T3 thermostat or the Receiver box is replaced • The T3 thermostat or the Receiver box has incorrect or no binding data stored To bind/rebind Status Note: When the Receiver box has been bound before, first press with a small pin the pinhole for approximately 3 seconds to reset the binding, LEDs will flash amber for a moment. Demand 1. Put the Receiver box into binding mode by pressing the button for 3 secs. Button The LED will flash amber. Reset 2. Enable binding on thermostat: Enter binding menu by pressing and hold the for 3 secs and the press ...
- Page 8 T3 PROGRAMMABLE THERMOSTAT WIRING (T3 and T3M only) Opentherm boiler ON/OFF boiler (230V) Combi boiler 2 Port Zone Valve WIRING (T3R only) ON/OFF boiler (230V) Combi boiler 2 Port Zone Valve...
- Page 9 T3 PROGRAMMABLE THERMOSTAT TROUBLESHOOTING – T3 and T3M only Problem Display Possible Cause Remedy Thermostat display is blank Batteries exhausted, installed Unclip thermostat from wall and check incorrectly or tab hasn't been battery installation ‐ replace batteries if removed necessary Display shows Battery power critically low Unclip thermostat from wall and replace (only for T3) batteries immediately Display shows Faulty temperature sensor Replace thermostat or check wiring to remote temperature sensor if fitted Thermostat shoes heat a. Boiler water already at a. Normal behaviour – wait for water demand but boiler doesn’t temperature temperature to drop respond b. Faulty wiring connection b. Check wiring at thermostat and boiler terminals TROUBLESHOOTING –...
-
Page 10: Product Notice
T3 PROGRAMMABLE THERMOSTAT OpenTherm® ID's (only for T3M) Menu item Standaard Wat wilt u aanpassen? OT1: Low Load Control 0= Disabled 1= Enabled 1= Enabled OT2: Control setpoint 5 ‐ 99°C OT3: Supply water temperature 5 ‐ 99°C OT4: Return water temperature 5 ‐ 99°C OT5: Max. supply water temperature 5 ‐ 99°C OT6: Hot water temperature 5 ‐ 99°C OT7: Hot water setpoint 5 ‐ 99°C OT8: Actual power 0 – 99% OT9: Water pressure 0.0 – 9.9 0= Disabled 1= Enabled 0= Disabled OT10: OTC control 4‐40 OT11: OTC curve 0= Disabled 0= Disabled...
Need help?
Do you have a question about the T3 and is the answer not in the manual?
Questions and answers