Mooer GE150 Pro, GE150 Pro Li Manual
- Owner's manual (29 pages)
- Also fits for
- Ge150 pro li
Advertisement
FEATURES
- New member of MOOER GE series, using the new design language
- Choice between GE150 Pro (traditional version with power adaptor) and GE150 Pro Li (version with integrated Lithium-Ion battery)
- 55 realistically sampled amp simulations using intelligent inverse modeling technology to recreate the sound of real amplifiers
- Supports loading of third-party IR cabinet simulation sample files
- Including 200 pre-programmed factory presets
- On-board EXP pedal can be configured as volume control or expression pedal
- Built-in 80 second stereo phrase LOOPER function
- Built-in drum machine module with 40 drum rhythms and 10 metronomes
- Precise built-in instrument tuner
- Type-C USB port: supports connection to computer-based editing software for preset editing, data management, firmware upgrades, or OTG connections for audio recording and playback
- AUX IN interface for audio input connections to mobile devices or external audio players for practicing
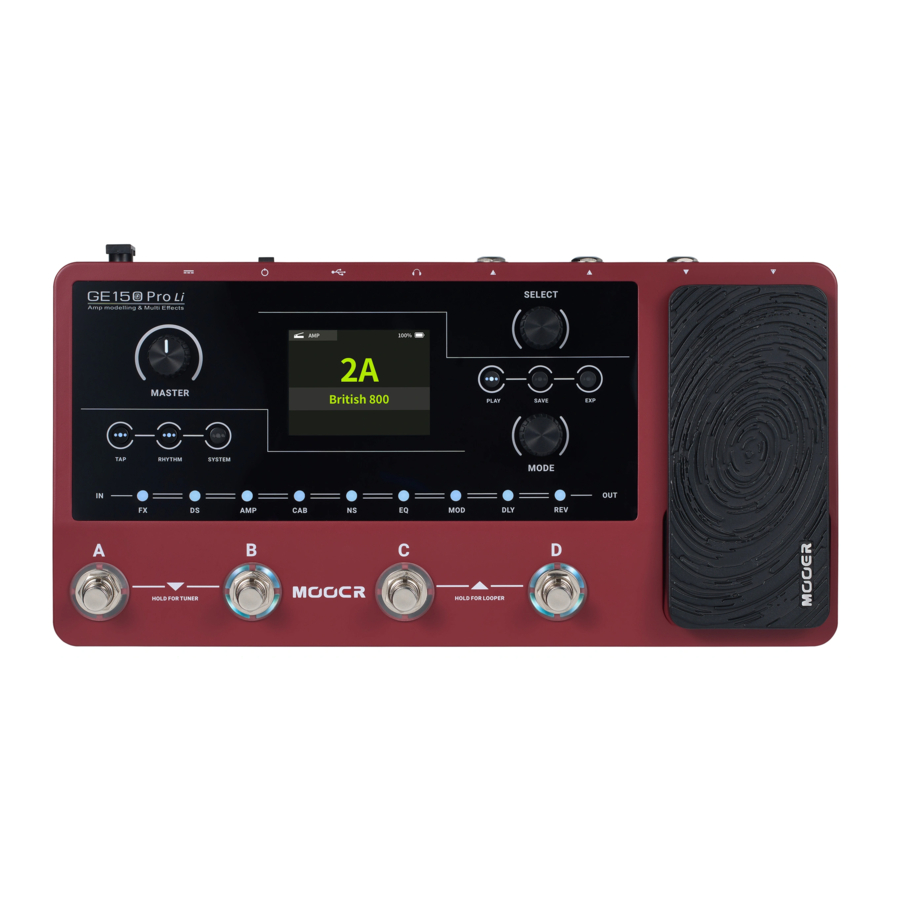
CONTROLS

- 2.8 inch LCD screen: Status and information about presets and operating modes.
- MASTER knob: Rotate to adjust the total output volume.
- TAP button: Use this to tap in tempo settings. The LED in the button blinks to indicate the currently selects tempo. (See Tap Tempo)
- RHYTHM button: Turns the DRUM MACHINE on/off and opens the RHYTHM settings menu.
- SYSTEM button: Opens the SYSTEM settings menu.
- Select knob: Use this to select presets, edit model parameters and adjust function settings in different menus.
- Rotate the knob to select items on the screen (highlighted).
- Press the knob to confirm the selection.
- Rotate the knob to change values.
- Press the knob to confirm the changes and return to selection mode.
- PLAY button: Press to return to the main user interface.
- SAVE button: Press to save your settings in a Preset.
- EXP button: Press to open the menu for expression pedal settings.
If this button is lit, the on-board EXP pedal works as an expression pedal to control module parameters. If it is not lit, the EXP pedal can work as a volume pedal, if so configured in the EXP menu. - MODE knob: Use this to select (rotate) and activate/deactivate (press) effect modules.
- Effect module indicators: The LEDs indicate the on/off status of the effect modules in the effect chain and their position in the chain. The individual LEDs will blink to indicate a module that was selected for editing by using the MODE knob.
- Footswitch A:
- in Preset mode: switches to Preset A in the selected bank
- in Looper mode: REC / PLAY / DUB (see Looper).
- Footswitches A + B simultaneously:
- short press A+B: switches down to the previous bank
- long press A+B: activates TUNER mode (see Tuner).
- Footswitch B:
- in Preset mode: switches to Preset B in the selected bank
- in Looper mode: STOP / CLEAR
- Footswitch C:
- in Preset mode: switches to Preset C in the selected bank
- in Looper mode: Drum Machine PLAY / STOP
- Footswitches C + D simultaneously:
- short press C+D: switches up to the next bank
- long press C+D: activates the LOOPER mode
- Footswitch D:
- in Preset mode: switches to Preset D in the selected bank
- in Looper mode: exits the LOOPER mode
- EXPRESSION pedal: Can be configured as volume pedal or as an expression pedal to control module parameters (e.g. Wah) (see Expression Pedal). When properly configured, the pedal function can be switched between VOLUME and EXPRESSION control by pressing the TOE SWITCH (pressing on the front of the closed pedal.)
CONNECTIONS

- AUX IN: 1/8" stereo TRS audio input jack for connecting an external audio source (mobile device, audio player) for practicing.
- INPUT: 1/4" mono audio jack, input for your instrument.
- OUTPUT (left / right): 1/4" unbalanced mono audio jacks. Connection to the input of active speakers, other effects, amplifiers or other audio devices.
- Phones: 1/8" stereo headphone output jack.
- OTG: USB Type C interface. Connection to a computer for using supported software for preset editing, data management and firmware upgrades. Connection to a mobile phone or a recording device for OTG audio playback and recording (see OTG Function, see DEVICE SOFTWARE).
- Power switch: Use this switch to turn the device ON / OFF
- 9 VDC power input: Connect the supplied power supply adaptor.
CONNECTION SCENARIOS
Connection to Full-Range equipment
This connection scenario includes full-range equipment such as studio monitors, sound cards, active stage monitors, PA systems (full-range/crossover amplifiers + full-range/crossover speakers), headphones, and other full-range equipment. When you establish connections using this application scenario it is recommended to activate AMP and CAB modules in order to achieve a professional guitar sound (see Preset editing).

- Connect an instrument.
- Connect FR equipment (mixing console, active stage monitor, PA system, sound card, studio monitor).
- Connect headphones.
Connection to a guitar power amplifier and cabinet
This connection scenario includes a guitar amplifier with FX LOOP or a pure power amp. It is recommended to activate the AMP module when you establish connections using this application scenario. All preamp functions will be performed by the GE150 PRO in this case.

- Connect an instrument.
- Connect to the RETURN jack of a guitar amplifier or to the input of a power amp.
Mixed full-range / non-full-range device connection
This connection combines the two scenarios above, when you need to use full-range equipment (e.g. mixers) and non-full-range equipment (e.g. guitar amps and cabinets) at the same time. Please refer to the following diagram for connections and activate CAB SIM THRU (Bypass) in SYSTEM settings for the left output. Deactivate CAB SIM THRU for the right output. (See SYSTEM SETTINGS).

- Connect an instrument.
- Connect your non full-range equipment (CAB module bypassed).
- Connect you full-range equipment (CAB module active).
Connection to a guitar amplifier
This connection scenario connects the output jack of the GE150 Pro directly to the input of your guitar amplifier. It is recommended to deactivate AMP and CAB modules to avoid unwanted interference with the sound characteristics of the physical amplifier and cabinet.

- Connect an instrument.
- Connect the INPUT of your guitar amplifier.
QUICK START
Start up
- Turn the MASTER volume knob down to minimize the output volume.
- Connect the inputs and outputs of the device as required according to the connection scenarios above.
- Connect the included power supply (the GE150 Pro Li can operate on battery power) and turn the device on by switching the Power switch to "I".
The display shows a boot-up screen for a few seconds. - After the boot sequence is completed and the screen shows the main user interface, adjust MASTER volume to the appropriate volume.
Main user interface

- Preset number and name of the currently active preset.
The GE150 Pro can store 200 presets.
The number indicates the bank (1 - 50) and the letter behind it indicates the preset within the bank (A - D). Presets A - D in each bank can be selected by pressing the A - D footswitches. The name can be customized during the SAVE process. - EXP pedal information: This indicates the module which is controlled by the on-board expression pedal when this pedal is used in Expression mode (EXP button LED is lit) (see Expression Pedal).
- Battery indicator: (GE150 Pro Li only) Indicates the current charge status of the integrated Li-Ion battery (see BATTERY).
Preset selection
The active preset is indicated by the number / name on the screen and by the illuminated LED ring around the corresponding footswitch.
There are two ways to select a preset after the pedal has powered up:
- Rotate the SELECT knob to change presets.
- Press one of the footswitches to select one of four presets in the current bank.
Note: You cannot select presets while in LOOPER mode. Exit LOOPER mode first before you change presets.

Bank Switching:
- Press A+B simultaneously once or repeatedly to scroll down through the banks.
- Press C+D simultaneously once or repeatedly times to scroll up through the banks.
- The screen will show the bank number and the four available presets in this bank.
- Then select one of the A / B / C / D footswitches to select a preset in the selected bank.
Shut down
The GE150 Pro is turned off by switching the Power switch on the back to "0".
Note for the GE150 Pro Li: If the power cable is still connected after shutdown, the screen will show a graphic to indicate the battery charging status.
OPERATION
Preset editing
Effect module selection and switching
The GE150 Pro has 9 built-in effect modules, including a total of 151 effect types, and supports the simultaneous use of all 9 effect modules. Each module can be configured to use one effect type.
The row of effect module LEDs below the display indicates the ON/Off status of the individual effect modules in the current preset. Illuminated LEDs indicate active modules. The LEDs are labeled with the effect module types used in the effect chain such as AMP (amp models), CAB (cabinet simulation models), REV (reverb models) and so on. The FX module can be used to select one of several different kinds of effect models. See EFFECT MODULE DESCRIPTIONS for more information. The sequence of the LEDs represents the actual sequence of modules in the effect chain.
- Rotate the MODE knob to select an effect module. The module LED of the selected module will start blinking and at the same time, the screen will show the effect type used in this module, its ON/OFF status and the available parameters.
![]()
- Press the MODE button to turn the module ON/OFF. The status is indicated in the upper right corner of the module menu.
- Press the PLAY button to return to the main view.

Parameter editing
Use the MODE knob to select the module you want to edit as described above.
The ON/OFF status of the module is indicated in the upper right corner of the menu. The ON/OFF status can be changed by pressing the MODE button.

Effect type selection:
- Rotate the SELECT knob to select (highlight) the name of the effect type (top row of the menu).
- Press SELECT to confirm the selection. The field is displayed with a green background.
- Rotate SELECT to choose from the available effect types for this module.
- Press SELECT to confirm the selection.
Parameter adjustment:
- Rotate the SELECT knob to select (highlight) one of the parameter dials.
- Press SELECT to confirm the selection. The dial is displayed with a green background.
- Rotate SELECT to adjust the value of the selected parameter. The available parameters depend on the selected effect type.
- Press SELECT to confirm the setting and return to parameter selection.
See EFFECT MODULE DESCRIPTIONS for a list of available effect types.
Note: All changes must be stored in the Preset using the SAVE button, before you switch presets. Otherwise your changes will be lost.
Saving presets
Note: If you switch presets (see Preset selection) without saving your settings first, all changes will be lost and the preset will return to the previously saved settings the next time you select it.
After adjusting all necessary settings, press the SAVE button to open the SAVE screen.
- Rotate the SELECT knob to select the Preset storage position field indicated by the preset number. The number indicates the bank (1 - 50) and the letter (A - D) indicates the preset position within the bank. The 4 presets in each bank can be selected with the A, B, C or D footswitches.
![]()
- Press and rotate SELECT to change the position.
![]()
- Press SELECT again to confirm.
- Rotate the SELECT knob to select a position in the name fields.
![]()
- Press SELECT and rotate SELECT to select a character for the field in the character list below.
![]()
- Press SELECT again to confirm the selected character.
- Rotate SELECT to the next position in the name fields and repeat the steps until you have written the name you want.
- When editing is complete, press the SAVE button to finish saving the preset.
- Rotating the MODE knob or pressing any key other than SAVE or SELECT will cancel the saving process.


Tap Tempo
The GE150 Pro comes with a built-in TAP TEMPO function, which can be used with the Delay module and the Drum Machine.
- Turn the MODE knob to select the DLY (delay) module and turn it on.
- Use SELECT to activate the SUB-D parameter and select the desired beat type (the TAP Tempo function cannot be used when SUB-D is OFF).

- After these settings have been completed, pressing theTAP button twice or more in succession will set the tempo to which the SUB-D setting is applied. The TIME parameter of the Delay module will reflect the resulting delay time.

For instructions on using the TAP button with the Drum Machine, please refer to the Drum Machine section of this document.
Expression Pedal
The GE150 Pro is equipped with an on-board rocker pedal. It can be used as an Expression pedal to control one parameter of one of the modules or it can be used as a master Volume pedal. Parameter mappings and volume pedal settings can be different for each preset and must be saved with the preset.
The EXP pedal is also equipped with a Toe Switch function (pressing firmly on the front of the pedal).
This switch can be used to switch between Expression and Volume mode.
If the EXP pedal is configured as WAH pedal (see below), the toe switch also switches the module on/off to simulate the function of a real WAH pedal.
Expression parameter mapping
- Press the EXP button on the panel to open the pedal setup menu.
- Rotate and press SELECT to select the FUNCTION field in the menu to open the sub-menu for parameter mapping.
![]()
- Select the top field and rotate SELECT to choose the module you want to control with the EXP pedal.
![]()
- Select the bottom field and rotate SELECT to choose the parameter you want to control with the EXP pedal.
- Press PLAY to return to the main view.
- If the LED in the EXP button is not lit, press the front of the pedal down (toe switch) to activate the Expression Mode (EXP LED is lit). Should the toe switch fail to work, please calibrate your pedal (see below).


Notes:
- The module you have selected to be controlled with the EXP pedal must be activated for the EXP pedal to have an effect.
- The selected module will be indicated in the top left corner of the main view.
- The parameter mapping for the EXP pedal must be saved with the preset and can be different for every preset. Remember to SAVE the preset before you switch presets or your settings will be lost. (See Saving presets.)
EXP pedal as WAH pedal (mapping example):
- Press the EXP button and use SELECT to select and open the FUNCTION menu.
- Select FX/COMP in the top field.
- Select POSITION in the bottom field.
- Press the PLAY button to exit the menu and complete the selection.
- Use the MODE knob to select the FX module and open its parameter view.
- Activate the FX module.
- Select CRY WAH or 535WAH as effect type.
- Make sure the EXP pedal is in expression mode (EXP LED is lit). If not, press on the front of the pedal (toe switch) to activate the expression mode.
After completing these settings, the FX module will be automatically activated if you engage the Expression mode with the toe switch and you can use the EXP pedal as WAH control.
When you switch the Expression mode off with the toe switch, the FX module will be deactivated and the EXP pedal is also deactivated (or works as Volume pedal if you have configured it accordingly - see below).
Calibration
You need to calibrate the GE150 Pro's expression pedal before you use it for the first time or if you experience erratic pedal function.
The calibration is global and does not have to be repeated for each preset.

Press the EXP button and rotate SELECT to select the CALIBRATE field in the menu.
Follow the on-screen instructions or the following steps:
- Open the pedal fully and select and press the SELECT knob.
- Close the pedal fully and select and press the SELECT knob.
- Push down at the tip of the pedal to calibrate the toe switch and press the SELECT knob.
- A successful calibration is indicated by an "OK" pop-up message. Repeat the steps above if you don't get an OK message.
Note: The amount of force used to press the pedal down in step 3 determines the force threshold for the expression pedal's toe switch function. It is recommended that you use your foot and apply the same pressure you would use when playing on stage.
EXP pedal as volume pedal
The GE150 Pro's on-board pedal rocker can be configured as a Volume Pedal.
Note: The on-board pedal can be switched between Expression Pedal Mode and Volume Pedal Mode by pressing on the front of the closed pedal (toe switch).
When the EXP button LED is on, the pedal works in Expression Pedal mode, when it is off, the pedal works Volume Pedal mode.
Should the toe switch not work as expected, please re-calibrate the EXP pedal.
- Volume pedal within the effect chain
This method uses the pedal to control the LEVEL parameter of one of the modules in the effect chain such as LEVEL in the FX module, VOLUME in the DS module or MST (MASTER) in the AMP module. The EXP pedal must be in Expression Mode for this to work.- Assign a level / volume parameter of one of the modules to the EXP pedal (see Expression parameter mapping above).
- Make sure the module you have mapped to the expression pedal is active (module LED is lit).
- Press the EXP pedal forward to activate the toe switch and switch it into Expression Mode (EXP LED is lit).
- Volume pedal at the end of the effect chain (Master volume)
This method is used to control the overall output volume of the GE150 Pro.
The EXP pedal must be in Volume Mode for this to work and the EXP VOL function must be activated in the EXP menu.
Configuring the Volume Mode:- Open the EXP menu and select EXP VOL.
- Use the SELECT knob to activate the volume control function by setting EXP VOL PEDAL ON/OFF to ON.
![]()
- Adjust the MIN and MAX parameters to set the minimum volume when the pedal is in full heel down position and the maximum value when the pedal is in full toe down position.
![]()


This setting must be saved for each individual preset.
The EXP pedal now works as a Volume pedal when the EXP LED is off.
Tuner
Hold footswitches A and B down simultaneously until the TUNER view opens.
- Select BYPASS with the SELECT knob to set the tuning mode to BYPASS or MUTE. BYPASS disables the internal effects and sends a clean signal to the outputs for as long as the tuning mode is active.
MUTE mutes the outputs for as long as the tuning mode is active. - Select A=440Hz with the SELECT knob to adjust the tuning reference frequency.
You can select a reference frequency from a range between 435 Hz - 445 Hz. The default value is A = 440 Hz.
![]()
- Pluck the open strings of your guitar. The screen will display the current note and the pitch.
- Tune your guitar until the pointer on the screen is in the center position.
- You can exit the TUNER mode by pressing any footswitch or button (except TAP).

Drum Machine
The GE150 Pro is equipped with a Drum Machine function providing a choice between drum rhythm patterns or metronome clicks.
Press the RHYTHM button to start the DRUM Machine and open the RHYTHM menu.
Press RHYTHM again to stop/start the DRUM MACHINE. The LED in the RHYTHM button is lit when the Drum Machine is running.

RHYTHM menu
Rotate and press the SELECT knob to select and modify settings in this menu.
MODE:
Choose between drum patterns (RHYTHM) or metronome clicks (METRONOME).
STYLE:
Choose a rhythm style or a metronome pattern when in METRONOME mode.
BPM:
Set the tempo of drum machine playback by dialing in a BPM (beats per minute) value between 40 and 260.
Note: When drum machine playback is turned on, you tap the TAP button several times to enter the tempo. The LED in the TAP button will flash to indicate the current BPM of the drum machine. If drum machine playback is stopped, the TAP button will revert to setting the tempo for the DELAY module.
VOL:
Adjust the volume level of drum machine playback.
Looper
The GE150 Pro is equipped with a stereo phrase Looper function providing a recording time of up to 80 seconds.

Press and hold footswitches C+D simultaneously to open the Looper menu.
PLAY VOL:
Use the SELECT knob to adjust the playback volume for the Looper function. All other Looper functions are controlled by the A and B footswitches:
REC (Recording):
If the track is empty, step on footswitch A to start the recording. The REC icon in the screen lights up and the TIME field starts to run a red progress bar. The LED ring around footswitch A is lit solid red to indicate an ongoing recording.
Note: If you continue recording until the progress bar is full (80 seconds), the Looper will automatically switch to playback.
PLAY (Playback):
During recording (REC), overdubbing (DUB) or in STOP state, step on footswitch A to start the playback of the recorded track. The PLAY icon in the screen lights up, the progress bar runs the loop according to the actual track length, and the LED ring around footswitch A is lit solid blue to indicate playback in progress.
DUB (Overlay Recording):
During playback (PLAY), step on footswitch A to start recording the next overlay track (DUB). The DUB icon in the screen lights up, the progress bar is displayed in red, and the LED ring around footswitch A is lit solid red to indicate an ongoing recording.
STOP:
During PLAY or DUB, step on footswitch B to stop track playback, the STOP icon in the screen lights up, the progress bar stops running, and the LED ring around footswitch B is flashing yellow.
CLEAR:
In any state, step on footswitch B and hold it for more than 1 second to execute CLEAR to delete all tracks. The CLEAR icon in the screen will light up and none of the LED rings around the A or B footswitches are lit.
Footswitch C:
Step on C in Looper mode to start / stop the Drum Machine. The Drum Machine will play the Rhythm or Metronome pattern you have programmed using the DRUM MACHINE feature (see above).
Footswitch D:
Step on D to exit the Looper mode.
Note: If the Looper is playing back when you exit the Looper mode, playback will continue and you will have to re-enter the Looper mode (hold C+D) to stop the playback. A Drum Machine playback that was started in Looper mode can be stopped any time by pressing the RHYTHM button.
OTG Function
The USB-C port on the GE150 Pro can be used to connect a mobile phone or tablet for OTG (On-TheGo) functions to for audio recording and playback.
Device Connection:
Use a USB-C cable to connect the GE150 Pro to your phone or tablet. After the connection is established, you can use third-party apps on your mobile device to play back audio material through your GE150 Pro or to record and process audio signals coming from your GE150 Pro.
Notes:
- Please make sure your mobile device supports OTG functions before using this function.
- Depending on the available interface on your mobile device, you may need to acquire a suitable 3rd party USB-C OTG adapter cable.
- If you play back audio from your mobile device through the GE150 Pro, use the volume controls on your mobile device to control the input volume into the GE150P Pro.
OTG output volume
Press the SYSTEM button on the panel to open the SYSTEM settings menu. Select OTG LEVEL and adjusts the output volume level of the OTG function of the USB port.
SYSTEM SETTINGS
The global SYSTEM SETTINGS screen can be accessed by pressing the SYSTEM button on the panel. Selections and changes are made with the SELECT knob.

INPUT LEVEL
Use this setting to adjust the input volume of the GE150 Pro according to the output power level of the currently used instrument. The adjustment range is -∞ dB to +6 dB. This setting is global and applies to all presets.
Note: Adjusting the global input level can prevent input distortion caused by exceedingly powerful input signals.
SCREEN
In some situations, you may want to adjust the screen brightness to adapt to different lighting environments, or to extend the battery life of the battery version.
CAB SIM TRHU
If the CAB module is enabled in some presets, you can specify whether cabinet simulation is effective for the left and/or right output channel or if the module is bypassed for one or both of the channels. This setting is effective for all output connections (left/right output, headphone, OTG audio output) and may be necessary for certain connection scenarios where different outputs with or without cabinet simulation (or amp simulation) are used. See section CONNECTION SCENARIOS for details.
- Select CAB SIM THRU (CAB simulation module bypass) and then set the desired status for the right and left channels.
- If ON is selected, the channel will have CAB simulation applied.
- If THRU is selected, the CAB simulation will be bypassed for this channel.
Note: When the left and right channels are set to different states, the CAB module is placed at the end of the effect chain by default.
OTG LEVEL
Adjusts the output volume level of the OTG function of the USB port.
LANGUAGE
The GE150 Pro supports menus in Chinese and in English.
RESET
Select RESET to restore your GE150 Pro to factory settings.
Use SELECT to confirm (YES) or cancel (NO).
The RESET view also shows the current Firmware Version of your device.
BATTERY
The GE150 Pro Li is a version of the GE150 Pro with built-in lithium battery.
Battery power information is displayed at the top right of the main view when the device is on.
The battery level is indicated in five levels: 20% / 40% / 60% / 80% / 100%.

- When the battery level drops to 20%, a pop-up window will appear on the screen to indicate that the battery level is low and you need to plug in the power adapter for charging to prevent the device from shutting down due to battery depletion, which may result in the loss of unsaved settings and parameter data.
![]()
- The device will automatically shut down when the battery is depleted. The device cannot be turned back on in this state and the power adapter must be plugged in to turn the device on again.
- When charging with the power adapter plugged in while the device is on, the battery icon in the screen will display a green lightning symbol to indicate that it is charging.
![]()
- When charging with the power adapter plugged in, but the device turned off, the screen will display battery level information as shown below.
![]()


DEVICE SOFTWARE
Mooer provides a computer editor software for your GE150 Pro. You can use it to edit effect module parameters, import or export preset files, import 3rd party IR sample files and perform data backups. Setting changes are transmitted between the GE150 Pro device and the software in real time. This way you can use the software to directly control your settings while you are practicing.
Software download
Visit the official MOOER AUDIO website (www.mooeraudio.com) and navigate to the SUPPORT - DOWNLOAD area. Find the "GE150 Pro" page, download the appropriate installation program for your operating system (Windows or Mac) and install it.
System requirements:
- Windows-Win10 or above
- Mac OS-10.11 or above
Establishing the connection
After the installation is complete, please use the supplied USB-C cable to connect your GE150 Pro to the computer and open the GE150 PRO software. The software will automatically connect to your device.
Software window

- Preset save area
This area shows the currently active preset.
You can type directly into the field to change the name and click on the SAVE icon to save all changes you have made to the preset.
You can also use the left/right arrows to switch presets. - Preset list
This area shows all the presets stored in your GE150 Pro. You can select and activate a preset by clicking on it. You can also use the right mouse button to copy, paste, clear and rename a selected preset. - Local folder area
This area displays the list of preset files in the local folder of your computer.
You can save presets from your GE150 Pro on your computer by dragging a preset from the area above into this area.
You can load presets from your computer into your GE150 Pro by dragging a preset from this area into the area above.
You can use the right mouse button to add preset files stored in other places on your computer to the list, delete preset files, refresh the list and open the local preset file folder. - Functions and system setup area
This area allows you to view Drum Machine information, switch CAB SIM bypass settings, view and edit expression pedal mappings and open the SYSTEM settings. The submenus for EXP and SYSTEM provide the same options as the respective menus on the GE150 Pro. (See Expression Pedal and SYSTEM SETTINGS.) - Effect module area
This area displays the ON/OFF status of the effect modules for the current preset. Use the mouse to select a module for parameter editing in the area below and to turn modules ON/OFF. - Effect model list
This area displays a list of the effect types that can be used with the selected module. Select a model from the list by clicking on it list. The switch above the list turns the module ON/OFF. - Parameter Adjustment Area
This area shows the available parameters for the selected model. You can adjust them by clicking the arrow buttons below the parameter names or by dragging the dials with your mouse. You will hear all changes in real time.
Note about saving:
If you have made changes in the software window and try to switch presets in the software, you will be prompted to save your setting changes.
However, if you switch presets by using the footswitches on the GE150 Pro, you will not be prompted and unsaved changes will be lost!
IR file import
The GE150 Pro supports the import of up to 10 third-party IR files for Cabinet Simulations.
- Obtain a 3rd party IR file and store it on your computer.
- Select the CAB module in the GE150 Pro software screen.
- The effect model list shows the CAB models already installed on your device. Scroll down to the bottom of the list. Slots 27-36 are designated for IR file import and show "EMPTY" if no files have been imported yet.
- Click on the "+" icon and a Windows Explorer prompt will be opened. Find your stored IR file and click "Open". Your file will be imported into your GE150 Pro and can now be used in the CAB module in your presets.
- Click the "-" icon behind an imported file to delete it.
Data backup
To backup your favorite presets on your computer, drag them from the PRESET list in the software window to the COMPUTER list.
To restore a backup preset, drag it from the COMPUTER list to the PRESET list.
The storage slot where the preset will be stored on your device will be highlighted before you release your mouse button.

The preset that occupies the place where you drop your restored preset will be overwritten!
TROUBLESHOOTING
The unit does not start
- Ensure that the original power adapter is connected.
- GE150 Pro Li (battery-powered version): Make sure the battery still has sufficient charge to meet the power demands during boot-up. Connect the original adapter before trying to start the device.
No sound after startup
- Check that the MASTER volume knob on the panel is turned to the proper position.
- Navigate to INPUT LEVEL in the SYSTEM settings to make sure the input gain slider is in the proper position.
- Check if the EXPRESSION pedal is in volume mode and move the pedal to the "toe down" position.
Noisy signal
- Please use signal cables with good shielding.
- Change the usage environment or the time of usage to determine if the noise is caused by interference from sources in the environment.
- Keep a distance from computers, motors, fans and other electrical appliances to reduce electromagnetic interference.
SPECIFICATIONS
| Effects | |
| Number of modules | 9 |
| Total number of effect models | 151 |
| Preset storage slots | 200 |
| Impulse response | |
| Supported formats | WAV |
| Sampling rate | 44.1 kHz |
| Sampling accuracy | 24 bit |
| Number of sample points | 512 points |
| Input | |
| Interface type | 1 x 1/4'' unbalanced mono input connector |
| Input impedance | 2.2 MOhm |
| Maximum input level | 5.75 dBu |
| Audio Analog-to-Digital Converter | |
| Sampling rate | 44.1 kHz |
| Sampling accuracy | 24 bit |
| Dynamic range | 5.75 dBu |
| Frequency response | 20 Hz - 20 kHz |
| Output | |
| Interface type | 2 x 1/4'' unbalanced mono output jacks |
| Output impedance | 100 Ohm |
| Maximum output level | 11.75 dBu |
| PHONES jack | |
| Interface type | 1 x 1/8'' unbalanced stereo output connector |
| Output impedance | 32 Ohm |
| Maximum output level | 11.75 dBu |
| Audio Digital-to-Analog Converter | |
| Dynamic range | 11.75 dBu |
| Frequency response | 20 Hz - 20 kHz |
| Signal-to-noise ratio | 97 dB |
| USB Interface | TYPE-C connector |
| Power Supply | GE150 Pro: DC 9 V, 300 mA, negative center GE150 Pro Li: DC 9 V, 1.5 A, negative center |
| GE150 Pro Li: | |
| Battery | Li-ion, rechargeable, 2000 mAh, 14.8 Wh, 7.4 V |
| Battery life | Approx. 9 hours |
| Operating temperature | 0 - 60°C |
| Dimensions | 310 mm × 153 mm × 55 mm (LxWxH) |
| Weight | GE150 Pro: 1.1 kg (2.4 lb) / GE150Pro Li: 1.2 kg (2.6 lb) |
| Accessories | Power adapter, USB cable, Quick guide |
Disclaimer: Parameter updates will not be notified separately.
EFFECT MODULE DESCRIPTIONS
FX miscellaneous modules
| Effect Description | ||
| No. | Model name | Description |
| 1 | Cry Wah | Modeled after a GCB95 |
| 2 | 535 Wah | Modeled after a modern 535Q |
| 3 | Auto Wah | Automatic sweeping Wah |
| 4 | Talk Wah Ah | Talking Wah algorithm from the MOOER Red Kid with "AH" vocal effect |
| 5 | Talk Wah Oh | Talking Wah algorithm from the MOOER Red Kid with "OH" vocal effect |
| 6 | Touch Wah | Dynamically responsive auto Wah with envelope filter |
| 7 | Yellow comp | Based on MOOER YELLOW COMP compressor with four parameters |
| 8 | Blue comp | Compressor based on MOOER BLUE COMP with four parameters |
DS overdrive / distortion modules
| Effect Description | ||
| No. | Model name | Description |
| 1 | Tube DR | Based on B.K. Butler Tubedrive |
| 2 | 808 | Based on IBANEZ TS808 |
| 3 | Pure Boost | Based on MOOER Pure Boost |
| 4 | Flex Boost | Based on MOOER Flex Boost |
| 5 | D-Drive | Based on Barber Direct Drive |
| 6 | Black Rat | Based on ProCo Rat |
| 7 | Grey Faze | Based on MOOER Grey Faze |
| 8 | Muffy | Based on EHX Big Muff |
| 9 | MTL Zone | Based on BOSS Metal Zone |
| 10 | MTL Master | Based on Digitech Metal Master |
| 11 | Obsessive Dist | Based on Fulltone OCD |
| 12 | Jimmy OD | Based on Paul Cochrane Timmy OD |
| 13 | Full Drv | Based on Fulltone Fulldrive 2 |
| 14 | Shred | Based on Marshall Shred Master |
| 15 | Beebee Pre | Based on Xotic BB Preamp |
| 16 | Beebee+ | Based on Xotic BB Plus |
| 17 | Riet | Based on Suhr Riot |
| 18 | Tight DS | Based on Amptweaker Tight Rock |
| 19 | Full DS | Based on Fulltone GT-500 |
| 20 | Gold Clon | Based on Klon Centaur Gold |
AMPplifier modules
| Effect Description | ||
| No. | Model name | Description |
| 1 | 65 US DLX | Based on Fende 65 Deluxe Reverb |
| 2 | 65 US TW | Based on Fender 65 Twin Reverb |
| 3 | 59 US BASS | Based on Fender 59 Bassman |
| 4 | US Sonic | Based on Fende Super Sonic |
| 5 | US BLUES CL | Based on Fender Blues Deluxe Clean Setting |
| 6 | US BLUES OD | Based on Fender Blues Deluxe Overdrive Setting |
| 7 | J800 | Based on Marshall JCM800 |
| 8 | J900 | Based on Marshall JCM900 |
| 9 | PLX 100 | Based on Marshall Plexi 100 |
| 10 | E650 CL | Based on ENGL E650 Clean Setting |
| 11 | E650 DS | Based on Engl E650 Distortion Setting |
| 12 | Powerbell CL | Based on ENGL Powerball E645 Clean Setting |
| 13 | Powerbell DS | Based on ENGL Powerball E645 Distortion Setting |
| 14 | Blacknight CL | Based on ENG Blackmore Signature Clean Setting |
| 15 | Blacknight DS | Based on ENGL Blackmore Signature Distortion Setting |
| 16 | MARK III CL | Based on MESA Boogie MARK III Clean Setting |
| 17 | MARK III DS | Based on MESA Boogie MARK III Distortion Setting |
| 18 | MARK V CL | Based on MESA Boogie MARK V Clean Setting |
| 19 | MARK V DS | Based on MESA Boogie MARK V Distortion Setting |
| 20 | Tri Rec CL | Based on MESA Boogie Triple Rectifier Clean Setting |
| 21 | Tri Rec DS | Based on MESA Boogie Triple Rectifier Distortion Setting |
| 22 | Rock Verb CL | Based on Orange Rockerverb Clean Setting |
| 23 | Rock Verb DS | Based on Orange Rockerverb Distortion Setting |
| 24 | Citrus 30 | Based on Orange AD30 |
| 25 | Citrus 50 | Based on Orange OR50 |
| 26 | Slow 100 CR | Based on Soldano SLO-100 Crunch Setting |
| 27 | Slow 100 DS | Based on Soldano SLO-100 Distortion Setting |
| 28 | DR ZEE 18 JR | Based on DR.Z Maz18 Jr |
| 29 | DR ZEE Reck | Based on DR.Z Z-Wreck |
| 30 | JET 100H CL | Based on Jet City JCA100H Clean Setting |
| 31 | Jet 100H OD | Based on Jet City JCA100H Overdrive Setting |
| 32 | JAZZ 120 | Based on Roland JC-120 |
| 33 | UK 30 CL | Based on VOX AC30 Clean Setting |
| 34 | UK 30 OD | Based on VOX AC30 Overdrive Setting |
| 35 | HWT 103 | Based on Hiwatw DR-103 |
| 36 | PV 5050 CL | Based on Peavey 5150 Clean Setting |
| 37 | PV 5050 DS | Based on Peavey 5150 Distortion Setting |
| 38 | Regal Tone CL | Based on Tone King Falcon Rhythm Setting |
| 39 | Regal Tone OD1 | Based on Tone King Falcon Tweed Setting |
| 40 | Regal Tone OD2 | Based on Tone King Falcon Lead Setting |
| 41 | Carol CL | Based on Two Rock Coral Clean Setting |
| 42 | Carol OD | Based on Two Rock Coral Overdrive Setting |
| 43 | Cardeff | Based on Two Rock Cardiff |
| 44 | EV 5050 CL | Based on EVH 5150 Clean Setting |
| 45 | EV 5050 DS | Based on EVH 5150 Distortion Setting |
| 46 | HT Club CL | Based on Blackstar HT Stage 100 Clean Setting |
| 47 | HT Club DS | Based on Blackstar HT Stage 100 Distortion Setting |
| 48 | Hugen CL | Based on Diezel Hagen Clean Setting |
| 49 | Hugen OD | Based on Dieze Hagen Overdrive Setting |
| 50 | Hugen DS | Based on Diezel Hagen Distortion Setting |
| 51 | Koche OD | Based on Koch Powertone Overdrive Setting |
| 52 | Koche DS | Based on Koch Powertone Distortion Setting |
| 53 | Acoustic 1 | Acoustic guitar amp simulation 1 |
| 54 | Acoustic 2 | Acoustic guitar amp simulation 2 |
| 55 | Acoustic 3 | Acoustic guitar amp simulation 3 |
CABinet modules
| Effect Description | ||
| No. | Model name | Description |
| 1 | US DLX 112 | Based on Fender 65 Deluxe Reverb 112 Cabinet |
| 2 | US TWN 212 | Based on Fende 65 Twin Reverb 212 Cabinet |
| 3 | US Bass 410 | Based on Fender 59 Bassman 410 Cabinet |
| 4 | Sonic 112 | Based on Fender Super Sonic 112 Cabinet |
| 5 | Blues 112 | Based on Fender Blues Deluxe 112 Cabinet |
| 6 | 1960 412 | Based on Marshall 1960A 412 Cabinet |
| 7 | Eagle P412 | Based on ENGL Pro XXL 412 Cabinet |
| 8 | Eagle S412 | Based on ENGL Vintage XXL 412 Cabinet |
| 9 | Mark 112 | Based on Mesa Boogie Mark 112 Cabinet |
| 10 | Rec 412 | Based on Mesa Boogie Rectifier Standard 412 Cabinet |
| 11 | Citrus 412 | Based on Orange PPC 412 Cabinet |
| 12 | Citrus 212 | Based on Orange PPC 212 Cabinet |
| 13 | Slow 412 | Based on Soldano Slo 412 Cabinet |
| 14 | Dr Zee 112 | Based on DR.Z MAZ 112 Cabinet |
| 15 | Dr Zee 112 | Based on DR.Z MAZ 112 Cabinet |
| 16 | Jazz 212 | Based on Roland JC120 212 Cabinet |
| 17 | UK 212 | Based on VOX AC30 212 Cabinet |
| 18 | HWT 412 | Based on Hiwatt AP412 Cabinet |
| 19 | PV 5050 412 | Based on Peavey 5150 412 Cabinet |
| 20 | Regal Tone 110 | Based on Tone King Falcon 110 Cabinet |
| 21 | Two Stones 212 | Based on Two Rock 212 Cabinet |
| 22 | Cardeff 112 | Based on Two Rock 112 Cabinet |
| 23 | EV 5050 412 | Based on EVH 5150 412 Cabinet |
| 24 | HT 412 | Based on Blackstar HTV 412 Cabinet |
| 25 | Gas Station 412 | Based on Diezel Hagen 412 Cabinet |
| 26 | Accoustic 112 | Acoustic guitar cabinet simulation, 1 x 12" speaker |
| 27-36 | EMPTY | Slots can be used for 3rd party IR files downloaded via computer-based editing software (see IR file import) |
NS noise gate modules
| Effect Description | ||
| No. | Model name | Description |
| 1 | Noise Killer | Hard noise gate based on the Mooer Micro Noise Killer. The effect solves noise issues quickly and efficiently with simple threshold adjustments. |
| 2 | Intel Reducer | Unlike conventional noise gates, this works by separating the conventional signal from the white noise in the signal and eliminating the white noise to achieve noise reduction while maintaining natural decay. This module is recommended for use before distortion effects or speaker simulation. |
| 3 | Noise Gate | Three parameter studio noise gate. The user can adjust the effective threshold according to the current noise level, then adjust the appropriate Attack and Release times according to their needs, and finally select the appropriate damping. |
EQ modules
| Parameter Description | ||
| No. | Parameter | Description |
| 1 | Mooer G | 5-band EQ for guitar |
| 2 | Mooer HM | 5-band EQ for heavy guitar |
| 3 | Mooer G-6 | 6-band EQ for guitar |
| 4 | Custom EQ | 3-band EQ with adjustable frequency bands. |
MODulation modules
| Effect Description | ||
| No. | Model name | Description |
| 1 | Phaser | Based on the MOOER Ninety Orange, standard sine waves |
| 2 | Step Phaser | Square wave phase shifter |
| 3 | Fat Phaser | Low frequency phase shifter |
| 4 | Flanger | Based on the MOOER E-Lady, square wave effect |
| 5 | Jet Flanger | Based on the MOOER Jet Flanger |
| 6 | Tremolo | Based on the MOOER Trelicopter |
| 7 | Stutter | Square wave tremolo effect |
| 8 | Vibrato | Pitch modulation |
| 9 | Pitch Shift | Pitch shift effect based on the original sound |
| 10 | Detune | Fine-tuned pitch adjustment. |
| 11 | Rotary | Simulates a vintage Leslie rotary speaker |
| 12 | Ana Chorus | Classic analog chorus |
| 13 | Tri Chorus | More pronounced multi-chorus effect |
| 14 | Ring Mod | Ring modulator effect |
| 15 | Q-Filter | Auto-Wah effect |
| 16 | High Pass | Modulation filter that emphasizes high frequencies |
| 17 | Low Pass | Modulation filter that emphasizes low frequencies |
| 18 | Slow Gear | Auto volume swell effect |
| 19 | Lofi | Low sampling rate filter for low fidelity sound |
DELAY modules
| Effect Description | ||
| No. | Model name | Description |
| 1 | Digital | Crystal-clear repeats |
| 2 | Analog | Warm and soft character of analog circuit reproduced by digital technology |
| 3 | Real | Realistic and natural echoes |
| 4 | Tape | Recreates classic tape delay sounds |
| 5 | Mod | Digital Delay with modulated repeats |
| 6 | Reverse | Clear reverse playback delay effect |
| 7 | Pingpong | Spatialized left/right Ping Pong delay |
| 8 | Dynamic | Digital delay which responds to instrument dynamics |
| 9 | Dual Delay | 2 clear delays with independent time controls |
REVERB modules
| Effect Description | ||
| No. | Model name | Description |
| 1 | Room | Small room reverb |
| 2 | Hall | Concert hall reverb with rich diffusion and long decay times |
| 3 | Church | Reverb simulating large space with long decay times |
| 4 | Plate | Bright metal plate reverb |
| 5 | Spring | Vintage spring reverb |
| 6 | Mod | Reverb with added chorus effect, adding more detail |
| 7 | Cave | Reverb reproducing the diffuse reflection of irregular surfaces in a cave |
Note: The names of the manufacturers and products mentioned in this manual are the property of their respective companies and are used here only to illustrate the types of effect sounds simulated in this product.
PRECAUTIONS
PLEASE READ CAREFULLY BEFORE PROCEEDING
Power supply
- Only use power supplies that have been approved by the relevant authorities and that meet local regulation requirements (such as UL, CSA, VDE or CCC).
- Please only use a power supply adapter that meets the specifications of the manufacturer.
- Unplug the power adapter when not in use or during thunderstorms.
For GE150Pro Li:
- Prevent a device containing a battery, from overheating (e.g., keep it out of direct sunlight and away from heat sources, etc.).
- Should the battery leak, prevent the liquid from getting into contact with skin or eyes. In case of contact with the liquid, consult a doctor.
![]()
The battery supplied with this product may pose a risk of fire or chemical burns if not handled properly.

Storage and usage locations
To avoid deformation, discoloration or other serious damage, do not expose this device to any of the following conditions:
- direct sunlight
- extreme temperature or humidity
- excessively dusty or dirty locations
- magnetic fields
- high humidity or moisture
- strong vibrations or shocks
Cleaning
Clean only with a soft, dry cloth. If necessary, lightly moisten the cloth. Do not use abrasive cleaners, cleaning alcohol, paint thinners, wax, solvents, cleaning fluids, or chemical-impregnated wiping cloths.
Operation
- Please do not use excessive force to operate the control elements of the unit.
- Prevent metal, paper or other objects from getting into the unit.
- Please do not drop the unit, and avoid heavy blows.
- Please do not modify the unit without authorization.
- Should repairs be required, please contact the MOOER Customer Service Center for more information.
Connections
Always turn off / disconnect the power to the GE150 Pro and any other equipment before connecting or disconnecting signal cables. This will help prevent malfunctions and / or damage to other devices.
Also make sure to disconnect all connection cables and the power supply before moving the device.
Documents / Resources
References
Download manual
Here you can download full pdf version of manual, it may contain additional safety instructions, warranty information, FCC rules, etc.
Advertisement


Need help?
Do you have a question about the GE150 Pro and is the answer not in the manual?
Questions and answers