Advertisement
Available languages
Available languages
Quick Links
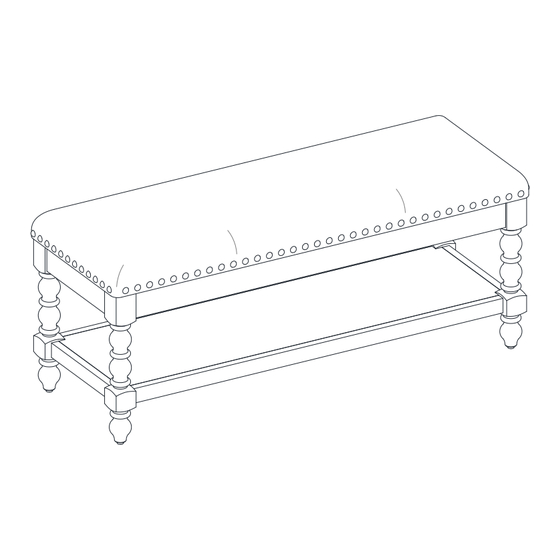
Harper Faux Cowhide Bench
If you have any questions regarding assembly or if parts are missing, DO NOT return this item to the
store where it was purchased. Please call our customer service number and have your instructions and
parts list ready to provide the model name, part name or factory number:
Or visit our web site 24 hours a day, 7 days a week for product assistance at
THIS INSTRUCTION BOOKLET CONTAINS IMPORTANT SAFETY INFORMATION.
Stock # PW1425004710060
ADULT ASSEMBLY REQUIRED
Pacific Standard Time: 8:30 a.m. - 4:30 p.m., Monday - Friday
www.whalenstyle.com
Or e-mail your request to parts@whalenfurniture.com
PLEASE READ AND KEEP FOR FUTURE REFERENCE.
Date 2024-07-08
1-866-942-5362
Rev. 0001-A
LOT NUMBER:
DATE PURCHASED:
/
/
Advertisement

Subscribe to Our Youtube Channel
Related Manuals for Pioneer Woman Harper PW1425004710060


Summary of Contents for Pioneer Woman Harper PW1425004710060
- Page 1 LOT NUMBER: DATE PURCHASED: Harper Faux Cowhide Bench Stock # PW1425004710060 ADULT ASSEMBLY REQUIRED If you have any questions regarding assembly or if parts are missing, DO NOT return this item to the store where it was purchased. Please call our customer service number and have your instructions and parts list ready to provide the model name, part name or factory number: 1-866-942-5362 Pacific Standard Time: 8:30 a.m.
- Page 2 M A X I M U M R E C O M M E N D E D W E I G H T L O A D S MANUFACTURER: Whalen Furniture Manufacturing CATALOG: Harper Faux Cowhide Bench STOCK: PW1425004710060 MAXIMUM LOAD 124.7 kg / 275 lb MAXIMUM LOAD 22.7 kg / 50 lb THIS UNIT IS INTENDED ONLY FOR USE WITHIN THE...
- Page 3 Parts and Hardware List Please read completely through the instructions and verify that all listed parts and hardware are present before beginning assembly. A- Seat B- Bottom Shelf (Qty. 1) (Qty. 1) C- Leg (1) 5/16” x 50 mm Bolt (Qty.
- Page 4 Assembly Instructions Remove the caps ③ x 4 ② x 4 ④ x 4 DO NOT fully tighten the bolts or nuts initially until all the bolts or nuts are ready to assemble. To avoid causing damages to the thread, DO NOT over-tighten the nuts or bolts. 1.
- Page 5 Assembly Instructions The corner blocks will face the floor when the unit is turned upright ③ x 2 ① x 2 ④ x 2 4. Lay the assembled legs on the floor. 5. Orient and fit the Bottom Shelf (B) between the notches on the Legs (C). Insert and screw two 50 mm Bolts (1) with the Lock Washers (3) and Flat Washers (4) through the drilled holes on the corner blocks and screw into the Legs (C).
- Page 6 Assembly Instructions Remove the caps ① x 2 ③ x 6 ② x 4 ④ x 6 6. Repeat the same process to attach the two remaining Legs (C) at the other corner blocks.
- Page 7 Assembly Instructions Floor Leveler 7. Ask for assistance to lift the unit upright on a flat floor. 8. Adjust each floor leveler as necessary until each Legs (C) touches the floor and the seat is level. 9. Sit down on the Seat (A) with the bolts not fully tightened. That will level all legs and then fully tighten all the bolts and nuts with the Ratchet Wrench and Open Wrench provided.
- Page 8 Care and Maintenance Use a soft, clean cloth that will not scratch the surface when dusting. Use of furniture polishes is not necessary. Should you choose to use polishes, test first in an inconspicuous area. Using solvents of any kind on your furniture may damage the finish. ...
- Page 9 NÚMERO de LOTE:__________ FECHA de COMPRA: Banca de piel sintética Harper Serie # PW1425004710060 ENSAMBLE REQUERIDO POR ADULTO Si tienen alguna pregunta acerca del ensamble o si alguna parte está faltante, no retorne esté producto a la tienda donde lo compro. Por favor llame a nuestro departamento de ayuda al cliente teniendo su instructivo y lista de partes para proveer el modelo, nombre de parte o el número de fábrica: 1-866-942-5362 Hora estándar del Pacífico: 8:30 a.m.
- Page 10 M Á X I M O P E S O R E C O M E N D A D O FABRICANTE: Whalen Furniture Manufacturing CATALOGO: Banca de piel sintética Harper SERIE: PW1425004710060 CARGA MÁXIMA 124.7 kg / 275 lb. CARGA MÁXIMA 22.7 kg / 50 lb.
- Page 11 Lista de partes y material de ferretería Por favor lea completamente las instrucciones y verifique que estén todas las partes y partes de ferretería antes de iniciar el ensamblado. A- Asiento B- Repisa inferior (Cant. 1) (Cant. 1) C- Pata (1) Perno de 5/16 de pulgada x 50 mm (Cant.
- Page 12 Instructivo de ensamble Retirar las tapas ③ x 4 ② x 4 ④ x 4 ADVERTENCIA NO apriete los pernos y tuercas hasta que todos los pernos o tuercas estén listos para el ensamble. Para evitar daños a la rosca, NO sobre apriete los pernos o tuercas. 1.
- Page 13 Instructivo de ensamble Los bloques esquina apuntarán hacia el piso cuando ya esté en posición vertical ③ x 2 ① x 2 ④ x 2 4. Descansar las patas ensambladas en el piso. 5. Orientar y encajar la repisa inferior (B) entre los espacios en las patas (C). Insertar y atornillar 2 pernos de 50 mm (1) con las arandelas de presión (3) y las arandelas planas (4) a través de los agujeros perforados en los bloques esquinas y atornillar en las patas (C).
- Page 14 Instructivo de ensamble Retirar las tapas ① x 2 ③ x 6 ② x 4 ④ x 6 6. Repetir el mismo proceso para adjuntar las 2 patas restantes (C) a los otros bloques de esquina.
- Page 15 Instructivo de ensamble Nivelador de piso 7. Pedir asistencia para poner la unidad en posición vertical sobre un piso plano. 8. Ajustar cada nivelador de piso como sea necesario hasta que cada pata (C) toque el piso y el asiento esté nivelado.
- Page 16 Mantenimiento y Cuidados Use una toalla suave y limpia para evitar daños y rayaduras. Uso de cera para pulir muebles no es necesario. Si desea usar cera, pruébela en un área que no sea visible para revisar su funcionamiento. ...
Need help?
Do you have a question about the Harper PW1425004710060 and is the answer not in the manual?
Questions and answers