Advertisement
Available languages
Available languages
Quick Links
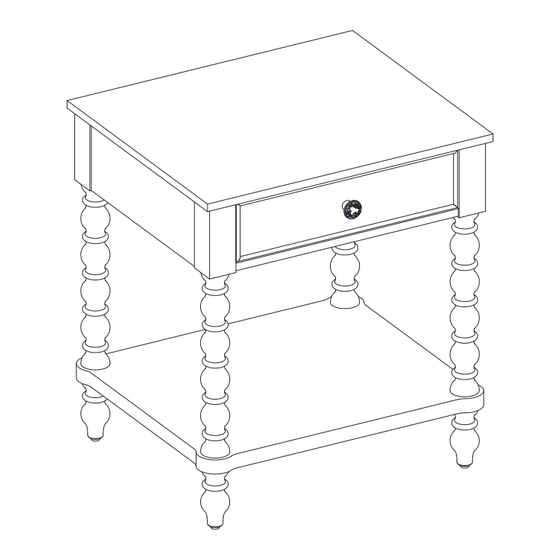
Spindle Nightstand
If you have any questions regarding assembly or if parts are missing, DO NOT return this item to the
store where it was purchased. Please call our customer service number and have your instructions and
parts list ready to provide the model name, part name or factory number:
Or visit our web site 24 hours a day, 7 days a week for product assistance at
THIS INSTRUCTION BOOKLET CONTAINS IMPORTANT SAFETY INFORMATION.
Stock # PW1425004710021
# PW1425004710022
ADULT ASSEMBLY REQUIRED
Pacific Standard Time: 8:30 a.m. - 4:30 p.m., Monday - Friday
www.whalenstyle.com
Or e-mail your request to parts@whalenfurniture.com
PLEASE READ AND KEEP FOR FUTURE REFERENCE.
Date 2024-06-07
1-866-942-5362
Rev. 0001-A
LOT NUMBER:
DATE PURCHASED:
/
/
Advertisement

Subscribe to Our Youtube Channel
Related Manuals for Pioneer Woman Harper PW1425004710021


Summary of Contents for Pioneer Woman Harper PW1425004710021
- Page 1 LOT NUMBER: DATE PURCHASED: Spindle Nightstand Stock # PW1425004710021 # PW1425004710022 ADULT ASSEMBLY REQUIRED If you have any questions regarding assembly or if parts are missing, DO NOT return this item to the store where it was purchased. Please call our customer service number and have your instructions and parts list ready to provide the model name, part name or factory number: 1-866-942-5362 Pacific Standard Time: 8:30 a.m.
- Page 2 M A X I M U M R E C O M M E N D E D W E I G H T L O A D S MANUFACTURER: Whalen Furniture Manufacturing CATALOG: Nightstand MODEL: PW1425004710021 / PW1425004710022 MAXIMUM LOAD 22.7 kg / 50 lb MAXIMUM LOAD 4.5 kg / 10 lb MAXIMUM LOAD 22.7 kg / 50 lb THIS UNIT IS INTENDED ONLY FOR USE WITHIN THE...
- Page 3 FURNITURE POWER DISTRIBUTION CENTER IMPORTANT SAFETY INSTRUCTIONS Carefully read all instructions installing and operating fixture IF YOU HAVE ANY QUESTIONS REGARDING THE PROPER INSTALLATION CONSULT A QUALIFIED ELECTRICIAN. TO REDUCE THE RISK OF FIRE, ELECTRICAL SHOCK OR INJURY TO PERSONS, PLEASE FOLLOW THE NEXT: ...
- Page 4 Furniture Power Distribution Unit User Guide Please read this user guide before installing and using your power distribution Center. INTRODUCTION The integrated USB center can connect to two devices, such as a digital camera, MP3 player, cell phone or wireless mouse. SPECIFICATIONS Input: 100 ~ 240 V, 0.3 A, 50/60 Hz, USB output: 5 V dc, 2.1 A MAX Product: Furniture Power Distribution Unit...
- Page 5 Parts and Hardware List Please read completely through the instructions and verify that all listed parts and hardware are present before beginning assembly. A- Table Top B- Bottom Shelf (Qty. 1) (Qty. 1) C- Post D- Bun Foot with Leveler (Qty.
- Page 6 Assembly Instructions Remove the cap AC/DC Adapter 1. Unpack the unit and confirm that you have all the hardware and required parts listed. Assemble the unit on a carpeted floor or the empty carton to avoid any scratch. 2. Position the Table Top (A) upside down on a level and protective surface. 3.
- Page 7 Assembly Instructions Remove the cap AC/DC Adapter 4. Align and position the Bottom Shelf (B) onto the Posts (C) with the subframe facing upward. Make sure that the through holes overlap the female connectors properly. 5. Remove the plastic cap from the hanger bolt of each Bun Foot (D). 6.
- Page 8 Assembly Instructions Floor leveler 8. Stand the assembled unit upright and position it near the desired location. 9. Insert the two-prong plug into an outlet to supply power. 10. If necessary, adjust the floor levelers pre-attached at the bottom of Bun feet (D) to correct the tilting.
- Page 9 Care and Maintenance Use a soft, clean cloth that will not scratch the surface when dusting. Use of furniture polishes is not necessary. Should you choose to use polishes, test first in an inconspicuous area. Using solvents of any kind on your furniture may damage the finish. ...
- Page 11 NÚMERO de LOTE:__________ FECHA de COMPRA: Buro con patas torneadas Serie # PW1425004710021 # PW1425004710022 ENSAMBLE REQUERIDO POR ADULTO Si tienen alguna pregunta acerca del ensamble o si alguna parte está faltante, no retorne esté producto a la tienda donde lo compro. Por favor llame a nuestro departamento de ayuda al cliente teniendo su instructivo y lista de partes para proveer el modelo, nombre de parte o el número de fábrica: 1-866-942-5362 Hora estándar del Pacífico: 8:30 a.m.
- Page 12 M A X I M O S P E S O S R E C O M E N D A D O S FABRICANTE: Whalen Furniture Manufacturing CATALOGO: Buro con patas torneadas SERIE: PW1425004710021 / PW1425004710022 MAXIMO PESO 22.7 kg / 50 lb. MAXIMO PESO 4.5 kg / 10 lb.
- Page 13 CENTRO DE DISTRIBUCIÓN DE ENERGÍA PARA MUEBLES INSTRUCCIONES DE SEGURIDAD IMPORTANTES Lea atentamente todas las instrucciones de instalación y funcionamiento del dispositivo SI TIENE ALGUNA DUDA SOBRE LA CORRECTA INSTALACIÓN CONSULTE A UN ELECTRICISTA CUALIFICADO. ADVERTENCIA PARA REDUCIR RIESGO INCENDIO, DESCARGA ELÉCTRICA O LESIONES A LAS PERSONAS, SIGA LO SIGUIENTE: ...
- Page 14 Guía del usuario de la unidad de distribución de energía para muebles Lea esta guía del usuario antes de instalar y utilizar su centro de distribución de energía. INTRODUCCIÓN El centro USB integrado puede conectarse a dos dispositivos, como una cámara digital, un reproductor MP3, un teléfono móvil o un ratón inalámbrico.
- Page 15 Lista de partes y material de ferretería Por favor lea completamente las instrucciones y verifique que estén todas las partes y partes de ferretería antes de iniciar el ensamblado A- Tapa de Buro B- Repisa inferior (Cant. 1) (Cant. 1) C- Poste D- Pata con nivelador (Cant.
- Page 16 Instructivo de ensamble Remover tapa Adaptador AD/DC 1. Desempacar la unidad y confirmar que se tiene todo el material de ferretería y partes requeridas. Ensamblar la unidad en un piso alfombrado o en el cartón vacío para evitar rasguños. 2. Coloque la tapa del buro (A) boca abajo sobre una superficie nivelada y protectora. 3.
- Page 17 Instructivo de ensamble Remover tapa Adaptador AD/DC 4. Alinee y coloque la repisa inferior (B) sobre los postes (C) con el soporte hacia arriba. Asegúrese de que los orificios pasantes se superpongan correctamente a los conectores hembra. 5. Retire la tapa de plástico del perno colgante de cada pata (D). 6.
- Page 18 Instructivo de ensamble Nivelador de piso 8. Coloque la unidad ensamblada en posición vertical y colóquela cerca de la ubicación deseada. 9. Inserte el enchufe de dos clavijas en un tomacorriente para suministrar energía. 10. Si es necesario, ajuste los niveladores de piso preinstalados en la parte inferior de las patas (D) para corregir la inclinación.
- Page 19 Mantenimiento y cuidados Use una toalla suave y limpia para evitar daños y rayaduras. Uso de cera para pulir muebles no es necesario. Si desea usar cera, pruébela en un área que no sea visible para revisar su funcionamiento. ...
Need help?
Do you have a question about the Harper PW1425004710021 and is the answer not in the manual?
Questions and answers