
Related Manuals for H3C CR16000-M1A


Summary of Contents for H3C CR16000-M1A
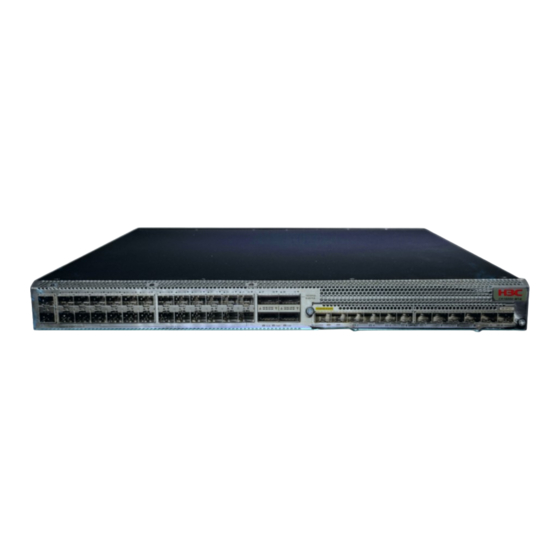
- Page 1 H3C CR16000-M1A Router Installation Guide New H3C Technologies Co., Ltd. http://www.h3c.com Document version: 5W100-20241112...
- Page 2 No part of this manual may be reproduced or transmitted in any form or by any means without prior written consent of New H3C Technologies Co., Ltd. Trademarks Except for the trademarks of New H3C Technologies Co., Ltd., any trademarks that may be mentioned in this document are the property of their respective owners. Notice The information in this document is subject to change without notice.
- Page 3 Preface This installation guide describes the installation procedure for the H3C CR16000-M1A router. It includes the following topics: • Preparing for installation. • Installing the router. • Installing removable components. • Accessing the router. • Replacing removable components. • Hardware management and maintenance.
- Page 4 GUI conventions Convention Description Window names, button names, field names, and menu items are in Boldface. For Boldface example, the New User window appears; click OK. Multi-level menus are separated by angle brackets. For example, File > Create > > Folder.
-
Page 5: Documentation Feedback
It is normal that the port numbers, sample output, screenshots, and other information in the examples differ from what you have on your device. Documentation feedback You can e-mail your comments about product documentation to info@h3c.com. We appreciate your comments. -
Page 6: Table Of Contents
Contents 1 Installation flow ························································································ 1-1 2 Preparing for installation ·········································································· 2-1 Safety recommendations ································································································································ 2-1 General safety recommendations ··········································································································· 2-1 Electrical safety ······································································································································· 2-1 Laser safety ············································································································································· 2-1 Moving safety ·········································································································································· 2-1 ESD prevention ······································································································································· 2-2 Examining the installation site ························································································································· 2-2 Temperature and humidity ······················································································································... - Page 7 Displaying router operating information ·········································································································· 9-1 Displaying detailed router information ············································································································· 9-2 Displaying electrical label information for the router ······················································································· 9-2 Displaying CPU usage information ················································································································· 9-3 Displaying memory usage information ············································································································ 9-3 Displaying the fan module operating status ···································································································· 9-4 Displaying the power supply operating status ·································································································...
-
Page 8: Installation Flow
Installation flow The installation flow for the router is as described in Figure1-1. Figure1-1 Installation flow Start Mount the router in a rack Ground the router Install removable components Connect cables Verify the installation Power on the router for the first time Troubleshoot the Operating correctly? router... -
Page 9: Preparing For Installation
Preparing for installation Safety recommendations To avoid any equipment damage or bodily injury, read the following safety recommendations before installation. Note that the recommendations do not cover every possible hazardous condition. General safety recommendations • Do not place the router on an unstable case or desk. The router might be severely damaged in case of a fall. -
Page 10: Esd Prevention
• If the router is to be transported over a long distance, perform the following tasks before the transport: Remove all removable components, such as power supplies and interface cards, and place them separately in antistatic bags. Replace the filler panels provided with the router to prevent obstacle intrusions and ... -
Page 11: Cleanliness
Cleanliness Dust buildup on the chassis might result in electrostatic adsorption, which causes poor contact of metal components and contact points, especially when indoor relative humidity is low. In the worst case, electrostatic adsorption can cause communication failure. Table2-2 Router requirement for cleanliness Substance Particle diameter Concentration limit... -
Page 12: Rack Requirements
Rack requirements • Make sure the rack is sturdy enough to support the total weight of the router and its accessories. For more information about the router weight, see H3C CR16000-M1A Router Hardware Information and Specifications. • Make sure the dimensions of the rack meet the requirements. -
Page 13: Installation Tools
Installation tools No installation tools are provided with the router. Prepare installation tools yourself as required. Figure2-2 Installation tools Installation accessories Figure2-3 Installation accessories... -
Page 14: Installing The Router
Table3-1 Installation accessories Router model Mounting brackets Rack mounting rail kit 1U high, including one pair of long slide CR16000-M1A 1U high, one pair. See Figure3-1. rails and one pair of chassis rails. See Figure3-2. Figure3-1 Mounting brackets provided with the router... -
Page 15: Rack-Mounting Requirements
NOTE: If a rack shelf is available, you can put the router on the rack shelf, slide the router to an appropriate location, and attach the router to the rack by using the mounting brackets. Rack-mounting requirements Figure3-4 Chassis dimensions (mounting brackets installed near the front panel) (1) Power supply handle (2) Mounting bracket installation position Figure3-5 Chassis dimensions (mounting brackets installed near the rear panel) -
Page 16: Mounting Bracket Installation Positions
Table3-2 Distance requirements between the front and rear rack posts Distance Router Installation between the Chassis dimensions Rack requirements model method front and rear rack posts • Height—44 mm • A minimum of 800 (1.73 in)/1 RU mm (31.50 in) in •... -
Page 17: Attaching The Slide Rails To The Rack
Determine the installation position of the chassis rails based on the position of mounting brackets. Place the chassis rail against the chassis side panel. Align the chassis rail installation holes with the screw holes. To install the chassis rails near the front panel, see Figure3-7. ... -
Page 18: Mounting The Router In The Rack
Figure3-9 Installing cage nuts Align the screw holes in one slide rail with the cage nuts in a rear rack post. Use screws to attach the slide rail to the post. See Figure3-10. Repeat the preceding steps to attach the other slide rail to the other rear rack post. Keep the two slide rails at the same height so the slide rails can attach into the chassis rails. - Page 19 Attach cage nuts to the front rack posts and make sure they are at the same level as the slide rails. One person performs the following operations: a. Supporting the bottom of the router, aligns the chassis rails with the slide rails on the rack posts.
-
Page 20: Grounding The Router
Figure3-12 Mounting the router in the rack (mounting brackets installed near the rear panel) Grounding the router WARNING! • Correctly connecting the grounding cable is crucial to lightning protection and EMI protection. • Do not connect the router grounding cable to a fire main or lightning rod. To ground the router by using a grounding strip: Use a Phillips screwdriver to remove the grounding screw from the router chassis. - Page 21 Figure3-13 Grounding the router...
-
Page 22: Installing Removable Components
Installing removable components CAUTION: • Make sure each slot has a module or a filler panel installed while the router is operating. • As a best practice, keep the filler panels and packaging boxes and bags for the removable components secure for future use. •... -
Page 23: Installing A Fan Module
Figure4-2 Installing an interface card Installing a fan module CAUTION: • Fan modules can be hot swapped. • If a fan module fails, replace the fan module immediately and keep the failed fan module in position before replacement. • The router came with the three fan module slots empty. To ensure good ventilation, you must install three fan modules of the same model before you power on the router. -
Page 25: Installing A Power Supply
Installing a power supply WARNING! Provide a separate circuit breaker for each power supply. CAUTION: • As a best practice, install two power supplies on the router to achieve 1+1 redundancy. • Follow the forward inertia of the power supply when inserting it into the chassis, and make sure the power supply has firm contact with the connectors on the backplane. - Page 26 Figure4-6 Installing a power supply...
-
Page 27: Connecting Cables
Connecting cables Connecting power cords CAUTION: • Before connecting a power cord, make sure the router is reliably grounded. • Use a separate circuit breaker for each power input. Before connecting a power cord, turn off the circuit breaker for the power input. •... -
Page 28: Connecting An Hvdc Power Cord
Figure5-2 Removing the protective plate over the DC power receptacle Correctly orient the DC power cord connector and insert it into the power receptacle. The DC power cord connector and DC power receptacle form an anti-misinsertion structure. If you orient the DC power cord connector upside down, you cannot insert it into the receptacle. Use a flat-head screwdriver to fasten the screws on the power cord connector to secure the connector to the power receptacle. -
Page 29: Connecting Copper Ethernet Cables
Connect one end of the Ethernet cable to a copper Ethernet port on the router, and the other end of the cable to the peer Ethernet port. Examine the LED for the Ethernet port to verify that the port is operating correctly. For more information about the LEDs, see H3C CR16000-M1A Router Hardware Information and Specifications. NOTE:... - Page 30 CAUTION: • Never bend an optical fiber excessively. The bend radius of an optical fiber must be not less than 100 mm (3.94 in). • Keep the fiber end clean. • To connect an optical fiber to a fiber port, make sure the fiber connector matches the transceiver module.
-
Page 31: Verifying The Installation
Verifying the installation After the installation is completed, verify the following items: • There is enough space around the router for heat dissipation. • The rack is stable. • The grounding cable is correctly and securely connected. • The power supplies are compatible with the router, and the power source is as required by the router. -
Page 32: Accessing The Router For The First Time
Accessing the router for the first time To access the router for the first time, use a console cable to connect a console terminal (for example, a PC) to the serial console port on the router. Connecting the router to a configuration terminal Console cables As shown in Table7-1, two types of console cables can be used for connecting a configuration terminal to the console port on the router. - Page 33 USB-to-RJ45 console driver on the configuration terminal, and then connect the USB-to-RJ45 console cable to the configuration terminal. To download the USB-to-RJ45 console driver, access the H3C official website or scan the QR code on the cable package.
- Page 34 Figure7-2 Driver installation wizard Click Finish after the drive installation is completed. Figure7-3 Finishing the driver installation Connect the standard USB connector of the cable to the USB port of the configuration terminal.
-
Page 35: Setting Terminal Parameters
Examine the LEDs on the router to verify that the router is operating correctly. If the RUN LED is flashing green at 1 Hz, the router is operating correctly. For more information about the LEDs, see H3C CR16000-M1A Router Hardware Information and Specifications. Access the CLI to configure the router. -
Page 36: Replacing Removable Components
Replacing removable components Replacing a power supply WARNING! To avoid router damage or bodily injury, strictly follow the removal procedure in Figure8-1 to remove a power supply. Figure8-1 Power supply removal procedure Turn off the circuit Disconnect the power Remove the power breaker cord supply... -
Page 37: Replacing A Fan Module
• Do not place the fan module in a wet area, and prevent liquid from flowing into the fan module. • When an internal circuit or component of a fan module is faulty, contact H3C Support for repair. Do not remove the components yourself. -
Page 38: Replacing An Interface Card
Figure8-4 Removing a fan module Replacing an interface card Prepare an antistatic mat to place the removed interface card. Wear an ESD wrist strap and make sure it makes good skin contact and is reliably grounded. Use a Phillips screwdriver to loosen the screws on the interface card. Open the ejector levers to disengage the interface card from the chassis. - Page 39 Figure8-6 Installing an interface card filler panel...
-
Page 40: Hardware Management And Maintenance
Hardware management and maintenance The command lines and outputs vary by software version. For more information about the command lines and their outputs, see the command references for the specific software version. Displaying software and hardware version information for the router Use the command to display software version and hardware information for the display version... -
Page 41: Displaying Detailed Router Information
Displaying detailed router information Use the command to display detailed information about the router and display device verbose the slots. <Sysname> display device verbose Slot No. Brd Type Brd Status Software Version CR16000-M1A Master CR16000M1A-test Slot 0 info: Status Master Type CR16000-M1A... -
Page 42: Displaying Cpu Usage Information
Field Description MANUFACTURING_DATE Manufacturing date of the router. VENDOR_NAME Vendor name of the router. Displaying CPU usage information Use the command to display CPU usage information for the router. display cpu-usage <Sysname> display cpu-usage Slot 0 CPU 0 CPU usage: 5% in last 5 seconds 5% in last 1 minute 5% in last 5 minutes... -
Page 43: Displaying The Fan Module Operating Status
Field Description Physical memory shared by processes. Shared If this field is not supported, two hyphens (--) are displayed. Physical memory used for buffers. Buffers If this field is not supported, two hyphens (--) are displayed. Physical memory used for caches. If this field is not supported, two hyphens (--) Cached are displayed. -
Page 44: Displaying Transceiver Module Information
Table9-5 Command output Field Description System Temperature Temperature information (°C). information (degree centigrade) Slot Slot number. Temperature sensor: • hotspot—Hotspot sensor. Sensor • inflow—Air inlet sensor. • outflow—Air outlet sensor. Temperature Current temperature. Lower temperature limit. If the router does not support this field, this field Lower displays NA. -
Page 45: Saving The Running Configuration
Task Command Remarks modules. alarm { controller | interface } [ interface-type interface-number ] For more information about transceiver module-rated commands, see the command references for the router. Saving the running configuration IMPORTANT: You must save the running configuration to a .cfg configuration file. You can use one of the following methods to save the running configuration: •... - Page 46 Reboot the router immediately by using the command. reboot Schedule a reboot to occur at a specific time or date or after a delay by using the command. schedule reboot • Power off and then power on the router. This method cuts off the power of the router forcibly, which might cause data loss and hardware damage.
-
Page 47: Troubleshooting
Fan module failure Symptom The system reports a fan module failure: %May 22 10:13:17:666 2024 H3C DEV/2/FAN_FAILED: Fan 1 failed. The status LED on the fan module is flashing. Solution To resolve the issue: Verify that the air inlet and outlet vents of the chassis are not blocked. Clear the obstructions if any. -
Page 48: Garbled Display
Parity—None. Flow control—None. If the issue persists, contact H3C Support. Interface card, cable, and connection failure Symptom After an interface card is installed and the router is powered on, the LEDs on the interface card panel are off.
Need help?
Do you have a question about the CR16000-M1A and is the answer not in the manual?
Questions and answers