Table of Contents
Advertisement
Quick Links
Advertisement
Table of Contents

Subscribe to Our Youtube Channel
Related Manuals for APRILIA ETX 125 - 1998


Summary of Contents for APRILIA ETX 125 - 1998
- Page 1 ETX 125 aprilia part# 8102852...
- Page 2 This manual is to be considered an integral part of the vehicle, which must be delivered complete with it also in case of resale. aprilia s.p.a. reserves the right to modify its models at any time, without prejudice to the main characteristics here described.
- Page 3 In this manual the various versions are indicated by the following contact only aprilia Authorized Outlets and Official Dealers, who symbols: can ensure you reliable and prompt servicing. & Thank you for choosing aprilia . We wish you a nice ride. optional catalytic version IMPORTANT: £...
-
Page 4: Table Of Contents
TABLE OF CONTENTS SAFE DRIVE .....................5 IDENTIFICATION DATA ................40 SAFETY RULES..................6 REMOVING THE SIDE COVERS............40 CLOTHING ....................9 AIR CLEANER ..................41 ACCESSORIES..................10 CHECKING THE TRANSMISSION OIL LEVEL AND TOPPING UP..42 LOAD ......................10 CHANGING THE TRANSMISSION OIL ..........43 FRONT WHEEL .................. -
Page 5: Safe Drive
safe drive... -
Page 6: Safety Rules
SAFETY RULES The use of medicins, alcohol and drugs or Most road accidents are caused by the psychotropic substances notably increases driver’s lack of experience. To drive the vehicle it is necessary to be in the risk of accidents. NEVER lend the vehicle to beginners and, possession of all the requirements pre- Be sure that you are in good psychophysi- in any case, make sure that the driver has... - Page 7 ¡ STOP 150 m 150 m STOP Rigorously observe all road signs and na- Avoid obstacles that could damage the ve- Always drive with both hands on the han- tional and local road regulations. hicle or make you lose control. dlebars and both feet on the footrests (or Avoid abrupt movements that can be dan- on the rider’s footboards), in the correct...
- Page 8 If necessary, have the vehicle inspected by an aprilia Official Dealer, who should care- fully check the frame, handlebars, suspen- sions, safety parts and all the devices that you cannot check by yourself.
-
Page 9: Clothing
ONLY ORIGINALS Never change the position, inclination or Any modification of the vehicle will result in CLOTHING colour of: number plate, direction indica- the invalidity of the guarantee. Before starting, always wear a correctly tors, lights and horns. Any modification of the vehicle and/or the fastened crash helmet. -
Page 10: Accessories
( aprilia genuine accessories). - Page 11 Avoid hanging bulky, heavy and/or danger- Do not carry any bag if it is not tightly se- Do not exceed the maximum load allowed ous objects on the handlebars, mudguards cured to the vehicle. for each side-bag. and forks, because the vehicle might re- Do not carry bags which protrude too much When the vehicle is overloaded, its stability spond more slowly in turns and its ma-...
-
Page 12: Arrangement Of The Main Elements
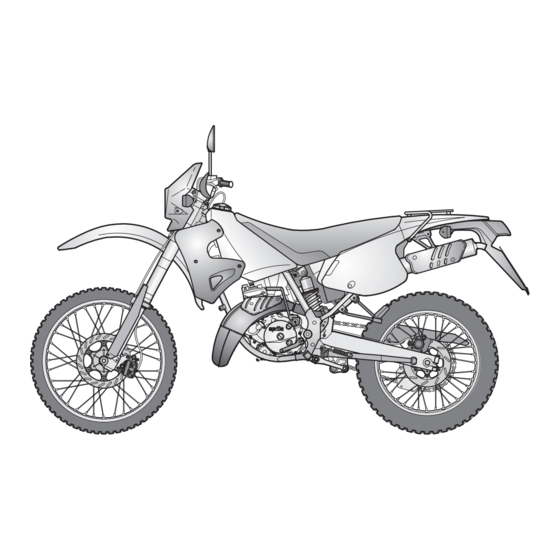
8) Rear luggage rack (with spring, always open) 3) Fuel tank 9) Passenger left grab rail 13) Transmission oil drain plug 4) Anti-theft hook (for the aprilia “Body- 10) Passenger left footrest 14) Shifting lever & Guard” armored cable (snapping, closed/open) - Page 13 1) Passenger right grab rail 7) Brake fluid reservoir (front brake) 12) Rider right footrest 2) 2 stroke oil tank plug 8) Ignition switch/steering lock (with spring, always open) 9) Coolant radiator cap 3) 2 stroke oil tank 13) Rear brake pump 10) Coolant radiator 4) Air cleaner 14) Drive chain...
-
Page 14: Arrangement Of The Instruments
ARRANGEMENT OF THE INSTRUMENTS INSTRUMENTS AND INDICATORS 1) Light switch ( - • ) 1) Red 2 stroke oil reserve warning light ( 2) Direction indicator switch ( 2) Total kilometres odometer 3) Horn push button ( 3) Speedometer 4) Dimmer switch ( 4) Red coolant overheating warning light ( 5) High beam signalling push button ( 5) Green neutral indicator warning light (... -
Page 15: Instruments And Indicators Table
If the light does not come on in this phase, contact an aprilia Official Dealer . If the warning light comes on during the normal operation of the engine, this means that the 2 stroke oil reserve is being used;... -
Page 16: Main Independent Controls
MAIN INDEPENDENT CONTROLS • 3) HEADLIGHT SWITCH ( Before operating the light switch, make sure that the dimmer switch ( ) (6) is in position “ ”. • When the light switch is in position “ ”, the lights are off. When the switch is in position “... -
Page 17: Ignition Switch
Position Function removal The steer- It is possi- ing is ble to locked. remove the It is neither key. possible to start the Steering engine, nor lock to switch on the lights. Neither the It is possi- IGNITION SWITCH STEERING LOCK engine, nor ble to the lights... -
Page 18: Auxiliary Equipment
AUXILIARY EQUIPMENT The tool kit (2) includes: CRASH HELMET HOOK GLOVE/TOOL KIT COMPARTMENT – n˚ 1 tool case Thanks to the crash helmet hook, you no T h e g l o v e / t o o l k i t c o m p a r t m e n t i s –... -
Page 19: Anti-Theft Hook
The anti-theft hook (1) is positioned on the advisable to use the following special left side of the vehicle. tools (to be requested to an aprilia Official To prevent the vehicle from being stolen, it Dealer ): is advisable to secure it with the aprilia &... -
Page 20: Main Components
TRANSMISSION OIL MAIN COMPONENTS Remember: 1 mile = 1.6 km FUEL 1 km = 0.625 miles The fuel used for internal com- Check the transmission oil level every bustion engines is extremely in- 4000 km, see p. 42 (CHECKING THE flammable and in particular con- TRANSMISSION OIL LEVEL AND TOP- ditions it can become explosive. -
Page 21: Stroke Oil Tank
2 stroke oil pipe has been The vehicle is provided with a separate TANK CAPACITY: 1.4 removed, contact an aprilia Official mixer that ensures the mixing of petrol Dealer , who will provide for bleeding TANK RESERVE: 0.5 and oil for the engine lubrication, see p. -
Page 22: Brake Fluid - Recommendations
The brake fluid must be changed once a In case maintenance operations are to year by an aprilia Official Dealer . be performed on the hydraulic circuit, it is advisable to use latex gloves. Use brake fluid of the type specified in the lubricant chart, see p. -
Page 23: Front Brake
Remove the cover (4). your aprilia Official Dealer, since it may be necessary to bleed the system. To check the brake fluid level, proceed as In order not to spill the brake fluid... -
Page 24: Rear Brake
" MIN " mark. there is air in the circuit, contact your If the fluid does not reach the " MIN " aprilia Official Dealer , since it may be mark, provide for topping up. necessary to bleed the system. -
Page 25: Adjusting The Rear Brake Lever Height
0.5 1 mm between Check the braking efficiency. position on assembly of the vehicle. the pump control rod (4) and the pump If necessary, contact an aprilia If necessary, it is possible to adjust the piston. Official Dealer . -
Page 26: Adjusting The Clutch
Rotate the adjuster (1), until the idle the inner nut (6). ly, contact your aprilia Official Dealer . Insert a cut-headed screwdriver (7) in stroke at the end of the clutch lever is the special spanner (5) and tighten the about 10 mm (see figure). -
Page 27: Tyres
Official Dealer or by a slip on the rim or it may become loose, qualified tyre repairer. -
Page 28: Coolant
Check the coolant level every 2000 km and Have the coolant changed by an Do not remove the radiator cap after long rides; change it every 24 aprilia Official Dealer . when the engine is hot, since the months. coolant is under pressure and its temperature is high. - Page 29 Wait for a few seconds, in order to permit Have it repaired by an aprilia Official the bleeding of any pressure present in Dealer . Stop the engine and wait until it has the system.
-
Page 30: Catalytic Silencer
CATALYTIC SILENCER The catalytic vehicle is fitted with a silencer It is sufficient to alternate these periods with metal catalytic converter of the “plati- with periods in which the engine runs at rel- Avoid parking the vehicle cata- num-rhodium bivalent” type. atively high rpm, even if only for a few sec- lytic version near dry brush onds, but rather frequently. -
Page 31: Instructions For Use
42-43 Wheel/tyres Check the tyre surface, the inflation pressure, wear and Do not hesitate to consult your aprilia tear and any damage. Official Dealer in case there is some- Brake levers Make sure that they work smoothly. If necessary, lubricate... -
Page 32: Starting
STARTING Position the vehicle on the stand. Position the shifting lever (6) in neutral Move to the left side of the vehicle. (green warning light “ ” on). Exhaust gases contain carbon If the vehicle is started with cold engine, monoxide, which is extremely rotate the cold start lever “... - Page 33 Slightly rotate the throttle grip (9) and at the same time press the start pedal (8) with energy a few times, releasing it im- mediately afterwards. If the engine starts Release the throttle grip (9). Rotate the cold start lever “ ”...
-
Page 34: Departure And Drive
Ride at reduced speed for the first miles, in order to warm the engine up. With released throttle grip (2) ( Pos. A ) and engine idling, pull the clutch lever (3) completely. Engage the first gear, by pressing the shifting lever (4) downwards. - Page 35 To shift down, proceed as follows: Release the throttle grip (2) ( Pos. A ). If necessary, pull the brake levers mod- erately and decrease the speed of the vehicle. Pull the clutch lever (3) and lower the shifting lever (4) to shift down. If the brake levers are pulled, release them.
- Page 36 Before beginning to turn, slow Pay the utmost attention to any down or brake driving at moder- obstacle or variation of the ate and constant speed or accel- ground. Uneven roads, rails, erating slightly; avoid braking at the manhole covers, indications painted on last moment: it would be very easy to the road surface, building site metal skid.
-
Page 37: Running-In
RUNNING-IN After the first 1000 km, carry out the checking operations indicat- The running-in of the engine is important to ed in the column "After running- ensure its correct functioning. in" of the REGULAR SERVICE INTER- If possible, drive on hilly roads and/or VALS CHART, see p. -
Page 38: Parking
NEVER leave the ignition key inserted and always use the steering lock. Park the vehicle in a safe place, possibly in a garage or a protected place. If possible, use the appropriate aprilia & “Body-Guard” armored cable , or an ad- ditional anti-theft device. -
Page 39: Maintenance
If you need as- Suspensions sistance or technical advice, consult your 2 stroke oil reserve warning light aprilia Official Dealer, who can ensure you Drive chain tension and lubrication every 500 km: C prompt and accurate servicing. -
Page 40: Identification Data
IDENTIFICATION DATA ENGINE NUMBER REMOVING THE SIDE COVERS The engine number (1) is stamped on the It is a good rule to write down the frame Carefully read p. 39 (MAINTENANCE). right side of the engine casing base. and engine numbers in the space provided Position the vehicle on the stand. -
Page 41: Air Cleaner
Clean the filtering element (3) with clean, non-inflammable solvents or solvents with high volatility point, then let it dry thoroughly. Apply a filter oil or a thick oil (SAE 80W- 90) on the whole surface of the filtering element, then squeeze it to eliminate the oil in excess. -
Page 42: Checking The Transmission Oil Level And Topping Up
TOPPING UP If it were necessary to top up, proceed as follows: Unscrew and remove the filling cap (2). Pour a small quantity of oil and wait about one minute, to allow the oil to flow uniformly inside the pan. Make sure that the oil level is included between one fourth ( MIN ) and a half ( MAX ) of the height of the glass (1). -
Page 43: Changing The Transmission Oil
Change the sealing washer of the drain plug (2) every 12000 km (or every sec- ond engine oil change). Screw and tighten the drain plug (2). Drain plug (2) driving torque: 27 Nm (2,7 kgm). Pour about 550 cmC of transmission oil through the filling opening (3), see p. -
Page 44: Front Wheel
If ing operation cannot be per- necessary, contact an aprilia Official Make sure that the vehicle is sta- formed by one person only. Dealer. - Page 45 Screw and tighten the wheel pin (4). balancing of the wheel checked by your control. Wheel pin (4) driving torque: aprilia Official Dealer, in order to avoid 80 Nm (8 kgm). accidents that may be harmful for you and/or other people.
-
Page 46: Rear Wheel
Due to the weight and dimen- necessary, contact an Official Dealer DISASSEMBLY sions of the vehicle, the follow- aprilia . Position the vehicle on the stand. ing operation cannot be per- Unscrew and remove the three screws If you want to perform these operations formed by one person only. - Page 47 Official Dealer, who will balancing of the wheel checked by your Do not introduce your fingers carry out the proper maintenance oper- aprilia Official Dealer, in order to avoid between the chain and the crown ation. accidents that may be harmful for you gear.
-
Page 48: Drive Chain
35 mm, adjust it, see p. 49 (AD- and crown in the lower part of the chain, To change the chain, contact an Official JUSTMENT). is about 30 35 mm. Dealer aprilia , who will ensure you prompt and accurate servicing. use and maintenance ETX 125... - Page 49 The crushed or seized links must be lubricated and made work again. If this is not possible, contact an Official Dealer aprilia, who will provide for changing the chain. ADJUSTMENT Check the chain slack, see p. 48 LUBRICATION AND CLEANING (CHECKING THE SLACK).
-
Page 50: Inspecting The Front And Rear Suspensions
Have the front fork oil changed contact your Official Dealer aprilia . Change the fork oil more frequently if the by an Official Dealer aprilia , vehicle is used on dusty or wet roads or off who will ensure you prompt and road. -
Page 51: Rear Suspension
Slightly unscrew the locking ring nut (2) by & means of the appropriate spanner (3) Act on the adjusting ring nut (1) (shock absorber spring preload adjustment) (see figure). Once the optimal attitude has been ob- tained, tighten the locking ring nut (2) completely. -
Page 52: Checking The Brake Pad Wear
The wear of the brake pads depends on Have the pads changed by your Loosen the nut (5)(by screwing it). the use, on the kind of drive and on the Official Dealer aprilia . Act on the adjuster (6) positioned on the road. carburettor. -
Page 53: Idling Adjustment
The ideal slack of the accelerator control should be about 2-3 mm. Adjust the idling after the first 1000 km and If necessary, contact your aprilia every time it is irregular. To adjust the slack, proceed as follows: Official Dealer. -
Page 54: Spark Plug
Check the spark plug gap with a thick- ness gauge. The gap must be 0.5÷0.6 mm, if neces- sary adjust it, carefully bending the earth electrode. Make sure that the washer is in good conditions. With the washer on, screw the spark plug by hand in order not to damage the thread. -
Page 55: Battery
BATTERY If the electrolyte is accidentally swal- lowed, drink a lot of water or milk, then Carefully read p. 39 (MAINTENANCE). continue drinking milk of magnesia or vegetable oil and consult a doctor with- Remember: 1 mile = 1.6 km out delay. -
Page 56: Checking And Cleaning The Terminals
CHECKING AND CLEANING Cover the terminals with special grease Partially remove the battery from its THE TERMINALS or Vaseline. compartment. Reinstall battery, Unscrew and remove the screw (7) from Carefully read p. 55 (BATTERY). (INSTALLING THE BATTERY). the positive terminal (+). Move the positive cable (+) (8) sidewards. -
Page 57: Checking The Electrolyte Level
Otherwise: Replace the element plugs. Remove the battery from its compart- Reinstall the battery only 5-10 ment, see p. 56 (REMOVING THE BAT- minutes after disconnecting the TERY). recharge equipment, since the Unscrew and remove the element plugs. battery keeps sending out extremely in- flammable hydrogen gas for a short Top up with distilled water only. -
Page 58: Changing The Fuses
Replace the damaged fuse with a new case it is advisable to consult an one having the same amperage. 7,5A fuse (3) aprilia Official Dealer. From the ignition switch to: ignition, start safety device. use and maintenance ETX 125... -
Page 59: Checking The Side Stand And The Safety Switch
Seat on the vehicle in driving position. If the engine does not stop, con- Carry out the following checks: tact an Official Dealer aprilia . Fold the side stand (1). The springs (2) must not be damaged, Start the engine, see p. 32 (STARTING). -
Page 60: Checking The Switches
CHECKING THE SWITCHES The vehicle is provided with three switch- Checking: Switches (1) and (2): withdraw the Carefully read p. 39 (MAINTENANCE). Stoplight switch (1) on the rear brake protection element. control lever. Make sure that there are neither dirt, nor Stoplight switch (2) on the front brake mud deposits on the switch. -
Page 61: Adjusting The Vertical Headlight Beam
ADJUSTING THE VERTICAL To adjust the headlight beam: BULBS HEADLIGHT BEAM Act on the suitable screw (1) by means Carefully read p. 39 (MAINTENANCE). of a screwdriver. To rapidly check the correct direction of the By TURNING IT CLOCKWISE, you set beam, place the vehicle on flat ground, 10 Before changing a bulb, position the beam upwards. -
Page 62: Changing The Headlight Bulbs
CHANGING Handle the plastic components For the installation: THE HEADLIGHT BULBS with care and avoid scraping or Insert the bulb (2) in the reflector, damaging them. making the two teeth (9) provided Carefully read p. 61 (BULBS). Withdraw the front part of the fairing (4), on the bulb coincide with the relevant complete with the headlight, downwards guide (10) on the reflector. -
Page 63: Changing The Dashboard Bulbs
WARNING LIGHT BULBS Extract the bulb sockets one by one, in order not to position them incorrectly upon reassembly. Extract the corresponding bulb socket: Pos. Warning light Colour High beam ( blue Direction green indicators ( Neutral indicator ( green CHANGING THE DASHBOARD To cha nge the bu l bs , pr o ce e d a s BULBS... -
Page 64: Changing The Front And Rear Direction Indicators
CHANGING THE FRONT AND REAR I n s e r t t h e b u l b i n t h e b u l b Unscrew and remove the two screws (4). DIRECTION INDICATORS socket, making the two pins co- incide with the relevant guides on the Upon reassembly, tighten the Carefully read p. -
Page 65: Transport
Prepare a container with capacity ex- tely cooled down. ceeding the fuel quantity present in the If necessary, contact an Official Dealer tank and put it on the ground on the left aprilia. side of the vehicle. Remove the fillercap. use and maintenance ETX 125... -
Page 66: Cleaning
CLEANING A f t e r t h e v e h i c l e h a s b e e n Do not wash the vehicle under washed, its braking functions the sun, especially during the could be temporarily impaired summer, when the body is still warm, because of the presence of water on the since if the shampoo dries before being... -
Page 67: Long Periods Of Inactivity
LONG PERIODS OF INACTIVITY Reinstall the spark plug, see p. 54 AFTER A PERIOD OF INACTIVITY (SPARK PLUG). After a long period of inactivity of the vehi- Uncover and clean the vehicle, see p. 66 Remove the battery, see p. 56 (REMOV- cle some precautions are necessary to (CLEANING). -
Page 68: Technical Data
TECHNICAL DATA DIMENSIONS Max. length (with rear mudguard extension) ....2295 mm Max. width............ 850 mm Max. height (front part of the fairing included) 1205 mm Seat height ..........915 mm Distance between centres ......1475 mm Min. ground clearance ......... 360 mm Weight ready for starting ...... - Page 69 TRANSMISSION Type ............. mechanical, 6 gears with foot control on the left side of the engine GEAR RATIOS Ratio Primary Secondary Final ratio Total ratio 19/63 = 1 : 3.315 10 / 30 = 1: 3.000 16 / 45 = 1 : 2.81 R1 x R2 x R3 = 1 : 27.35 14 / 29 = 1: 2.071 R1 x R2 x R3 = 1 : 18.88...
- Page 70 WHEEL RIMS Type.............. in stainless steel with tangential spokes Front ............. E - 21” x 1.60 DOT Rear.............. E - 18” x 2.15 DOT TYRES FRONT ............3.00 - 21” 51 P alternative: - 90/90 - 21” 54R - 90/90 - 21” 54S - 80/100 - 21”...
-
Page 71: Stroke Oil Reserve
ELECTRIC Battery ............12 V - 4 Ah SYSTEM Fuses ............20 - 15 - 7.5 A Generator ............ 12 V - 180 W BULBS Low/high beam (halogenous)....... 12 V - 55/60 W Front parking light ........12 V - 5 W Direction indicators ........ -
Page 72: Lubricant Chart
LUBRICANT CHART Gearbox oil (recommended): F.C., SAE 75W - 90 As an alternative to the recommended oil, it is possible to use high-quality oils with characteristics in compliance with or superior to the A.P.I. GL-4 specifications. 2 stroke oil (recommended): MAX 2T COMPETITION As an alternative to the recommended oil, use high-quality oils with characteristics in compliance with or superior to the ISO-L-ETC++, A.P.I. -
Page 73: Importers
Importers APRILIA MOTO U.K. LTD. DUNRAGIT STRANRAER WIGTOWNSHIRE DG9 8PN SCOTLAND (UK) TEL. (01581) 400660 FAX (01581) 400661 IDEAL MOTOR SPORT PTE LTD. 18, HOWARD ROAD 1336 SINGAPORE (SGP) TEL. 2820082 FAX 2821012 AVIRAM & GOLDMAN IMPORT & MARKETING CO. LTD. -
Page 74: Wiring Diagram - Etx 125
WIRING DIAGRAM - ETX 125 use and maintenance ETX 125... -
Page 75: Wiring Diagram Key - Etx 125
WIRING DIAGRAM KEY - ETX 125 1) Generator 31) Front right direction indicator 2) Coil 32) Low/high beam bulb 4) Voltage regulator 33) Front parking light bulb 5) Fuses 34) Front left direction indicator 6) Battery 35) Diode 8) Front stoplight switch 36) Multiple connectors 9) Rear stoplight switch 37) Spark plug... - Page 76 NOTE use and maintenance ETX 125...
- Page 77 NOTE use and maintenance ETX 125...
- Page 78 NOTE use and maintenance ETX 125...
- Page 79 NOTE use and maintenance ETX 125...
- Page 80 – Do not dispose of oil, fuel, polluting substances and components in the envi- ronment. – Do not keep the engine running if it isn’t necessary. – Avoid disturbing noises.
Need help?
Do you have a question about the ETX 125 - 1998 and is the answer not in the manual?
Questions and answers