Advertisement
Quick Links
Carefully read p. 29 (REAR DRUM
BRAKE) and p. 43 (MAINTENANCE).
Check the wear of the rear brake
shoes after the first 500 km (312 mi) and
successively every 4000 km (2500 mi).
Have the rear brake shoe wear checked by
an aprilia Official Dealer after the first
1000 km (625 mi) and successively every
6000 km (3750 mi).
In any case:
WARNING
If the adjuster (1) can be screwed com-
pletely, this means that the shoes are
worn; in this case, contact an
Official Dealer.
To verify the wear of the rear brake shoes,
proceed as follows:
N
Pull the rear brake lever (2) completely
and keep it pulled.
N
Check the position of the rear brake
shoe wear indicator (3).
Position
Wear condition
Indicator between
Rear brake shoes
within the wear limit.
the two reference
teeth (4) and (5)
.
Indicator on or
Rear brake shoes
beyond the lower
worn
reference tooth(5)
To be replaced.
.
WARNING
If the rear brake shoe wear indicator (3)
is positioned on or beyond the lower
reference tooth (5), contact an
Official Dealer, who will provide for re-
placing the rear brake shoes.
Carefully read p. 43 (MAINTENANCE).
Check the tightening of all the components
and the functionality of the articulations of
the front and rear suspensions after the
first:
N
sively every 4000 km (2500 mi);
N
sively every 6000 km (3750 mi).
.
If you notice irregularities in the opera-
tion or if the help of a qualified techni-
cian is necessary, contact your
Official Dealer.
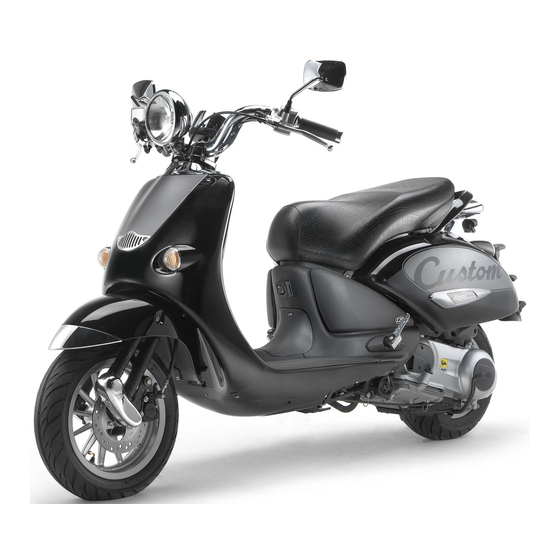
use and maintenance Habana 50/125 - Habana Custom 50/125
500 km (312 mi) and succes-
1000 km (625 mi) and succes-
CAUTION
51
Advertisement

Subscribe to Our Youtube Channel
Related Manuals for APRILIA HABANA 125 - PART3


Summary of Contents for APRILIA HABANA 125 - PART3
- Page 1 Have the rear brake shoe wear checked by Indicator between Rear brake shoes sively every 4000 km (2500 mi); an aprilia Official Dealer after the first within the wear limit. the two reference 1000 km (625 mi) and succes- 1000 km (625 mi) and successively every teeth (4) and (5) sively every 6000 km (3750 mi).
- Page 2 If any slack should be noticed, contact slack, contact your aprilia Official Dealer front wheel can move freely and the ve- your aprilia Official Dealer, to restore the to restore the optimal steering condi- hicle cannot fall down. optimal operating conditions.
- Page 3 Release the couplings (3) and (4) from their seats and remove the two collars Carefully read p. 43 (MAINTENANCE). (5) and (6). Position the vehicle on the centre stand. Unscrew and remove the two lower Unscrew and remove the screw (1). screws (7).
- Page 4 Move the lower handlebar cover (6) carefully downwards. Unscrew and remove the screw (7). Carefully read p. 43 (MAINTENANCE). Carefully read p. 43 (MAINTENANCE). CAUTION Position the vehicle on the centre stand. Position the vehicle on the centre stand. Unscrew and remove the headlight metal Unscrew and remove the screw (11).
- Page 5 Remove the rear-view mirrors, see p. 56 CAUTION (REMOVING THE REAR-VIEW MIR- The upper handlebar cover (3) (com- RORS). Carefully read p. 43 (MAINTENANCE). plete with switches, instruments and in- Raise the rubber ring (1), releasing it dicators) remains connected to the from the odometer control coupling (2).
- Page 6 At this point, proceed as follows to reach the dashboard bulbs: Unscrew and remove the two screws Carefully read p. 43 (MAINTENANCE). Carefully read p. 43 (MAINTENANCE). (7). The following information refers to one Unscrew and remove the three nuts (5). Remove the upper cover (8).
- Page 7 NOTE Carefully read p. 43 (MAINTENANCE). Carefully read p. 43 (MAINTENANCE). Position the vehicle on firm and flat ground. CAUTION CAUTION Position the vehicle on the centre stand. Handle the painted components with Handle the plastic and painted compo- Make sure that the ignition switch is in care and avoid scraping or damaging nents with care and avoid scraping or position “...
- Page 8 Carry out the following checks: To reach the switches, proceed as follows: The springs (2) must not be damaged, Partially remove the upper han- Carefully read p. 43 (MAINTENANCE). worn, rusty or weakened. dlebar cover, see p. 55 (PARTIAL RE- WARNING The stand must rotate freely, if neces- MOVAL OF THE UPPER HANDLEBAR...
- Page 9 NOTE If necessary, contact your aprilia If necessary: Official Dealer. Remove the left inspection cover, see p. 57 (REMOVING THE RIGHT AND LEFT INSPECTION COVERS).
- Page 10 Carefully read p. 43 (MAINTENANCE). Check the spark plug after the first 500 km (312 mi); change it every 4000 km (2500 mi). Check the spark plug after the first 1000 km (625 mi); successively every 6000 km (3750 mi) and change it every 12000 km (7500 mi).
- Page 11 To remove and clean the spark plug: Check the spark plug gap with a thick- CAUTION ness gauge. Take off the spark plug cap (1). The spark plug must be well tightened, The gap must be: Remove all the dirt from the base of the otherwise the engine may overheat and spark plug, then unscrew it with the –...
- Page 12 NOTE ponents. If you need assistance or techni- continue drinking milk of magnesia or cal advice, consult your aprilia Official vegetable oil and consult a doctor with- Dealer, who can ensure you prompt and out delay. CAUTION accurate servicing.
- Page 13 If necessary: Make sure that the ignition switch is in Carefully read p. 62 (BATTERY). position “ ”. Carefully read p. 62 (BATTERY). Remove the battery cover, see p. 57 Disconnect first the negative (–) and then Remove the battery cover, see (REMOVING THE BATTERY COVER the positive cable (red) (+).
-
Page 14: Partial Removal
Grasp the battery (2) and remove it from Make sure that the fluid level is included its compartment by withdrawing it from between the two “MIN” and “MAX” notch- Carefully read p. 62 (BATTERY). behind. es stamped on the battery side. PARTIAL REMOVAL Otherwise: COMPLETE REMOVAL... - Page 15 CAUTION Carefully read p. 62 (BATTERY). Reassemble the battery only 5-10 min- utes after disconnecting the recharger, since the battery continues to produce Remove the battery from its compart- gas for a short lapse of time. ment, see p. 63 (REMOVING THE BAT- TERY Unscrew and remove the element plugs.
-
Page 16: Arrangement Of The Fuses
ARRANGEMENT OF THE FUSES In this case it is advisable to consult an the filament is broken. aprilia Official Dealer. 7.5 A fuse (1) - From key switch to: Before replacing a fuse, try to find out the – start relay and relevant circuit;... - Page 17 Carefully read p. 43 (MAINTENANCE) WARNING Risk of fire. Keep fuel and other flammable sub- stances away from the electrical com- ponents. CAUTION Before changing a bulb, position the ve- hicle on the centre stand, move the igni- tion switch to position “ ”...
-
Page 18: Parking Light Bulb
To reach the bulbs, proceed as follows: LOW / HIGH BEAM BULB Rotate the bulb socket (5) anticlockwise Remove the lower handlebar cover, see and extract it. Carefully read p. 67 (BULBS). p. 54 (REMOVING THE LOWER HAN- Press the bulb (2) moderately and rotate DLEBAR COVER The headlight contains: it anticlockwise. - Page 19 To reach the bulbs, proceed as follows: LOW/HIGH BEAM BULB (HALOGEN) Remove the headlight metal ring, see p. CAUTION Carefully read p. 67 (BULBS). 5 4 ( RE MO VI NG TH E HEAD L IG HT To extract the bulb electric connector, METAL RING The headlight contains: do not pull its electric wires.
- Page 20 To reach the bulbs, proceed as follows: LOW/HIGH BEAM BULB Rotate the bulb socket (5) anticlockwise Remove the headlight metal ring, see p. and extract it. Carefully read p. 67 (BULBS). 54 (R EMOV IN G THE HE ADLIG HT Press the bulb (2) moderately and rotate METAL RING The headlight contains:...
- Page 21 To reach the bulbs, proceed as follows: LOW/HIGH BEAM BULB (HALOGEN) Remove the headlight metal ring, see p. CAUTION Carefully read p. 67 (BULBS). 5 4 ( RE MO VI NG TH E HEAD L IG HT To extract the bulb electric connector, METAL RING The headlight contains: do not pull its electric wires.
- Page 22 NOTE Take the metal ring (4). To install the new bulb: introduce the bulb in the bulb socket, making sure NOTE The coloured screen (5) is sup- that the two guide pins coincide with the Carefully read p. 67 (BULBS). plied only if the direction indicator is relevant guides on the bulb socket.
- Page 23 NOTE Extract the bulb sockets one by DASHBOARD LIGHTING BULBS one, in such a way as to avoid positioning NOTE To change the two bulbs of the them incorrectly during the reassembly. Carefully read p. 67 (BULBS). upper part of the dashboard, it is sufficient Extract the relative bulb socket: to remove the lower handlebar cover.
- Page 24 WARNING LIGHT BULBS Extract the bulb and replace it with one of the same type. NOTE Extract the bulb sockets one by Carefully read p. 67 (BULBS). one, in such a way as to avoid positioning DASHBOARD LIGHTING BULBS them incorrectly during the reassembly. NOTE Before changing a bulb, check NOTE...
- Page 25 NOTE To change the bulb: Insert the bulb in the bulb socket, making the two bulb pins coincide with the Position the vehicle on the stand. relevant guides on the socket. Unscrew and remove the two screws (1). Remove the protection screen (2). Correctly install a new bulb of the same Carefully read p.
- Page 26 WARNING Before transporting the vehicle, it is necessary to empty the fuel tank and the carburettor completely, see p. 77 (DRAINING THE FUEL TANK) making sure that both are completely dry. During transport the vehicle must be kept in vertical position and be firmly anchored, in order to avoid any leakage of fuel, oil or coolant.
- Page 27 Position the vehicle on the centre stand. To drain the carburettor completely, Stop the engine and wait until it has proceed as follows: Carefully read p. 25 (FUEL). cooled down. Remove the left inspection cover, see p. Prepare a container with capacity ex- 57 (REMOVING THE RIGHT AND LEFT WARNING ceeding the fuel quantity present in the...
-
Page 28: Checking Operations)
WARNING CAUTION After the vehicle has been washed, its Polish with silicone wax only after hav- braking functions could be temporarily ing carefully washed the vehicle. Do not impaired because of the presence of wash the vehicle under the sun, espe- water on the grip surfaces. -
Page 29: After A Period Of Inactivity
After a long period of inactivity of the vehi- cle some precautions are necessary to avoid any problem. Further, it is important to carry out the nec- essary repairs and a general check up be- fore the period of inactivity, since you could forget to carry them out later. - Page 30 Description Max. length 1900 mm 1950 mm 1980 mm Max. width 720 mm 900 mm 720 mm 920 mm Max. height (headlight included) 1075 mm 1120 mm 1090 mm 1135 mm DIMENSIONS Seat height 745 mm 750 mm 780 mm 755 mm Distance between centres 1300 mm...
- Page 31 Description Speed change gear automatic and stepless Primary V-belt minimum minimum TRANSMISSION for stepless change: for stepless change: 2,38 Ratios maximum maximum for stepless change: 0,75 for stepless change: 0,79 Secondary with gears Fuel (reserve included) Fuel reserve Transmission oil 130 cm 85 cm 2 stroke oil (reserve included)
- Page 32 Description FRAME Type one beam split in two at the rear Front fork with connection elements Stroke 50 mm SUSPENSIONS Rear hydraulic mono-shock absorber Stroke 67,5 mm 72 mm Front disc brake, Ø190 mm with hydraulic transmission BRAKES drum brake, Ø120 mm, with drum brake, Ø140 mm, with Rear mechanic transmission...
- Page 33 Description Standard NGK R BPR8HS CHAMPION RG4HC alternative NGK R BPR7HS – SPARK PLUG Spark plug gap 0,6 - 0,7 mm 0,7 - 0,8 mm Engine idle rpm 1600 ± 200 rpm Battery 12 V - 4 Ah 12 V - 9 Ah ELECTRIC Fuses 7,5 A - 10 A...
- Page 34 Transmission oil (recommended): F.C., SAE 75W - 90. As an alternative to the recommended oil, it is possible to use high-quality oils with characteristics in compliance with or superior to the A.P.I. GL4 specifications. 2 stroke oil (recommended): GREEN HIT 2. Use high-quality oils with characteristics in compliance with or superior to the ISO-L-ETC++, A.P.I.
- Page 35 Engine oil (recommended): EXTRA RAID 4 SAE 15W / 50. As an alternative to the recommended oil, it is possible to use high-quality oils with characteristics in compliance with or superior to the CCMC G-4, A.P.I. SG specifications. Transmission oil (recommended): F.C., SAE 75W - 90.
- Page 36 use and maintenance Habana 50/125 - Habana Custom 50/125...
- Page 37 use and maintenance Habana 50/125 - Habana Custom 50/125...
- Page 38 use and maintenance Habana 50/125 - Habana Custom 50/125...
- Page 39 use and maintenance Habana 50/125 - Habana Custom 50/125...
- Page 40 use and maintenance Habana 50/125 - Habana Custom 50/125...
- Page 41 1) Generator 31) Front right direction indicator 2) CDI 32) Front left direction indicator 3) Spark plug 33) Front light 4) HT coil 34) Low / high beam bulb 5) Voltage regulator 35) Horn 6) Battery 36) Pick up 7) Starter 37) Fuses 8) Start relay 38) Multiple connectors...
- Page 42 use and maintenance Habana 50/125 - Habana Custom 50/125...
- Page 43 1) Generator 31) Front right direction indicator 2) CDI 32) Front left direction indicator 3) Spark plug 33) Front light 4) HT coil 34) Low / high beam bulb 5) Voltage regulator 35) Horn 6) Battery 36) Pick up 7) Starter 37) Fuses 8) Start relay 38) Multiple connectors...
- Page 44 use and maintenance Habana 50/125 - Habana Custom 50/125...
- Page 45 1) Generator 31) Front right direction indicator 2) CDI 32) Front left direction indicator 3) Spark plug 33) Front light 4) HT coil 34) Low / high beam bulb 5) Voltage regulator 35) Horn 6) Battery 36) Pick up 7) Starter 37) Fuses 8) Start relay 38) Multiple connectors...
- Page 46 use and maintenance Habana 50/125 - Habana Custom 50/125...
- Page 47 1) Generator 31) Front right direction indicator 2) CDI 32) Front left direction indicator 3) Spark plug 33) Front light 4) HT coil 34) Low / high beam bulb 5) Voltage regulator 35) Horn 6) Battery 36) Pick up 7) Starter 37) Fuses 8) Start relay 38) Multiple connectors...
- Page 48 use and maintenance Habana 50/125 - Habana Custom 50/125...
- Page 49 31) Front right direction indicator 1) Generator 32) Front left direction indicator 2) CDI 33) Front light 3) Spark plug 34) Low / high beam bulb 4) HT coil 35) Horn 5) Voltage regulator 36) Pick up 6) Battery 37) Fuses 7) Starter 38) Multiple connectors 8) Start relay...
- Page 50 – Do not dispose of oil, fuel, polluting substances and components in the envi- ronment. – Do not keep the engine running if it isn’t necessary. – Avoid disturbing noises.
Need help?
Do you have a question about the HABANA 125 - PART3 and is the answer not in the manual?
Questions and answers