
Subscribe to Our Youtube Channel
Related Manuals for Ingersoll-Rand GlobalGear Series


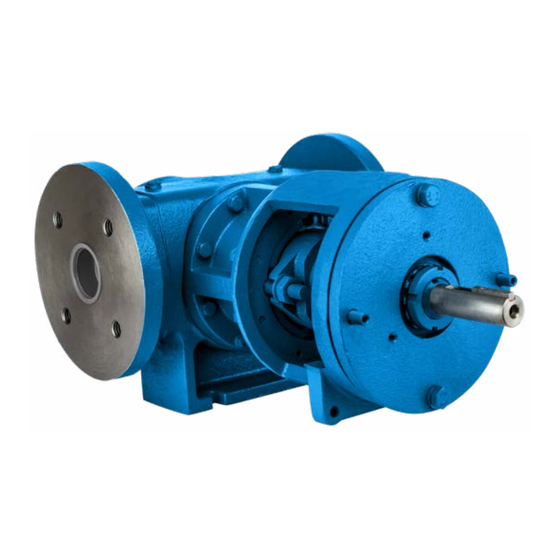
Summary of Contents for Ingersoll-Rand GlobalGear Series
- Page 1 Installation and Service Instructions Installation and Service Instructions GlobalGear Series Pumps ® V 2.1...
- Page 2 Table of Contents Introduction General Description Modular Design GlobalGear Models ® GlobalGear Model Number System ® Installation Simple Efficiency Improvement Packing Adjustment Lubrication Requirements Parts Interchangeability Inspection / Repair Pump Disassembly - Partial Drive Module Removal Drive Module Installation Install New Cover and Idler Gear In-Line Seal / Packing Replacement Pump - Complete Disassembly Procedure Pump - Complete Assembly Procedure...
- Page 3 Introduction The GG Series pumps have been certified to the requirements of the ATEX Directive 94/9/EC for use in Category II, Group 2 G applications. Read this manual before operating or working on the GG Series pumps. If additional information is required to facilitate operation or maintenance, contact the authorized Ingersoll Rand distributor shown at the back of this service manual.
- Page 4 GlobalGear Models ® Max Capacity Max Pressure Weight Material Size MaxSpeed USGPM GG015 1800 13.8 22.7 GG030 1800 13.8 22.7 GG050 1500 49.9 GG070 1500 49.9 GG080 1500 49.9 GG090 1500 49.9 GG120 1200 13.8 78.1 GG130 1000 13.8 78.1 GG200 1000 13.8...
- Page 5 GlobalGear Model Number System ® For Special Pumps with a Feature not Described Below Sequential Pump Series Pump Size Material Port Position Special Indicator Year of Design Special Number Position Pos. 1 & 2 - Pump Series Pos. 9 - Sealing Method Pos.
- Page 6 WARNING! Failure to follow these instructions could result in serious bodily injury or death. Do not attempt to work on any Ingersoll Rand pump installation before completing the steps below. Disconnect the drive so that it cannot be started while work is being performed. Review the Material Safety Data Sheet (MSDS) applicable to the liquid being pumped to determine its characteristics and the precautions necessary to ensure safe handling.
- Page 7 Simple Efficiency Improvement The efficiency of the pump may decrease after considerable use as a result of wear. If performance deteriorates below acceptable levels, it may be moderately improved by reducing the end clearance between rotating elements. Refer to the appropriate reassembly instructions to accomplish this task.
- Page 8 Parts Interchangeability PORTS BEARING CARRIER BRACKET BUSHING RELIEF VALVE ASSEMBLY BEARING CAPS IDLER ROTOR/SHAFT IDLER ASSEMBLY BUSHING BALL BEARING IDLER SEAL GLAND GEAR COVER BRACKET SEAL HOUSING ASSEMBLY FOOT Figure 2 Part Name Pump Size GG015 GG030 GG050 GG070 GG080 GG090 GG120 GG130 GG200 GG210 GG250 GG500 GG550 Housing Parts Relief Valve...
- Page 9 Inspection / Repair Should it be necessary to remove the pump from service for periodic inspection of components and/or a major repair, the following steps should be taken. WARNING! Failure to follow these instructions could result in serious bodily injury or death. Do not attempt to work on any Ingersoll Rand pump installation before completing the steps below.
- Page 10 Acceptable Clearance Pump Size Inch GG015 0.001 - 0.007 0.038 - 0.178 GG030 0.001 - 0.007 0.038 - 0.178 GG050 0.002 - 0.008 0.051 - 0.203 GG070 0.002 - 0.008 0.051 - 0.203 GG080 0.002 - 0.008 0.051 - 0.203 GG090 0.002 - 0.008 0.051 - 0.203...
- Page 11 Drive Module Installation Place the gasket on the bracket. Note: The standard bracket for the GlobalGear pumps provides a vent to the seal chamber from the suction port of the housing (see Figure 4). Position the bracket so the vent hole lines up with the hole in the housing by the suction port. See Table 4 for proper torque specifications.
- Page 12 CAUTION! The adjusting screw of the valve must point towards the suction port. The end clearances can now be set. Refer to instructions on Page Fastener Size Foot - Pounds Newton - Meters 6 - 9 8 - 12 14 - 21 19 - 28 30 - 40 41 - 54...
- Page 13 Packing Gland Bearing Lock Washer/Locknut Stud/Nut/Washer Ball Bearing Assembly Figure 6 – Pump with Packing Pumps with single seal behind the bushing (Out-Board location –see Figure 10). Remove the gland nuts and washers. Remove the gland and gland gasket. Remove the seal head from the shaft. Remove the seal seat from the gland. Remove the out-board seal collar. Remove the pin from the shaft.
- Page 14 Bracket Gland O-ring Locating Collar Gland Locating Pin Figure 7 Shaft Stationary Seat Seat O-ring CAUTION! The highly polished seal faces should not be touched during the assembly process, as any minor scratch could result in leakage once in service. •...
- Page 15 Refit Coupling and Guard If you have been able to take advantage of the modular design of this pump, the complete overhaul has been accomplished without removal of the housing from the base plate or piping. Thus, your original coupling alignment should be intact. Refit the coupling and spacer, double-check alignment and complete any final adjustments.
- Page 16 Remove the Drive Module Assembly from Housing If service is being completed with the housing still mounted to the base plate/piping, you must first remove the spacer from the spacer coupling. Adequately support the housing (on the cover side) so it will not fall. Remove the bolts that hold the bracket to the housing.
- Page 17 Clean and Inspect Clean all parts and inspect for signs of excessive wear or scoring and replace if necessary. Any signs of excessive wear between the bracket bushing and shaft may also cause housing wear. This should be checked. If only the bracket bushing shows signs of minor wear it should be replaced.
- Page 18 Tungsten Carbide or High-Temperature Carbon Bushings Heat the idler gear evenly to about 400°F (204°C). Set the heated idler gear on a flat surface. Drop the bushing into the idler gear making certain that the bushing is flush to slightly below the face of the idler. Ensure that the bushing does not protrude beyond the surface of the idler on both faces.
- Page 19 BRACKET ACCESS HOLE MECHANICAL SEAL LIP SEAL O-RING INNER GLAND Figure 9 – Single Seal in In-Board Location It is always recommended to replace the rotor if scoring is present on the shaft. If the old one is being re-used, lightly polish the shaft in order to remove minor defects.
- Page 20 BRACKET ACCESS HOLE GLAND MECHANICAL SEAL COLLAR Figure 10 – Single Seal in Out-Board Location It is always recommended to replace the rotor if scoring is present on the shaft. If the old one is being re-used, lightly polish the shaft in order to remove minor defects.
- Page 21 CAUTION! The highly polished seal faces should not be touched during the assembly process as any minor scratch could result in leakage once in service. To install the gland slide the gland o-ring and gland over the shaft and position it onto the studs on the bracket. Then install the washers and nuts and tighten.
- Page 22 Install Cover and Idler Assembly • Place the gasket on the cover • Tilt the top of the cover away from the pump until the crescent can be fitted into the rotor i.D. • Then rotate the idler until its teeth mesh with the rotor teeth •...
- Page 23 Standard End Clearances For GlobalGear Series Pumps Pump Size Cast Iron Stainless Steel Carbon Steel GG015 0.003 - 0.005 inch ( 0.076 - 0.127mm) 0.006 - 0.008 inch ( 0.152 - 0.203mm) 0.003 - 0.005 inch ( 0.076 - 0.127mm) GG030 0.003 - 0.005 inch ( 0.076 - 0.127mm)
- Page 24 Disassembly of relief valve (see figure 12) Note the valve position in relation to the housing and suction piping. Ensure that system pressure has been relieved and that the driver has been locked out prior to doing any service work. •...
- Page 25 GlobalGear Materials of Construction ® Availability Compressor Part Name Material Standard Comments Duty GGI GGS* GGC* cast iron (CI) ASTM A48 Tutrided CI ASTM A48 surface hardened Housing, Cover stainless steel (SS) ASTM A743, grade CF8M cast version of 316 SS cast steel (CS) ASTM A216, grade WCB cast iron (CI)
- Page 26 GlobalGear Temperature Limits ® °F Clearances Pump Series Bushings Seal Elastomers Packing HT Opts °C 475°F -100 Notes: 1. A pump’s performance is dependent on more than just the temperature ranges of the component materials. 2. Pumps with extra clearances may have reduced flow rates when operated at lower temperatures. 3. Pumps with PTFE seals also have PTFE- encapsulated Viton O-rings which are limited to 400°F (204°C) Clearance Class J = Chocolate Clearance Mods (Include Class B Clearance, Bronze Bushings, Root Drilled Idler &...
- Page 27 Troubleshooting Capacity is too low Mechanical defects • Air leaks in suction line & losses are too high • Drive shaft and pump are misaligned. • The suction lift is too great or the suction line is too • Pump is binding due to insufficient end clearance. small or too long •...
- Page 28 Material Returns If it becomes necessary to return a pump to the factory, a Return Goods Authorization (RGA) must be obtained from either your local Authorized Distributor or our Alsip plant. No RGA can be issued until a completed Material Safety Data Sheet (MSDS) has been forwarded to our Alsip plant and return of the pump approved.
Need help?
Do you have a question about the GlobalGear Series and is the answer not in the manual?
Questions and answers