Table of Contents
Advertisement
Quick Links
Advertisement
Table of Contents

Related Manuals for HIKVISION AX HOME DSPA201P32WE


Summary of Contents for HIKVISION AX HOME DSPA201P32WE
- Page 1 Panel de Control AX HOME Manual de usuario...
-
Page 2: Legal Information
● Products described in this Document, which may include licenses obtained from third parties. Any part of the Document, including text, pictures, graphics, etc., belongs to Hikvision. No part ● of this Document may be excerpted, copied, translated, or modified in whole or in part by any means without written permission. - Page 3 Control Panel User Manual PRODUCT, EVEN IF HIKVISION HAS BEEN ADVISED OF THE POSSIBILITY OF SUCH DAMAGES OR LOSS. YOU ACKNOWLEDGE THAT THE NATURE OF THE INTERNET PROVIDES FOR INHERENT SECURITY ● RISKS, AND HIKVISION SHALL NOT TAKE ANY RESPONSIBILITIES FOR ABNORMAL OPERATION, PRIVACY LEAKAGE OR OTHER DAMAGES RESULTING FROM CYBER-ATTACK, HACKER ATTACK, VIRUS INFECTION, OR OTHER INTERNET SECURITY RISKS;...
-
Page 4: Symbol Conventions
Control Panel User Manual Symbol Conventions The symbols that may be found in this document are defined as follows. Symbol Description Indicates a hazardous situation which, if not avoided, will or could Danger result in death or serious injury. Indicates a potentially hazardous situation which, if not avoided, could Caution result in equipment damage, data loss, performance degradation, or unexpected results. -
Page 5: Table Of Contents
Control Panel User Manual Contents Chapter 1 Appearance ........................ 1 1.1 Packing List ..........................1 1.2 Components Introduction ...................... 1 Chapter 2 Start Up ........................3 2.1 Download and Login the App ....................3 2.2 Activation ..........................3 2.2.1 Activation with Wi-Fi ..................... 3 2.2.2 Activation with SIM ....................... - Page 6 Control Panel User Manual 4.1.9 Device Maintenance ....................21 4.1.10 Check Alarm Notification ..................21 Chapter 5 General Operations ....................22 5.1 Arming ..........................22 5.2 Disarming ..........................23 5.3 SMS Control ......................... 23 Chapter 6 Appendix ........................24 6.1 Specifications ........................24 6.2 Trouble Shooting ........................
-
Page 7: Chapter 1 Appearance
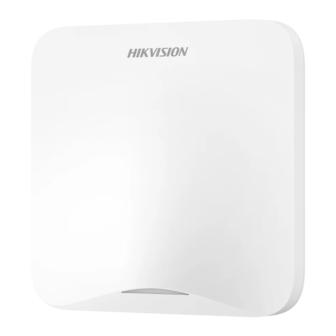
Control Panel User Manual Chapter 1 Appearance 1.1 Packing List Unbox and check device and accessories. Table 1-1 Packing List Control Panel Power Adapter Screws Quick Start Guide 1.2 Components Introduction Check components location and name for further use. Note Structures may differ in different models, please refer to the actual product. - Page 8 Control Panel User Manual Indicator Status Control Panel Status Solid Green Powered on (station mode) Flashing Green AP Mode Solid White Connected to the cloud Flashing white once, and flashing green twice Unbinding Mode Flashing white rapidly Reset...
-
Page 9: Chapter 2 Start Up
Control Panel User Manual Chapter 2 Start Up 2.1 Download and Login the App Download the App and login the client before operating the control panel. Steps 1. Scan the QR code below to download the App. Figure 2-1 App QR Code 2. - Page 10 Control Panel User Manual 2. Open the App, tap → Scan QR Code . Scan the QR code of the control panel. Or tap Add Device Manually and enter the serial No. Note Make sure your phone is connected to your home Wi-Fi. 3.
-
Page 11: Activation With Sim
Control Panel User Manual 2.2.2 Activation with SIM Steps 1. Slide to remove the rear cover. 2. Open the App, tap → Scan QR Code . Scan the QR code of the control panel. Or tap Add Device Manually and enter the serial No. 3. -
Page 12: Activation With Ethernet
Control Panel User Manual 2.2.3 Activation with Ethernet Steps 1. Slide to remove the rear cover. 2. Open the App, tap → Scan QR Code . Scan the QR code of the control panel. Or tap Add Device Manually and enter the serial No. 3. -
Page 13: Unbind The Device
Control Panel User Manual 5. Wait for the device to log in the cloud. The white indicator will remain on. 2.3 Unbind the Device 2.3.1 Unbind the Device from Your Own Account When the device is bound to your own account, you can delete it directly. Steps 1. -
Page 14: Unbind The Device From Another Account
Control Panel User Manual Figure 2-2 Delete Device 2.3.2 Unbind the Device from Another Account Make sure the control panel is in your hands. The phone and device are on the same network segment. Steps 1. Open the App, tap →... - Page 15 Control Panel User Manual Figure 2-4 Unbind Device 4. Press and hold the reset button for more than 10 s. Figure 2-5 Reset Button 5. Check Device Unbound, and tap Add Again to add the device to your own account.
-
Page 16: Chapter 3 Installation
Control Panel User Manual Chapter 3 Installation 3.1 Precaution 1. Avoid installing the device on metal surfaces. 2. Avoid placing the device directly on the ground. 3. The device is not allowed to be wrapped in metal. 4. Avoid obstructions within 50 cm around the device, except for the installation surface. 5. -
Page 17: Installation Faq
Control Panel User Manual 3.3 Installation FAQ Question 1: Why is the signal normal during installation, but worse in actual use? Answer: Check whether the working environment changes during installation and actual use. Such as obstruction caused by closed doors and windows. - Page 18 Control Panel User Manual Figure 3-1 Installation FAQ Question 2: After the installation is complete, the peripheral is offline. Answer: Adjust the position of the control panel and check whether the signal strength is suitable for ● installation. Check whether to install devices according to the precautions. ●...
-
Page 19: Chapter 4 Configuration
Control Panel User Manual Chapter 4 Configuration 4.1 Set-up with App The operator can use the App to control the device, such as general arming/disarming operation, and user management etc. 4.1.1 Add Control Panel to the App Add a control panel to the App before other operations. Before You Start The control panel has been activated. -
Page 20: Installation Wizard
Control Panel User Manual 4.1.3 Installation Wizard You can test the installation environment for devices. Steps 1. On the home page, tap → Settings → Maintenance → Installation Wizard to enter the page. 2. Tap + to enroll more peripherals. 3. -
Page 21: Panic Alarm
Control Panel User Manual Arming / Disarming / Silence Alarm Arming to arm the area. When someone intrudes into the detection area, the control panel will trigger alarm, and the system will upload alarm information. Disarming to disarm the area. When someone intrudes into the detection area, the system will not upload alarm information. -
Page 22: User Management
Control Panel User Manual Figure 4-2 Area Management 2. Tap +, enter area name, and tap OK. 3. Tap to set the area image. 4. Tap Link to More Devices, select devices and tap OK. 5. Tap Area Details and slide to enable Add to Home Shortcut, the area will be shown on the device list page. - Page 23 Control Panel User Manual The user is permanently valid. Valid Time Period You can set the start date, start time, end date and end time. The user is only valid during the configured time period. One-time User The user's arming and disarming operation is only valid once. 5.
-
Page 24: System Settings
Control Panel User Manual Name Edit device name. User Select linked user. I/II Key Select the function of configurable keys. Deactivation The selected part will be deactivated. 5. Optional: Tap Delete to delete the keyfob. 4.1.7 System Settings System Settings You can change language and select time zone. -
Page 25: Cellular Data Network
Control Panel User Manual 4.1.8 Network Wired Network Steps 1. On the home page, tap → Settings → Network Configuration → TCP/IP to enter the page. 2. Set the parameters. - Automatic Settings: Enable DHCP. - Manual Settings: Disabled DHCP and set IP address, subnet mask, gateway address, DNS server address. - Page 26 Control Panel User Manual Traffic Threshold Set the data threshold every month. If data usage is more than the configured threshold, an alarm will be triggered and uploaded to the alarm center and mobile client. 4. Tap Network Test to diagnose network connection. 5.
-
Page 27: Device Maintenance
Control Panel User Manual 4.1.9 Device Maintenance You can reboot, upgrade, test the device, etc. Steps 1. On the home page, tap → Settings → Maintenance to enter the page. 2. You can perform the following operations. Operation Description Reboot Device Tap Reboot Device to reboot the control panel. -
Page 28: Chapter 5 General Operations
Control Panel User Manual Chapter 5 General Operations 5.1 Arming You can use keypad, keyfob, App to arm your system. After the arming command is sending to control panel, the sytem will check the detector status. If the detector is in fault, you will need to choose whether to arm the system with fault. While the system is armed, the control panel will prompt the result, and upload the arming report. -
Page 29: Disarming
Control Panel User Manual Main power supply exception ● Backup battery exception ● Alarm receiving fault ● Sounder fault ● Low battery of the keyfob (when using keyfob to arm) ● Others ● Arming with Fault While the arming is stopped with fault, user in level 2 has the permission to arm the system with fault (forced arming). -
Page 30: Chapter 6 Appendix
Control Panel User Manual Chapter 6 Appendix 6.1 Specifications Model PA201P- PA201P- PA201PG PA201PG PA201PS- PA201PS- WE: 868 Mhz 32WE 16WE -32WE -16WE 32WE 16WE WB: 433 Mhz WA: 915 Mhz PA201P- PA201P- PA201PG PA201PG PA201PS- PA201PS- 32WB 16WB -32WB -16WB 32WB 16WB... - Page 31 Control Panel User Manual Model PA201P- PA201P- PA201PG PA201PG PA201PS- PA201PS- WE: 868 Mhz 32WE 16WE -32WE -16WE 32WE 16WE WB: 433 Mhz WA: 915 Mhz PA201P- PA201P- PA201PG PA201PG PA201PS- PA201PS- 32WB 16WB -32WB -16WB 32WB 16WB PA201P- PA201P- PA201PG PA201PG PA201PS-...
-
Page 32: Trouble Shooting
Control Panel User Manual Model PA201P- PA201P- PA201PG PA201PG PA201PS- PA201PS- WE: 868 Mhz 32WE 16WE -32WE -16WE 32WE 16WE WB: 433 Mhz WA: 915 Mhz PA201P- PA201P- PA201PG PA201PG PA201PS- PA201PS- 32WB 16WB -32WB -16WB 32WB 16WB PA201P- PA201P- PA201PG PA201PG PA201PS-... -
Page 33: Problems While Arming
Control Panel User Manual Solution: Search the current available IP through ping. Change the IP address and log in again. 6.2.2 Problems While Arming Failure in Arming (When the Arming Process is Not Started) Fault Description: When the panel is arming, prompt arming fails. Solution: The panel does not enable "forced arming", and when there is a fault in the zone, the arming will fail. - Page 34 Control Panel User Manual Detection of ATP/ATS Faults ATP (Alarm Transmission Path) faults will be detected when network interface of the control panel disconnected or the transmission path to the transceiver of receiving center located in ARC blocked somewhere in between. An ATS (Alarm Transmission System) fault will be reported when ATP faults are detected on both transmission paths.
-
Page 35: Sia And Cid Code
Control Panel User Manual connection is restored, the path will be switched back to LAN or Wi-Fi. The control panel checks the connection status continuously, and generates logs transmission fault for any of the path. While both of the paths are invalid, the control panel determines ATS fault. 6.5 SIA and CID Code The code is for transmitting from the security control panel to ARC via DC09 protocol. - Page 36 www.rosarioseguridad.com.ar Grupo Instaladores https: / /www. f acebook. c om/groups/591852618012744/ ventas@rosarioseguridad.com.ar rosarioseguridadok Rosario Seguridad +54 9 341 6708000 +54 9 341 6591429 +54 9 341 6799822 Rosario Seguridad +54 9 341 4577532 Avenida Pellegrini 4820 - Presidente Perón 3998 - Rosario - Santa Fe - Argentina UD36018B...
Need help?
Do you have a question about the AX HOME DSPA201P32WE and is the answer not in the manual?
Questions and answers