
Related Manuals for Silvercrest 437395 2307


Summary of Contents for Silvercrest 437395 2307
- Page 1 CONTACT GRILL SKGE 2000 D3 CONTACT GRILL ΨΗΣΤΙΕΡΑ Operating instructions Οδηүίες χρήσης KONTAKTGRILL Bedienungsanleitung IAN 437395_2307...
- Page 2 Before reading, unfold the page containing the illustrations and familiarise yourself with all functions of the device. Πριν ξεκινήσετε την ανάγνωση, ανοίξτε τη σελίδα με τις εικόνες και εξοικειωθείτε με όλες τις λειτουργίες της συσκευής. Klappen Sie vor dem Lesen die Seite mit den Abbildungen aus und machen Sie sich anschließend mit allen Funktionen des Gerätes vertraut.
- Page 4 Contents Introduction ..........2 Information concerning these operating instructions .
- Page 5 Introduction Information concerning these operating instructions Congratulations on the purchase of your new appliance. You have selected a high-quality product. The operating instructions are part of this product. They contain important information on safety, usage and disposal. Before using the product, familiarise yourself with all handling and safety guidelines. Use the product only as described and for the range of applications specified.
- Page 6 CAUTION A warning notice at this hazard level indicates a potential for property damage. Failure to avoid this situation could result in property damage. ► Follow the instructions in this warning notice to prevent property damage. NOTE ► A note provides additional information that will assist you in using the appliance.
- Page 7 Cleaning and user maintenance must not be performed by ■ children unless they are older than 8 years of age and are supervised. Children younger than 8 years of age must be kept away from ■ the appliance and the power cable. All repairs must be carried out by authorised specialist companies ■...
- Page 8 RISK OF ELECTRIC SHOCK! The appliance should only be connected to correctly installed ► and earthed mains power sockets. Ensure that the rating for your local power supply corresponds with the details on the rating plate of the appliance. Arrange for customer service to repair or replace connecting ►...
- Page 9 RISK OF ELECTRIC SHOCK! Protect the appliance from drips or splashes of water. Thus, ► do not place any vessels containing liquid (e.g. flower vases) on or near the appliance. Always pull the plug out of the power socket during each ►...
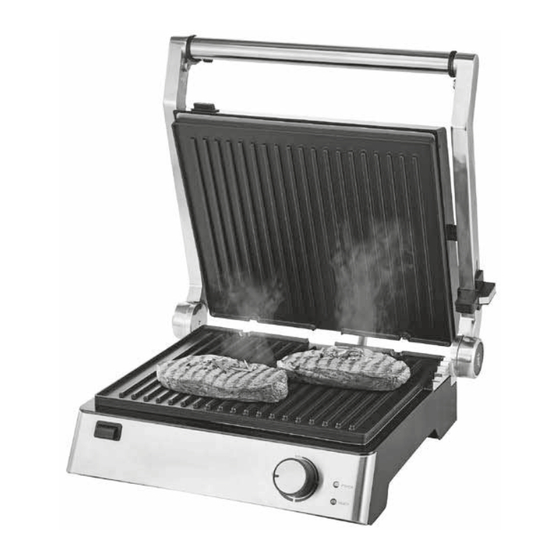
- Page 10 NOTE No user action is required to switch the product between ► 50 and 60 Hz. The product adapts automatically to either 50 or 60 Hz. Operating components Figure A: 1 Support feet 2 Safety catch 3 Unlocking button 180° 4 Red "Power"...
- Page 11 Package contents and transport inspection The appliance is supplied with the following components as standard (see fold-out page): ● Contact grill ● Fat collector tray ● Cleaning scraper ● Operating instructions NOTE ► Check the package for completeness and for signs of visible damage. ►...
- Page 12 NOTE ► The first time the appliance heats up, a small amount of smoke and odour may be generated due to production-related residue. This is normal and is completely harmless. Ensure sufficient ventilation; for example, by opening a window. 9) After heating, pull the plug out of the mains socket and allow the appliance to cool down completely.
- Page 13 Operation 1) Close the appliance lid using the handle. 2) Slide the fat collector tray 8 into the appliance. 3) Replace the plug in the mains power socket. The red control lamp "Power" 4 lights up. The green control light "Ready" 5 lights up if the heat level control 6 is set to MIN.
- Page 14 CAUTION Damage to the appliance! ► Do not use pointed or sharp objects to remove the grilled food. These could damage the surfaces of the hotplates 0! 6) Turn the heat level control 6 to MIN and remove the plug from the mains power socket.
- Page 15 "Table grill" position 1) Fold out both support feet 1 (Fig.1). 2) Press the unlocking button 180° 3 (Fig.1) and open the appliance lid until both hotplates 0 can be used as a table grill. Fig.1 3) The hotplates 0 are now positioned next to each other and can be used as a table grill (Fig.
- Page 16 5) Turn the food to be grilled from time to time and remove it from the hot- plates 0 once it is cooked. CAUTION Damage to the appliance! ► Do not use pointed or sharp objects to turn or remove the grilled food. These could damage the surfaces of the hotplates 0! 6) Turn the heat level control 6 to MIN and remove the plug from the mains power socket.
- Page 17 Tips and tricks ■ To make meat more tender and speed up the grilling process, you can marinate it beforehand. An ideal basis for this can be sour cream, red wine, vinegar, buttermilk or fresh papaya or pineapple juice, for example. Add herbs and spices according to taste.
- Page 18 Wipe the hotplates 0 with a damp cloth. Do not use any abrasive cleaning ■ agents, rough sponges or sharp objects for cleaning as these could damage the non-stick coating. For more stubborn soiling or hardened residue, remove the hotplates 0: –...
- Page 19 Clean the emptied fat collector tray 8 in hot water and washing-up liquid. ■ Rinse off detergent residues with clean water and dry it well. NOTE For gentle cleaning of the fat collector tray 8 we recommend that you wash it by hand as described above. You can, however, also clean the fat collector tray 8 in the dishwasher.
- Page 20 Rump steak with spring onion & herb sauce 500 g lean rump steak (each 125 g) 120 g margarine 1 tsp. Worcestershire sauce 1 finely chopped garlic clove 4 tbsp. finely chopped parsley 4 finely chopped spring onions 1) Mix the margarine and Worcestershire sauce in a small bowl and mix in the garlic, parsley and spring onions.
- Page 21 "Panini grill" position Spinach and cheese panini 250 g spinach leaves 1 onion 1 clove of garlic 1 tbsp. cooking oil 2 tsp. lemon juice 1 pinch of salt (and pepper) 4 slices of toasting bread/white bread 40 g herb butter 75 g mozzarella 20 g pine nuts 1) Sort and wash the spinach leaves.
- Page 22 Chicken breast panini 400 g chicken breast 20 g butter Pepper, salt, paprika powder 120 g bacon, in strips 6 slices of toasting bread/white bread 3 tbsp. salad dressing (yoghurt) 30 g of iceberg lettuce 2 tomatoes 1 avocado 1 tsp. lime juice 50 g cucumber 1) Rinse the chicken breast under running tap water and pat dry with kitchen paper.
- Page 23 Mustard baguette 1 baguette 1 garlic clove 50 g mustard-pickled gherkins 40 g Pecorino 1 tbsp. hot mustard 2 tbsp. sweet mustard 50 g butter 2 tbsp. chopped chives Salt, pepper 1) Cut into the baguette at 2 – 3 centimetre intervals, but do not cut all the way through.
- Page 24 Grilled vegetables 2 peppers 1 courgette 1 aubergine Olive oil Salt Pepper Herbs de Provence (seasoning mix) 1) Wash the vegetables thoroughly. Cut the peppers in half, remove the seeds and cut them into strips. Cut the aubergine and courgette in half along their length and then into pieces measuring around 0.5 cm.
- Page 25 5) Spread the prawns and the vegetables evenly over four pieces of aluminium foil. The aluminium foil must be big enough so that it is possible to wrap up the ingredients in little packages. Drip the coconut curry sauce over the food and season everything with salt and pepper.
- Page 26 Disposal Disposal of the appliance The adjacent symbol of a crossed-out dustbin means that this appliance is subject to Directive 2012/19/EU. This directive states that this appliance may not be disposed of in the normal household waste at the end of its useful life, but must be taken to specially set-up collection locations, recycling depots or disposal companies.
- Page 27 Appendix Technical data Voltage supply 220 – 240 V ∼ (alternating current) 50/60 Hz Power consumption 2000 W All of the parts of this appliance that come into contact with food are food-safe. Kompernass Handels GmbH warranty Dear Customer, This appliance has a 3-year warranty valid from the date of purchase. If this product has any faults, you, the buyer, have certain statutory rights.
- Page 28 Scope of the warranty This appliance has been manufactured in accordance with strict quality guide- lines and inspected meticulously prior to delivery. The warranty covers material faults or production faults. The warranty does not extend to product parts subject to normal wear and tear or to fragile parts which could be considered as consumable parts such as switches, batteries or parts made of glass.
- Page 29 Service Service Great Britain Tel.: 0800 404 7657 E-Mail: kompernass@lidl.co.uk Service Ireland Tel.: 1800 101010 E-Mail: kompernass@lidl.ie Service Cyprus Tel.: 8009 4241 E-Mail: kompernass@lidl.com.cy IAN 437395_2307 Importer Please note that the following address is not the service address. Please use the service address provided in the operating instructions.
- Page 30 Περιεχόμενα Εισαγωγή ..........28 Πληροφορίες...
- Page 31 Εισαγωγή Πληροφορίες για αυτές τις οδηγίες χρήσης Συγχαρητήρια για την αγορά της νέας σας συσκευής. Αποφασίσατε έτσι για την απόκτηση ενός προϊόντος υψηλής ποιότητας. Οι οδηγίες χρήσης είναι τμήμα αυτού του προϊόντος. Περιέχουν σημαντικές υποδείξεις για την ασφάλεια, τη χρήση και την απόρριψη. Πριν από τη χρήση του...
- Page 32 ΠΡΟΣΟΧΗ Μία υπόδειξη προειδοποίησης αυτού του βαθμού κινδύνου χαρακτηρίζει μία πιθανή υλική ζημιά. Στην περίπτωση που δεν μπορεί να αποφευχθεί αυτή η κατάσταση, μπορεί να προκληθούν υλικές ζημιές. ► Τηρείτε τις οδηγίες σε αυτή την υπόδειξη προειδοποίησης ώστε να απο- φεύγονται...
- Page 33 Τα παιδιά δεν επιτρέπεται να παίζουν με τη συσκευή. ■ Ο καθαρισμός και η συντήρηση χρήστη δεν επιτρέπεται να ■ διεξάγονται από παιδιά, εκτός εάν είναι άνω των 8 ετών και επιτηρούνται. Τα παιδιά κάτω των 8 ετών πρέπει να παραμένουν μακριά από ■...
- Page 34 ΚΙΝΔΥΝΟΣ ΗΛΕΚΤΡΟΠΛΗΞΙΑΣ! Συνδέετε τη συσκευή μόνο σε μια σύμφωνα με τις προδιαγραφές ► εγκατεστημένη και γειωμένη πρίζα. Η τάση δικτύου πρέπει να συμφωνεί με τα στοιχεία στην πινακίδα τύπου της συσκευής. Καλώδια σύνδεσης ή συσκευές που δεν λειτουργούν άψογα ► ή...
- Page 35 ΚΙΝΔΥΝΟΣ ΕΓΚΑΥΜΑΤΟΣ! Προσοχή! Καυτή επιφάνεια! Η επιφάνεια της συσκευής μπορεί να υπερθερμανθεί κατά τη ► λειτουργία. Γι' αυτό αγγίζετε τη συσκευή μόνο από τη λαβή. ΠΡΟΣΟΧΗ! ΥΛΙΚΕΣ ΖΗΜΙΕΣ! Μη χρησιμοποιείτε εξωτερικό χρονοδιακόπτη ή ξεχωριστό ► τηλεχειριστήριο για να λειτουργήσετε τη συσκευή. Ποτέ...
- Page 36 Στοιχεία χειρισμού Εικόνα A: 1 Πόδια στήριξης 2 Κλείστρο ασφαλείας 3 Πλήκτρο απασφάλισης 180° 4 Κόκκινη λυχνία ελέγχου «Power» 5 Πράσινη λυχνία ελέγχου «Ready» 6 Ρυθμιστής βαθμίδας θέρμανσης 7 Πλήκτρο RELEASE (κάτω θερμαντική πλάκα) 8 Δοχείο συλλογής λίπους 9 Σημείο εκροής λίπους 0 Θερμαντικές...
- Page 37 Παραδοτέος εξοπλισμός και έλεγχος μεταφοράς Η συσκευή παραδίδεται κανονικά με τα εξής στοιχεία (βλ. αναδιπλούμενη σελίδα): ● Ψηστιέρα ● Δοχείο συλλογής λίπους ● Σπάτουλα καθαρισμού ● Οδηγίες χρήσης ΥΠΟΔΕΙΞΗ ► Ελέγξτε τον παραδοτέο εξοπλισμό ως προς την πληρότητα και για εμφανείς φθορές.
- Page 38 ΥΠΟΔΕΙΞΗ ► Κατά το πρώτο ζέσταμα της συσκευής μπορεί να προκύψουν υπολείμματα από τη διαδικασία ετοιμασίας, όπως και μικρή ανάπτυξη καπνού και οσμής. Αυτό είναι φυσιολογικό και πλήρως ακίνδυνο. Φροντίζετε για επαρκή αερισμό, ανοίγοντας για παράδειγμα ένα παράθυρο. 9) Αφού η συσκευή ζεσταθεί, αποσυνδέστε το βύσμα από την πρίζα και αφήστε τη...
- Page 39 Χειρισμός 1) Κλείστε το καπάκι της συσκευής από τη λαβή. 2) Σπρώξτε το δοχείο συλλογής λίπους 8 μέσα στη συσκευή. 3) Συνδέστε ξανά το βύσμα στην πρίζα. Η κόκκινη λυχνία ελέγχου «Power» 4 ανάβει. Η πράσινη λυχνία ελέγχου «Ready» 5 ανάβει όταν ο ρυθμιστής βαθμίδας...
- Page 40 5) Εάν είστε ευχαριστημένοι με το ρόδισμα, απομακρύνετε το προϊόν ψησίματος. ΠΡΟΣΟΧΗ Ζημιά στη συσκευή! ► Μη χρησιμοποιείτε μυτερά ή αιχμηρά αντικείμενα για να απομακρύνετε το προϊόν ψησίματος. Αυτά μπορεί να καταστρέψουν τις επιφάνειες των θερμαντικών πλακών 0! 6) Γυρίστε το ρυθμιστή βαθμίδας θέρμανσης 6 στη θέση ΜΙΝ και αποσυνδέστε το...
- Page 41 5) Γυρίστε το ρυθμιστή βαθμίδας θέρμανσης 6 στη θέση ΜΙΝ και αποσυνδέστε το βύσμα από την πρίζα. ΠΡΟΣΟΧΗ ► Όταν δεν χρησιμοποιείτε τη συσκευή, αποσυνδέετε πάντα το βύσμα από την πρίζα. Δεν αρκεί να θέσετε το ρυθμιστή βαθμίδας θέρμανσης 6 στη θέση...
- Page 42 Εικ. 2 4) Τοποθετήστε τα τρόφιμα για ψήσιμο επάνω στις θερμαντικές πλάκες 0. 5) Γυρίζετε το προϊόν ψησίματος ενδιάμεσα και όταν ψηθεί απομακρύνετέ το από τις θερμαντικές πλάκες 0. ΠΡΟΣΟΧΗ Ζημιά στη συσκευή! ► Μη χρησιμοποιείτε μυτερά ή αιχμηρά αντικείμενα για να γυρίσετε/απομα- κρύνετε...
- Page 43 ΒΑΘΜΙΔΑ ΧΡΟΝΟΣ ΤΡΟΦΙΜΟ ΘΕΣΗ ΘΕΡΜΟΤΗΤΑΣ ΜΑΓΕΙΡΕΜΑΤΟΣ Κεφτεδάκια Ψηστιέρα 10 - 15 min Επιτραπέζια Μπέικον 2 x 3 - 4 min ψησταριά Χοιρινές μπριζόλες Επιτραπέζια 2 x 13 - 16 min λαιμού ψησταριά Φιλέτο σολομού Ψηστιέρα 8 - 10 min Φιλέτο τόνου Ψηστιέρα...
- Page 44 Καθαρισμός και φροντίδα Υποδείξεις ασφαλείας ΠΡΟΕΙΔΟΠΟΙΗΣΗ! ΚΙΝΔΥΝΟΣ ΖΩΗΣ ΛΟΓΩ ΗΛΕΚΤΡΟΠΛΗΞΙΑΣ! Κατά τον καθαρισμό της συσκευής μπορεί να προκύψουν σωματικές βλάβες! Τηρείτε τις ακόλουθες υποδείξεις ασφαλείας, ώστε να αποφεύγετε κινδύνους: ► Πριν από τον καθαρισμό αποσυνδέετε το βύσμα και περιμένετε, μέχρι η συ- σκευή...
- Page 45 ΥΠΟΔΕΙΞΗ Για έναν προστατευτικό καθαρισμό των θερμαντικών πλακών 0 συστή- νουμε να τις πλένετε όπως περιγράφηκε με το χέρι. Μπορείτε ωστόσο να καθαρίζετε τις θερμαντικές πλάκες 0 και στο πλυντήριο πιάτων. Οι κάτω πλευρές των πλακών ψησίματος 0 ενδέχεται να ξεβάψουν ελαφρά...
- Page 46 Συνταγές ΥΠΟΔΕΙΞΗ Ανάλογα με το είδος των συστατικών, μπορεί να ποικίλουν οι αναφερόμενες ρυθμίσεις θερμοκρασίας ή τα στοιχεία των χρόνων στις συνταγές! Θέση «Απλή ψηστιέρα» Mexican Burger 900 γρ. κιμάς μοσχαρίσιος 6 ΚΣ σος μπάρμπεκιου 6 ΚΣ λεπτοκομμένα κρεμμύδια 3 ΚΣ φρέσκια ή έτοιμη σάλσα 1/2 ΚΓ...
- Page 47 Τόνος με φέτες πορτοκαλιού (4 άτομα) 4 φρέσκα φιλέτα τόνου (έκαστο 170 γρ.) 1 πορτοκάλι 1 ΚΣ λεπτοκομμένος μαϊντανός Αλάτι Πιπέρι 1) Ξεφλουδίζετε το πορτοκάλι και το κόβετε σε φέτες πάχους περίπου 5 χιλ. 2) Ζεσταίνετε τη συσκευή (τομέας βαθμίδας θέρμανσης 3). 3) Τοποθετείτε...
- Page 48 6) Καλύπτετε τα ψωμάκια με μία δεύτερη φέτα ψωμί του τοστ. 7) Τοποθετείτε προσεκτικά τα ψωμάκια στην προθερμασμένη ψηστιέρα panini maker στον τομέα βαθμίδας θέρμανσης 3/Max. 8) Με το κλείστρο ασφαλείας 2 ρυθμίζετε την επιθυμητή απόσταση της άνω θερμαντικής πλάκας 0 και κλείνετε το καπάκι. 9) Περιμένετε, μέχρι...
- Page 49 10) Τοποθετείτε τα ψωμάκια προσεκτικά επάνω στην θερμαντική πλάκα 0. 11) Με το κλείστρο ασφαλείας 2 ρυθμίζετε την επιθυμητή απόσταση της άνω θερμαντικής πλάκας 0 και κλείνετε το καπάκι. 12) Περιμένετε, μέχρι τα ψωμάκια να ροδοψηθούν και τα βγάζετε προσεκτικά από...
- Page 50 Θέση «Επιτραπέζια ψηστιέρα» Στήθος κοτόπουλου/γαλοπούλας 200 γρ. στήθος κοτόπουλου/γαλοπούλας Λίγο αλεύρι 1) Βάζετε λίγο κατάλληλο λάδι τηγανίσματος στις θερμαντικές πλάκες 0 και ζεσταίνετε τη συσκευή στον τομέα βαθμίδας θέρμανσης 3. 2) Κόβετε τα 200 γρ. στήθους κοτόπουλου/γαλοπούλας σε φέτες και αλευρώ- νετε...
- Page 51 Γαρίδες με καρύδα και κάρυ 100 γρ. κόκκινη πάστα κάρυ 50 ml γάλα καρύδας 400 γρ. γαρίδες (εναλλακτικά και καβούρια) 200 γρ. στρογγυλά φασόλια 2 πιπεριές 2 κρεμμύδια 2 σκελίδες σκόρδο Αλάτι και πιπέρι Αλουμινόχαρτο 1) Ανακατεύετε την πάστα κάρυ και το γάλα καρύδας. 2) Πλένετε...
- Page 52 Ψητή ρόκα καλαμποκιού 2 ρόκες καλαμποκιού 100 γρ. βούτυρο με μυρωδικά Αλάτι σκόρδου Αλάτι Πιπέρι Αλουμινόχαρτο 1) Αλείφετε ένα κομμάτι αλουμινόχαρτο με το βούτυρο μυρωδικών. 2) Αλατίζετε τις ρόκες καλαμποκιού και τις τυλίγετε στο αλουμινόχαρτο. 3) Ζεσταίνετε τη συσκευή στην τελευταία βαθμίδα του τομέα βαθμίδας θέρμανσης...
- Page 53 Απόρριψη συσκευασίας Τα υλικά συσκευασίας έχουν επιλεγεί σύμφωνα με τους κανόνες προστασίας του περιβάλλοντος και τις τεχνικές απόρριψης και, ως εκ τούτου, είναι ανακυκλώσιμα. Απορρίπτετε τα υλικά συσκευασίας που δεν χρησιμοποιούνται πλέον σύμφωνα με τους κατά τόπους ισχύοντες κανονισμούς. Απορρίπτετε τη συσκευασία με τρόπο φιλικό προς το περιβάλλον. Λαμβάνετε...
- Page 54 Εάν το ελάττωμα καλύπτεται από την εγγύησή μας, θα λάβετε το επισκευασμένο ή ένα νέο προϊόν. Η αντικατάσταση του προϊόντος συνεπάγεται, σύμφωνα με τον ΝΟΜΟΣ 2251/1994, ανανέωση του χρόνου εγγύησης. Για την Κύπρο ισχύει: Η επισκευή ή η αντικατάσταση του προïόντος δε συνεπάγεται ανανέωση του χρόνου...
- Page 55 Στην ιστοσελίδα www.lidl-service.com μπορείτε να πραγματοποιήσετε λήψη των παρόντων ή άλλων οδηγιών χρήσης, βίντεο προϊόντων και λογισμικού. Με αυτόν τον κωδικό QR μεταβαίνετε απευθείας στη σελίδα εξυπηρέτη- σης Lidl (www.lidl-service.com) και εισαγάγοντας τον κωδικό προϊόντος (IAN) 437395_2307 μπορείτε να ανοίξετε τις αντίστοιχες οδηγίες χρήσης. Σέρβις...
- Page 56 Inhaltsverzeichnis Einführung ..........54 Informationen zu dieser Bedienungsanleitung .
- Page 57 Einführung Informationen zu dieser Bedienungsanleitung Herzlichen Glückwunsch zum Kauf Ihres neuen Gerätes. Sie haben sich damit für ein hochwertiges Produkt entschieden. Die Bedienungs- anleitung ist Bestandteil dieses Produkts. Sie enthält wichtige Hinweise für Sicherheit, Gebrauch und Entsorgung. Machen Sie sich vor der Benutzung des Produkts mit allen Bedien- und Sicherheitshinweisen vertraut.
- Page 58 ACHTUNG Ein Warnhinweis dieser Gefahrenstufe kennzeichnet einen möglichen Sachschaden. Falls die Situation nicht vermieden wird, kann dies zu Sachschäden führen. ► Die Anweisungen in diesem Warnhinweis befolgen, um Sachschäden zu vermeiden. HINWEIS ► Ein Hinweis kennzeichnet zusätzliche Informationen, die den Umgang mit dem Gerät erleichtern.
- Page 59 Kinder dürfen nicht mit dem Gerät spielen. ■ Reinigung und Benutzer-Wartung dürfen nicht durch Kinder ■ durchgeführt werden, es sei denn, sie sind älter als 8 Jahre und beaufsichtigt. Kinder jünger als 8 Jahre sind vom Gerät und der Anschluss- ■...
- Page 60 GEFAHR DURCH ELEKTRISCHEN SCHLAG! Schließen Sie das Gerät nur an eine vorschriftsmäßig installierte ► und geerdete Netzsteckdose an. Die Netzspannung muss mit den Angaben auf dem Typenschild des Gerätes überein- stimmen. Lassen Sie Anschlussleitungen bzw. Geräte, die nicht ein- ► wandfrei funktionieren oder beschädigt wurden, sofort vom Kundendienst reparieren oder austauschen.
- Page 61 GEFAHR DURCH ELEKTRISCHEN SCHLAG! Schützen Sie das Gerät vor Tropf- und Spritzwasser. ► Stellen Sie deshalb keine mit Flüssigkeit gefüllten Gegen- stände (z. B. Blumenvasen) auf oder neben das Gerät. Ziehen Sie bei jeder Unterbrechung sowie nach Beenden ► des Gebrauchs und vor jeder Reinigung den Netzstecker aus der Steckdose.
- Page 62 HINWEIS Es ist keine Aktion seitens der Benutzer erforderlich, um das ► Produkt zwischen 50 und 60 Hz umzustellen. Das Produkt passt sich sowohl für 50 als auch für 60 Hz an. Bedienelemente Abbildung A: 1 Stützfüße 2 Sicherheitsverschluss 3 Entriegelungstaste 180° 4 rote Indikationsleuchte „Power“...
- Page 63 Lieferumfang und Transportinspektion Das Gerät wird standardmäßig mit folgenden Komponenten geliefert (siehe Ausklappseite): ● Kontaktgrill ● Fettauffangschale ● Reinigungsschaber ● Bedienungsanleitung HINWEIS ► Prüfen Sie die Lieferung auf Vollständigkeit und auf sichtbare Schäden. ► Bei einer unvollständigen Lieferung oder Schäden infolge mangelhafter Verpackung oder durch Transport wenden Sie sich an die Service-Hotline (siehe Kapitel „Service“).
- Page 64 HINWEIS ► Beim erstmaligen Aufheizen des Gerätes kann es durch fertigungsbedingte Rückstände zu leichter Rauch- und Geruchsentwicklung kommen. Das ist normal und völlig ungefährlich. Sorgen Sie für ausreichende Belüftung, öffnen Sie zum Beispiel ein Fenster. 9) Ziehen Sie den Netzstecker nach dem Aufheizen aus der Netzsteckdose und lassen Sie das Gerät abkühlen.
- Page 65 Bedienen 1) Schließen Sie den Gerätedeckel am Griff. 2) Schieben Sie die Fettauffangschale 8 in das Gerät. 3) Stecken Sie den Netzstecker wieder in die Netzsteckdose. Die rote Indika- tionsleuchte „Power“ 4 leuchtet. Die grüne Indikationsleuchte „Ready“ 5 leuchtet auf, wenn der Heizstufenregler 6 auf MIN steht. 4) Stellen Sie die gewünschte Stufe am Heizstufenregler 6 ein.
- Page 66 HINWEIS Fangen Sie mit kurzen Grillzeiten an und steigern Sie sie, bis Sie die richtige Dauer gefunden haben. Beachten Sie zu Ihrer Orientierung auch das Kapitel „Gartabelle“. 5) Wenn Sie mit der Bräunung zufrieden sind, entnehmen Sie das Grillgut. ACHTUNG Beschädigung des Gerätes! ►...
- Page 67 ACHTUNG Beschädigung des Gerätes! ► Verwenden Sie keine spitzen oder scharfen Gegenstände, um das Grillgut zu entnehmen. Diese könnten die Oberflächen der Grillplatten 0 beschädigen! 5) Drehen Sie den Heizstufenregler 6 auf MIN und ziehen Sie den Netz- stecker aus der Netzsteckdose. ACHTUNG ►...
- Page 68 3) Die Grillplatten 0 liegen nun nebeneinander und können als Tischgrill genutzt werden (Abb. 2). Abb. 2 4) Legen Sie die zu grillenden Lebensmittel auf die Grillplatten 0. 5) Wenden Sie das Grillgut zwischendurch und nehmen Sie es von den Grill- platten 0, wenn es gar ist.
- Page 69 LEBENSMITTEL HEIZSTUFE POSITION GARZEIT Hackfleischfrikadellen Kontaktgrill 10 - 15 min Bauchspeck Tischgrill 2 x 3 - 4 min Schweinenackensteaks Tischgrill 2 x 13 - 16 min Lachsfilets Kontaktgrill 8 - 10 min Thunfischsteaks Kontaktgrill 6 - 8 min gegrilltes Gemüse mit Öl Tischgrill 2 x 3 - 6 min Käsesandwiches...
- Page 70 Reinigen und Pflegen Sicherheitshinweise WARNUNG! LEBENSGEFAHR DURCH ELEKTRISCHEN SCHLAG! Bei der Reinigung des Gerätes können Personenschäden auftreten! Beachten Sie die folgenden Sicherheitshinweise, um die Gefahren zu vermeiden: ► Ziehen Sie vor der Reinigung den Netzstecker und warten Sie, bis das Gerät vollständig abgekühlt ist.
- Page 71 HINWEIS Für eine schonende Reinigung der Grillplatten 0 empfehlen wir diese, wie beschrieben, mit der Hand zu spülen. Sie können die Grillplatten 0 jedoch auch in der Spülmaschine reinigen. Die Unterseiten der Grillplatten 0 können nach der Reinigung in der Spülmaschine leicht abfärben.
- Page 72 Rezepte HINWEIS Je nach Beschaffenheit der Zutaten können die angegebenen Temperaturein- stellungen oder Zeitangaben in den Rezepten variieren! Position „Kontaktgrill“ Mexiko-Burger 900 g Rinderhackfleisch 6 EL Barbecuesauce 6 EL fein gehackte Zwiebeln 3 EL frische oder fertige Salsa 1/2 TL Chilipulver 4 große Hamburgerbrötchen 1) Vermischen Sie das Hackfleisch, die Zwiebeln, die Salsa, das Chilipulver und die Barbecuesauce in einer großen Schüssel.
- Page 73 Thunfisch mit Orangenscheiben (4 Personen) 4 frische Thunfischsteaks (je 170 g) 1 Orange 1 EL fein gehackte Petersilie Salz Pfeffer 1) Schälen Sie die Orange und schneiden Sie sie in etwa 5 mm dicke Scheiben. 2) Heizen Sie das Gerät vor (Heizstufenbereich 3). 3) Legen Sie die Thunfischsteaks auf den vorgeheizten Grill, streuen Sie die Petersilie darüber und würzen Sie sie mit Salz und Pfeffer.
- Page 74 5) Verteilen Sie den Mozzarella und den abgetropften Spinat auf 2 Toastschei- ben und betreuen Sie sie mit Pinienkernen. 6) Die Panini mit einer zweiten Scheibe Toast bedecken. 7) Die Panini vorsichtig auf den auf Heizstufenbereich 3/Max vorgeheizten Paninimaker legen. 8) Mit dem Sicherheitsverschluss 2 den gewünschten Abstand der oberen Grillplatte 0 einstellen und den Deckel schließen.
- Page 75 8) Salatgurke in Scheiben schneiden und auf die Avocado legen. 9) Die Panini mit einer zweiten Scheibe Toast bedecken. 10) Die Panini vorsichtig auf die Grillplatte 0 legen. 11) Mit dem Sicherheitsverschluss 2 den gewünschten Abstand der oberen Grillplatte 0 einstellen und den Deckel schließen. 12) Warten, bis die Panini gold-braun geröstet sind und vorsichtig aus dem Paninimaker entnehmen.
- Page 76 Position „Tischgrill“ Hühner-/Putenbrust 200 g Hühner-/Putenbrust etwas Mehl 1) Ein wenig zum Braten geeignetes Öl auf die Grillplatten 0 geben und das Gerät auf den Heizstufenbereich 3 aufheizen. 2) Die 200 g Hühner-/Putenbrust in Scheiben schneiden und leicht bemehlen. 3) Ca. 4 Minuten von der einen Seite braten, dann wenden, leicht salzen und die zweite Seite ca.
- Page 77 Kokos-Curry-Garnelen 100 g rote Curry-Paste 50 ml Kokosmilch 400 g Garnelen (alternativ Krabben oder Shrimps) 200 g Zuckerschoten 2 Paprika 2 Zwiebeln 2 Knoblauchzehen Salz und Pfeffer Alufolie 1) Mischen Sie die Curry-Paste und die Kokosmilch. 2) Waschen Sie die Garnelen, die Zuckerschoten und die Paprika. 3) Schälen Sie die Zwiebeln und die Knoblauchzehen.
- Page 78 4) Legen Sie das Päckchen auf die Grillplatten 0. 5) Wenden Sie es nach 15 Minuten und garen Sie die Maiskolben weitere 15 Minuten. 6) Würzen Sie den Maiskolben mit Knoblauchsalz und Pfeffer. Entsorgung Gerät entsorgen Das nebenstehende Symbol einer durchgestrichenen Mülltonne auf Rädern zeigt an, dass dieses Gerät der Richtlinie 2012/19/EU unterliegt.
- Page 79 Anhang Technische Daten Spannungsversorgung 220 – 240 V ~ (Wechselstrom), 50/60 Hz Leistungsaufnahme 2000 W Alle Teile dieses Gerätes, die mit Lebensmitteln in Berührung kommen, sind lebensmittelecht. Garantie der Kompernaß Handels GmbH Sehr geehrte Kundin, sehr geehrter Kunde, Sie erhalten auf dieses Gerät 3 Jahre Garantie ab Kaufdatum. Im Falle von Mängeln dieses Produkts stehen Ihnen gegen den Verkäufer des Produkts gesetz- liche Rechte zu.
- Page 80 Garantieumfang Das Gerät wurde nach strengen Qualitätsrichtlinien sorgfältig produziert und vor Auslieferung gewissenhaft geprüft. Die Garantieleistung gilt für Material- oder Fabrikationsfehler. Diese Garantie erstreckt sich nicht auf Produktteile, die normaler Abnutzung ausgesetzt sind und daher als Verschleißteile angesehen werden können oder für Beschädigungen an zerbrechlichen Teilen, z.
- Page 81 Service Service Deutschland Tel.: 0800 5435 111 (kostenfrei aus dem dt. Festnetz / Mobilfunknetz) E-Mail: kompernass@lidl.de Service Österreich Tel.: 0800 447 744 E-Mail: kompernass@lidl.at Service Schweiz Tel.: 0800 56 44 33 E-Mail: kompernass@lidl.ch IAN 437395_2307 Importeur Bitte beachten Sie, dass die folgende Anschrift keine Serviceanschrift ist. Kontaktieren Sie zunächst die benannte Servicestelle.
- Page 82 KOMPERNASS HANDELS GMBH BURGSTRASSE 21 44867 BOCHUM GERMANY www.kompernass.com Last Information Update · Έκδοση των πληροφοριών · Stand der Informationen: 09/ 2023 · Ident.-No.: SKGE2000D3-092023-1 IAN 437395_2307...
Need help?
Do you have a question about the 437395 2307 and is the answer not in the manual?
Questions and answers