Advertisement
Quick Links
Installation Guide
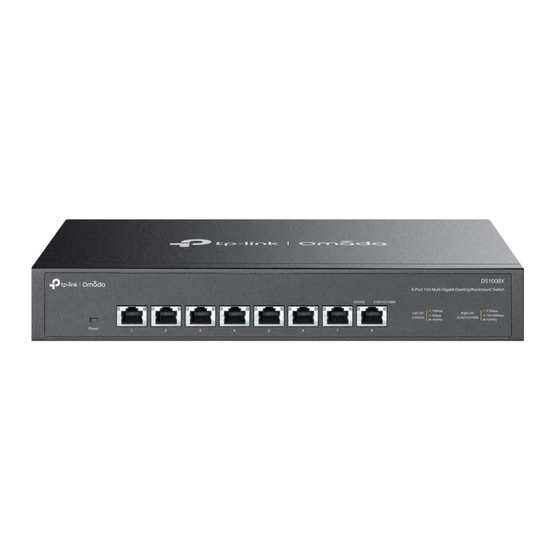
8-Port 10G Multi-Gigabit Desktop/Rackmount Switch
DS108X & DS1008X
Appearance
Front Panel
LEDs
10 Gbps RJ45 Port
Rear Panel
Kensington
Power
Grounding
Security Slot
Socket
Terminal
Installation
Note: The images in this guide are for demonstration only and may differ from your actual product.
Method 1: Desktop Installation
1) Remove the adhesive backing papers from the feet.
2) Attach the feet to the bottom of the switch to prevent it from slipping when placed on a desktop.
Note:
Place nothing on the top of the switch to avoid blocking the top ventilation openings for better cooling.
Leave at least 7.6 cm (3 inches) gaps around the device, especially the vertical space above, for air circulation.
Connection
AC Power Cord
Note: For simplicity, we will take DS1008X for example.
Power
Power
On: Power on
Off: Power off
Port LED
When one of the LED is on/flashing:
On: Connecting to a device but no activity.
Flashing: Transmitting or receiving data.
Left LED (10G/5G):
Green: Running at 10 Gbps.
Amber: Running at 5 Gbps.
Right LED (2.5G/1G/100M):
Green: Running at 2.5 Gbps.
Amber: Running at 100/1000 Mbps.
Feet
Bottom of the Device
Notch
Router/Gateway
WAN Port
LAN Port
To ask questions, find answers, and communicate with TP-Link users or
engineers, please visit https://community.tp-link.com/business to join
TP-Link Community.
For technical support and other information, please visit
https://www.tp-link.com/support/?type=smb, or simply scan the QR
code.
Kensington Security Slot
Secure the lock (not provided) into the security slot to prevent the device from being stolen.
Power Socket
Plug the female connector of the power cord directly into the power socket and plug the
male connector into an AC outlet. Make sure that the voltage of the power supply meets
the requirement of the input voltage (100–240 V ~ 50/60 Hz).
Grounding Terminal
The switch already comes with lightning protection mechanism. You can also ground the
switch through the PE (Protecting Earth) cable of AC cord or with Ground Cable.
Method 2: Rack Installation
Rack-mounting Bracket
Screw
Note:
Leave 5 to 10 cm gaps around the devices for air circulation.
Avoid placing heavy things on the device.
Place the device with its bottom facing downwards.
Mount devices in sequence from the bottom to top of the rack and ensure a certain clearance
between devices for the purpose of heat dissipation.
For DS108X: The preferred rack-mounting position is at the base of the rack or cabinet (for
optimal cooling) or below as many of the other products as can be accommodated.
10G
Workstation
NAS/Server
Computer
Rack
Ethernet Ports (1-8)
Gaming
8K Video
2.5G
Wi-Fi 6 AP
Advertisement

Subscribe to Our Youtube Channel
Related Manuals for TP-Link DS108X


Summary of Contents for TP-Link DS108X
- Page 1 Leave at least 7.6 cm (3 inches) gaps around the device, especially the vertical space above, for air circulation. between devices for the purpose of heat dissipation. For DS108X: The preferred rack-mounting position is at the base of the rack or cabinet (for optimal cooling) or below as many of the other products as can be accommodated.
- Page 2 EU declaration of conformity Safety Information TP-Link hereby declares that the device is in compliance with the essential requirements and other relevant provisions of Keep the device away from water, fire, humidity or hot environments. directives 2014/30/EU, 2014/35/EU, 2011/65/EU and (EU)2015/863.
Need help?
Do you have a question about the DS108X and is the answer not in the manual?
Questions and answers