Advertisement
Quick Links
Advertisement

Related Manuals for Dickson OCEAView Cobalt X1


Summary of Contents for Dickson OCEAView Cobalt X1
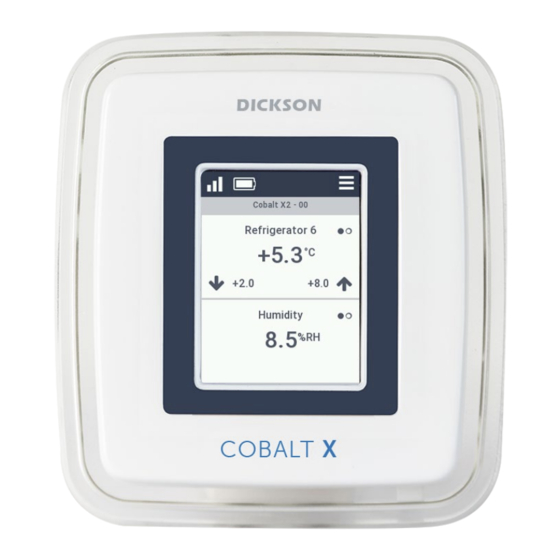
- Page 1 Cobalt X1 / X2 OCEAView User guide for firmware version 2.10...
-
Page 2: Notices And Safety
Introduction Notices and safety Disclaimer Dickson assumes no liability for any loss or claims by third parties which may arise through the use of this product. Users must not use the product in any manner not limitation of specifically indicated by Dickson. -
Page 3: Certifications And Compliance
Introduction Certifications and compliance Caution: Any changes or modifications made to this product not expressly approved in writing by Dickson could void the user's authority to operate the equipment. FCC statement This device complies with part 15 of the FCC rules. - Page 4 This device is compliant with the restriction of the use of certain hazardous substances in electrical and electronic equipment Directive 2002/95/EC (RoHS Directive). Do not dispose of this product with household trash. Dickson recycles this product under certain conditions. Please contact us for more information.
- Page 5 ©2023 Dickson. All rights reserved. Dickson, the Dickson logo, Cobalt, Cobalt X, OCEAView, and DicksonOne are the exclusive property of Dickson. LoRa and LoRaWAN are registered trademarks or service marks of Semtech Corporation or its affiliates. The Bluetooth word mark, figure mark, and combination mark are trademarks of the Bluetooth SIG, Inc.
-
Page 6: Table Of Contents
Introduction Table of contents Notices and safety ....................2 Certifications and compliance ................3 1 Introduction ..................... 9 1.1 Note regarding compatible sensors ..............9 1.2 About this User Guide ..................10 Terminology ...................... 10 1.3 OCEAView / Cobalt X solution overview ............11 LoRaWAN vs Bluetooth wireless topologies .......... - Page 7 Introduction 3 Getting started ....................26 3.1 Prerequisites....................... 26 3.2 Attaching the antenna ..................27 3.3 Using the mounting cradle ................28 Using the magnet .................... 28 Mounting the cradle with screws ..............29 3.4 Activating your Cobalt X data logger .............. 30 3.5 LoRaWAN network selection ................
- Page 8 Introduction Resetting the Cobalt X data logger battery counter ......... 66 LoRaWAN network setup ................67 LoRaWAN wireless range test ............... 68 LoRaWAN radio performance ................ 70 6.4 Quick server connection test ................71 6.5 Data synchronization ..................72 6.6 Using your data logger in Bluetooth-only mode .......... 73 7 Alarms and warnings ..................
-
Page 9: Introduction
Introduction 1 Introduction Congratulations and thank you for choosing Cobalt X, a powerful and flexible wireless data logger created by Dickson. Starting with firmware v2.9, Cobalt X data loggers can connect to the DicksonOne Cloud monitoring solution. For more details, please check the appropriate DicksonOne Cloud documentation. -
Page 10: About This User Guide
Alert The OCEAView solution alerts users when an alarm occurs. Alert notifications can be sent to users via e-mail, voice message, or SMS/text. The system can also trigger Dickson alert devices. Bluetooth Short-range wireless communication protocol, generally ®... -
Page 11: Oceaview / Cobalt X Solution Overview
Introduction 1.3 OCEAView / Cobalt X solution overview Cobalt X data loggers monitor temperature, humidity, and other physical parameters that may be critical in life science, pharmaceutical, and agri-food sectors. Combined with the OCEAView web application, Cobalt X data loggers provide a flexible solution for monitoring parameters simultaneously on several pieces of equipment in your lab or storage facilities. - Page 12 Introduction read times as low as 5 seconds (in specific cases) and cost-effective coverage in areas with a low number of sensors. Figure 2 – Data logger in Bluetooth mode with OCEABridge gateway The usage model described in the OCEAView User Guide is identical for both LoRaWAN and Bluetooth operation.
-
Page 13: Cobalt X Data Logger Features
Introduction Cobalt X data logger features Monitoring • Multi-parameter sensor monitoring, with support for a variety of Dickson Smart-Sensors, digital and Pt100 sensors, and Dickson Atlas and Emerald Bluetooth-enabled wireless sensors • Automatic recognition of connected sensors • Configurable high/low alarm and warning limits, delays, alerts, reading and transmission intervals •... -
Page 14: Information Flow
Introduction Information flow The diagram below summarizes the information flow between Cobalt X data loggers and the OCEAView platform. Remember, Cobalt X data loggers can be used with either LoRaWAN or Bluetooth wireless connectivity. Your choice of technologies depends on your specific needs and site requirements. -
Page 15: Lorawan Operation Overview
Introduction LoRaWAN operation overview Step Process Comments For best wireless performance, follow recommendations when Place your Cobalt X data logger as physically placing your data required to monitor your equipment. logger, as described in section 4 - Placing your Cobalt X data logger, p. 34. Plug in wired sensors (recognized automatically) and/or pair Bluetooth sensors. -
Page 16: Bluetooth-Only Operation Overview
Introduction Bluetooth-only operation overview The steps described here require the presence of a properly configured OCEABridge Bluetooth enabled gateway to communicate with OCEAView on the Cloud. Step Process Comments Remember that Bluetooth connectivity is limited to about 30 Place your Cobalt X data logger as meters. -
Page 17: Hardware Overview
Introduction 1.4 Hardware overview Front view The front of the Cobalt X data logger is comprised of a touch screen LCD and a translucent LED status ring around the casing. The touch screen shows data collected by the sensor(s) and gives you access to the setup menus. The status/alarm LED provides visual indications of the data logger status. -
Page 18: Rear View
Introduction Rear view The battery compartment is located on the back of the data logger. The rear of the data logger has a slot to attach the data logger to the plastic holder using a small padlock (optional). See Chapter 4 – Placing your Cobalt X data logger, p. 34, for mounting information. -
Page 19: Bottom View
Introduction Bottom view Cobalt X data loggers supports a combination of wired or wireless sensors: • Up to four simultaneous sensor channels on Cobalt X2 • Up to two simultaneous sensor channels with Cobalt X1 Plugs for connecting wired sensors are located at the bottom of the unit (two physical connectors on the X2 model and one physical connector on the X1 model). -
Page 20: Compatible Sensors
Smart-Sensors, and Bluetooth wireless sensors: Dickson Emerald and Atlas Bluetooth sensors Dickson Smart-Sensor interface External digital temperature Figure 8 – Cobalt X data logger with Dickson wired and wireless sensors. Cobalt X Data Logger User Guide (OCEAView) Page 20... -
Page 21: Package Contents
Introduction 1.5 Package contents • 1 Cobalt X1 or Cobalt X2 wireless data logger with antenna • Two 3.6V LS17500 batteries (with screw for battery cover) • Mounting kit o Plastic mounting cradle with screw holes o Adhesive-backed magnet (already attached) o Plastic ties and adhesive hooks for arranging cables •... -
Page 22: Technical Specifications
Technical specifications Technical specifications 2.1 Characteristics General • Color LCD display: 2.4” • Touch screen: Resistive • Number of sensor channels (simultaneous data logging sessions): X1: 2 channels, X2: 4 channels • Number of sensors (wired and/or wireless): X1: One physical plug (supports 1 single, dual, or triple sensor) and up to four Bluetooth wireless sensors. -
Page 23: Monitoring
Technical specifications Monitoring • Read interval: Bluetooth operation: 5 seconds minimum on Cobalt X1 or 15 seconds minimum on Cobalt X2, up to 12 hours maximum. LoRaWAN operation: 1 minute to 12 hours (depending on the transfer interval configured in OCEAView) •... -
Page 24: Dimensions
Technical specifications 2.2 Dimensions Data logger (in mm) Figure 9 – Cobalt X data logger dimensions Mounting kit (in mm) Figure 10 – Cobalt X mounting kit details Cobalt X Data Logger User Guide (OCEAView) Page 24... -
Page 25: Power Options
Technical specifications 2.3 Power options The Cobalt X data logger can be powered by two replaceable internal batteries (3.6 V) located on the back, or by AC power using the optional 5 Volt DC adapter. Battery specifications • 2 x SAFT LS17500 batteries: Lithium thionyl chloride, A-size bobbin cell •... -
Page 26: Getting Started
Getting started 3.1 Prerequisites • An operational gateway: o For LoRaWAN operation: Dickson LoRaWAN gateway installed and setup to connect to the OCEAView web platform o For Bluetooth operation: OCEABridge Bluetooth gateway installed and setup for web platform connectivity •... -
Page 27: Attaching The Antenna
Getting started 3.2 Attaching the antenna The Cobalt X data logger requires an antenna to connect properly to your LoRaWAN network. The antenna is provided in the package with your data logger. Attach the antenna to the data logger as shown here: 1. -
Page 28: Using The Mounting Cradle
Getting started 3.3 Using the mounting cradle The Cobalt X data logger includes a mounting cradle with a pre-attached magnet for adhering to metal surfaces. It is imperative to thoroughly clean the mounting surface before placing the data logger cradle. The cradle may also be mounted with screws. -
Page 29: Mounting The Cradle With Screws
Getting started Mounting the cradle with screws Please make sure any screws and anchors you use are compliant with local regulatory requirements and safety practices. 1. Insert the screws through the holes in the mounting cradle on the desired surface. 2. -
Page 30: Activating Your Cobalt X Data Logger
Getting started To prevent removal, you may attach the data logger to the holder using a small padlock (not included): 3.4 Activating your Cobalt X data logger To activate your Cobalt X data logger and enable it to communicate with the web platform, follow these steps: 1. - Page 31 Getting started Insert screw to secure battery compartment door Figure 14 – Install the battery cover 4. Insert the provided screw to hold the battery cover in place, being careful not to over-tighten it. 5. Wait during the boot sequence. To power your data logger using the AC adapter: 1.
-
Page 32: Lorawan Network Selection
Getting started 3.5 LoRaWAN network selection This section assumes that your LoRaWAN-enabled gateway is up and running and within wireless range of the Cobalt X data logger you are trying to connect. After powering up the Cobalt X data logger: 1. - Page 33 Getting started 3. The Cobalt X ready screen is displayed as shown below, pending configuration via the monitoring application. This screen is displayed whenever data logging is not running on the data logger. Figure 16 – Cobalt X ready screen Cobalt X Data Logger User Guide (OCEAView) Page 33...
-
Page 34: Placing Your Cobalt X Data Logger
Long-range wireless connectivity enables Cobalt X data loggers to be placed nearly anywhere in your building or site. If you are using a Dickson LoRaWAN gateway and the signal is not strong enough, a second LoRaWAN-enabled gateway may be required. -
Page 35: Cobalt X User Interface
Cobalt X user interface Cobalt X user interface The Cobalt X data logger offers a highly visible color LCD screen and a simple menu system. Using the data logger’s touch screen, you can navigate easily through data logging pages and menu settings, even while wearing most types of protective gloves. -
Page 36: Entering Your Pin Code
Cobalt X user interface 5.2 Entering your PIN code Some actions on your Cobalt X data logger require the user to enter a PIN code to continue. Only users authorized to use a PIN code are allowed to enter into the Advanced menu or acknowledge alarms directly on the data logger screen. -
Page 37: Sensor Display And Control
Cobalt X user interface 5.3 Sensor display and control Cobalt X allows you to connect a variety of different sensors that can be configured to meet your needs. With the X1 data logger, you may monitor up to two physical parameters simultaneously (2 sensor channels);... -
Page 38: Status Bar
Cobalt X user interface Status bar The Status bar across the top of Cobalt X screen includes the menu icon, wireless status, and battery level. The status bar remains visible on all screens, except when the data logger is in screen saver mode. It is slightly different in LoRaWAN and Bluetooth modes. -
Page 39: Data Logging
Cobalt X user interface Data logging The Cobalt X data logger shows the currently programmed data logging cycle(s). Data is shown on a single screen or splits into distinct areas when two or more configurations are defined. Single data logging session (one sensor) Figure 20 –... - Page 40 Cobalt X user interface Multiple data logging sessions The display can show details for up to four sensors at the same time on the main screen. To adjust the display: 1. Select Menu Settings Items per page: Figure 21 – Setting the number of displayed data logging sessions 2.
- Page 41 Cobalt X user interface More than two data logging sessions (three or four sensors) If you set the display to show two sensors, and more than two sensors are currently activated for data logging (on a Cobalt X2 data logger), right and left arrows present on the screen so you can access the other sensors: Figure 23 –...
- Page 42 Cobalt X user interface Wireless sensor indicator As mentioned earlier, Cobalt X supports wired and wireless sensors. Wired sensors are plugged directly into the data logger; wireless sensors communicate via Bluetooth and are “paired” with the data logger (pairing process described in section 6.2.3 –...
-
Page 43: On-Demand Reading
Cobalt X user interface On-demand reading Data on the Cobalt X screen is refreshed periodically. As a result, the temperature in the monitored environment may be different than the reading currently displayed on the unit itself. You may check the current reading at any time without affecting stored information. -
Page 44: Screen Backlight
Cobalt X user interface 5.4 Screen backlight When the Cobalt X is on battery power, the backlight is managed to preserve battery life. The backlight turns off after 30 seconds of inactivity following the last user action. When the display is turned off, simply touch the Cobalt X screen to turn it back on. By default, the screen backlight remains on when the data logger is plugged in using the AC power adapter (USB). -
Page 45: Configuration Menus
Configuration menus Configuration menus The Cobalt X data logger includes configuration menus for interacting with the data logger and setting specific parameters. Tap on the menu bars to open configuration menus. Figure 27 – Accessing Cobalt X configuration menus Cobalt X Data Logger User Guide (OCEAView) Page 45... - Page 46 Configuration menus The following diagrams shows the menu structure according to whether the data logger is being used with LoRaWAN or Bluetooth wireless communication. Features are described in the following sections: Menu structure for LoRaWAN use Figure 28 – Menu structure when using LoRaWAN wireless operation Cobalt X Data Logger User Guide (OCEAView) Page 46...
- Page 47 Configuration menus Menu structure for Bluetooth use The structure is the same as for LoRaWAN operation, but some options are grayed out in the interface and not available in Bluetooth mode. Figure 29 – Menu structure when using Bluetooth wireless operation Cobalt X Data Logger User Guide (OCEAView) Page 47...
-
Page 48: Settings
Configuration menus 6.1 Settings Tap on Menu ( ) Settings for the following options: Figure 30 – Options in the Settings menu Cobalt X Data Logger User Guide (OCEAView) Page 48... -
Page 49: Setting Cobalt X Language
Configuration menus Setting Cobalt X language The Language option allows you to change the display language of your Cobalt X. To change the language: 1. Tap on Menu ( ) Settings Language Figure 31 – Choosing the display language 2. -
Page 50: Changing The Temperature Unit
Configuration menus Changing the temperature unit Temperature readings can be displayed in degrees Celsius (°C) or Fahrenheit (°F). To change the temperature unit shown on your Cobalt X data logger: 1. Tap on Menu ( ) Settings More Units 2. -
Page 51: Decimal Places
Configuration menus Decimal places You may choose to display sensor readings on the home screen with either one or two decimal places, as shown here: – or – Figure 33 – Values displayed with one or two decimal points 1. Tap on Menu ( ) ... -
Page 52: Information
Configuration menus Information System information such as the firmware version, LoRaWAN wireless frequency, and remaining battery capacity can be found in the Information screen. This information is mostly useful in case you need technical support and are asked to provide specific details. 1. -
Page 53: Sensor Management
Configuration menus 6.2 Sensor management Showing sensors When several sensors are connected to your Cobalt X data logger, you may display the readings and parameters of each sensor using the Show sensors feature. The display shows each sensor for about ten seconds before cycling on to the next. Tap on Menu ( ) ... -
Page 54: Updating Sensors On Oceaview
Configuration menus Updating sensors on OCEAView When you physically plug a sensor into the connector on the Cobalt X data logger, the unit automatically recognizes the sensor and sensor type. That information is then transmitted to the OCEAView web application. If a sensor is not present or not up to date in the web application, you may use the Refresh sensor option to force it to detect the new sensor and update the configuration. -
Page 55: Using Remote Sensors
Pairing the Cobalt X data logger with a Dickson wireless sensor is simple and guided through the touch screen. - Page 56 Configuration menus 5. When discovered, your sensor is displayed on the screen. Figure 39 – Tap to pair the wireless sensor Note: Sensors with data logging currently activated or already connected to another Cobalt X data logger cannot be paired. 6.
- Page 57 Configuration menus Once in paired with a Cobalt X data logger in “remote” mode, the wireless sensor is no longer visible as a data logger itself in the OCEAView Mobile application and will not be detected by the OCEABridge Bluetooth gateway. Sensor configuration will now be controlled exclusively by your OCEAView web application.
- Page 58 Configuration menus 6.2.3.2 Unpairing a Dickson wireless sensor To unpair your Dickson wireless sensor: 1. Tap on the menu icon ( ) Sensors Remote sensors 2. Enter your PIN code and tap OK. 3. Tap on Unpair remote sensors 4.
- Page 59 Configuration menus 6.2.3.3 Resetting a remote sensor’s battery counter To reset the Emerald wireless sensor’s battery counter (only after removing or replacing batteries), use the Reset battery option on your Cobalt X data logger. Only perform this action if you really install new batteries in your Emerald wireless data logger.
- Page 60 Configuration menus 6.2.3.4 Checking Bluetooth wireless signal strength You may check Bluetooth wireless signal strength between your Cobalt X data logger and paired remote sensors to make sure that connectivity is strong and reliable between the devices. ) Sensors Remote sensors 1.
-
Page 61: Swapping Sensors
Configuration menus Swapping sensors Wired sensors With your Cobalt X data logger, you may directly swap wired sensors that are physically connected to your data logger, such as for recalibration or to replace damaged cables. Wired sensors may be replaced on-the-fly whether data logging is running or not. - Page 62 Configuration menus To swap sensors: 1. Tap on the menu icon ( ) Sensors Remote sensors 2. Enter your PIN code and tap OK. 3. Tap on Swap sensor 4. Tap to select the sensor to replace and tap OK to confirm: ...
- Page 63 Configuration menus 6. A confirmation message is shown when the process is complete. Figure 46 – Confirmation message that the swap process is complete 7. Tap on OK menu icon ( ) to return to the home screen. You may unpair the first sensor if you do not expect to use it again on the same Cobalt X data logger.
-
Page 64: Advanced Menu
Configuration menus 6.3 Advanced menu The Cobalt X data logger includes an Advanced menu that you can use for troubleshooting and to confirm that your data logger is working properly. Figure 47 – Features in the Advanced menu To limit access to the Cobalt X parameters and prevent unwanted changes, the Advanced menu is protected by your personal access code as configured in the OCEAView web application and is recommended for qualified personnel only. -
Page 65: Calibrating The Cobalt X Screen
Configuration menus Calibrating the Cobalt X screen If your Cobalt X data logger screen does not respond accurately to your touch, the touch screen may require calibration to position touch point coordinates correctly. Proceed as follows to calibrate screen alignment: 1. -
Page 66: Resetting The Cobalt X Data Logger Battery Counter
Configuration menus Resetting the Cobalt X data logger battery counter It is imperative to replace Cobalt X data logger batteries when the battery indicator is down to one bar, before data logging becomes unreliable. To install new Replacing batteries batteries, see section 8.1 , p. -
Page 67: Lorawan Network Setup
Configuration menus LoRaWAN network setup LoRaWAN wireless technology offers the flexibility to deploy your monitoring solution with different types of access architecture. Your network selection must reflect the license or subscription you choose for your system. To configure your data logger: 1. -
Page 68: Lorawan Wireless Range Test
Configuration menus LoRaWAN wireless range test You may use the range test feature in the Advanced menu to ensure that your Cobalt X data loggers are within wireless range of the configured LoRaWAN network (i.e. your LoRaWAN gateway). This feature is useful for system installers, as it can help you prepare your environment before deploying Cobalt X data loggers. - Page 69 Configuration menus The wireless signal may be affected by excessive obstruction, RF/radio interference, or harsh environmental conditions. Make sure the data logger in question is placed optimally long-term operation. Please contact support services if you are having difficulties connecting to the LoRaWAN network. 5.
-
Page 70: Lorawan Radio Performance
Configuration menus LoRaWAN radio performance You may check to see how well your data logger’s wireless radio is performing. Based on results, you may choose to adjust placement or positioning of the data logger. 1. Tap on Menu ( ) Advanced 2. -
Page 71: Quick Server Connection Test
Configuration menus 6.4 Quick server connection test Without using the Advanced menu, you may perform a simple Test command to make sure that your Cobalt X data logger is able to communicate with the server. This function sends a request to the server and waits for a response to determine whether the server is reachable. -
Page 72: Data Synchronization
Configuration menus 6.5 Data synchronization The OCEAView monitoring solution enables you to force synchronization of your Cobalt X data logger with the server. This may be useful to speed up certain operations, notably: • When adding a new sensor to a Cobalt X data logger: if you use the Synchronize function, the new sensor is updated on the server right away, otherwise the update occurs at the next programmed data transfer. -
Page 73: Using Your Data Logger In Bluetooth-Only Mode
Configuration menus 6.6 Using your data logger in Bluetooth-only mode The Cobalt X data logger may be used in “Bluetooth-only” mode, that is, without any LoRaWAN functionality. In that case, the data logger behaves exactly as it does with LoRaWAN connectivity, but data transmission is handled via Bluetooth wireless “advertising frames”... -
Page 74: Alarms And Warnings
Alarms and warnings Alarms and warnings One of the Cobalt X data logger’s most important features is its ability to detect alarm conditions and work in tandem with the OCEAView server platform to notify designated users when problems occur. An alarm condition can be one of the following: •... - Page 75 Alarms and warnings When an alarm or warning occurs, the translucent outer ring on the Cobalt X casing flashes for as long as the data logger remains in excursion. The light stops flashing if, at the next programmed sensor read, the alarm condition has ended. Two colors are used for alarms: •...
-
Page 76: Led Status Indications
Alarms and warnings 7.1 LED status indications The color ring on the Cobalt X casing indicates data logger status and offers simple patterns based on status, as described below: General ( = short flash ) Data logger is booting ... -
Page 77: Managing Alarms
Alarms and warnings 7.2 Managing alarms When the Cobalt X data logger is running on external power (using the optional AC adapter), the buzzer is activated to notify users in case of event on the data logger itself or at any point during data logging, such as when the temperature or humidity is above or below programmed limits. - Page 78 Alarms and warnings In some cases, or certain known situations, you may want to mute alarms temporarily. To snooze an alarm: 1. Tap once on the alarm icon ( 2. A “mute” symbol appears in the left-hand corner of the screen: ...
-
Page 79: Acknowledging An Alarm
Alarms and warnings Acknowledging an alarm When an alarm is in progress, the Cobalt X data logger remains in an alarm state as long as the alarm conditions are present. If data logging was programmed with a delay to trigger an alarm only after a specified period of time, a stopwatch icon is displayed on the data logging screen (as described in the next section) and the alarm is activated when the limit is reached. - Page 80 Alarms and warnings 3. Tap on the up/down arrows ( ) to select a reason for the acknowledgement: Figure 60 – Choose a reason for acknowledging the alarm 4. Once the alarm is acknowledged, the alarm icon is no longer shown on the Cobalt X data logger screen.
-
Page 81: Alarm Delay Indicator
Alarms and warnings Alarm delay indicator When setting up data logging, you may program a delay before the alarm is triggered. For example, you could set a 5-minute delay for the data logger to wait 5 minutes before triggering an alarm in case the temperature rises above, or drops below, the programmed limit. -
Page 82: Pausing Alarms
Alarms and warnings Pausing alarms Cobalt X allows you to pause alarms for a period ranging from 30 minutes to 72 hours. This feature is typically used to avoid generating alert notifications when an alarm or warning occurs due to a planned action such as preventive maintenance or an equipment move. - Page 83 Alarms and warnings While alarms and warnings are paused, the data logger will continue to take sensor readings and send them to the server. The following types of alarms/warnings are not generated during the pause: • Limit alarms • Dry contact alarms •...
- Page 84 Alarms and warnings To resume alarms/warnings: 1. When your data logger is set to show one or two items per page, the main screen indicates clearly when alarms are paused: Figure 63 – Resuming alarm/warning functionality The Resume alarms button is not displayed if your data logger is set to show four items per page, as shown here: Figure 64 –...
-
Page 85: Maintaining Your Cobalt X Data Logger
Maintaining your Cobalt X data logger Maintaining your Cobalt X data logger 8.1 Replacing batteries The Cobalt X data logger runs on batteries and/or AC power (via an adapter plugged into the USB port). Batteries are not installed prior to delivery. If data logging is currently running, we recommend that you not take any risks by removing both batteries at the same time. - Page 86 Maintaining your Cobalt X data logger 3. A single battery will ensure continued operation so you can replace the other battery without interrupting data logging: Remove one used battery from the data logger and replace it with a new one, making sure to respect battery polarity (see image printed inside battery slot).
-
Page 87: Cleaning Instructions
Maintaining your Cobalt X data logger 8.2 Cleaning instructions You may occasionally need to clean your Cobalt X data loggers depending on conditions at your site. Here are some recommendations and guidelines for cleaning your data loggers: 1. Clean the data logger using a soft cloth lightly moistened with water, a detergent or isopropanol alcohol. -
Page 88: Appendix 1 - Cobalt X Battery Life
Appendix 1 – Cobalt X battery life Appendix 1 – Cobalt X battery life Cobalt X data logger battery life varies depending upon many factors: 1. Ambient temperature: battery capacity is diminished when subject to very cold or extreme heat conditions. 2. -
Page 89: Appendix 2 - Faq / Troubleshooting
If you are having difficulties with your configuration, have a look at these frequently asked questions before contacting technical support. Where can I find information about compatible sensors ? For details regarding supported sensors, please see the Dickson OCEAView Sensor Reference Guide. Click here for PDF I swapped a sensor and received a Sensor Fail error. - Page 90 The wireless sensor I wish to pair does not appear on the Cobalt X data logger screen. What should I do? To make a wireless sensor visible to your Cobalt X data logger, make sure Bluetooth is enabled on the sensor as described in the Dickson OCEAView Sensor Reference Guide (click here for PDF), then follow the instructions in section 6.2.3.1 Pairing a Bluetooth wireless sensor, p.
- Page 91 Appendix 2 – FAQ / troubleshooting My wireless sensor’s calibration parameters are incorrect in the OCEAView web application. What should I do? During pairing, the Cobalt X data logger downloads calibration parameters from the remote sensor. If wireless communication fails during the pairing process, the calibration parameters may be invalid in the web application.
- Page 92 Appendix 2 – FAQ / troubleshooting Cobalt X Data Logger User Guide (OCEAView) Page 92...
Need help?
Do you have a question about the OCEAView Cobalt X1 and is the answer not in the manual?
Questions and answers