Table of Contents
Advertisement
Quick Links
Advertisement
Table of Contents

Related Manuals for Dickson Cobalt ML3


Summary of Contents for Dickson Cobalt ML3
- Page 1 Cobalt ML3 ™ User Guide Firmware version 2.5.x and higher...
-
Page 2: Notices And Safety
Introduction Notices and safety Dickson assumes no liability for any loss or claims by third Disclaimer parties which may arise through the use of this product. Users must not use the product in any manner not limitation specifically indicated by Dickson. -
Page 3: Certifications And Compliance
Introduction Certifications and compliance Caution: Any changes or modifications made to this product not expressly approved in writing by Dickson could void the user's authority to operate the equipment. FCC statement This device complies with part 15 of the FCC rules. - Page 4 This device is compliant with the restriction of the use of certain hazardous substances in electrical and electronic equipment Directive 2002/95/EC (RoHS Directive). Do not dispose of this product with household trash. Dickson recycles this product under certain conditions. Please contact us for more information.
- Page 5 Tel: 1 (630) 543-3747 Fax: +33 467 42 84 13 © 2022 Dickson. All rights reserved. Dickson, the Dickson logo, Cobalt, Cobalt L3, Cobalt ML3, and OCEAView are the exclusive property of Dickson. LoRa and LoRaWAN are registered trademarks or service marks of Semtech Corporation or its affiliates. The Bluetooth word mark, figure mark, and combination mark are trademarks of the Bluetooth SIG, Inc..
-
Page 6: Table Of Contents
1 Introduction ....................9 1.1 About this user guide ..................9 1.2 Before you begin – identify the firmware version ........10 1.3 OCEAView / Cobalt ML3 solution overview ..........11 Terminology ...................... 11 LoRaWAN® wireless topology ............... 12 Information flow from data logger to OCEAView ........13 Data logger process overview ................ - Page 7 4 Cobalt ML3 sensor options ..............25 4.1 Cobalt ML3 with Internal temperature sensor .......... 25 Placing modules with an internal sensor ............. 25 4.2 Cobalt ML3 with external digital temperature sensor ......26 Connecting an external digital sensor ............27 Placing the sensor .................... 27 Optional IP 67 protective casing ..............
-
Page 8: Table Of Figures
Figure 2 – Data loggers communicate with Web platform via LoRaWAN ....13 Figure 3 – Example of usage for mobile monitoring ........... 13 Figure 4 – Cobalt ML3 wireless data logger (with external sensor) ......19 Figure 5 – Cobalt ML3 screen details ................20 Figure 6 –... -
Page 9: Introduction
2.5.x. 1.1 About this user guide This User Guide presents an overview of the Cobalt ML3 data logger, followed by practical instructions to get your data logger(s) up and running quickly. This document focuses almost entirely on physical/hardware aspects of the data logger. -
Page 10: Before You Begin - Identify The Firmware Version
Introduction 1.2 Before you begin – identify the firmware version While the physical appearance of the Cobalt ML3 data logger remains unchanged, firmware version 2.5.x (and above) offers many functional improvements as well as visual changes that can be seen on the LCD screen. -
Page 11: Oceaview / Cobalt Ml3 Solution Overview
Introduction 1.3 OCEAView / Cobalt ML3 solution overview Cobalt ML3 data loggers monitor temperature in environments that may be critical in life science, pharmaceutical, and agri-food sectors. Combined with the OCEAView web application, Cobalt ML3 data loggers provide a flexible solution for... -
Page 12: Lorawan® Wireless Topology
Introduction LoRaWAN® wireless topology The OCEAView / Cobalt ML3 solution implements LoRaWAN wireless technology for extensive wireless range, installation flexibility, and infrastructure cost savings. LoRaWAN is a long-range wireless technology (with free-field range up to 10 mi./about 15 km) whose architecture is based on a “star” topology in which wireless... -
Page 13: Information Flow From Data Logger To Oceaview
Figure 2 – Data loggers communicate with Web platform via LoRaWAN As Cobalt ML3 is designed as a mobile monitoring solution, with robust casing and a wide temperature range, the usage scenario generally involves collecting data via more than one LoRaWAN receiver. In the example shown below, the data logger could be programmed at Site 1 (on the left) and then placed in the container or vehicle to be monitored. - Page 14 You may trigger data synchronization manually by pressing the pushbutton on the ML3 data logger for one second (first to connect to the server), then again for one second (to force immediate data synchronization). Cobalt ML3 Data Logger User Guide Page 14...
-
Page 15: Data Logger Process Overview
Data logger process overview Step Process Comments For best wireless performance, follow recommendations when Place your Cobalt ML3 data logger as physically placing your device, appropriate to monitor your as described in section 3 - equipment. Placing your Cobalt ML3 data logger, p. -
Page 16: Package Contents
Introduction 1.4 Package contents • Cobalt ML3 wireless module with one of these two sensor options: o Internal temperature sensor o External digital temperature sensor (with cable) • 3.6 V Lithium battery (pre-installed in data logger) • Mounting kit with plastic holder, magnet, screws, cable ties, plastic cable ®... -
Page 17: Monitoring (In Association With Oceaview Web Application)
• Activating/deactivating the screen saver (15-second press), p. 34) • Simple push-button control • Supported Dickson sensors: Internal or external digital temperature sensor • Automatic recognition of connected sensors • Runs on one non-rechargeable battery o 1 x SAFT LS17500 batty: Lithium thionyl chloride, A-size bobbin cell o Nominal voltage: 3.6 V... -
Page 18: Casing And Dimensions
Dimensions: 4 x 4.4 x 1.1 in. (208 x 34 x 64 mm) • Mounting: o Velcro 2-sided adhesive tape o Screws – use two appropriate screws in compliance with regulatory requirements and safety practices Cobalt ML3 Data Logger User Guide Page 18... -
Page 19: Data Logger Overview
Introduction 1.6 Data logger overview Product presentation Cobalt ML3 data loggers are available either with an internal temperature sensor or an external digital sensor (as shown below). The data logger devices are identical in both cases. LCD display Push-button Dickson external digital... -
Page 20: Lcd Display Details
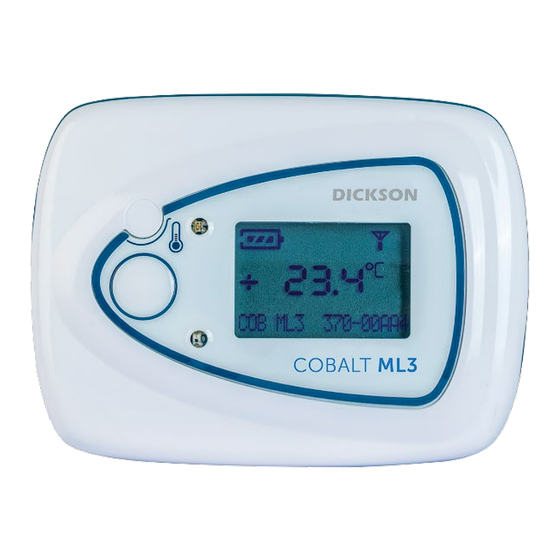
Introduction 1.7 LCD display details With data logging active, the Cobalt ML3 LCD screen shows the following information under normal operation: Battery level Wireless signal strength Latest sensor reading Data logging session name Figure 5 – Cobalt ML3 screen details... -
Page 21: Getting Started
Internet access to multi.oceaview.com • OCEAView web account with at least one configured user Starting with firmware version 2.5.x, Cobalt ML3 data loggers are configured entirely using the OCEAView web application. OCEAView access is therefore a requirement for using Cobalt ML3 data loggers as described in this manual. -
Page 22: Connecting To Your Lorawan Network
2.2 Connecting to your LoRaWAN network This section assumes that your LoRaWAN-enabled receiver is up and running and within wireless range of the Cobalt ML3 data logger you are trying to connect. Your Cobalt ML3 data logger will automatically attempt to connect with a nearby LoRaWAN receiver every 20 minutes. -
Page 23: Placing Your Cobalt Ml3 Data Logger
A typical LoRaWAN wireless installation involves one or more Cobalt ML3 data loggers and one or more LoRaWAN-enabled receivers. Your receiver(s) must be up and running and within wireless range of the Cobalt ML3 data loggers you are trying to connect. -
Page 24: Using The Mounting Kit
Placing your Cobalt ML3 data logger Using the mounting kit Your Cobalt ML3 module includes a plastic holder so you can mount the device easily on various surfaces. You may use the provided screws or Velcro adhesive tape to fix the holder. -
Page 25: Cobalt Ml3 Sensor Options
4 Cobalt ML3 sensor options 4.1 Cobalt ML3 with Internal temperature sensor Cobalt ML3 modules with an integrated temperature sensor do not have any cable on the outside of the data logger and you do not have to connect a sensor yourself. -
Page 26: Cobalt Ml3 With External Digital Temperature Sensor
Cobalt ML3 sensor options 4.2 Cobalt ML3 with external digital temperature sensor Cobalt ML3 data loggers are available with either an integrated digital temperature sensor, or an external digital temperature sensor. This section explains how to use the external sensors. -
Page 27: Connecting An External Digital Sensor
Figure 11 – Cobalt ML3 data logger with external digital sensor Placing the sensor 1. If you have a Cobalt ML3 data logger with an external sensor, the best solution is to use your equipment’s access port or specific opening to insert the sensor. -
Page 28: Optional Ip 67 Protective Casing
6. Attach or coil the excess cable neatly. Optional IP 67 protective casing The Cobalt ML3 data logger may be used with an IP 67 waterproof protective casing as shown below. Figure 13 – IP 67 casing to protect ML3 in harsh environments This casing does not affect the data logger’s regular operating range of -22°F to... -
Page 29: Using Your Cobalt Ml3
Using your Cobalt ML3 5 Using your Cobalt ML3 When data logging is running, the Cobalt ML3 LCD screen shows the following information: Battery level Wireless signal strength Pushbutton Data logging session name Latest sensor reading Figure 14 – Cobalt ML3 LCD screen details... -
Page 30: Display Icons
Battery level This icon indicates remaining battery capacity (3 bars for full battery, 0 bars when near empty). At the latest, we recommend changing the battery when this indicator reaches 1 bar. Cobalt ML3 Data Logger User Guide Page 30... -
Page 31: Using The Pushbutton
Figure 15 – Single short press for instant sensor reading Synchronize data (1-second press) The OCEAView monitoring solution enables you to force synchronization of your Cobalt ML3 data logger with the server. This may be useful to speed up certain operations, notably: •... -
Page 32: Refresh Sensors On Data Logger And In Oceaview (3-Second Press)
Figure 16 – One-second press to synchronize data logger with server Refresh sensors on data logger and in OCEAView (3-second press) When you physically plug a sensor into the connector on the Cobalt ML3 data logger, the unit automatically recognizes the sensor and sensor type. That information is then transmitted to the OCEAView web application. -
Page 33: Data Logger Information (6-Second Press)
You may check the data logger’s serial number and firmware version by pressing and holding the pushbutton for about 6 seconds: Figure 18 – Six-second press to show serial number and firmware version Cobalt ML3 Data Logger User Guide Page 33... -
Page 34: Activating/Deactivating The Screen Saver (15-Second Press)
Using your Cobalt ML3 Activating/deactivating the screen saver (15-second press) As the Cobalt ML3 data logger is used mainly in mobile monitoring environments, the screen turns off by default after 60 seconds of inactivity. This is done to preserve battery life. - Page 35 4. The main screen is displayed after a few seconds. 5. Wait 60 seconds to make sure the screen saver is set correctly. The screen saver is designed to save Cobalt ML3 battery life by turning off the LCD display when it is not needed. This behavior...
-
Page 36: Led Color Details
Using your Cobalt ML3 LED color details During the normal course of operation, the LED on the front of your Cobalt ML3 data logger may change color as described here. The LED blinks green when you do single short-press for an instant sensor read. -
Page 37: Maintaining Your Data Logger
6 Maintaining your data logger 6.1 Installing or replacing the battery The Cobalt ML3 module is a standalone device that runs on battery power. The battery is installed prior to delivery. Removing the module cover as described below voids the Dickson water-tightness guarantee. -
Page 38: Figure 22 - Idle Screen Right After Inserting Battery
6. Replace the four screws, being careful not to over-tighten them. 7. Wait a few seconds for the data logger to restart. The idle screen is displayed as shown here: Figure 22 – Idle screen right after inserting battery Cobalt ML3 Data Logger User Guide Page 38... -
Page 39: Cleaning Instructions
Maintaining your data logger 6.2 Cleaning instructions You may occasionally need to clean your Cobalt ML3 data loggers depending on conditions in your operating environment. Here are some recommendations and guidelines for cleaning: 1. Clean the data logger using a soft cloth lightly moistened with water, detergent, or isopropanol alcohol. -
Page 40: Estimated Battery Life
• Button presses and pushbutton LED usage also consume small amounts of battery power. The estimated Cobalt ML3 operating lifetime on batteries is about 1 year, based on: • Starting with a fresh battery •... -
Page 41: Appendix 2 - Troubleshooting
The Cobalt ML3 data logger is properly connected to the Web platform. Why don’t I get any temperature readings? The Cobalt ML3 wireless protocol is based on LoRaWAN™... - Page 42 To achieve the same results, you may also delay the transmission of alarms via the software and leave the sensor exposed. Cobalt ML3 Data Logger User Guide Page 42...
- Page 43 Appendix 2 - Troubleshooting Cobalt ML3 Data Logger User Guide Page 43 USER GUIDE...
Need help?
Do you have a question about the Cobalt ML3 and is the answer not in the manual?
Questions and answers