Advertisement
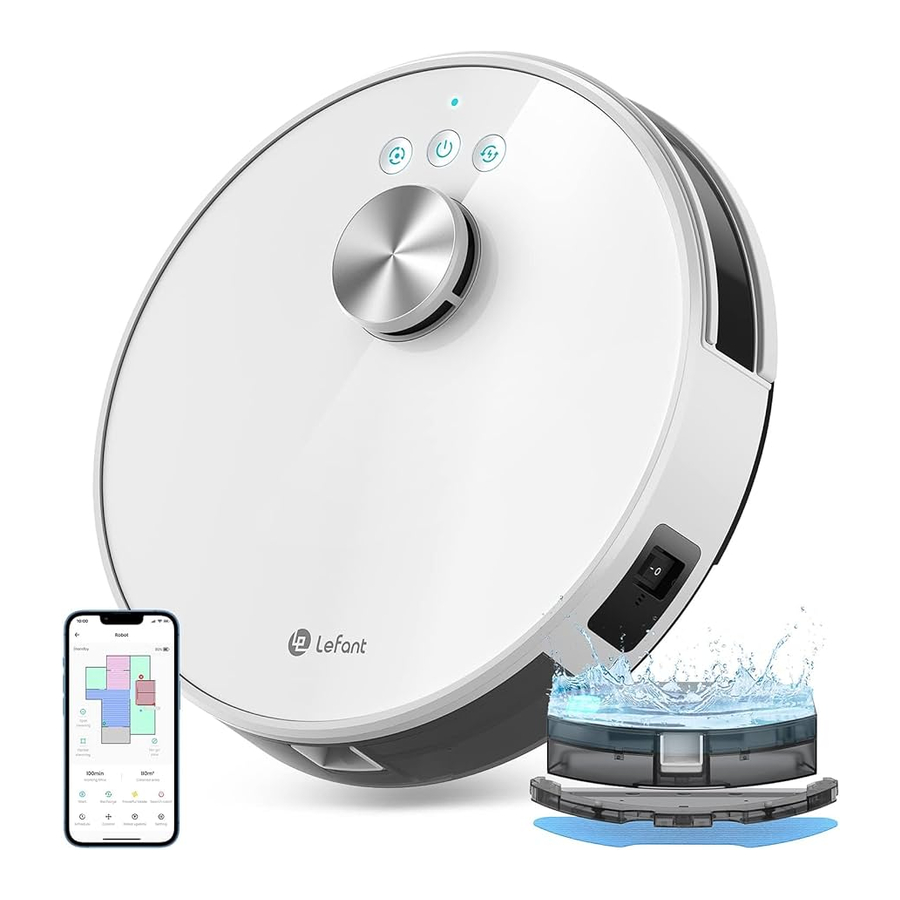
Product introduction
Packing list
The different models of this series are only different in appearance, parameters, configuration, etc., and the usage methods are the same.
This manual uses one of the models as an example to explain how to use it.

Part Name

Preparation
Assemble and charge
- Remove the protective film on the robot and docking station

- Install the side brushes

- Placement of the charging base / connection of power supply
* Place the docking station on an open place.
* Connect the power supply and tidy up the power cord to avoid twining. - Turn on the robot
" I "means ON, " O "means OFF
![information]() Reminder: Cannot charge when the robot is turned off.
Reminder: Cannot charge when the robot is turned off.

- Charging
Place the robot at Docking Station and make sure to align the charging electrodes.
![]() twinkling means charging.
twinkling means charging.
![]() turn off means fully charged.
turn off means fully charged.
A full charge takes 5 hours.


 Reminder: Cannot charge when the robot is turned off.
 twinkling means charging.
Using environment preparation
Tidy up the room
 Organize the items on the floor, such as wires, slippers and other sundries to avoid affecting the operation of the robot

If the rug at home has fringed edges, please put the edges under the rug in advance.

Do not let the robot operate on wet floors.

The robot can climb to the top of objects with a height of less than 12mm. If you don't want the robot to climb on them, please take them away.

Using the product
How to use buttons


Fixed point mode button
It is suitable for the ground environment where the garbage is relatively concentrated, and the main machine performs fixed-point cleaning in the designated area.


Start/pause button
Single press: Start/pause
Keep pressing for 3 seconds: Entering Wi-Fi pairing mode
When cleaning for the first time, the robot automatically builds a map through LDS. After the map is created, the robot cleans each home area in the same way.


Return and charge button
During the cleaning process, the host can sense that its own power is insufficient, automatically start the "return to charging" mode, and automatically find a charging base for charging.

NOTE: During the first cleaning, supervise the robot and assist if problems arise.
Floor-mopping functions
- Open the lid on the water tank and add the appropriate amount of water
![]()
- Close the lid
![]()
- Attaching the mop to the mop holder
![]()
- Snap the Dust bin water tank into the slot at the rear of the Robot
![]()
- Align and snap the mopping module into the mop bracket mounting holes at the rear of the Robot. A "click" sound will be made when the unit is in place
![]()
- Start mopping


Tips:
- To prolong the life of the water tank, we recommend that you use purified or softened water.
- Do not use the mopping function on carpets.
- Empty the water tank immediately after mopping.
- When cleaning with the mopping function, please fold the edges of the carpet to avoid contaminating the carpet with foreign objects on the mop.
App download and configuration
- Downloading and installation of the "Lefant" app
Method I: Scan the following QR code, and then download and install App as prompted.


Method II: Search "Lefant" in the App store, download and install the Lefant app.


Note: The robot works with 2.4GHz Wi-Fi networks only.

Tips:
* Follow the guidance in the Lefant app to register, login, and pair the robot.
* Please make sure that the mobile phone is connected to your Wi-Fi network before paring the robot vacuum cleaner.
Maintenance
Dust bin
* When cleaning and maintaining the robot and its accessories, please unplug the docking station.

The HEPA Filter should not touch the water.

- Press and hold the Dustbin Release Button to remove the dust bin
![]()
- Open the dust bin latch and dump the garbage
![]()
- Remove the dust filter assembly

- Clean the Filter Net
![]()
- Tap the High Efficiency Filter

- Clean the dustbin


Water tank
* When cleaning and maintaining the robot and its accessories, please unplug the charging stand.
- Remove the mop holder assembly, remove the mop and wash it with water and leave it to dry in the sun.
* If disposable dry mop are used, they can be discarded after use.
![]()
- When you have finished mopping, empty the water in the tank.


Others
* When cleaning and maintaining the robot and its accessories, please unplug the docking station.

- Clean the roller brush to ensure smooth cleaning.

- Clean the Anti-collision sensors to ensure sensitive obstacle avoidance.
![]()
- Clean the side brush to prevent hair from tangling.
![]()
- Clean the charging electrode of the docking station to ensure successful charging.
![]()


Abnormal symptoms prompts
When the robot runs into trouble, its red indicator light will be on or flash and beep with different durations and separations. The following table summarizes the corresponding causes:
The red light is on
| Fault cause: |
| The wheels are not wokring. Please check |
| Solutions: Please check whether the driving wheel is tangled, and clean up it. |
| Fault cause: |
| The side brush is not working. Please check |
| Solutions: Please check whether the side brush is tangled, and clean up the side brush. |
| Fault cause: |
| The rolling brush is not working. Please check |
| Solutions: Please clean the waste in the rolling brush. |
| Fault cause: |
| Mop missing. Please install again |
| Solutions: The mop holder has come off, please put the mop holder back on the robot. |
Red light flashes
| Fault cause: |
| I am suspended. Please put me back on the ground |
| Solutions: The robot hangs in the air. Please move it to the ground. |
| Fault cause: |
| I am stuck, please help me out |
| Solutions: Fail to get rid of a dilemma; please move to an open place. |
| Fault cause: |
| Low battery. Can't return to charging dock. Please put me back to the charging dock to start charging |
| Solutions: Please move the robot to the docking station for charging. |
| Fault cause: |
| Abnormal charging voltage. Please use the original power adapter to charge. |
| Solutions: Clean the electrode and ensure the original adapter. |
| Fault cause: |
| Unable to start charging. Please toggle the power button on the side of robot to try again. |
| Solutions: Check if the robot is turned on. |
* If the above method cannot resolve the problem, please try the following operations: turn on the ON/OFF button on the side to restart the robot.
Troubleshooting
If the following problems occur in the application process of the product, users can resolve them independently by comparison and inquiry.
| Fault | Abnormal cleaning |
| Possible causes Solutions | |
| Possible causes Solutions | |
| Fault | Unable to connect to App |
| Possible causes Solutions | |
| Possible causes Solutions | |
| Fault | Difficult to return and charge |
| Possible causes Solutions | |
| Possible causes Solutions | |
| Possible causes Solutions | |
| Possible causes Solutions | |
| Fault | Unable to charge |
| Possible causes Solutions | |
| Possible causes Solutions | |
| Possible causes Solutions | |
* If the fault cannot be eliminated according to the operation in the table, contact our customer service representative.
Technical parameters
| Product model | M1 | ||
| Rated input of machine | 19V  1A, 19W 1A, 19W | ||
| Docking Station Model | C1.5/C1 | ||
| Rated Output Voltage | 19V | Rated Output Current | 1A |
| Power Adapter Model | AD-0191900100US | ||
| Power Adapter Input | 100-240V~ 50-60Hz 0.8A | ||
| Power Adapter Output | DC 19V, 1A, CLASS II | ||
| Off/Standby Mode Power | Less than 0.5W | ||
| Networked Standby Power | Less than 2.00W | ||
Note: Since the product needs continuous improvement, the actual product shall prevail. Our company reserves the right to update the product.
IMPORTANT SAFETY INSTRUCTIONS


Read all safety warnings and instructions. Failure to follow the warnings and instructions may result in electric shock, fire or serious injury.
READ ALL INSTRUCTIONS BEFORE USING THIS APPLIANCE.
For Household use only
When using an electrical appliance, basic precautions should always be followed, including the following:
- The robot must be used in accordance with the directions in this User Manual. Our company cannot be held liable or responsible for any damages or injuries caused by improper use.
- Do not allow to be used as a toy. Close attention is necessary when used by or near children.x Do not allow children to sit on the vacuum.
- Clear the area to be cleaned. Remove power cords and small objects from the floor that could entangle the Robot. Tuck rug fringe under the rug base, and lift items such as curtains and table cloths off the floor.
- If there is a drop off in the cleaning area due to a step or stairs, you should operate the Robot to ensure that it can detect the step necessary to place a physical barrier at the edge to keep the unit from falling. Make sure the physical barrier is not a trip hazard.
- Only use as described in this manual. Only use attachments recommended or sold by the manufacturer.
- Please make sure your power supply voltage matches the power voltage marked on the Docking Station.
- Do not handle or plug appliance with wet hands.
- Non-rechargeable batteries are prohibited.
- Do not use without dust bin and/or filters in place.
- Do not operate the robot in an area where there are lit candles or fragile objects on the floor to be cleaned.
![burn hazard]() Do not use and store in extremely hot or cold environments (below -5°C /23°F or above 40°C/104°F). Please charge the robot in temperature above 0°C/32°F and below 40°C/104°F. Follow all charging instructions and do not charge the battery pack or appliance outside of the temperature range specified in the instructions. Charging improperly or at temperatures outside of the specified range may damage the battery and increase the risk of fire.
Do not use and store in extremely hot or cold environments (below -5°C /23°F or above 40°C/104°F). Please charge the robot in temperature above 0°C/32°F and below 40°C/104°F. Follow all charging instructions and do not charge the battery pack or appliance outside of the temperature range specified in the instructions. Charging improperly or at temperatures outside of the specified range may damage the battery and increase the risk of fire.- Keep hair, loose clothing, fingers, and all parts of body away from any openings and moving parts.
- Do not operate the robot in a room where an infant or child is sleeping.
- For INDOOR use ONLY. Do not use the robot in outdoor, commercial or industrial environments. Do not use Appliance on wet surfaces or surfaces with standing water.
- Do not allow the robot to pick up large objects like stones, large pieces of paper or any item that may clog the robot.
- Do not use the robot to pick up flammable or combustible materials such as gasoline, printer or copier toner, or use in areas where they may be present.
![burn hazard]() Do not use the robot to pick up anything that is burning or smoking, such as cigarettes, matches, hot ashes, or anything that could cause a fire.
Do not use the robot to pick up anything that is burning or smoking, such as cigarettes, matches, hot ashes, or anything that could cause a fire.- Do not put any object into openings. Do not use with any opening blocked; keep free of dust, lint, hair, and anything that may reduce air flow.
- Take care not to damage the power cord. Do not pull on or carry the robot or the Docking Station by the power cord, use the power cord as a handle, close a door on the power cord, or pull power cord around sharp edges or corners. Do not run the robot over the power cord. Keep power cord away from hot surfaces. Do not unplug by pulling on cord, To unplug, grasp the plug, not the cord.
- If the power cord is damaged, it must be replaced by the manufacturer or its service agent in order to avoid a hazard.
- Do not use the Docking Station if it is damaged.
- Do not use the robot or the Docking Station if it is not working properly, has been dropped, damaged, left outdoors, or come in contact with water. It must be repaired by the manufacturer or its service agent in order to avoid a hazard.
- Turn OFF the power switch before cleaning or maintaining the robot. Turn off all controls
- The plug must be removed from the receptacle before cleaning or maintaining the Docking Station.
- Remove the robot from the Docking Station, and turn OFF the power switch to the Appliance before removing the battery for disposal of the robot.
- The battery must be removed and discarded according to local laws and regulations before disposal of the robot.
- Please dispose of used batteries according to local laws and regulations.
- Do not incinerate the robot even if it is severely damaged. The batteries can explode in a fire.
- When not using the Docking Station for a long period of time, please unplug it.
- Prevent unintentional starting. Ensure the switch is in the off position before connecting to battery pack, picking up or carrying the appliance. Carrying the robot with your finger on the switch or energizing the robot that have the switch on invites accidents.
![]()
When battery pack is not in use, keep it away from other metal objects, like paper clips, coins, keys, nails, screws, ect, that can make a connection from one terminal to another. Shorting the battery terminals together may cause burns or a fire.![]()
Under abusive conditions, liquid may be ejected from the battery; avoid contact. If contact accidentally occurs, flush with water. If liquid contacts eyes, additionally seek medical help. Liquid ejected from the battery may cause irritation or burns.![burn hazard]() Do not use a battery pack that is damaged or modified. Damaged or modified batteries may exhibit unpredictable behavior resulting in fire, explosion or risk of injury.
Do not use a battery pack that is damaged or modified. Damaged or modified batteries may exhibit unpredictable behavior resulting in fire, explosion or risk of injury.- Do not expose a battery pack or appliance to fire or excessive temperature. Exposure to fire or temperature above 130°C/265°F may cause explosion.
- Have servicing performed by a qualified repair person using only identical replacement parts.
- Do not modify or attempt to repair the robot or the battery pack (as applicable) except as indicated in the instructions.
- Do not operate the robot in a room that has lit candles on furniture that the vacuum may accidentally hit or bump into.
![burn hazard]() Recharge only with the charger specified by the manufacturer. A charger that is suitable for one type of battery pack may create a risk of fire when used with another battery pack.
Recharge only with the charger specified by the manufacturer. A charger that is suitable for one type of battery pack may create a risk of fire when used with another battery pack.![burn hazard]() Use the robot only with specifically designated battery packs. Use of any other battery packs may create a risk of injury and fire.
Use the robot only with specifically designated battery packs. Use of any other battery packs may create a risk of injury and fire.- The robot contains batteries that are only replaceable by skilled persons. To replace the robot's battery, please contact Customer Service.
- If the robot is not going to be used for a long time, fully charge the robot, power it OFF, and unplug the Docking Station.

SAVE THESE INSTRUCTIONS
To satisfy RF exposure requirements, a separation distance of 20 cm or more should be maintained between this device and persons during device operation.
To ensure compliance, operations at closer than this distance is not recommended. The antenna used for this transmitter must not be co-located in conjunction with any other antenna or transmitter.
 | Short-circuit-proof safety isolating transformer |
 | Switch mode power supply |
 | For indoor use only |
 | Direct current |
 | Alternating current |
 | Detachable supply unit |
Should you encounter situations that have not been properly addressed in this User Manual, please contact our Customer Service Center, we will solve your specific problem. For more information, please visit the Lefant ROBOTICS official website: www.lefant.com or send email to the following email address: support.us@lefant.com.
Documents / Resources
References
Download manual
Here you can download full pdf version of manual, it may contain additional safety instructions, warranty information, FCC rules, etc.
Advertisement


Need help?
Do you have a question about the M1 and is the answer not in the manual?
Questions and answers