Denver City E-4400 Manual
- Instructions for use and maintenance manual (109 pages)
Advertisement
- 1 Recommendation for safe and secure use
- 2 Structure of the product
-
3
First use and adjustments
- 3.1 Positioning of the safety elements
- 3.2 Adjusting the seat and the handlebars
- 3.3 Tyres
- 3.4 Adjusting the brakes
- 3.5 Brake adjustment
- 3.6 Adjusting the gear changing system
- 3.7 Adjusting the chain
- 3.8 Changing the chain
- 3.9 Changing the pedals
- 3.10 Wheel and engine
- 3.11 Luggage rack
- 3.12 Kickstand
- 4 Maintenance
- 5 Pedal assistance and battery
- 6 LED displays
- 7 Battery
- 8 Wear and tear
- 9 Solving basic issues
- 10 Documents / Resources
Recommendation for safe and secure use
Before using your bicycle, make sure it is working correctly. Check the following points in particular:
- The position is comfortable
- The nuts, screws, tightening levers, tightened components
- The brakes are working properly
- The handlebars' range of movement is correct, without excessive play
- The wheels are not blocked by anything and the bearings are correctly adjusted
- The wheels are correctly tightened and attached to the frame/fork
- The tyres are in good condition and their pressure is correct
- The condition of the wheel rims
- The pedals are firmly attached to the chain set
- The transmission works
- The reflectors are correctly positioned.
 RECOMMENDATION: Your bicycle should undergo a revision by a professional every 6 months, in order to ascertain that it is working properly and safe to use. It is the user's responsibility to ensure that all the components are working correctly before use.
Choose a safe spot, away from traffic, to familiarise yourself with your new bicycle. The assistance may be triggered with force, check that your handlebar is straight and that the road is clear.
Make sure that you are in good health before getting on your bicycle.
In the case of unusual weather conditions (rain, cold, night time...), be particularly vigilant and adapt your speed and your reactions accordingly.
When transporting your bicycle on the outside of your vehicle (bicycle carrier, roof rack...), it is strongly recommended to remove the battery and store it in a cool place.
The user must comply with the requirements of the national regulations when the bicycle is used on public roads (lighting and signalling for example).

You acknowledge that you are responsible for any loss, injury or damage caused by not following the above instructions and that this will void the warranty automatically.
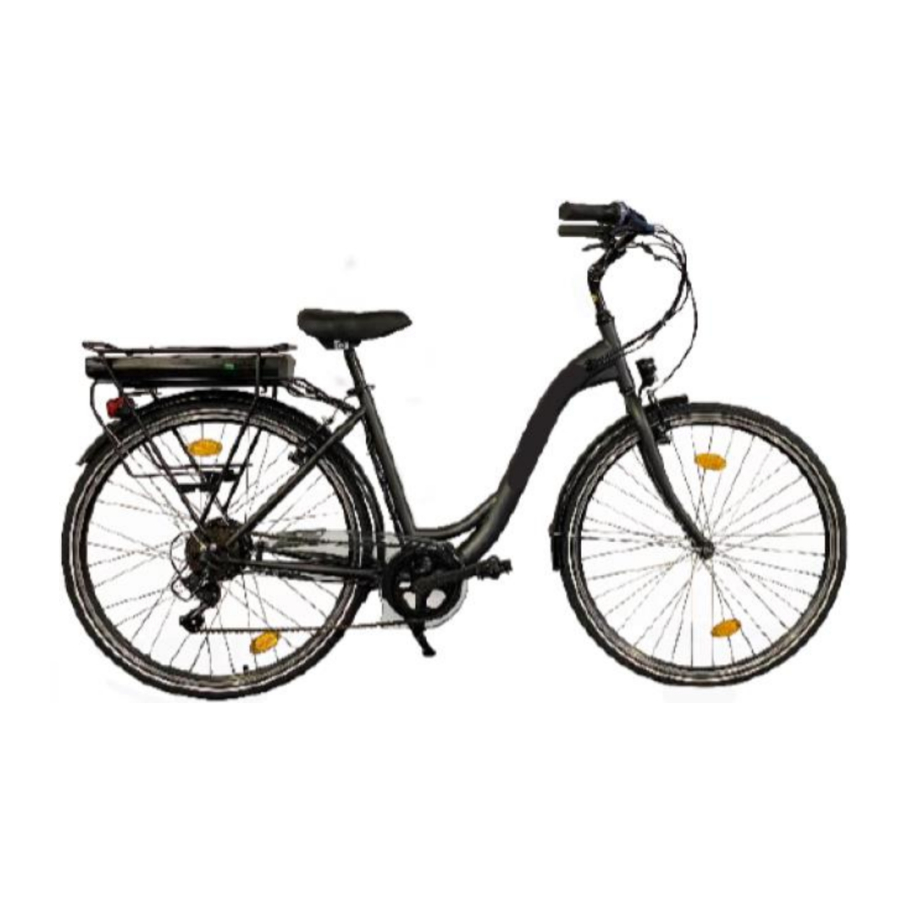
Structure of the product

- Tire and inner tubes
- Rims
- Spokes
- Hub front with quick release
- Fork
- Front brake
- Front mudguard
- Handlebar & Stem
- Bell
- Frame
- Pedal
- Crank set
- Carter
- Collar Seat post
- Seatpost
- Saddle
- Chain
- Protector derailleur
- Rear derailleur
- Rear motor
- Freewheel
- Kickstand
- Rear mudguard
- Luggage rack
- Battery
- Grips, shifter lever and brake lever
- Cables
- Displays
- Charger
- Key lock
First use and adjustments
Positioning of the safety elements
Lighting
Lighting is provided with the bicycle, consisting of two reflectors (one white included in the front light and one red in the rear light), one front light, one rear light and other orange reflectors positioned between the spokes of the wheels.
The lighting system is an obligatory safety feature of your bicycle, as such it must be present. Check that your lighting system works before riding.
Headlight with external battery
Remove the transparent part above the headlight by pressing the notch located behind the case. Once
everything has been removed, it is possible to remove the batteries and replace them respecting the indicated polarity. Change the transparent part. Turn the headlight on/off by flipping the small switch located above the lamp.
Rear light with external battery
Remove the transparent part using a screwdriver. Once everything has been removed, it is possible to remove the batteries and replace them respecting the indicated polarity. Replace the transparent part.
Turn the taillight on/off by flipping the small switch located on the back of the bulb.
Bell
A bell is situated on your handlebars. It can be heard in a range of 50 m.
The bell is an obligatory safety feature of your bicycle, as such it must be present on your handlebars.
Wearing a helmet
For a safe use, wearing a bicycle helmet is strongly recommended. It reduces the risk of skull injuries in the case of falls.
Wearing a helmet is obligatory for children under 14 years old, whether they are riders or passengers.
Adjusting the seat and the handlebars
It is important to adjust your bicycle according to your morphology.
Seat
Open the quick-lock system.
When positioning the seat in its lowest position, make sure that it does not touch any components of the bicycle such as the frame. Likewise, make sure you do not exceed the minimum insertion mark of the seat tube. This insertion mark should never be visible when using the bicycle.

To check the seat's correct height, you should be sitting with straight legs and your heel on the pedal (illustration B). When pedalling, the knee should be lightly bent with the foot pointing down (illustration A).

It is important to protect the seat springs if installing a child seat in order to avoid the risk of getting your fingers caught.
Handlebars
Your bicycle's handlebars can be adjusted up and down.
- Screw stem
Your bicycle is equipped with an "immersion" stem, and you can change the height by changing the insertion of the stem in the frame pivot tube.

To adjust the height of the handlebar, loosen the clamping screw with a 6 mm hex wrench and raise or lower the stem to the desired height.
Be careful not to exceed the minimum insertion mark. This insertion mark should never be visible when using the bicycle.
Tighten the immersion screw, making sure that the stem is in the correct position.

To adjust the tilt of the handlebar, loosen the stem screw-pivot shown in the picture above with a 5 mm hex key, select the position and tighten it.

You may then need to adjust the position of the handlebars on the stem by loosening the screws of the stem cover, turn the handlebars at your convenience and tighten these same screws. Take care that the handlebars are correctly centered.
Tyres
Periodically check the tyre pressure. Riding with under or over-pressured tyres can reduce performance, cause premature wear, deteriorations of the wheel rim, reduce autonomy or increase the risk of an accident.
If significant wear or a tear is visible on one of the tyres, replace it before using the bicycle. A pressure range is indicated on the tyre sidewall by the manufacturer and in the following table. The pressure should be adjusted according to the user's weight.
| Model | Bicycle size | Room size of air | Tire size | psi extension | Bar |
| City | 28" | 700 x 40 | 700 x 40 | 30 - 55 | 2 - 4,5 |
Method for determining the correct adjustment of the quick release mechanisms (wheel and seat clamp)
The quick release devices are designed to be operated by hand. Never use tools to lock or unlock the mechanism so as not to damage it.
To adjust the clamping force of the wheel axle, you must use the adjusting nut and not the quick release lever. If the lever can be manoeuvred with minimal manual pressure, it means that it is not tight enough. You therefore need to tighten the adjusting nut. The quick release system must mark the fork legs when closed in the locked position.
At each adjustment operation, check that the front wheel is properly centred with the fork. To set, close, and open the quick-lock mechanisms, use the following method:

Adjusting the brakes
Before every use, check that the front and rear brakes are working perfectly.
The handle on the right activates the rear brake. The left handle activates the front brake.
It is recommended to distribute your braking force approximately 60/40 between the front and rear. The brake lever should not be in contact with the handlebars, and the sheaths should not be bent at right angles so that the cables can slide with a minimum of friction. Damages, fraying, rusty cables must be changed immediately.
- In case of rain or damp weather, braking distances are longer. It is recommended to anticipate braking in such a situation.
- If turning and braking, the handlebars can have a negative influence on the cyclist's response time.
![burn hazard]() Do not touch the disc brakes after heavy use of your power-assisted bicycle's braking system as you may get burnt.
Do not touch the disc brakes after heavy use of your power-assisted bicycle's braking system as you may get burnt.
 Do not touch the disc brakes after heavy use of your power-assisted bicycle's braking system as you may get burnt.
Brake adjustment
Before each use, check that the front and rear brakes are working properly.
The right handle activates the rear brake. The left handle activates the front brake.
It is recommended to distribute the braking force approximately 60/40 between the front and the rear. The brake lever must not come into contact with the handlebar and the sheaths must not undergo closed angle trajectories, to ensure that the cables slide without the slightest friction. Damaged, frayed, rusty cables must be replaced immediately.
NB:
- In rainy or wet weather, braking distances become longer. It is recommended to brake earlier in these situations.
- When cornering and braking, the handlebars can have a negative influence on the rider's response time.
![burn hazard]() Do not touch the disc brakes after intensive use of the pedal assisted bicycle's braking system, as you risk getting burned.
Do not touch the disc brakes after intensive use of the pedal assisted bicycle's braking system, as you risk getting burned.
Adjusting the V-brakes
The pads exert a pressure directly on the wheel rims. The intensity of the pressure is controlled by a lever connected to the brake by a cable. Do not operate the brake lever when the wheel is detached from the frame.
- Position the calliper arms vertically and parallel using the correct cable tension. Once the cable position has been defined, tighten the cable with the appropriate screw.

- Align the pad with the side of the wheel rim.

- Adjust the distance between the pads and the wheel rim, from 1 to 3 mm, to get better braking.
- Move the rear of the pad slightly away from the wheel rim.
![]()
- Adjust the calliper symmetry, balancing the return springs of the right and left callipers.

- A system consisting of a nut and a locking nut allows you to adjust the cable tension and therefore the braking power, which will vary with time as the brake pads wear down.
![]()


Changing the brake pads
- V-brake
Unscrew the pads using a 5 mm hex key.
Place the new pads on the calliper in the right direction.
Tighten the pads, while respecting the setting, see previous chapter.
![]()

Wear of the wheel rims
As any other part that is subject to wear, the wheel rim should be checked regularly. The wheel rim can weaken and break, causing you to lose control and fall.
It is very important to check the wear of the wheel rims. If the mark becomes invisible with a V-brake, it means that the wheel rim has reached its maximum wear for safe use. A damaged wheel rim can be very dangerous and needs to be replaced. Adjust the brake pads to maintain a spacing of 1 to 1.5 mm with the wheel rim.
Adjusting the gear changing system

Your bicycle has several manually interchangeable speeds with a system with a rear derailleur. Use the right handle to make the desired change.
The higher the indicator, the more difficult it will be to pedal and vice versa.
Careful, never pedal backwards while changing gears and never force the command lever.
For an optimum use of the gear-changing system, we recommend avoiding changing gear other than during heavy pedalling sessions.
Adjusting the limit screws
The derailleur's range of movement can be adjusted with the H and L screws.
The L screw allows you to adjust the upper limit (on the side of the largest sprocket).
When you loosen the L screw, the chain is positioned more towards the outside of the largest sprocket.
The H screw allows you to adjust the lower limit (on the side of the smallest sprocket).
When you loosen the H screw, the chain is positioned more towards the outside of the smallest sprocket.

These actions are performed by a quarter of a turn at a time. At each adjustment, you should achieve a perfect alignment between the sprocket, the chain and the pulley of the rear derailleur.

Adjusting the cable tension
To adjust a correct sprocket change, use the barrel adjuster on the rear derailleur or the handle. This barrel adjuster allows you to adjust the derailleur cable tension and to correctly position the derailleur depending on the chosen speed.
Adjusting the chain
Your bicycle is equipped with an external rear derailleur, the chain is automatically tightened.
Changing the chain
New chains are usually sold with too many links, the first step is to reduce it to the correct length. The safest method is to count the number of links on the old chain in order to adjust the new one. To remove the old chain, simply undo a rivet.
Once the chain has been removed, the new one must be fitted. To do so, it must be placed around the chainring and the rear sprocket so that it meshes properly with the other gear elements. To fasten the chain closed, we recommend using a quick clamp. This stands in for a female link, inserted between to male links. The quick clamp also allows you to remove the chain more easily for cleaning.
To check that the chain length is correct, it must be put on the smallest sprocket. In this position, the virtual line drawn between the wheel hub of the rear wheel and the axis of the lower derailleur pulley should be vertical.
Changing the pedals
To change the pedals, identify the pedals by the letter printed on the pedal. The right pedal has an "R" printed on it and the left pedal has an "L" printed on it. Turn the R pedal clockwise to fix it on the crank arm. Turn the L pedal anti-clockwise.
Wheel and engine
After the first month of use, it is advisable to tighten your spokes to limit the impact of the engine traction on your rear wheel. You may hear a light noise when starting the engine. This noise is normal because the engine starts and assists pedalling. This noise can become louder when in full use.
Luggage rack
It is already fixed above your rear wheel. The fasteners must be tightened and checked regularly at a torque of 4 - 6 Nm. Your luggage rack is designed for a maximum load of 25 kg, it is possible to attach a child seat.
Your luggage rack is not designed to pull a trailer.
As a safety measure, luggage must only be carried on the luggage rack.
When the luggage rack is loaded, the bearing of your bicycle changes.
Spread the luggage load equally on both sides to help keep your bicycle stable. All luggage must be firmly secured to the luggage rack, before each use it is important to check that nothing is left hanging over an edge which may become caught in the rear wheel of the bicycle. Do not adjust the rack arbitrarily, please consult your dealer for adjustment if necessary. Do not modify the luggage rack, any modification of the rack by the user leads to the invalidity of this user guide. The luggage should not obscure your bicycle's the reflectors and lights.
Kickstand
Before using the bicycle, make sure that the kickstand is definitely folded up.
Maintenance
Your bicycle requires regular maintenance, not only for your safety but also to prolong its useful life. It is important to periodically check the mechanical elements in order to replace worn-out components or components showing signs of wear if necessary.
When replacing components, it is important to use original brand parts in order to preserve the bicycle's performance and reliability. Make sure to use appropriate spare parts when it comes to the tyres, inner tubes, gear system components and the various brake system components.
It is the responsibility of the user to use different parts of the original parts.
Always remove the battery before performing any maintenance.
Cleaning
In order to avoid corrosion on the bicycle, it should be rinsed in fresh water after every use, especially if it has been exposed to sea air.
It should be cleaned with a sponge, a bowl of warm soapy water and a hosepipe (without pressure).
RECOMMENDATION: Be particularly careful to not use a pressurised water jet.
Lubrication
Lubrication is essential for the various components that move, in order to avoid corrosion. Regularly grease the chain, brush the sprockets and chainrings and trickle a few drops of lubricant into the brake and derailleur cable sheaths.
We recommend starting by cleaning and drying the components to be greased.
Specific lubricant is recommended for the chain and derailleur. Grease can be used for the other components.
Regular checks
Concerning the tightening of the bolts: lever, crank, pedals, brackets.
The tightening torques to apply are as follows:
| COMPONENTS | RECOMMENDED TORQUE (Nm) | SPECIFIC GUIDELINES |
| Pedals on crank arms | 30 - 40 | Lubricate the threads |
| Crank arm on bracket | 30 - 40 | Lubricate the threads |
| Stem/handlebar tightening | 9 - 10 | |
| Headset tightening | 14 - 15 | |
| Brake lever | 14 - 15 | Immersion screw (stem) |
| Brake callipers | 6 - 8 | |
| Seat | 6 - 8 | |
| Seat post clamp | 18 - 20 | |
| Wheel | 30 | Quick clamp |
The other tightening torques depend on the nut sizes: M4: 2.5 to 4.0 Nm., M5: 4.0 to 6.0 Nm., M6: 6.0 to 7.5 Nm. Tighten the bolts according to the required torque.
Regularly check the tyres and the tread of the rear wheel: wear, cuts, cracks, pinching. Replace the tyre if necessary. Check the wheel rims for excessive wear, warping, denting, cracks...
Revisions
For safety reasons and to maintain the components in a good state, you should have your bicycle revised periodically by your distributor. Your bicycle should also undergo regular maintenance by a qualified technician.
First revision: 1 month or 150 km
- Check the components are well-tightened: crank arm, wheel, stem, pedals, handlebars, seat clamp,
- Check the power-assistance system is working correctly,
- Check and adjust the brakes,
- Tighten and/or straighten the wheels.
Every year or 2000 km:
- Check the wear levels (brake pads, gear system, tyres),
- Check the power-assistance system is working correctly,
- Check the bearings (bottom bracket, wheels, steering, pedals),
- Check the cables (brakes, derailleur),
- Check the lighting,
- Tighten and/or straighten the wheels.
Every 3 years or 6000 km:
- Replace the gear system (chain, freewheel, chainring),
- Check the power-assistance system is working correctly,
- Replace the tyres,
- Replace the wheels for wear (spokes, wheel rim),
- Tighten and/or straighten the wheels,
- Replace the brake pads,
- Check electric functions.
Pedal assistance and battery
The user must rotate the pedal forward to receive the motorized assistance. This is an important safety feature. This power-assisted bicycle provides motorized assistance up to a speed of 25 km/h. Beyond that, the engine will stop. You can go faster, but you will have to do it on your own, without any electrical assistance.
The engine will not work until you have completed a full turn of the pedal. This feature protects the motor and its controller and extends the life of the electrical components.
Pedalling assistance
To start the bicycle, turn on the main switch on the side of the ON/OFF battery.
The rest of the settings and information are done directly on the display on the handlebars.
Recommendation: Please turn off the main switch on the battery when you are no longer in the seat. This saves the battery charge.
Pedal assistance
To start the bicycle, operate the main switch on the side of the battery ON/OFF .
The rest of the settings and information can be adjusted directly on the display located on the handlebar.
NB: Please turn off the main switch on the battery when you are no longer riding.
This will save battery power.
LED displays
The LED display is as follows:

Activate / deactivate the LED display
To activate the assistance, press the "ON/OFF" button on the display once. The red charge indication and assistance level LEDs will come on.
To turn off the assistance press and hold the "ON/OFF" button for 2 seconds. The red charge indication and assist level LEDs will go off.
Displaying the battery charge on LED display
Under normal conditions, turn on the power and the four LEDs will indicate the battery charge level. When they are all on, it means that charge is at maximum level. If the last one is flashing, it means that the battery must be recharged immediately before using the bicycle.
| DISPLAY | CHARGE LEVEL |
| 4 LED on | 100% |
| 3 LED on | 75% |
| 2 LED on | 50% |
| 1 LED on | 25% |
| 1 LED flashing | The battery is flat and needs to be charged immediately. |
If the user forgets to turn the power off after 5 minutes of inactivity, the four LEDs will come on one after the other to remind the user to turn the power off and save power.
Choosing the level of assistance on LED display
When power is turned on, you can choose between 6 levels of assistance. Press the "+" or "-" buttons to select one of these six levels of assistance.
When the power supply is activated, the "LOW" assistance LED lights up continuously, which means that the assistance is at level 2. To increase the level, press the "+" button, to decrease it press "-"
| LED DISPLAY | LEVEL OF ASSISTANCE |
 | Assistance deactivated |
 | 1 |
 | 2 |
 | 3 |
 | 4 |
 | 5 |
 | 6 |
- If you choose a high level of assistance (5 and 6), battery usage will go up and the effort needed on the part of the user will be lower. These levels are suitable for slopes, headwind or heavy loads.
- Average support levels (3 and 4) mean that user effort and battery usage are equal.
- The low assistance levels (1 and 2) mean that the propulsion of the bicycle comes more from the effort of the user than from the use of the battery. These are therefore energy-saving modes. We suggest that you use the level of assistance 1 when using the bicycle to play sports.
Pedestrian assistance on LED display
Long press on the "+" button to use the "assisted start" function to make start-up easier. When the starting aid is used, the assistance does not exceed 6 km/h.
As soon as the "+" button is released, the start aid stops.
Battery
Handling the battery
Reading the level of charge on the battery

To find out your charge level, press the charge button located on the top of your battery once.
The 5 LEDs light up to indicate the level of charge and then go off after 4 seconds.
| DISPLAY | CHARGE LEVEL |
 | 100% |
 | 80% |
 | 60% |
 | 40% |
 | < 20% |
Switching the battery on/off

To turn on your battery, press the red ON/OFF button at the back on the bottom of the battery. Press it again to switch it off. When your battery is off it no longer provides power to your bicycle however the battery charge display remains functional.
Inserting/removing the battery
The battery on the power-assisted bicycles is placed on the rear rack, it is directly connected to the control box at the front.
Before handling the battery, make sure the switch is in the off position.

To install the battery, first slide the battery pack along the rail horizontally and press to make sure it is securely in place and lock.

To lock insert the key into the lock and turn it halfway clockwise (battery and luggage rack locked). You can unlock by turning halfway counter-clockwise.
Remember to remove the key and keep it safe after removing the battery from the rack!
Using the charger
Before charging the battery, please read the user manual and the charger manual, if supplied with your bicycle. Please also note the following regarding the battery charger:
- Follow the instructions on the battery charger label.
- Do not use this charger near explosive gases or corrosive substances.
- Do not shake the charger, knock it, and avoid dropping it.
- Always protect the charger from rain and moisture for indoor use.
![]()
- The temperature tolerance of this charger is between 0 and +40°C.
- You should not disassemble the charger, should you encounter any problems, give the device to a qualified repairer.
- You should only use the charger supplied with your power-assisted bicycle to prevent damage.
Note that failure to comply with this requirement will void the warranty. - When recharging, the battery and charger must be at least 10 cm away from the wall and in a dry, ventilated area. Do not place anything near the charger during use.
![]()
Do not touch the charger for too long when charging (risk of surface burn).- Do not position the charger in an unsteady place.
- Do not cover the charger to avoid it overheating when charging.
- Do not submerge the product
- Avoid all contact with water when the battery is charging. Do not touch the charger with wet hands.
- Do not use the charger with a damaged power cord or plugs. Make sure the charger plug is properly connected to the mains for charging.
- Do not short-circuit the charger pins using a metal object.
- Disconnect the power supply before connecting or disconnecting the connections to the battery.
- This charger is designed to charge Lithium batteries, do not charge the wrong type of battery. Do not use a non-rechargeable battery.
- This appliance can be used by children aged from 14 years and above and persons with reduced physical, sensory or mental capabilities or lack of experience and knowledge if they have been given supervision or instruction concerning use of the appliance in a safe way and understand the hazards involved. Children shall not play with the appliance. Cleaning and user maintenance shall not be made by children without supervision.
- Children should be supervised to ensure that they do not play with the device.
- Keep out of reach of children, this product is not a toy.

Charging process
If an outlet is available near your bicycle, you can recharge the battery directly on the bicycle without detaching it. The charger socket is covered by a plastic cap you just have to open it to recharge the battery directly.
Removing the battery may be useful in places that can not accommodate your bicycle or when it is not near a power outlet.
RECOMMENDATION: The battery should be charged indoors in a ventilated area.
Please charge the bicycle battery according to the following procedure:
- The battery can be recharged using a standard power outlet. You do not need to operate its switch.
- Insert the charger plug into the battery and plug the charger power cable into a nearby outlet.
- When charging, the LED on the charger will be red to show that it is working correctly. When the light goes green, the battery is charged.
- To finish the charging, you must unplug the power plug and then the plug connected to the battery. Close the cap on the battery plug.
Your battery's autonomy
This power assisted bicycle is equipped with a high quality Li-ion battery. Li-ion batteries have no memory effect charging and a wide temperature tolerance range of -10 to +40°C.
To ensure maximum battery life and protection from damage, please follow the use and care instructions below.
After charging your battery, it is advisable to let it sit for 20 to 30 minutes before use.
The autonomy of your battery depends on several operational factors:
- Your choice of assistance mode
- The weight of the user
- The slope of the route
- Tyre inflation
- Wind
- The pedalling effort provided
- Starting and number of stops
- The outside temperature
Battery maintenance
To ensure maximum battery life and protect against damage, please follow the following usage and care instructions:
When you notice that the charge drops to 10%, the battery needs to be recharged quickly.
RECOMMENDATION: If the bicycle is not used frequently over a period of time, you must fully charge every month. The battery case must be stored in a dry, protected place at a temperature between 5 and 35°C.
- The battery life may be reduced if it is in storage for a long time without regular recharging as mentioned above.
- Do not use metal to directly connect two poles of the battery, which could cause it to short circuit.
- Never place the battery near a fireplace or other heat source.
- Do not shake, knock or drop it.
- When the battery pack is removed from the bicycle, keep it out of the reach of children to prevent accidents.
- You must not open the battery.
Using and maintaining the electric engine
Our power-assisted bicycles are programmed to start the power assist after a half turn of the pedal.
Do not use the bicycle in flooded areas or in thunderstorms. Do not put electrical components in water to avoid damage.
Avoid knocks to the engine so as not to damage it.
Controller maintenance
It is vital that you take good care of the controller according to the following instructions:
- Protect the controller from water intake and submersion.
Note: If you suspect that water has seeped into the case, please turn off the battery immediately and continue without assistance. You can restart it as soon as the controller is dry. - Do not shake the controller, knock it, and avoid dropping it.
Do not open the controller housing. Any attempt to open the controller housing, modify it, or adjust it will void the warranty. Please ask your dealer or a qualified professional to make repairs
Any changes to the electrical management system settings, including changing the speed limit, are strictly prohibited and will cause you to lose the warranty of your bicycle.
Circuit diagram and specifications
We reserve the right, without notice, to modify this product. For additional information, please contact your retailer.

Form main technique
| Characteristics | E-4400 | |
| Maximum weight: Cyclist + Load + bicycle | 130kg | |
| Maximum speed with assistance | 25km/h | |
| Autonomy | Approx. 30 to 50 km | |
| Motorisation | Motorisation | 250W |
| Voltage | 36V | |
| Noise maximum during use | < 70dB | |
| Drums | Drums | Lithium ion |
| Voltage | 36V | |
| Capacity | 13 Ah | |
| Weight | 3.3kg | |
| Charging time | 6-8 hours | |
| Number of cycles (≥70% capacity) | 500 cycles | |
| Charger | input voltage | 100-240V |
| Output voltage | 36V | |
| Total weight of the bicycle | 23.8kg | |
| Bicycle size | 28" | |
| Tire/Wheel Size | 700 x 40 | |
| User size | 155 - 180 | |
Wear and tear
The different heavy wear items are standard items. Always replace worn parts and/or parts with identical components for sales in the trade or with your dealer.
Solving basic issues
Do not attempt to access or repair an electrical component yourself. Contact the specialist closest to you for an appointment with a qualified person.
The information below is for explanatory purposes and is not intended to assist the user in repairs. Any such resolution procedure must be performed by a qualified professional, aware of safety issues and familiar with electrical maintenance.
| Description of the issue | Possible causes | Resolution |
| After switching the battery on, the engine doesn't assist the pedalling. |
| Firstly, check that the battery is charged. If not, charge it.
|
Battery autonomy is shorter(note: battery performance is directly influenced by user weight, baggage, wind force, type of road, constant braking). |
|
|
| After connecting the charger, the charging LEDs do not light up. |
|
|
| After recharging for more than 4/5 hours, the charge indication LED is still red (note: it is very important to recharge the battery according to the instructions to avoid damaging the equipment). |
|
|
The speed is not displayed on the LCD monitor | The magnetic ball on the wheel radius is too far from the sensor (attached to the rear of the frame or the front fork) which prevents the sensor from receiving the signal when the wheel rotates. | Check the distance between the magnetic ball and the sensor and make sure it does not exceed 5 mm. |
Solving charger-related issues:
- Red light does not work when charging: check that the connectors are properly connected. Check if the normal voltage went right away, if so, please check the charger repair. If the above is correct, the battery is likely faulty.
- The red light does not turn green: turn off the power, after 5 seconds connect the mains supply, it can continue to charge. The battery no longer charges, the battery is likely faulty.
- The red light turns immediately green: check that the battery is fully charged. If it is not, the battery or charger is faulty.
Documents / ResourcesDownload manual
Here you can download full pdf version of manual, it may contain additional safety instructions, warranty information, FCC rules, etc.
Advertisement


Need help?
Do you have a question about the City and is the answer not in the manual?
Questions and answers